Building a patio yourself is absolutely doable, but the projects that hold up for 20 years versus the ones that sink, crack, or flood all come down to what happens before you lay a single paver or pour a drop of concrete. Plan the size and layout first, choose materials that match your climate and budget, dig and grade the site properly for drainage, compact the base in lifts, then install the surface with the right edging and jointing. If you want a clear patio design guide, plan the layout first so seating, circulation, and drainage all work together. Do those steps in order and you end up with a patio you're proud of. Skip or rush any of them and you're reliving the whole project in five years.
Guide Construction Patio: Step-by-Step DIY Build Plan

Miles Sutton
24 Jun 2026
Choosing the Right Design and Materials
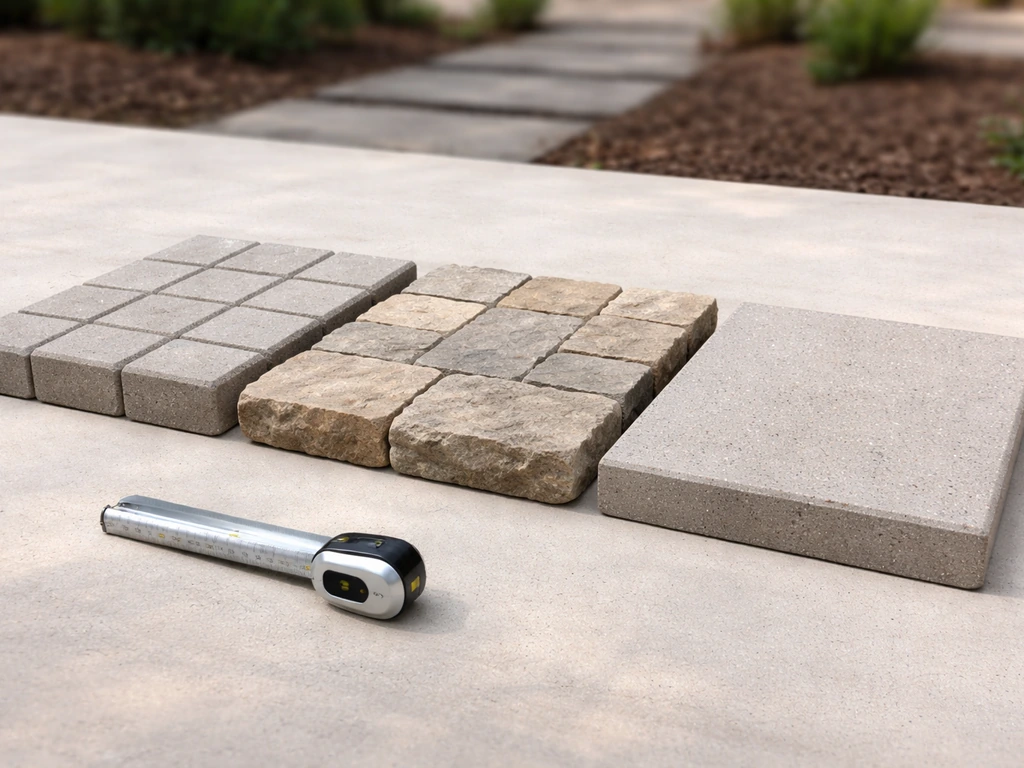
The material you choose shapes everything else: the excavation depth, the base requirements, the tools you need, and the long-term maintenance. The four most common options for residential patios are concrete pavers, natural stone, poured concrete, and concrete slabs. Each has a real sweet spot.
| Material | Best For | Typical Cost (installed) | DIY Difficulty | Durability |
|---|---|---|---|---|
| Concrete pavers | Most climates, high traffic, DIY-friendly | $15–$25/sq ft | Moderate | Excellent; individual pieces replaceable |
| Natural stone (flagstone, bluestone) | High-end look, irregular layouts | $20–$40/sq ft | Moderate–Hard | Very good if set on proper base |
| Poured concrete | Clean modern look, large flat areas | $8–$18/sq ft | Hard (forming, finishing) | Good with proper control joints and curing |
| Concrete slabs (precast) | Budget patios, simple DIY | $6–$12/sq ft | Easy–Moderate | Fair; prone to movement without good base |
If you're doing this yourself for the first time, interlocking concrete pavers are the most forgiving choice. You can make adjustments as you go, individual pieces are replaceable if one cracks or stains, and the jointing system drains naturally. Poured concrete gives you a seamless, low-maintenance surface but demands more precision and equipment during the pour and finishing stages. Natural stone looks incredible but takes longer to set if you're going for a dry-laid irregular pattern.
Climate matters more than most people expect. If you're in a freeze-thaw zone (most of the northern US and Canada), you need a deeper compacted base to keep frost from heaving your surface. Pavers handle freeze-thaw better than poured concrete because the joints allow micro-movement without cracking. In hot, dry climates, lighter-colored materials that don't absorb as much heat are worth the slight extra cost. Near the coast, look for materials rated for salt exposure.
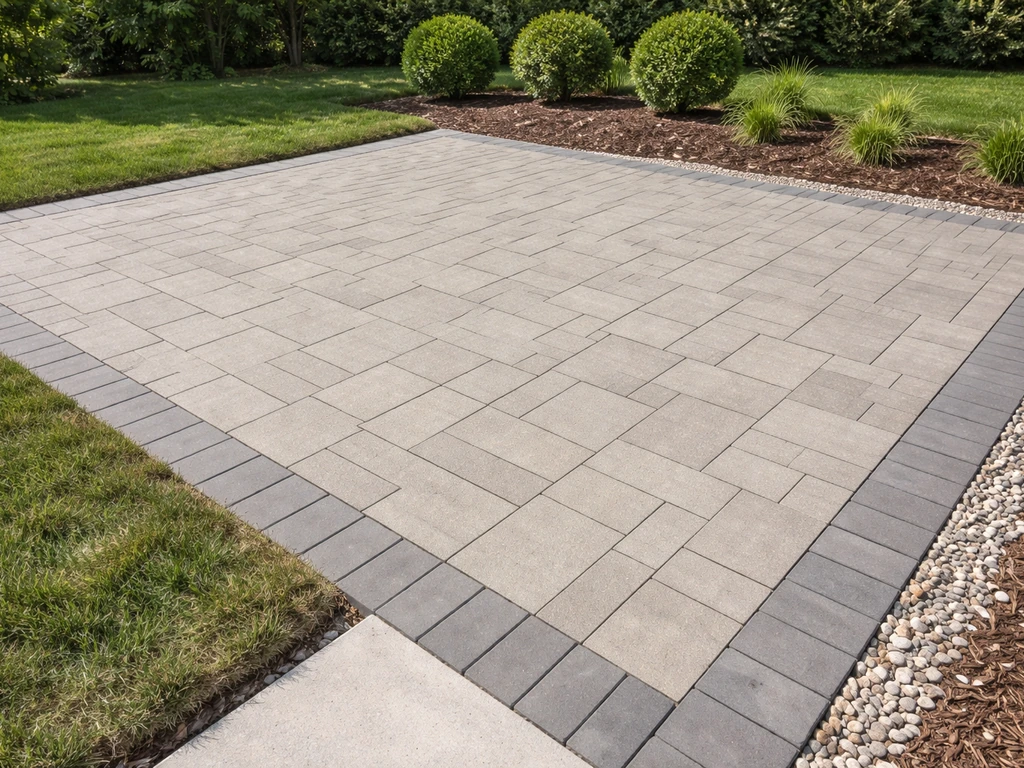
For design style, keep it practical alongside pretty. A patio design guide will show you dozens of patterns and shapes, but the most important design decisions are: where traffic flows in and out, where furniture sits, and how water leaves the surface. Everything else is aesthetic.
Sizing, Layout, and Site Evaluation
The most common mistake homeowners make is building too small. A 10x10 ft patio sounds generous until you put a table, four chairs, and a grill on it. Here are the numbers that actually work in practice:
- Dining area for 4 people: minimum 12x12 ft, ideally 14x14 ft
- Dining area for 6–8 people: 16x18 ft or larger
- Lounge seating area (sofa + chairs): 12x14 ft minimum
- Grill zone with clearance: add at least 4 ft of depth to any cooking area
- Combined dining and lounge: 20x20 ft is a realistic starting point
Walk your yard with a tape measure before you do anything else. Mark out the proposed patio with stakes and string, then leave those stakes in place for a day or two and actually walk around them. Sit in a chair inside the marked area. Watch how afternoon sun hits the space. This small step saves a lot of regret.
When evaluating the site, look at three things: slope and drainage, underground obstacles, and access for equipment. Call 811 (in the US) to have utilities marked before you dig anything. Look at where water flows during a heavy rain. If it currently drains toward the house, that's a problem you have to solve before you build, not after. The finished patio surface should slope away from the house at 1/8 to 1/4 inch per foot (roughly 1% to 2% grade). That slope is enough to move water off the surface without being noticeable underfoot.
Permits, Safety, and When to Hire a Pro
Most municipalities don't require a permit for a ground-level paver or concrete patio under a certain size (often 200 sq ft), but this varies widely. Some jurisdictions require permits for any impervious surface over a set area because of stormwater runoff rules. Call your local building department before you start. It's a five-minute call that can save you from having to tear out work later.
There are situations where hiring a professional isn't just helpful, it's the right call. Be honest with yourself about these scenarios:
- The site has significant slope (more than 6 inches across the patio footprint) requiring retaining walls or major grading
- You're building adjacent to the house foundation and need to ensure drainage away from footings
- The project requires a permit with engineered drawings
- You're pouring a large area of concrete and have never done flatwork before
- There's suspected buried infrastructure (old pipes, septic, cisterns) on the property
- The patio will be elevated and need footings or ledger connections to the house
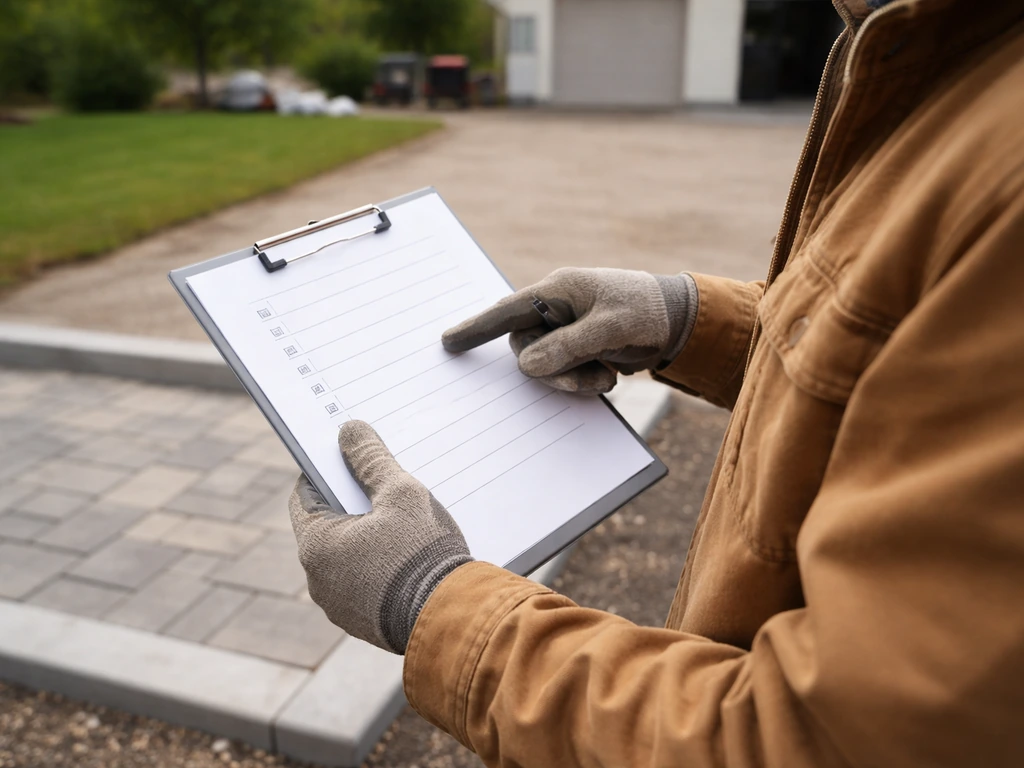
Even if you're doing most of the work yourself, it's worth getting a quote from a contractor for the excavation and grading portion. Renting a mini excavator yourself is possible, but a contractor with the right equipment can grade a patio site in two hours that would take a DIYer two weekends. Getting a patio quote for at least the prep work is smart budgeting, not a sign you can't handle the project. A patio quote example can help you understand what contractors include, like excavation, base prep, edging, and labor.
Site Prep, Excavation, and Getting the Grade Right
This is the most physically demanding part of the project and the one that makes or breaks long-term performance. For a standard interlocking paver patio, plan to excavate 7 to 9 inches deep: roughly 4 to 6 inches for compacted gravel base, 1 inch for bedding sand, and the paver thickness (typically 2.375 to 3.125 inches for standard residential pavers). For poured concrete, you're looking at 4 to 6 inches of compacted base plus the slab thickness.
- Call 811 and wait for utility marking before breaking ground
- Set up batter boards and string lines at the perimeter of the patio with your finished surface height marked
- Strip all sod and organic material from the area, going 12 inches outside your perimeter on all sides
- Excavate to the required depth, checking frequently with a tape measure against your string lines
- Establish the drainage slope (1/8 to 1/4 inch per foot away from the house) across the entire excavated area
- Remove any soft spots, roots, or debris from the subgrade
- Compact the native soil with a plate compactor before adding any base material
Don't skip compacting the native subgrade. Loose or disturbed soil will settle unevenly under the base material, and that's where paver dips and cracked concrete come from. If the native soil is very soft, sandy, or high in clay, add a layer of geotextile landscape fabric before your gravel base. It prevents the base material from migrating into the soil over time.
Building the Base: Subbase, Gravel, and Compaction
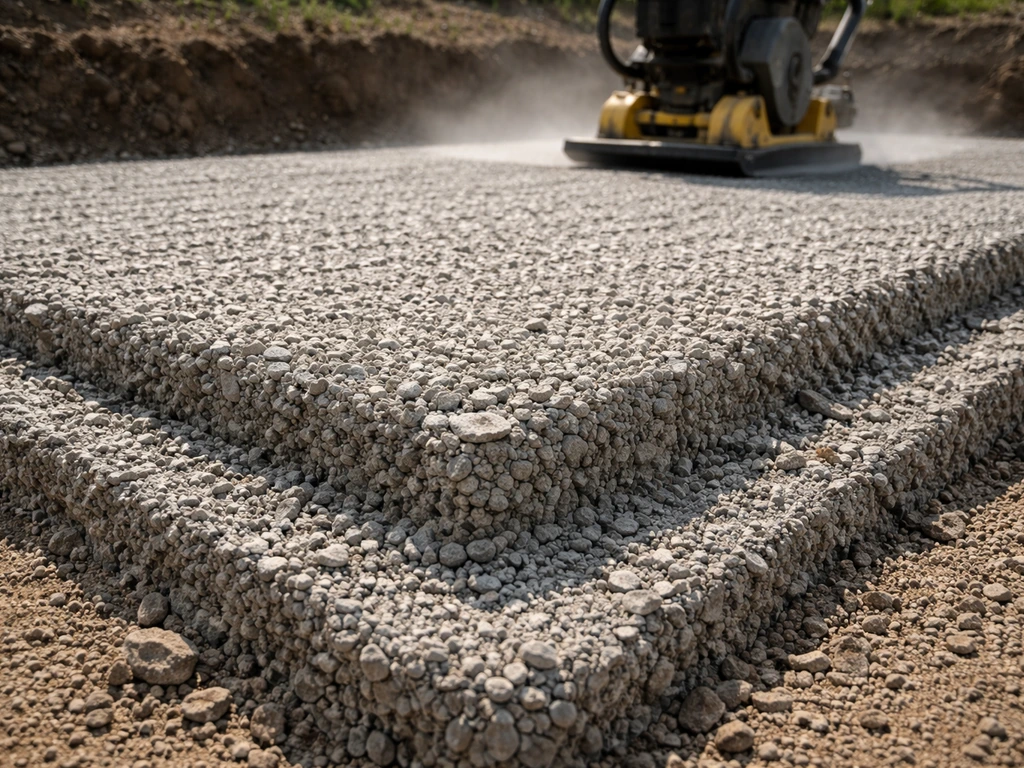
The base is the invisible foundation that determines how your patio performs for the next two decades. Use a crushed angular gravel (sometimes called road base, Class II base, or dense-grade aggregate) rather than rounded pea gravel. Angular gravel compacts and interlocks; rounded gravel doesn't, and it will shift under load.
The critical rule here is to compact in lifts of 2 to 3 inches rather than dumping all the gravel in at once and running a compactor over it. A plate compactor can only effectively densify the top 2 to 3 inches of material. Dumping 6 inches of gravel and making a few passes leaves the bottom layers loose, which means eventual settlement.
- Add 2 to 3 inches of crushed gravel and spread evenly with a rake
- Run the plate compactor over the entire area, making two to three passes in different directions (overlapping each pass by about half the plate width)
- Check your slope and grade with a level and straight board after compaction
- Add the next lift and repeat until you reach the target base depth
- For the final lift, check your grade precisely against the string lines before moving on
Once the gravel base is compacted and graded, install your edge restraints (plastic paver edging or concrete edging) before the bedding sand. Pinning edge restraints into solid compacted base is far more secure than pinning them after sand is down. For pavers, follow with at least 1 inch of coarse bedding sand (concrete sand, not mason sand) screeded to your final grade using screed pipes or rails as guides. Don't compact the bedding sand after screeding. It needs to stay loose so pavers can seat into it evenly.
Laying the Surface and Installing Edging
For Pavers and Natural Stone
Start laying pavers from a fixed, straight reference edge, typically the house wall or a chalk line you've snapped on the sand. Work outward from that reference so any cuts end up at the perimeter where they're less visible. Set each paver without sliding it into place (sliding displaces sand and creates high spots). Press it firmly down so it's flush with adjacent pieces.
Once all the field pavers are down, cut border pieces with an angle grinder with a diamond blade or a wet saw. Install edge restraints fully around the perimeter, pinning every 12 inches with the manufacturer's spikes. Then sweep polymeric sand across the surface, using a push broom to work it into every joint. Make two or three passes, adding more sand until joints are filled to within 1/8 inch of the paver top. Run the plate compactor over the entire surface (put a protective pad under the plate to avoid scratching pavers), then do a final sweep. Mist lightly with water to activate the polymeric binder and don't let rain hit it for at least 24 hours.
For Poured Concrete
For poured concrete, set your forms first using 2x4 or 2x6 lumber staked at the perimeter, with the top of the form representing your finished surface height and the drainage slope already built into the form elevation. Pour the concrete, screed it to the form tops, then float and finish the surface. Cut control joints as soon as the concrete is hard enough to support foot pressure (typically 4 to 12 hours after the pour depending on temperature). For a standard 4-inch residential slab, space control joints every 8 to 12 feet in both directions to give the concrete predictable places to crack if it shrinks.
Curing, Weather, and Long-Term Maintenance
Concrete requires at least 7 days of curing at temperatures above 50°F to reach adequate strength for foot traffic and furniture. Keep the surface moist during that period, either by covering with burlap and misting regularly or by applying a liquid curing compound immediately after finishing. Don't let it dry out in the first week. Avoid putting heavy loads on it for at least 28 days. In hot weather, cure for longer and keep the surface shaded if possible. In cold weather (below 40°F), don't pour at all without proper cold-weather protection measures.
For paver patios, the first year often involves a small amount of settling. If a paver drops slightly, you can pull it up, add a bit of sand, and re-seat it. This is the main advantage of pavers over poured concrete: the surface is serviceable and adjustable. Check the edge restraints in fall before the ground freezes, and re-spike any that have started to bow or pull away.
For ongoing maintenance, here's what actually matters year to year: To make sure your patio stays comfortable through the seasons, it helps to follow a cap times patio guide for temperature, drainage, and material care.
- Sweep or blow debris off the surface regularly, especially in fall, to prevent organic staining and moss growth
- Check joints in paver patios annually and top up polymeric sand if it has washed or blown out
- Reseal concrete pavers or poured concrete every 2 to 3 years in heavy-use or freeze-thaw climates
- Clear any standing water areas immediately after rain to identify drainage problems while they're still minor
- Pull weeds as soon as they appear in joints, before roots can displace material
- Re-check the slope near the house every few years; soil compaction can cause subtle grade changes toward the foundation over time
A well-built patio on a proper base will last 25 to 30 years with minimal intervention. The work is front-loaded. Spend the time on the base, get the drainage slope right, compact properly, and the surface almost takes care of itself. That's the core of any solid patio construction guide, and now you have everything you need to get started today. If you're looking for local, practical help, use a Toledo patio guide to match the right materials and drainage approach to how the area handles rain and temperature swings.
FAQ
How do I know my drainage is truly correct before I buy materials?
After you grade to your target slope, do a simple water test: run a hose for 10 to 15 minutes over the working area and watch where runoff goes. If any water concentrates toward your foundation or stands in low spots, adjust the base while it is still accessible, because once you install bedding sand and pavers the fix is much more disruptive.
What slope should I use at the doorway or where the patio meets the garage slab?
Stay consistent with the overall 1/8 to 1/4 inch per foot fall away from the house, but at door thresholds you must avoid creating a noticeable step. A practical approach is to plan the patio height early, measure the interior floor and exterior step height, then modify the layout so the thinest edge still maintains the drainage grade.
Can I install pavers over an existing patio or slab?
Usually not as a reliable DIY option. Old concrete can be uneven or move over time, and new pavers will inherit the dips and cracks. If you want pavers, the safer path is to remove the failing surface to reach stable subgrade, then rebuild the base to your required depth.
Do I really need geotextile fabric, and when should I skip it?
Use geotextile when your native soil is soft, very sandy, or high in clay, because base material can migrate or pump over time. If your subgrade is firm, well-graded soil, fabric may be unnecessary and can even interfere with proper compaction, so base it on soil conditions rather than habit.
What happens if I compact the bedding sand after screeding?
Compacting bedding sand can prevent pavers from seating evenly, which increases the risk of rocking units and uneven joints. Bedding sand is meant to remain loose so pavers can bed in under pressure, then lock in after jointing and compaction of the paver surface.
How do I keep my paver cuts from ending up too visible along the main walkway?
Dry-lay or measure the first two to three rows before you set any pavers, then center your layout so most full units fall in the visible field. If cuts must occur, try to push them toward the least-used perimeter or where edging will hide them.
Should I use polymeric sand, and what are the main mistakes people make with it?
Polymeric sand helps lock joints and resist weed growth, but it must be installed and activated correctly. Avoid over-wetting before compaction, sweep it into joints thoroughly, keep it dry for at least 24 hours after misting, and follow the bag-specific instructions for the right amount of water.
My pavers look level right after install, but they settle in the first year. Is that normal?
A small amount of settling can occur, especially if the subgrade was disturbed or the base was not compacted uniformly. The fix is usually localized: lift the affected pavers, add or re-level bedding sand, re-seat them, and check the edge restraints, since bowed edges often indicate a drainage or restraint issue.
How do I prevent edge restraints from bowing or pulling away later?
Install edge restraints before bedding sand so they contact solid compacted base. Pin according to the manufacturer, and verify the perimeter is correctly graded before you sweep and compact joint material. After the first freeze or heavy rain season, inspect and re-spike any sections that have lifted or shifted.
Can I use a plate compactor on pavers without damaging them?
Yes, but use a protective pad or compactor plate cover to prevent surface abrasion and chipping. Also make sure you compact only after jointing and filling is nearly complete, so you do not force movement while joints are empty.
When should I cut control joints in a poured concrete patio?
Do it as soon as the slab is hard enough to support a person’s weight without deforming the surface. Waiting too long can cause random cracking paths instead of planned joints, and cutting too early can create ragged edges that collect debris and water.
How do I space control joints if my patio is not a perfect rectangle?
Use the 8 to 12 foot guidance as your maximum spacing, but adjust spacing so joint layout matches slab geometry. Longer walls or narrow sections still need joints at reasonable intervals, so prioritize regular intervals over matching a single grid that might leave one area too large.
How long should I wait before moving furniture or placing a grill on concrete?
Plan for at least 28 days before heavy loads, even if you can walk on it sooner. For pavers you have more flexibility, but for concrete the curing period is what prevents surface damage, indentation, and early cracking from concentrated weight.
What temperature problems should I watch for when pouring concrete?
Below 40°F, you should not pour without cold-weather measures because curing slows dramatically and can lead to strength issues. In hot weather, extend curing time, keep the slab protected from drying, and consider shading or additional moisture management during the first week.
Is it worth hiring a contractor just for excavation and grading, or should I do everything myself?
If access is tight, soil is unknown or soft, or you need a perfect elevation and drainage grade, hiring out excavation and grading can be the highest ROI. Even if you DIY the surface, accurate base depth, compaction, and slope usually determine long-term performance, so consider outsourcing that part when you cannot verify density or grade.
Do permits really vary by patio size, and what should I check besides square footage?
Yes, jurisdictions often regulate patios as impervious coverage for stormwater, not just by size. Call your building department and ask whether you need approval for runoff, drainage plans, or any work near property lines, easements, or existing drains.