
A patio playhouse is a child-sized play structure designed to fit on a patio, deck, or small outdoor surface rather than a dedicated yard. The right one for your space depends on four things: your patio's substrate (pavers, concrete slab, wood deck, or a pedestal system), your child's age and the number of kids using it, your budget, and how much assembly complexity you're willing to take on. This guide covers all of that, comparative reviews of the five main playhouse types, substrate compatibility, anchoring, drainage, safety, costs, and a step-by-step project plan, so you can make a confident purchase and a safe installation.
Patio Playhouse Reviews: Buyer's Guide for Small Patios

Miles Sutton
12 Jul 2026
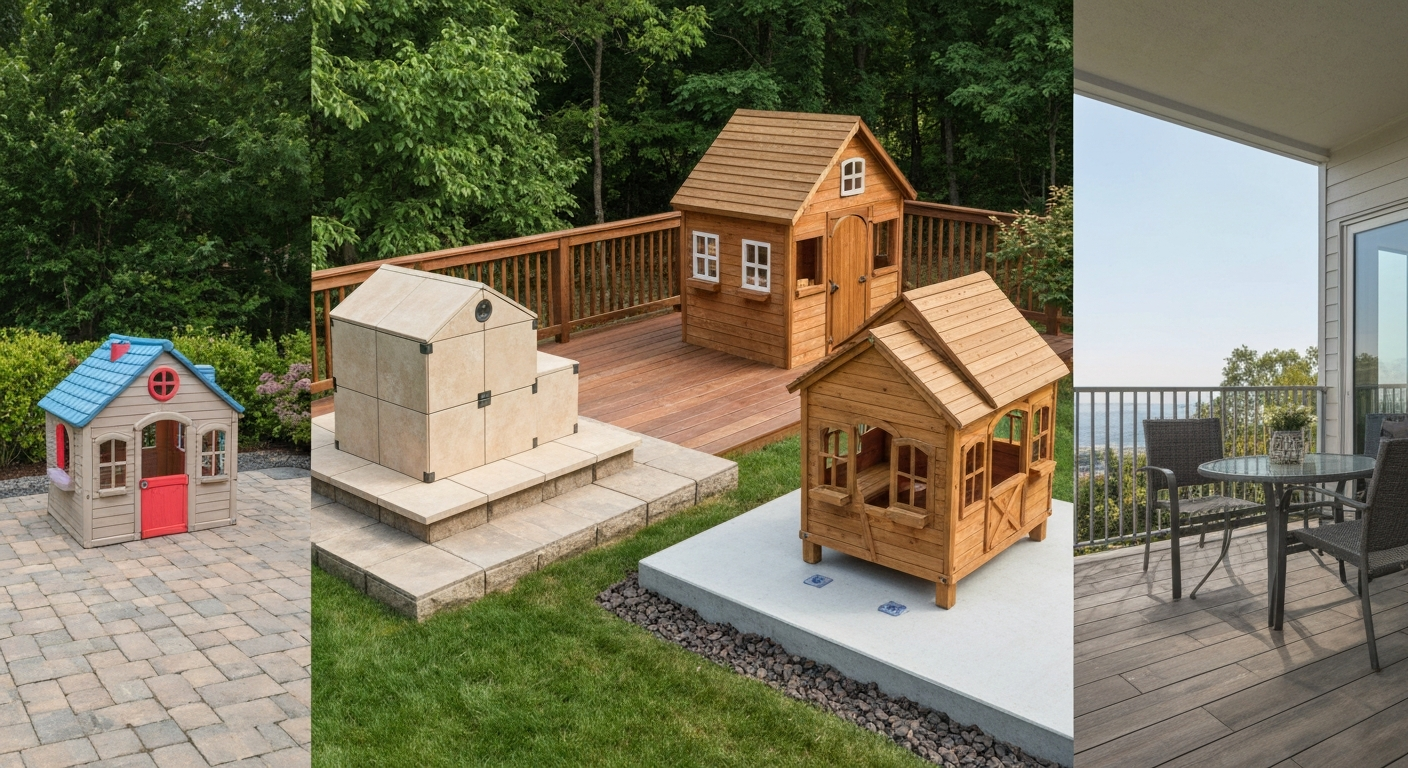
What is a patio playhouse and who is this guide for
A patio playhouse is purpose-sized for hard-surface outdoor spaces: typically 4 to 10 feet wide and 4 to 8 feet deep, with a footprint small enough to sit on a standard 10x12 or 12x16 patio section. Unlike full backyard play sets, patio playhouses don't assume a lawn or soft ground underneath. They're built for concrete, pavers, composite decking, or modular patio systems, and that changes everything about how you anchor them, drain them, and ensure they're safe.
This guide is written for homeowners with existing patios, renters who have a paved outdoor space and can't break ground, and DIYers who are planning a patio build or renovation and want to incorporate a play area from the start. If you've landed here after researching patio systems or pedestal systems, you'll find direct guidance on how playhouses interact with those specific substrates.
Quick buyer summary: top picks by patio type
Not everyone needs to read every section. Here's where to start based on your situation.
| Best for | Playhouse type | Approx. price | Why it works |
|---|---|---|---|
| Concrete slab or pavers, ages 2–5 | Plastic molded / dome (e.g., Little Tikes, Step2) | $100–$400 | Lightweight, freestanding, drill-free anchoring possible, easy to move |
| Wood deck or composite, ages 3–7 | Wooden cottage-style (e.g., KidKraft) | $500–$2,500 | Looks integrated, anchor hardware available, weather sealing supported |
| Pedestal or modular patio systems, ages 4–8 | Modular / flat-pack kit | $300–$1,200 | Adjustable footprint, lighter per panel, easier to level on raised surfaces |
| Small patio, tight budget, ages 2–5 | Convertible furniture-to-play set | $150–$600 | Dual-use, compact footprint, stored or repurposed when outgrown |
| Large patio or deck, ages 4–10 | Freestanding kit (wood or plastic, larger format) | $800–$5,000+ | More features, longer use window, can include loft or slide |
The five main types of patio playhouses
Patio playhouses fall into five categories. Each has a different build material, assembly method, weight profile, and suitability for different substrates. Understanding the differences saves you from buying the right playhouse for the wrong surface, or vice versa.
Freestanding kit playhouses
Freestanding kit playhouses arrive as a hardware-and-panel package, wood framing members, siding panels, a roof, windows, and a door, and you bolt them together on site. Brands like Backyard Discovery sell kits at major retailers (Lowe's, Home Depot) in the $800–$5,000 range depending on size and features. Assembled footprints commonly run 6x8 ft to 10x12 ft, so measure your patio before ordering. Assembly typically takes two adults four to eight hours. Shipping weight on larger kits often exceeds 200 lbs, so curbside delivery is standard and you'll want help moving panels.
- Pros: Longest use window (ages 3–10+), most interior space, best integration with a deck aesthetic, anchor hardware straightforward on wood or concrete
- Pros: Can be sealed or painted to match patio decor, modifiable over time
- Cons: Highest assembly complexity and time investment, heaviest footprint load, requires more surface prep and leveling
- Cons: Wood components need annual sealing or staining to prevent weathering and rot
- Best use case: Established patio with a wood deck or large concrete slab, homeowners with long-term plans who want a permanent-feeling play area
Modular and flat-pack playhouses
Modular and flat-pack playhouses come as pre-cut panels, often tongue-and-groove or panel-and-clip systems, that you assemble without needing to cut any lumber. They're lighter per component than full kit playhouses and can often be reconfigured. Price range at retail is roughly $300–$1,200. Assembled footprints are typically 4x6 ft to 8x8 ft. Because panels are smaller, this type works better on elevated pedestal systems or modular patio tiles where you're working on a surface that isn't perfectly level at the edges.
- Pros: Easier to transport panel-by-panel onto a raised deck or pedestal system, lower per-panel weight reduces point loads, reconfigurable if your patio layout changes
- Pros: Good mid-range price point with decent durability
- Cons: Panel connections can loosen with seasonal wood movement — check and re-tighten fasteners each spring
- Cons: Fewer premium finish options than full cottage-style kits
- Best use case: Pedestal patio systems, modular tile patios, or renters with a ground-level patio who want something moveable but more substantial than a plastic playhouse
Wooden cottage-style playhouses
Wooden cottage playhouses, KidKraft is the dominant brand in this space, are the ones that look like small houses, complete with shutters, flower boxes, and pitched roofs. KidKraft lists limited 5-year warranties on many of their wood components, which is the best coverage in this category. Retail price range is $500–$2,500 for standard residential sizes, with assembled footprints from about 5x4 ft (small units like the Backyard City Playhouse) to 8x6 ft for mid-range models. Interior headroom for an adult is limited, typically 4 to 5 ft, but kids aged 3–8 fit comfortably.
- Pros: Best visual integration with a landscaped or designed patio, premium feel, longest warranty in category (KidKraft 5-year wood), anchor-friendly on concrete and wood decks
- Pros: Natural wood finish takes paint or stain well for customization
- Cons: Wood requires maintenance — at minimum annual sealing, ideally staining every two to three years in wet climates
- Cons: Heavier than plastic alternatives, harder to move, customer reviews on retailer sites consistently note long assembly times (4–10+ hours for two adults) and occasional missing or damaged parts in shipping
- Cons: Some KidKraft Trustpilot reviews flag slow replacement-parts response times — order early in the season so you have time to resolve any shipping issues before the play season starts
- Best use case: Homeowners with a concrete slab or wood deck who want a playhouse that looks designed, not dropped there
Plastic domes and molded playhouses
Molded plastic playhouses from Step2 and Little Tikes are the entry point of this category: $100–$400, assembled in one to three hours, and light enough (most units weigh 30–60 lbs assembled) that one adult can reposition them. Little Tikes publishes assembly manuals with item weights and assembled dimensions for all their units, the Activity Garden Playhouse, for instance, lists specific assembled footprints you can verify before buying. Step2 units include design warnings about water pooling in molded features like play sinks, which is a real maintenance issue: tip the unit periodically to drain standing water and prevent mosquito breeding.
- Pros: Lowest cost, fastest assembly, easiest to reposition or store, suitable for renters, no anchoring required for lighter units (though anchoring is still recommended)
- Pros: Low maintenance — wipe down with mild soap, no sealing required
- Cons: UV fading and surface cracking are the most common consumer complaints on retailer review pages after 2–3 years of sun exposure; colored plastic can look worn quickly in harsh climates
- Cons: Limited interior space, lower ceiling height, less structurally robust than wood for older or heavier children
- Cons: Step2 limited warranties run about 2 years for most plastic playhouses — shorter than wooden alternatives
- Best use case: Toddlers and preschoolers (ages 1.5–5), small patios, renters, anyone who wants easy seasonal storage
Convertible furniture-to-play sets
Convertible sets are dual-use products: a picnic table or storage bench that folds or clips together into a play structure, or a play table with panels that snap into a playhouse shape. Price range is $150–$600. They're designed specifically for the indoor/outdoor transition, many are marketed as equally suitable for living rooms, playrooms, and patios. Footprints are typically under 4x4 ft in playhouse mode, making them the only category genuinely workable on a balcony or very small patio. The trade-off is durability: these are designed for versatility, not structural permanence.
- Pros: Smallest footprint of any category, true indoor/outdoor portability, excellent for apartments with patio access or seasonal use cases
- Pros: Easy to repurpose when children outgrow the play mode
- Cons: Least structural of all five types — not appropriate for climbing or rough play, age range tops out around 5–6 years
- Cons: Conversion mechanisms wear with repeated use; check fastener tightness regularly
- Best use case: Urban patios, balconies, renters, families who want one product that works indoors in winter and outdoors in summer
Side-by-side comparison: materials, durability, and footprint
| Type | Primary material | Typical footprint | Typical assembled weight | Durability / lifespan | Warranty (typical) | Assembly difficulty |
|---|---|---|---|---|---|---|
| Freestanding kit | Wood / composite panels | 6x8 ft – 10x12 ft | 150–300+ lbs | 8–15 years with maintenance | 1–2 years (varies) | High (4–10 hrs, 2 adults) |
| Modular / flat-pack | Wood / MDF panels | 4x6 ft – 8x8 ft | 80–180 lbs | 5–10 years with maintenance | 1–2 years (varies) | Moderate (3–6 hrs) |
| Wooden cottage-style | Cedar, pine, or hardwood | 5x4 ft – 8x6 ft | 100–250 lbs | 8–12 years with sealing | 5 years on wood (KidKraft) | High (4–10+ hrs, 2 adults) |
| Plastic molded / dome | HDPE or polyethylene | 3x3 ft – 5x5 ft | 30–70 lbs | 3–6 years before UV wear | 2 years (Step2 typical) | Low (1–3 hrs, 1 adult) |
| Convertible furniture-play | Plastic or wood composite | Under 4x4 ft | 20–50 lbs | 3–5 years | 1 year typical | Low to moderate (1–2 hrs) |
Buyer checklist before you order
Run through this checklist before clicking buy. It will save you a return shipment.
- Measure your usable patio footprint and subtract 6 feet in every direction from the playhouse for fall zone clearance (CPSC residential guidance recommends protective surfacing or clear space extending at least 6 ft around equipment)
- Confirm your child's age and the age range listed on the product — most manufacturers print minimum and maximum age and weight limits in the assembly manual
- Check assembled dimensions against your patio measurement, not the box dimensions — these are very different numbers
- Identify your substrate (concrete, pavers, wood deck, pedestal system) and match it to anchoring options before buying
- Check for weather-resistance ratings: wood needs sealing, plastic should state UV-stabilized or UV-resistant in the product specs
- Verify ventilation: enclosed playhouses should have at least one window or ventilation opening to prevent heat buildup in summer
- Confirm door and window opening sizes against CPSC head/neck entrapment guidance — openings should be smaller than 3.5 inches or larger than 9 inches to avoid head entrapment risk
- Review the warranty terms and the manufacturer's replacement-parts process before buying, especially for wooden playhouses where a single missing panel can stall assembly
- Check shipping method — many wooden kit playhouses ship via freight with curbside delivery only, meaning you move it from the curb; factor that into your planning
Dimensions and footprint planning by age and group size
These dimensions are practical starting points, not absolute rules. The fall zone clearance requirement, 6 ft on all sides, typically has a bigger impact on your total space requirement than the playhouse footprint itself.
| Age group | Playhouse interior (min. recommended) | Suggested unit footprint | Total space needed (with 6-ft fall zone) | Notes |
|---|---|---|---|---|
| Ages 1.5–3 (1 child) | 2x2 ft interior | 3x3 ft unit | 15x15 ft total | Molded plastic category; typically no climbing |
| Ages 3–5 (1–2 children) | 3x3 ft interior | 4x4 ft unit | 16x16 ft total | Molded plastic or small flat-pack |
| Ages 4–7 (2–3 children) | 4x4 ft interior | 5x6 ft unit | 17x18 ft total | Wooden cottage or modular kit |
| Ages 5–10 (2–4 children) | 5x5 ft interior | 7x8 ft unit | 19x20 ft total | Freestanding kit with possible loft |
| Mixed ages (family patio) | 6x6 ft interior min. | 8x8 ft+ unit | 20x20 ft+ total | Large kit; verify deck or slab load capacity first |
A standard 12x16 ft patio can realistically fit a small to mid-sized playhouse (4x5 ft to 5x6 ft unit footprint) and still meet the 6-ft clearance requirement on two or three sides if the playhouse is positioned in a corner. On a 10x10 ft patio, only the smallest molded plastic units work within safe clearance guidelines, or you accept that the patio edge acts as a boundary and add appropriate safety barriers.
Substrate compatibility: matching your playhouse to your patio surface
This is where most buyer guides skip the important details. Your patio surface affects how you anchor the playhouse, whether you need drainage modifications, and whether the surface can handle the load. Here's what each substrate means in practice.
Concrete slabs
Concrete is the most straightforward substrate for a patio playhouse. It's flat, stable, and accepts standard concrete anchor hardware (wedge anchors, sleeve anchors, or epoxy anchors for permanent installs; rubber-footed frame anchors for semi-permanent setups). The main issue is drainage: a concrete slab that doesn't slope away from the playhouse will allow water to pool under the structure, accelerating wood rot or plastic degradation. Check that your slab has at least a 1/8 inch per foot slope away from the house. If it doesn't, use 1/2 inch rubber leveling pads under the playhouse feet to create clearance for water to escape.
Paver patios
Paver patios introduce a leveling variable that concrete doesn't. Individual pavers can settle unevenly, and playhouse feet that span paver joints can rock over time. ICPI guidance for pedestrian paver patios calls for a minimum 4-inch compacted aggregate base and a consistent sand bedding layer, but even well-installed paver patios settle slightly under point loads. Check your paver surface with a 4-foot level before placing a playhouse, and re-check each spring. For heavier wooden playhouses, add composite or rubber shim pads under each corner foot to distribute load across multiple pavers rather than concentrating it on joints. Paver thickness for pedestrian patios is typically around 60 mm (2-3/8 inches), which is adequate for residential playhouse loads, but avoid positioning heavy playhouse legs directly over paver joints.
Pedestal patio systems
Pedestal systems, adjustable-height deck tiles on screw-jacks, are an increasingly popular patio surface, and they work well with lighter playhouses (flat-pack and plastic categories) but require extra consideration for heavier wooden kits. The key question is whether your pedestal system's tiles and joists are rated for the point load of a playhouse corner leg. Most residential pedestal systems spec their decking for distributed loads (walking, furniture), not concentrated point loads from a structure's legs. For wooden playhouses over about 150 lbs, use a base plate or spreader board under each corner to distribute the load across multiple tiles. Renter-friendly: if you're using a pedestal system and can't drill, use non-penetrating ballast anchors or heavy rubber anti-tip feet.
Patio on a pallet systems
Patio-on-a-pallet tile systems (interlocking ground-level tiles, often polypropylene or composite) sit directly on existing surfaces without a structural base. They're designed for foot traffic loads, not structural point loads. For plastic or convertible playhouses under 50 lbs, they work fine. For wooden playhouses, run a treated lumber base frame (2x4 or 2x6) under the playhouse that spans enough tiles to distribute the load, and make sure the tiles underneath that frame are on a flat, compacted surface. Don't anchor through patio-on-a-pallet tiles, instead, use surface straps or weighted ballast feet that rest on top.
Wood decks
Wood and composite decks are the most structurally capable substrate for a playhouse, but they require the most due diligence. The IRC requires decks to be designed for live loads typically at 40 psf, but that's a distributed load spec. A 200 lb playhouse sitting on four 3x3 inch feet concentrates load in ways that a deck's joist layout may or may not handle well. Before placing any playhouse heavier than 100 lbs on a wood deck, locate your deck joists and position the playhouse so its legs land over or within 6 inches of a joist. Also verify that your deck's ledger board is positively anchored to the house structure, nail-only ledger attachments (non-compliant with current IRC) are a red flag that the deck wasn't built to handle additional loads. If you have any doubt, have a contractor do a quick load assessment before installation.
Anchoring options by substrate
| Substrate | Permanent / semi-permanent options | Renter-friendly (no-drill) options | Notes |
|---|---|---|---|
| Concrete slab | Wedge anchors, sleeve anchors, epoxy anchor bolts through base plate | Anti-tip rubber feet, sandbag ballast, surface strap system | Pre-drill anchor holes with hammer drill and masonry bit |
| Paver patio | Ground anchor stakes through paver joints into base, epoxy anchor through paver | Rubber leveling pads + heavy ballast plate, anti-tip brackets on adjacent wall or fence | Avoid anchoring directly into joint sand — use paver anchor kits rated for the load |
| Pedestal system | Bolt through deck tile into joist below (check tile and joist specs first) | Spreader board + ballast feet, surface tension strap to perimeter | Confirm load rating before any penetration of tile surface |
| Patio-on-a-pallet tiles | Not recommended — tiles not rated for anchor hardware | Weighted ballast base, surface tension strap to fence or railing | Use lumber spreader frame to distribute load |
| Wood deck | Lag bolt through playhouse base into deck joists, hurricane strap tie-down | Heavy rubber anti-tip feet, strap to deck railing (verify railing load rating) | Locate joists before drilling; check ledger attachment on older decks |
Drainage, load capacity, and structural safety
Drainage is an underrated issue. Water that pools under or inside a playhouse accelerates wood rot, promotes mold growth on plastic surfaces, and in cold climates causes freeze-thaw damage to pavers or concrete under the structure. Practical rules: elevate wooden playhouses at least 1/2 inch off the patio surface using rot-resistant composite shims or rubber feet; ensure the patio surface slopes away from the playhouse at 1/8 to 1/4 inch per foot; and if your playhouse has a flat roof section, check that it drains off the edge rather than pooling.
For load capacity on wood decks, the IRC's 40 psf live load specification is a useful reference point for distributed loads. A 250 lb wooden playhouse on a 6x8 ft (48 sq ft) footprint works out to about 5 psf if the load were distributed evenly, well within spec. The problem is point loads: if the playhouse has only four 2x2 inch corner feet, you're concentrating load at those four small areas. Use base plates or skids under wooden playhouses on decks to spread load across the joist span. On concrete, this isn't a concern. On pavers, use the rubber pad approach described above.
Safety checklist for on-patio playhouses
The CPSC Outdoor Home Playground Safety Handbook is the primary residential reference here. ASTM F1487, Standard Consumer Safety Performance Specification for Playground Equipment for Public Use (ASTM listing) is the consumer safety performance specification for playground equipment and is a technical test/performance reference used in CPSC guidance ASTM F1487 — Standard Consumer Safety Performance Specification for Playground Equipment for Public Use (ASTM listing). Its recommendations translate to these practical checks for patio-sited playhouses.
- Fall zone: maintain at least 6 ft of clear space on all sides of the playhouse; on a patio, this may mean using rubber edging, low fence panels, or furniture placement to create a defined boundary
- Entrapment openings: verify that all openings (window frames, decorative cutouts, balustrades) are either smaller than 3.5 inches or larger than 9 inches to eliminate head and neck entrapment risk per CPSC guidance
- Crush and shear points: check hinged doors and lids for pinch points — add rubber door stops or slow-close mechanisms on any panel that could trap fingers
- Finish and materials: confirm paint or stain is lead-free and non-toxic; for wooden playhouses, use water-based exterior finishes rated for children's products; avoid pressure-treated lumber on interior surfaces
- Ventilation: enclosed playhouses can reach dangerous interior temperatures in direct sun — ensure at least one window or vent opening of meaningful size, and position the playhouse out of direct afternoon sun where possible
- Structural check: inspect fasteners, panel connections, and anchor hardware at least twice per year (beginning and end of play season); replace any corroded hardware immediately
- Surface below: patio hard surfaces don't provide fall cushioning — position protective rubber mat tiles or foam interlocking mats in any area where a child could fall from a raised feature such as a step, porch element, or loft
- Stability test: before first use and after each winter, conduct a stability push test — push firmly on each side wall; the structure should not tip or shift significantly
DIY or professional installation: how to decide
For plastic molded playhouses, DIY is almost always the right call, one adult, two to three hours, no special tools. For wooden kit playhouses, the honest answer is: most of them are DIYable, but assembly genuinely takes two adults, a full day (sometimes two), and a good set of tools including an impact driver. The cases where I'd recommend professional assembly are: units over 200 lbs assembled weight, any install requiring concrete anchoring, wood deck installs where you need to locate joists and assess ledger attachment, and situations where you simply don't have a reliable second adult to help.
Permit considerations: most residential patio playhouses don't require a building permit because they're classified as temporary structures or play equipment, not permanent buildings. However, if your playhouse will be permanently anchored, has a footprint exceeding your local limit for unpermitted structures (commonly 100–200 sq ft), or is being placed on a deck that hasn't been permitted itself, check with your local building department. This is especially relevant for HOA properties, many HOAs have specific rules about playhouses, fencing, and patio structures.
Installation step checklist
- Measure patio, confirm footprint and fall zone fit, photograph the surface
- Identify substrate type and select anchoring method before ordering
- Order playhouse with confirmed lead time — freight deliveries for large wooden kits can take 1–3 weeks
- Inspect delivery for damaged or missing parts before accepting — note any issues on the delivery receipt
- Prepare surface: clean, check level, install base plates or shims as needed
- Assemble playhouse per manufacturer instructions with a second adult — do not skip hardware steps
- Install anchors per substrate type
- Conduct stability test and full safety inspection before children use it
- Photograph final installation for warranty records
What does a patio playhouse actually cost
Retail prices are the starting point, not the total cost. Here's a realistic budget breakdown.
| Cost category | Plastic molded | Wooden cottage-style | Freestanding kit (large) |
|---|---|---|---|
| Unit purchase price | $100–$400 | $500–$2,500 | $800–$5,000+ |
| Shipping / delivery | Often free or $20–$50 | Freight curbside: $50–$150 | Freight curbside: $100–$250 |
| Optional professional assembly | $100–$300 (retailer service) | $250–$600 | $400–$1,000+ |
| Anchoring hardware | $0–$30 (rubber feet) | $30–$100 (anchor bolts, base plates) | $50–$200 (lag bolts, hurricane straps) |
| Surface prep (shims, leveling pads, base board) | $10–$40 | $30–$80 | $50–$150 |
| Safety accessories (rubber mat tiles, edge pads) | $30–$100 | $50–$150 | $80–$200 |
| Annual maintenance (sealant, cleaning, hardware) | ~$10–$20/year | ~$40–$100/year (sealant, stain) | ~$50–$150/year |
| Estimated total first year | $250–$870 | $900–$3,580 | $1,480–$6,950+ |
Hidden costs to watch for: replacement parts if any arrive damaged (shipping a single replacement panel can cost $30–$80 plus the wait time); optional add-ons like sunshade canopies, weather covers, and storage boxes (budget $50–$200); and on paver or pedestal patios, any re-leveling work that your substrate needs before installation.
Maintenance and seasonal care
Wooden playhouses
Wood playhouses need real maintenance to last their warranty period. At the start of each season: inspect all fasteners and tighten anything that has loosened with winter freeze-thaw cycles; check the roof panels and any horizontal surfaces for standing water damage; sand any rough or splintering surfaces; and apply a fresh coat of water-based exterior wood sealant or stain to any bare or faded wood. In climates with wet winters, apply a mold-inhibiting exterior finish rather than plain sealant. If you're leaving the playhouse outside through winter, cover it with a UV-resistant playhouse cover to slow weathering and keep debris out of joints and hardware.
Plastic playhouses
Plastic playhouses need much less maintenance but aren't zero-maintenance. Twice a season, wipe down all surfaces with a mild soap solution, avoid harsh chemical cleaners that degrade UV-stabilized coatings. Drain any molded features like play sinks by tipping the unit, Step2 manuals specifically note this step to prevent water pooling. Check plastic fasteners for cracking and replace with stainless steel hardware if any show fatigue. In winter, if possible, store molded plastic playhouses in a garage or shed: extended freeze-thaw cycling causes micro-cracking in standard polyethylene that shortens lifespan significantly.
Re-leveling after winter
Paver and pedestal patios settle over winter. Make re-leveling the playhouse your first spring task: set a 4-foot level across the base of the playhouse in both directions and adjust shims or leveling feet as needed. An out-of-level playhouse puts uneven stress on panel joints and makes doors and windows stick or bind, which is often the first sign that your substrate has shifted.
Design and planning tools for your patio layout
Before you commit to a playhouse size and position, it's genuinely worth sketching your patio to scale. Free patio design software tools can help you visualize the playhouse footprint, the required fall zone, and how it relates to existing furniture, doors, and walkways. If you've already been looking at patio design software reviews on this site, you know that most tools let you input your patio dimensions and drop in furniture or structure objects, using a rectangular object the size of your target playhouse plus the 6-foot fall zone buffer is a quick way to see what's actually feasible.
For small patios, the layout principle that works best is: playhouse in one corner or against one wall (reducing the fall zone to two sides instead of four), with the door facing into the usable patio space. This gives you the most flexibility to also have a small seating area on the same patio. On a 12x16 ft patio, a corner-placed 5x5 ft playhouse with fall zone on two free sides leaves a usable adult seating area of roughly 7x11 ft, enough for a small bistro set.
Siting tips for homeowners, renters, and DIYers
- Shade: position the playhouse so it receives morning sun and afternoon shade — interior temperatures in a south-facing enclosed playhouse can exceed 100°F in summer; east or north-facing doors and windows help
- Privacy: a playhouse tucked against a fence or hedge gives children a sense of enclosed play space and reduces the visual impact on neighbors; check HOA rules on patio structure visibility
- Sight lines: parents need to see the playhouse from inside the home or from the adult seating area — avoid placing it completely behind large planters or screening where supervision is difficult
- Surface protection: place a rubber mat or outdoor rug under the playhouse footprint to protect paver joints or deck finish from concentrated point loads and scratching
- Renters: if you're renting, document the patio surface condition before installation, use only non-penetrating anchors, and plan your removal method before you commit to a large wooden kit
Recommended accessories to make it work better
A playhouse alone on a hard patio surface leaves a few practical gaps. These accessories address the most common gaps: safety, weather protection, and usability. If you're sourcing patio essentials more broadly for your outdoor space, the same principles apply, think about safety surfaces, weather coverage, and storage in combination.
- Interlocking rubber or foam mat tiles (1/2 inch or 3/4 inch thick): place around the playhouse entry and any raised step to cushion falls on hard patio surfaces
- UV-resistant playhouse cover (sized to the unit): extends outdoor season and dramatically slows weather fading on both wood and plastic — measure your unit before buying a cover
- Ground anchoring kit matched to your substrate: either a concrete anchor plate set or a surface ballast frame — don't skip anchoring even for lighter plastic units
- Shade sail or pergola extension: if your patio has partial pergola coverage, extending shade over the playhouse area is the single most effective temperature management step
- Weatherproof outdoor storage box: keeps accessories (sandbox tools, dress-up items) next to the playhouse without cluttering the patio
- Outdoor-rated extension handle for a bristle brush: makes twice-a-season cleaning of roof panels and hard-to-reach surfaces much faster
- Stainless steel replacement hardware kit: buy one when you buy the playhouse — when original hardware corrodes (and it will in coastal or wet climates), having replacements on hand saves a hardware store run mid-assembly
Sample project plan: from patio prep to installed playhouse
Here's a realistic timeline for a mid-range wooden cottage-style playhouse on a concrete or paver patio. Adjust the timeline for smaller plastic units (compress significantly) or larger kit playhouses on wood decks (add substrate assessment and possibly a contractor visit).
- Week 1: Measure patio, photograph substrate, confirm footprint and fall zone fit using a scale sketch or design software
- Week 1: Research and select playhouse model; confirm assembled dimensions, weight, and anchoring options against your substrate; check warranty terms
- Week 1: Order playhouse (account for 1–3 week freight delivery lead time); order anchoring hardware and accessories concurrently
- Week 2–3: While waiting for delivery, clean and inspect patio surface; check level across the planned footprint area; install any leveling shims or base plates; purchase rubber mat tiles
- Delivery day: Inspect all components against the parts list before accepting delivery; photograph any damage; contact manufacturer before assembly if parts are missing
- Assembly day (schedule a full weekend day, two adults): Lay out all components, confirm all hardware is present, assemble per instructions without skipping steps
- Assembly day: Install anchor hardware per substrate type immediately after assembly — don't leave anchoring as a to-do for later
- Day after assembly: Conduct stability test, check all fastener tightness, verify window and door operation, apply first coat of sealant if required
- First week: Supervise initial play sessions closely to identify any stability, fit, or safety issues while they're easy to address
- Each spring: Re-level, re-tighten, inspect for weathering damage, apply maintenance sealant or stain as needed
More patio design resources to help you plan
A playhouse is one component of a functioning patio space, not a standalone decision. If you're still designing or building your patio surface, the type of system you choose has direct implications for playhouse compatibility, anchoring options, and load distribution, all the topics covered in this guide. Patio systems reviews on this site walk through the main surface system options in detail, which is useful context if you're deciding between a permanent slab, a modular tile system, or a pedestal build before adding a playhouse.
For elevated or rooftop patio surfaces, the pedestal patio system reviews cover load ratings and tile specifications that directly affect whether a given playhouse is appropriate for your surface. If you're working with a tight budget on both the patio build and the playhouse, patio essentials reviews cover the practical surface accessories, mats, weather covers, drainage inserts, that make a hard-surface play area safer and more functional without large capital outlay. And if you're in the planning stage and want to visualize multiple layout options before committing, patio design software reviews can help you find a free or low-cost tool that handles playhouse footprint and fall zone planning alongside your broader patio layout.
FAQ
What core safety standards and authoritative sources should the guide cite for patio playhouse recommendations?
Cite CPSC resources (Outdoor Home Playground Safety Handbook and Public Playground Safety Handbook) for residential safety guidance and protective surfacing recommendations, ASTM standards (notably ASTM F1487) for equipment performance/test criteria, and relevant building-code excerpts (IRC live-load and deck anchorage requirements). Use manufacturer manuals for specific product dimensions, weights, and maintenance notes.
What substrate-compatibility data must be collected and reported for each playhouse type?
For each playhouse type collect: recommended ground/contact surface (hardscape, soil, wood deck), required bearing pressure/contact footprint, typical assembled weight, and any manufacturer guidance about placing on pavers/concrete/deck. Cross-reference with ICPI/Techo‑Bloc paver specs (base depth, paver thickness) and typical deck design loads (IRC 40 psf) to assess suitability and need for reinforcement or base modifications.
What technical load and structural checks are needed before siting a playhouse on a patio or deck?
Verify deck design live-load capacity (typically 40 psf per IRC) and confirm that localized concentrated loads from the playhouse (point loads at legs/anchors) are supported by joists/ledger. For pavers, confirm compacted aggregate base depth and paver thickness per ICPI/Techo‑Bloc and check for adequate bearing to prevent settlement. For pedestal systems or ‘patio on a pallet,’ confirm manufacturer load-rating per pedestal and ensure even load distribution.
What anchoring and restraint information is required?
Document manufacturer anchoring instructions for each product. For hard surfaces (concrete/pavers) provide concrete-anchoring options (mechanical sleeve or wedge anchors, epoxy anchors) with minimum embedment depths. For decks, describe through-bolting to framing or use of freestanding ballast options if ledger attachment is not permitted. For pedestal/paver systems, explain edge restraint and block/plate distribution to prevent tipping or uplift. Always recommend corrosion-resistant fasteners and follow product torque/specs.
How should drainage and moisture-management be addressed for patio playhouses?
Specify that playhouses need positive surface drainage away from the footprint; for pavers ensure bedding/sand joints and aggregate base are not compromised by pooling water; recommend slope of at least 1/8–1/4" per foot away from structure on flat patios or an internal drain in larger bases. For wood decks recommend flashing and water-shedding details and avoid trapping moisture beneath playhouse bases—use spacers or breathable pads to promote airflow.
What safety features and measurements must be included in a consumer-facing safety checklist?
Include: maintain 6 ft clearance of protective surfacing per CPSC where applicable, check for entrapment openings (avoid 3.5–9 in hazardous openings), eliminate crush/shear/entanglement hazards, verify non‑toxic finishes, soften hard edges, install secure latches on doors, anchor units per instructions, and perform routine inspection for decay, sharp edges, loose fasteners, and trip hazards. Recommend supervising age-appropriate use.