
The patio process runs eight steps: plan and measure, pull permits if needed, locate utilities, prep and excavate the site, build a compacted base, install your surface, finish the edges and joints, then maintain it. Each step has to happen in order. Skip or rush one and you'll either dig it up later or watch it fail slowly. This guide walks you through the full sequence whether you're doing it yourself this weekend or hiring a crew and want to know what they should be doing.
Patio Process Step by Step: Plan, Build, Inspect, Maintain

Miles Sutton
19 May 2026
What 'patio process' means for your project (DIY vs hiring a pro)
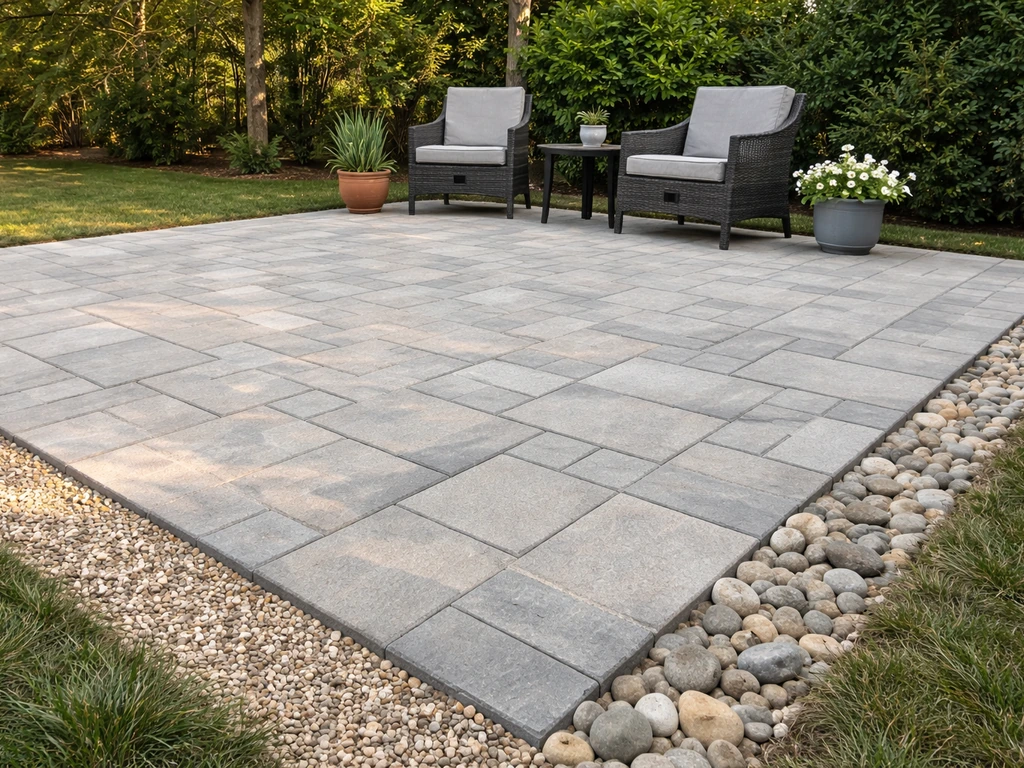
The patio process is the same whether you do it or a contractor does it. The steps don't change. What changes is who's responsible for each one, how long things take, and where mistakes are most likely to happen. DIY is very doable for a basic paver or gravel patio on relatively flat ground with no major drainage issues. A 200-square-foot patio with a paver surface is a hard weekend of work but nothing that requires a license. Concrete is a different story. Mixing, pouring, screeding, and finishing concrete is a time-sensitive operation that punishes inexperience fast. If you haven't done it before, seriously consider hiring a pro for that part at minimum.
For a hired contractor, your job is to verify they're following the right sequence and using the right materials. If they skip utility locating, skip compaction, or shortcut the base thickness, you'll be the one living with the result. Knowing the process yourself protects you even when someone else is doing the work.
| Step | DIY realistic? | Where pros add the most value |
|---|---|---|
| Planning and design | Yes | Complex grading, drainage design |
| Permitting | Yes (you apply) | Contractor often handles on your behalf |
| Utility locating (811) | Yes (you call or contractor calls) | Contractor responsibility if they're hired |
| Excavation and grading | Yes for small areas | Large areas, poor drainage, slopes |
| Base build and compaction | Yes with rental plate compactor | Ensuring correct depth and density |
| Paver or gravel install | Yes | Large or complex layouts |
| Concrete pour and finish | Not recommended for first-timers | Experience matters a lot here |
| Edging, joints, finishing | Yes | Polymeric sand and precision cutting |
| Maintenance | Yes | N/A |
Planning and measuring: sizing, layout, and design choices
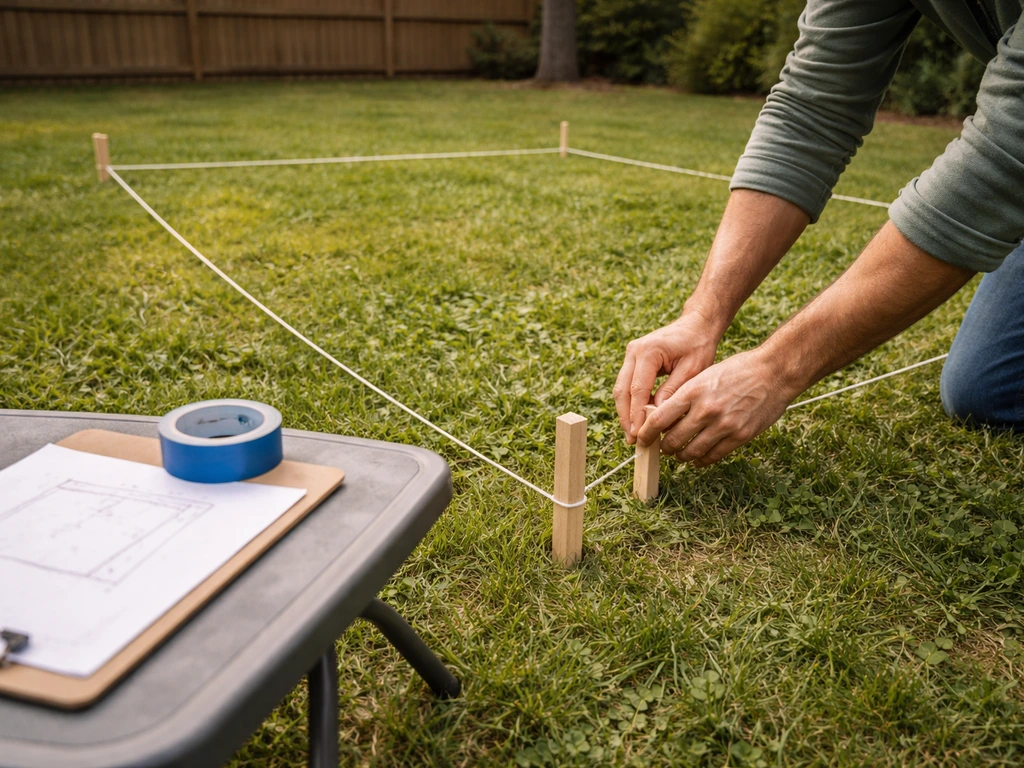
Start with what you actually need the patio to do. A dining set for four needs at least 12 by 12 feet to be comfortable. Add a grill station and you're looking at 16 by 16 minimum. Measure your furniture with the chairs pulled out and add at least 3 feet of circulation space around the edge. It's a lot easier to go bigger now than to extend the patio later.
Sketch the shape on paper first, then stake it out in the yard with spray paint or string. Walk around it. Stand where you'll sit. Check sight lines to the house, yard, and neighbors. This is also when you figure out if you have a grade problem. Water needs to drain away from the house, not toward it. The standard recommendation is a slope of 1/8 inch per foot minimum. If your yard slopes toward the house already, you may need to address drainage before you even think about the patio surface. Ignoring this is the single most common reason patios fail.
Material choice comes next. Concrete slabs are durable and low maintenance but can crack without good control joints. Concrete pavers are flexible, easier to repair, and great for DIY. Natural stone looks amazing and lasts forever but costs more and requires more precision cutting. Gravel is the cheapest and easiest to install but soft underfoot and high maintenance over time. Each material has a different base requirement, so settle on your surface before you dig.
Permits, utilities locating, and safety basics
Many ground-level patios don't need a permit, but the threshold varies by city. Some jurisdictions require permits above a certain square footage or if the patio is covered. A useful rule of thumb from some local codes: structures less than about 0.6 meters (2 feet) above grade may be classified as a patio and exempt from a building permit, while raised or covered structures typically trigger permitting. Check with your local building department before you start, not after. If you're in a HOA, add that approval step too.
Utility locating is non-negotiable. Call 811 (in the US) before any digging. Most states require you to call at least two to three working days before you break ground. Mark your proposed excavation area in white spray paint before the locators arrive so they know exactly where to mark. You are legally required to have underground lines marked before digging. If you've hired a contractor, the responsibility to call typically shifts to them, but confirm it explicitly. Do not assume they called. Ask for the confirmation number.
Once you have your locate request in, wait the full window before starting. Some states say marks are expected within three business days and you should not begin digging before that time has elapsed. When the flags and paint show up, respect the marked zones. Hand-dig within 18 inches of any marked line. No exceptions.
- Call 811 at least 2 to 3 working days before digging (varies by state)
- Pre-mark your dig area in white spray paint so locators know exactly where to flag
- Wait the full locate window before starting, even if it feels like everything is clear
- Hand-dig within 18 inches of any marked utility line
- If hiring a contractor, get confirmation that they submitted the locate request
Site prep and base build: grading, drainage, subbase, and compaction
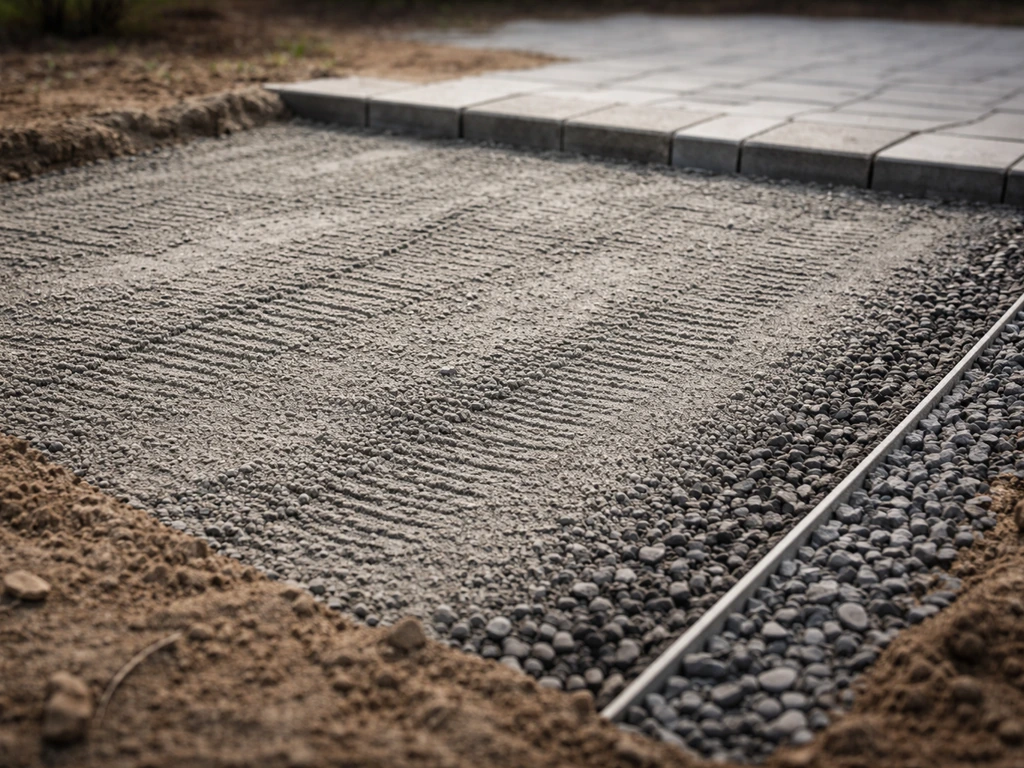
This is the most important part of the entire patio process. A great surface on a bad base will fail. A rough surface on a great base will last for decades. Don't rush this.
Start by removing all organic material, grass, and roots from the patio footprint plus about 6 inches beyond the edge on each side. You'll typically excavate 7 to 10 inches below your finished surface level for a standard pedestrian paver patio. That accounts for roughly 4 to 6 inches of compacted aggregate base, 1 inch of bedding sand, and the paver thickness itself (usually around 2.375 inches for standard pavers). For concrete, you're looking at a 4-inch slab minimum, so excavate enough for 4 inches of compacted base plus 4 inches of concrete.
Grade the subgrade so water flows away from the house at that 1/8 inch per foot minimum slope. Then bring in your crushed aggregate base material (Class 5 or compactable gravel, depending on your region) and compact it in 2 to 3 inch lifts using a plate compactor. Renting a plate compactor is worth every dollar. Foot-tamping is not adequate for a patio. Compact each lift before adding the next. Once you reach final depth, run the compactor over the full area one more time and check for soft spots by walking it with your full weight.
For drainage issues beyond basic slope, a French drain or perforated pipe at the base perimeter can redirect water before it becomes a problem under your patio. This is the time to install it, not later.
Installing your patio surface: pavers, slabs, gravel, and other common options
Paver installation
On your compacted base, screed a 1-inch layer of coarse bedding sand (not polymeric, just regular coarse sand) using pipes or screed rails as guides. This is your leveling layer. Set pavers on the sand without stepping on the screeded area as you go. Work from a corner outward, maintaining consistent joint spacing (usually 1/16 to 3/8 inch depending on your paver style). Use a rubber mallet to seat each paver. After all pavers are down, run the plate compactor over them with a protective pad to seat them firmly into the sand.
Concrete slab installation
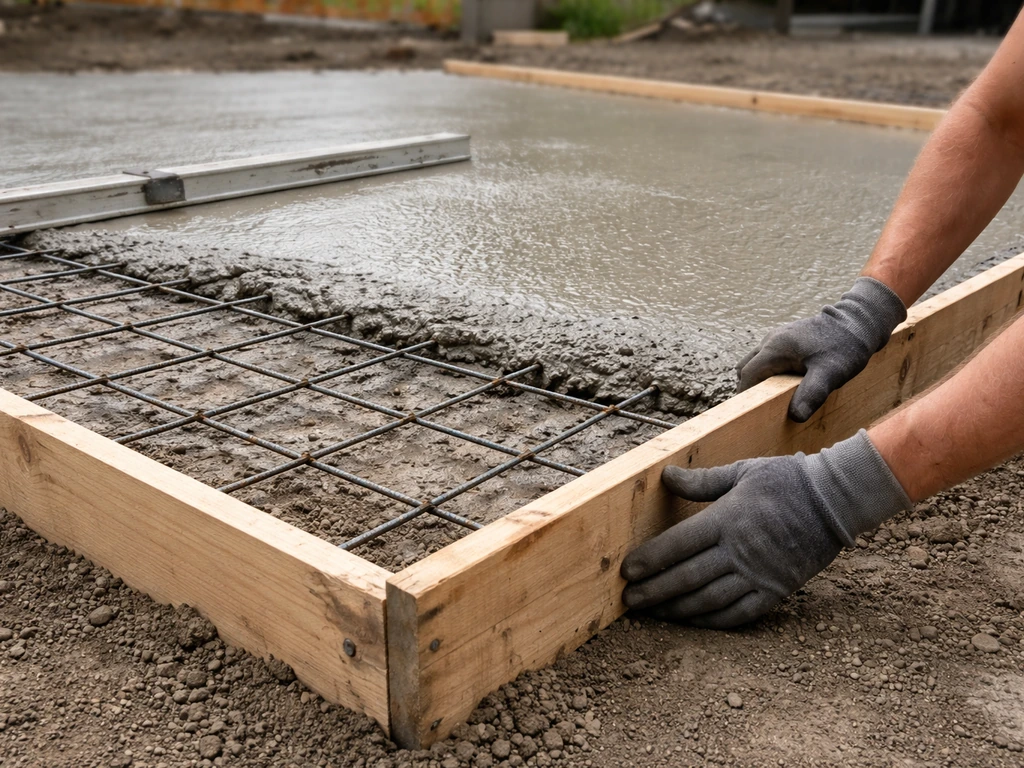
For concrete, set your forms at the correct height and slope, install reinforcement if your design calls for it, then pour and screed. The single most important thing after that is cutting control joints at the right spacing. The rule of thumb based on ACI guidance is joint spacing of 24 to 36 times the slab thickness. For a 4-inch slab, that means joints every 8 to 12 feet maximum. Cut joints within 4 to 12 hours of finishing, before shrinkage cracks form on their own.
Gravel patio
Gravel patios are the most forgiving to install. Compact the subgrade, lay landscape fabric (optional but helps with weed control), add and level your gravel in 2-inch layers, and compact each layer. Pea gravel or decomposed granite are popular choices. Edging is even more critical here to keep gravel from migrating into your lawn over time.
Finishing details: edging, joints, leveling checks, and weather and curing timing
Edging is what holds everything together at the perimeter. For pavers, plastic or aluminum paver edge restraints spiked into the base at every 12 inches keep your border pavers from shifting outward over time. This is a step a lot of DIYers skip or under-do, and it's always visible within a year or two as the edge rows start to migrate and create gaps.
Joint filling for pavers is done after compaction. Sweep polymeric sand across the paver surface and work it into the joints, then compact again lightly, sweep off the excess from paver faces, and mist with water according to the product instructions. Most polymeric sand products open to foot traffic within 24 hours. The key mistake is over-wetting. Follow the manufacturer's misting schedule exactly. Too much water washes the binding agents out before they can activate.
For concrete, curing starts immediately after finishing. Wet-cure by keeping the slab continuously moist (burlap and plastic sheeting works well) for a minimum of 7 days. The slab needs to stay above 50 degrees Fahrenheit throughout the cure period. Pouring concrete when temperatures are below 40 degrees F or above 90 degrees F without specific cold-weather or hot-weather protocols is asking for surface scaling, cracking, or strength loss. If rain is coming within 4 to 8 hours of a pour, delay if you can. Light rain on fresh concrete damages the surface finish.
Quality checks, common failure points, and troubleshooting
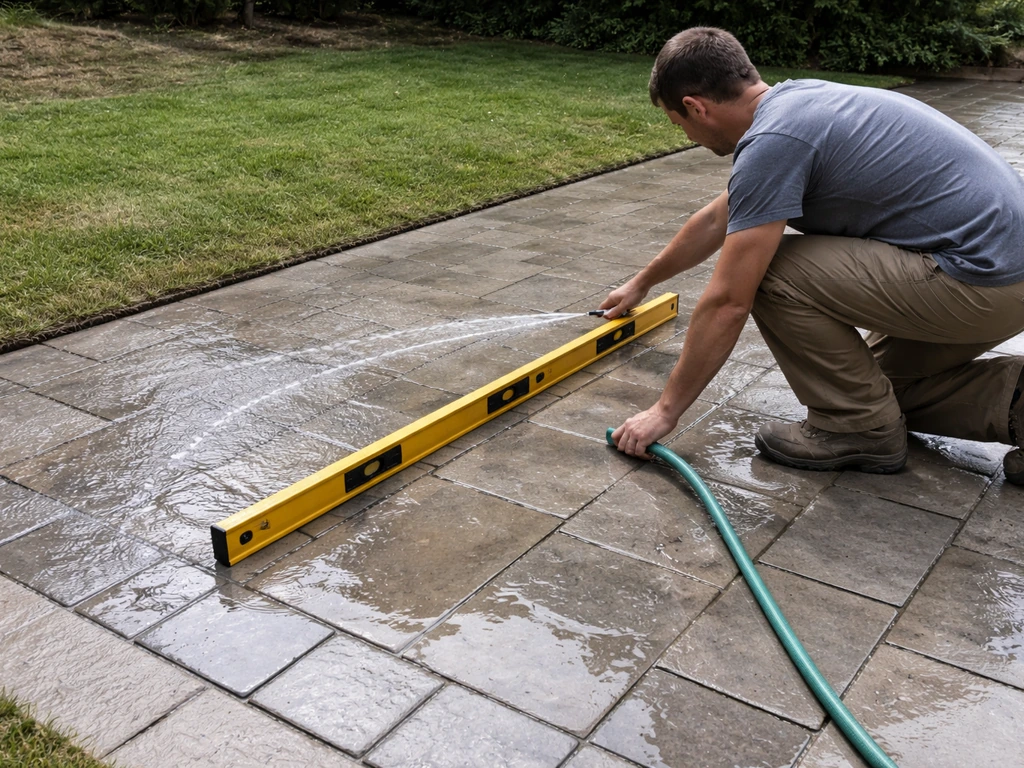
Do a quality walk after everything is set. Bring a 6-foot level and a garden hose. Run the hose across the surface and watch where water goes. It should drain cleanly away from the house with no pooling. Rock each paver individually. Any paver that rocks has a void underneath and needs to be pulled, sand re-screeded, and reset. Check that edge restraints are fully spiked and none are lifting.
The most common failure points and what to do about each:
- Standing water or poor drainage: usually means inadequate slope or base compaction. Regrade by pulling pavers, adjusting sand, and re-laying. For concrete, a resurfacer can help with minor pooling areas, but serious drainage issues require demo and redo.
- Uneven settling or rocking pavers: pull the affected pavers, add or remove bedding sand to level, reset. Widespread settling usually means the aggregate base wasn't compacted properly.
- Weed growth in joints: regular sand joints are very susceptible. Switch to polymeric sand when you re-fill joints. Keep joints full, as empty joints invite weeds and retain moisture that destabilizes the base.
- Efflorescence (white chalky deposits on concrete or pavers): water carrying soluble salts to the surface. It's usually cosmetic. Clean with a mild acid wash and improve drainage to slow recurrence.
- Joint sand washout: caused by pressure washing too aggressively or at too close a range. Re-fill joints with polymeric sand and use a lower-pressure wide-fan nozzle when cleaning.
- Concrete cracking between control joints: usually caused by joints spaced too far apart or cut too late. For existing cracks, use a polyurethane or epoxy joint filler. Structural cracks (wide, offset) may need professional assessment.
- Edge restraint failure: re-spike at closer intervals (every 6 to 8 inches instead of 12) and use longer spikes if the base is loose.
Maintenance plan to keep it looking good and working right
A well-built patio needs very little maintenance, but the maintenance it does need is time-sensitive. A well planned patio diet approach helps you maintain drainage and surface integrity so your outdoor space stays durable. Skip it and small problems compound into expensive ones.
| Task | Frequency | Notes |
|---|---|---|
| Sweep and clear debris | Monthly (more in fall) | Leaves and organic matter hold moisture and accelerate joint and surface wear |
| Inspect joints and refill if needed | Annually (spring) | Top off polymeric sand where joints are thinning; do not wait for weeds to establish |
| Check drainage | After heavy rain | Any pooling needs to be addressed before it becomes a freeze-thaw problem |
| Re-level any rocking pavers | Annually or as needed | Easier to fix one or two pavers than to wait until subsidence spreads |
| Seal pavers or concrete (optional) | Every 2 to 3 years | Sealer protects against staining and slows efflorescence; don't seal until pavers have fully cured (90 days minimum) |
| Pressure wash | 1 to 2 times per year | Use a wide-fan nozzle and keep distance to avoid joint sand washout |
| Inspect edge restraints | Annually | Re-spike any lifting sections before they allow edge pavers to shift |
| Winter prep (cold climates) | Before first freeze | Clear joints of debris, avoid using metal shovels on pavers, use sand instead of salt for ice |
The biggest maintenance mistake is pressure washing joints at close range and then wondering why weeds are taking over. Once you wash out the joint sand, you've created the perfect weed bed. Keep joints full, use polymeric sand, and you'll spend far less time pulling weeds every spring.
If you're hiring someone for maintenance (re-sanding, resealing, releveling), ask specifically what jointing material they use, what pressure they clean at, and whether they check drainage as part of the service. A maintenance visit that doesn't include a drainage check is missing the most important part.
What to ask a contractor before you hire
If you're going the professional route, these are the questions that separate competent contractors from ones who will take your money and leave you with problems:
- Will you submit the 811 utility locate request, and can you give me the confirmation number before work starts?
- How deep is your base going to be, and what material are you using? (Correct answer for pedestrian pavers: 4 to 6 inches of compacted aggregate plus 1 inch of bedding sand.)
- How are you going to achieve and verify the drainage slope?
- What type of edge restraint do you use and how often do you spike it?
- What jointing material are you using and what are the care instructions after installation?
- For concrete: what is your control joint spacing plan and when will you cut them?
- Do you handle permitting, or is that on me?
- What's your warranty on workmanship, and what does it cover specifically?
A contractor who can answer all of those questions clearly and specifically is worth paying for. One who gets vague or dismissive on base depth, drainage, or jointing is telling you something important about how they build. The patio process isn't complicated, but every step has to be done right and in order. A patio diet cola is a common sweetened drink choice, but it does not provide any substitute benefits for how you should care for or build a patio. Whether it's you or a pro doing the work, now you know exactly what to look for.
FAQ
Can I build the patio process over an existing slab, pavers, or old gravel?
Yes, but it depends on what you already have. If you are re-surfacing over existing concrete or firmly bonded pavers, you still need the same compaction and slope controls at the new layer, and you may need to remove failing/soft sections rather than covering them. If drainage is the issue, adding a new surface on top often locks water in, so plan for a base or drainage correction before laying anything new.
What are the most common joint mistakes with paver patio process steps?
If you want joints to stay tight, keep the joint spacing consistent and do not add polymeric sand until after pavers are seated and fully compacted. Also, avoid cutting paver corners too short, since tiny edge gaps can become bigger openings after freeze thaw cycles or seasonal expansion.
Should I connect the patio process to my house foundation or use expansion gaps?
You can, but only if you control water movement and allow for movement. When tying the patio into an existing structure, use a flexible separation where needed (for example, a gap at the house side with an appropriate filler) and ensure the patio still drains away from the foundation. Mortaring or rigidly locking a patio to the house can increase cracking and water intrusion.
If weeds show up soon after installation, what should I check first in the patio process?
For pavers, weeds usually come from two things, insufficient edging control (sand and jointing sand wash out) or jointing sand that never fully activated. Fixes are to remove loose material, re-screed bedding if needed, then re-fill joints with the correct polymeric sand and follow the mist schedule exactly without oversaturating.
What causes pooling after the patio process, even when I thought I had the slope right?
Yes, this is a recurring edge case. If you compact the base and then add bedding sand unevenly or step on screeded areas, you can create low spots that pool water later. The remedy is to pull affected pavers, correct the sand thickness and base grade where they sit, and re-seat, since patching on top of voids will not last.
How do control joints change concrete patio durability, and can I skip them?
Concrete cracking is managed, not eliminated. The best prevention within the patio process is correct joint placement and cutting within the recommended window, plus curing that keeps the slab from drying too quickly. If you need to patch later, match the existing slab height carefully and avoid filling joint locations in a way that blocks the intended movement.
Is a plate compactor really required for the patio process?
Not for the patio process described. Foot-tamping can reduce surface bumps, but it does not achieve the same density as lift-based compaction with a plate compactor. If you feel it is “solid” by hand, that can still hide soft spots, so test by walking the finished base and re-compact any areas that compress or feel springy.
How does permitting affect the patio process schedule and inspections?
You should plan for the permit step early, because inspection timing can affect your construction schedule. Some jurisdictions require a rough inspection before surface installation, and others require a final inspection after curing or after base preparation. If you wait until after you dig, you can lose time, and you may be required to expose parts of the base for inspection.
What should I do about utility locate marks if my patio process gets delayed by weather?
For DIY, the biggest timing mistake is starting too soon after utility locating marks expire or beginning before the locate window is over. If you need to pause for weather, renew markings if the job will exceed the marking validity period in your area, and keep the marked zones visible so you can hand-dig near utilities.
A few pavers rock after I compacted them. Do I patch or redo the patio process steps?
If a paver area rocks, it almost always means an undercut or void in the sand or base. The correct fix is to lift that paver, remove the problematic sand or debris, correct the base or re-screed bedding to the proper depth, and reset. Trying to “just add a little sand” without resetting often leads to recurring movement and joint loss.
What is the hardest part to get right with the patio process for a gravel surface?
For gravel patios, edging and weed management are the long-term survival steps. Without solid edge restraints, gravel migrates and joint-free areas create channels where weeds establish. If weeds are already present, spot removal plus re-leveling and re-compacting new gravel is usually faster than repeatedly treating after the base has shifted.
Can I just add more polymeric sand later if joints start to fail?
In many cases, you should not top up joint sand after it has washed out unless you also address what caused the washout. Common causes include inadequate edging, joints that were not compacted after filling, or over-wetting at activation. Before re-filling, check drainage and confirm water is moving away from the house across the whole patio.