
If you're searching 'patios today,' you're probably ready to stop thinking and start doing. Good. Here's the direct path: figure out what you actually need your patio to do, measure your space, pick a material that fits your budget and maintenance tolerance, decide whether you're hiring out or doing it yourself, and handle the site prep right so the whole thing lasts. That's the project in five steps, and this guide walks you through every one of them with the specifics you need to move forward today.
Patios Today: Quick Steps to Plan, Size, and Build One

Miles Sutton
1 May 2026
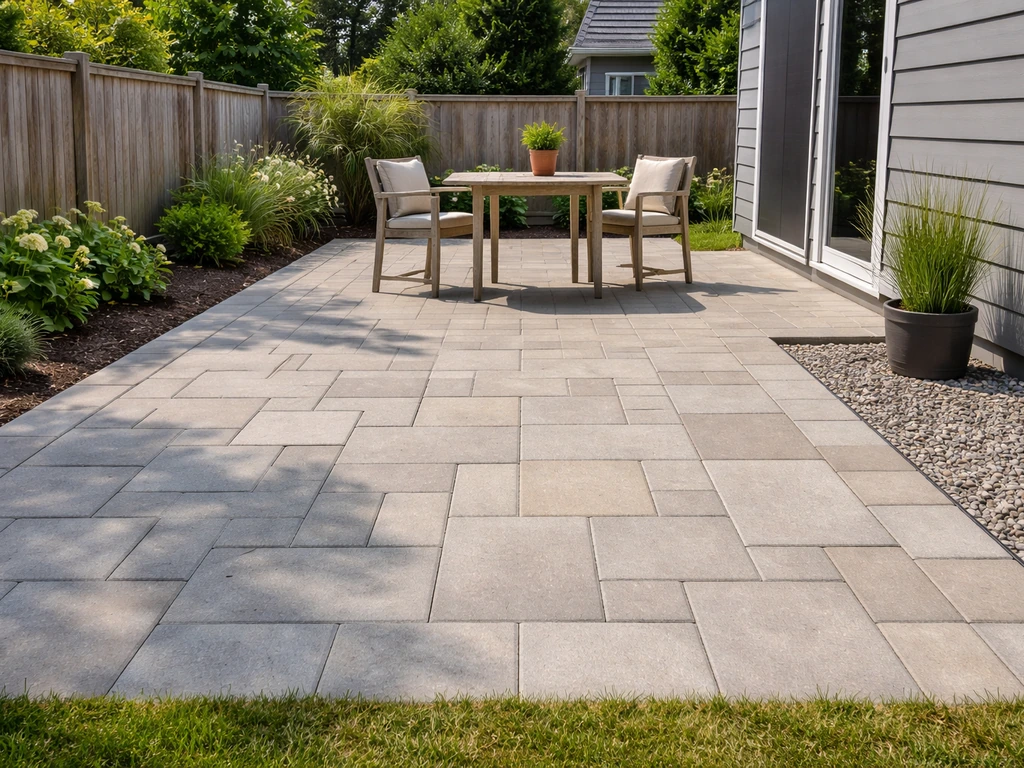
Quick 'What Do You Need Today?' Patio Decision Checklist
Before you buy a single paver or call a contractor, spend ten minutes answering these questions. Your answers will determine layout, material, budget, and timeline. Skip this step and you'll likely redo decisions later.
- What will you primarily use the patio for? (Dining, lounging, grilling, entertaining, kids' play, or a mix?)
- How many people do you want to comfortably seat at once? (Each dining seat needs roughly 25–30 sq. ft of patio space when you account for chairs and circulation.)
- What's your realistic budget, installed? (Know your ceiling before you fall in love with a material.)
- Do you have existing drainage issues, slopes, or soggy spots in the area where you want to build?
- Is your backyard fenced or open? (Affects privacy needs and layout choices.)
- What direction does the space face? (South/west-facing patios get intense afternoon sun; you'll want shade structures or natural screening.)
- Do you want to DIY, hire a pro, or do a hybrid (you prep, they lay)?
- Are there HOA rules or local permit requirements you need to check before starting?
- Will you need accessibility for anyone with limited mobility? (A 60-inch turning circle minimum is the benchmark for wheelchair-accessible circulation.)
- What's your timeline? (Concrete needs curing time; pavers can be walked on almost immediately.)
Write your answers down. They're your project brief. Everything else in this guide connects back to them.
Choosing the Right Layout, Size, and Style
Size is the decision most homeowners underestimate. A 10x10-foot patio feels plenty large on paper but gets cramped fast once you put a table, four chairs, and a grill on it. A comfortable outdoor dining setup for four to six people typically needs at least 12x14 feet, and 16x20 feet gives you room to breathe. If you're working with a small yard, a 10x12 space is a reasonable minimum for a bistro-style setup for two.
For layout, think in zones. A single-purpose patio is easy: dining area near the door, done. A multi-purpose patio works better when you separate the dining zone from the lounging zone, even if it's just a change in level or a planter dividing them. If accessibility matters, keep circulation paths at least 36 inches wide and plan a 60-inch clear turning space where routes change direction.
Style follows function. A clean rectangular patio is the easiest to build and the most budget-friendly in labor. Curved or freeform shapes look great but cost more, especially in poured concrete or cut stone. L-shaped patios work well for corner lots or for wrapping around a door and a side yard. Raised patios add drama and solve grade problems but require retaining walls and more structural planning. If you're deciding today, start with the simplest shape that meets your functional needs, then add complexity only if your budget and skill level support it.
Materials Compared: Pavers, Concrete, Wood, and Stone
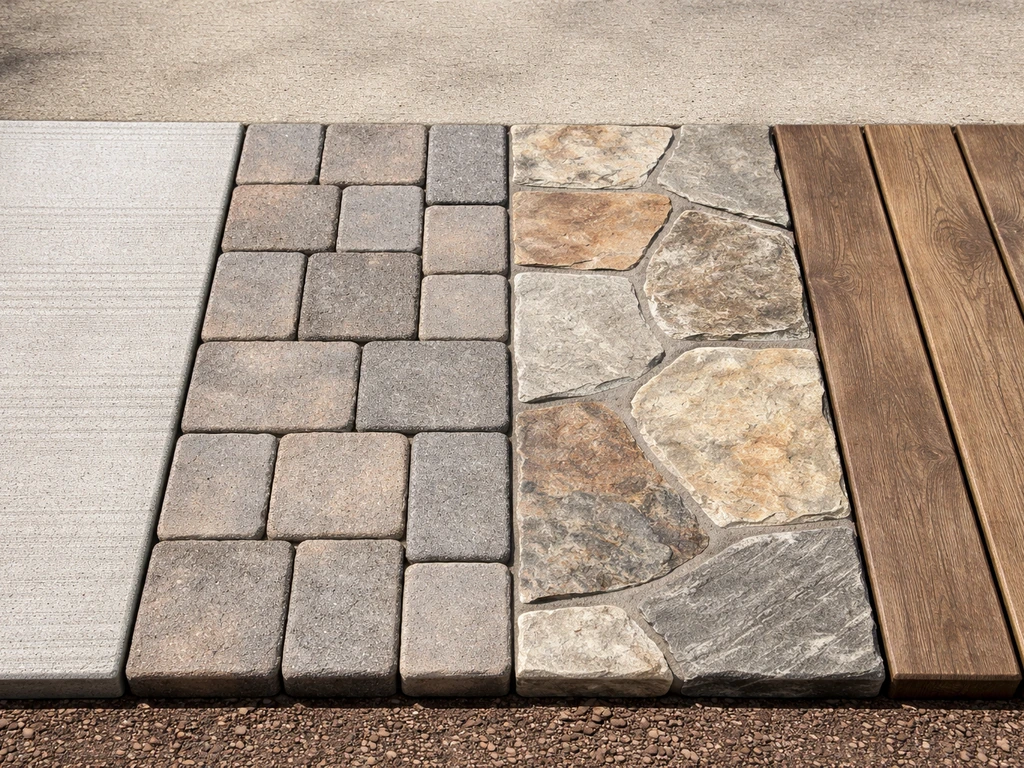
Material choice affects installed cost, how long the patio lasts, how much maintenance you'll do every year, and whether you can realistically DIY it. Here's an honest breakdown across the most common options.
| Material | Installed Cost (per sq. ft) | Lifespan | Maintenance Level | DIY-Friendly? |
|---|---|---|---|---|
| Concrete (poured) | $6–$17 | 25–50 years | Low–Medium (reseal every 3–4 yrs) | Moderate (mixing, forming, finishing) |
| Concrete pavers | $10–$20 | 30–50+ years | Low (resand joints, occasional sealing) | Yes, one of the most DIY-friendly |
| Natural stone | $15–$30+ | 50–100 years | Low–Medium (seal periodically) | Possible but labor-intensive |
| Pressure-treated wood | $8–$20 | 10–20 years | Medium–High (stain/seal every 1–3 yrs) | Yes, especially for raised platforms |
| Composite decking | $15–$30 | 25–30 years | Low (wash annually) | Yes, with basic carpentry skills |
| Gravel/stepping stone | $3–$10 | Variable | Medium (top-up, weed control) | Very easy DIY |
Concrete pavers hit the best balance for most homeowners: moderate cost, long lifespan, and genuine DIY accessibility. They're also repairable, meaning if one cracks or settles, you pull it up and reset it without jackhammering the whole surface. Natural stone costs more up front but lasts the longest, easily 50 to 100 years with basic care. Poured concrete is affordable and clean-looking but cracks over time, especially in freeze-thaw climates, and repairs are ugly. Wood and composite are better suited to raised platforms and decks than ground-level patios in wet climates.
If you're shopping a sale or comparing quotes today (related to what you'd find browsing today's patio sales), know your material cost per square foot before any contractor conversation so you can separate material markup from labor. If you're shopping for options, keep “today's patio sale” deals in mind and compare material costs per square foot before you decide browsing today's patio sales.
Site Prep: Drainage, Grading, and the Base Layer
This is the part most DIYers shortcut, and it's exactly why patios fail. A beautiful surface on a bad base will crack, shift, sink, or heave within a few years. Get the prep right and almost any material will perform well for decades.
Grading and Drainage First
Your patio surface needs to slope away from your house at a minimum of 1/8 inch per foot, though 1/4 inch per foot is safer. That's enough to shed water without being noticeable underfoot. If your yard has existing drainage problems, like standing water after rain, resolve those before you build. A patio on a poorly drained site will hold water at the foundation or flood into the slab edges. In some cases, you'll need a French drain or channel drain at the low edge of the patio.
Excavation Depth and Base Layers
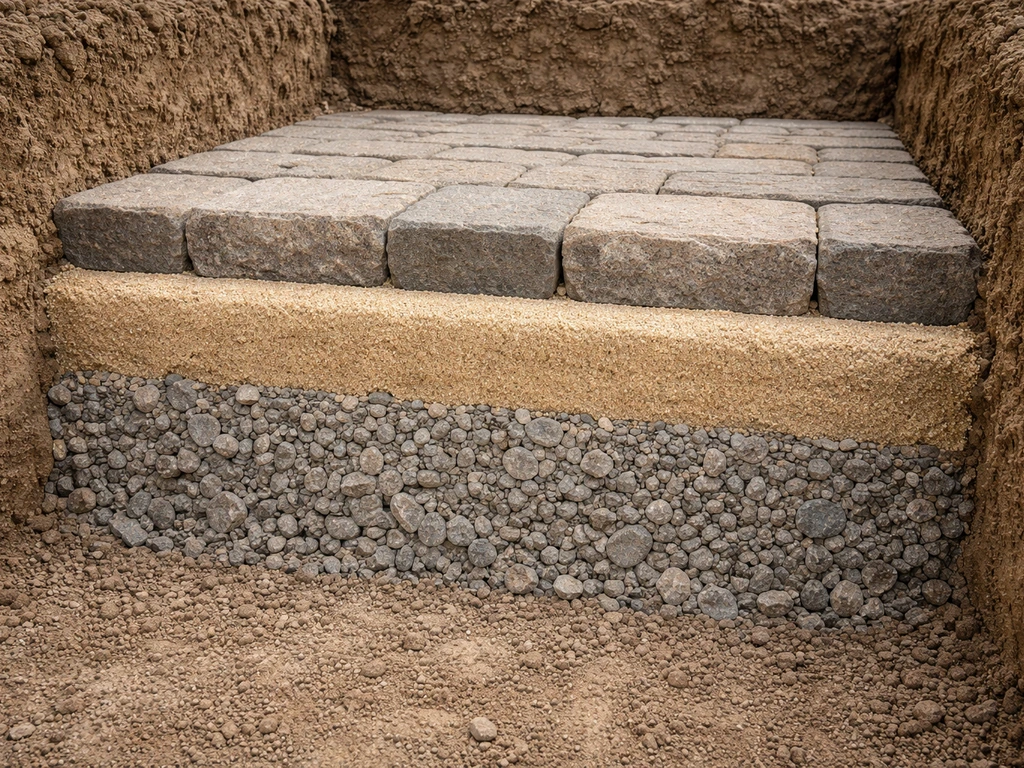
For a paver patio, plan on excavating roughly 8 to 10 inches below your finished surface level. That gives you room for a compacted gravel base, a 1-inch bedding sand layer, and the pavers themselves. Industry guidance from CMHA recommends a minimum 4-inch compacted gravel base for standard pedestrian patios, increasing to 6 inches or more in areas with freeze-thaw cycles, weak soils, or poor drainage. Belgard's installation guides call for compacting base material in 2- to 4-inch lift increments rather than all at once, which gives you a tighter, more stable base. If you're in a cold climate, check your local frost line depth: in some regions you may need to go deeper to prevent frost heaving.
Avoid base materials with too many fines (fine particles) because they retain water and contribute to frost heaving. Use clean crushed stone, not pea gravel or bank-run material with a high fines content.
For poured concrete, the slab typically sits on 4 inches of compacted gravel and needs to be at least 4 inches thick itself, with 6 inches in areas that see vehicle traffic or heavy loads. Reinforcing with rebar or wire mesh adds crack resistance.
DIY vs. Hiring a Pro: Honest Cost and Risk Tradeoffs
A paver patio in the 200 to 400 square foot range is genuinely doable as a DIY project if you're comfortable with physical labor and methodical work. Expect to put in roughly 60 to 80 hours from excavation to final joint sand. That's a big time commitment, but you can save 30 to 50 percent on total project cost by doing it yourself. Labor runs roughly $3 to $17 per square foot depending on region, complexity, and material, so on a 300-square-foot patio, that's $900 to $5,100 in potential savings.
The risk with DIY is mostly in the base prep and drainage. If you rush those steps, you'll be resetting pavers or patching concrete in three to five years. The surface work, laying pavers, cutting borders, screeding sand, is learnable from good video tutorials. The invisible work underneath is where experience matters most.
Hire a pro when: you have significant grade changes to deal with, you need retaining walls, your drainage situation is complex, you're working with natural stone that requires precision cutting, or you simply don't have 60 to 80 hours to give it. A good installer will also reduce material waste because they can estimate quantities more accurately than a homeowner working from a rough sketch.
A hybrid approach works well for budget-conscious homeowners: you do the excavation and hauling (the most time-consuming, low-skill labor), and the pro handles the base compaction, layout, and surface work. This can cut labor costs by 20 to 30 percent without putting the structural decisions in amateur hands.
Permits, Safety, and Mistakes That Catch People Off Guard
Do You Need a Permit?
Ground-level patios often don't require a permit in most jurisdictions, but raised patios, patios attached to the house, or anything over a certain square footage threshold (which varies by municipality) frequently do. Check with your local building department before you start, not after. HOA rules are separate from municipal permits, and some HOAs require design approval. If you're in a flood zone or near a wetland, additional restrictions may apply.
Safety During Construction
Cutting pavers and concrete produces respirable crystalline silica dust, which is a serious lung hazard. OSHA is clear on this: wet cutting is one of the primary engineering controls to reduce silica exposure when cutting masonry materials. If you're renting a saw to cut pavers, use a wet saw or attach a vacuum shroud to a dry saw. Wear an N95 respirator at minimum, and don't cut inside enclosed spaces. This isn't optional safety theater; silica-related lung disease is permanent.
Before you dig, call 811 (in the US) to have underground utilities marked. It's free and legally required in most states. Also check for buried irrigation lines and low-voltage landscape wiring, which 811 won't always locate.
Common Mistakes to Avoid
- Skipping the base compaction steps: uncompacted base settles unevenly and causes surface cracking or sinking.
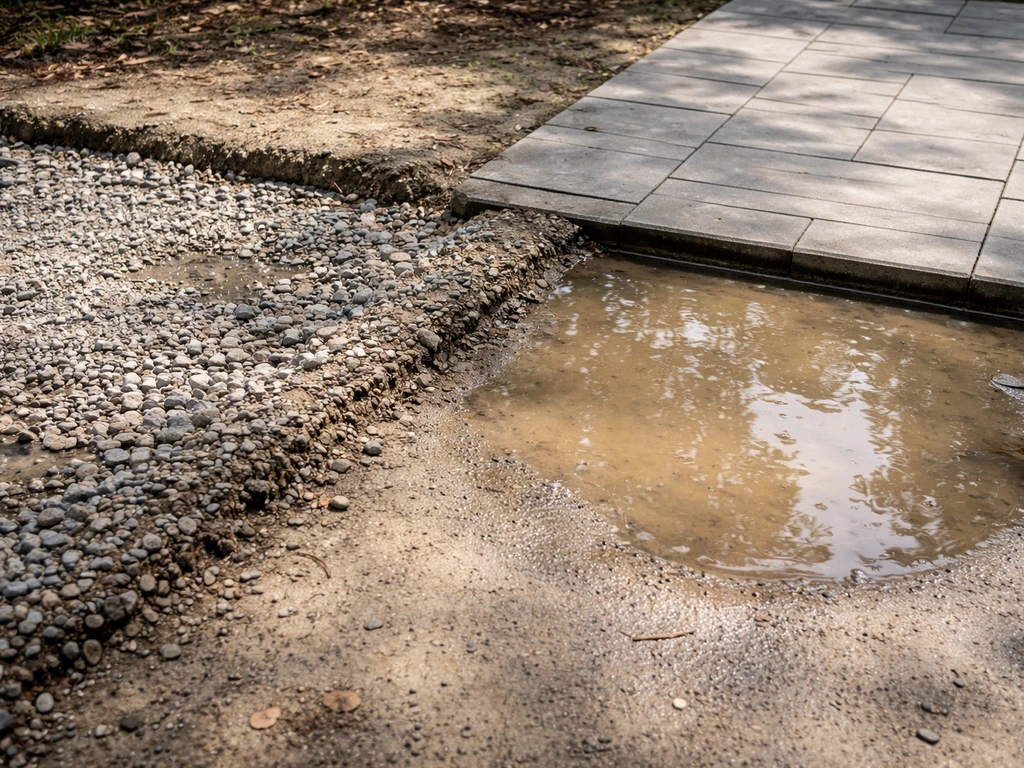
- Poor slope or flat grade: water pools on the patio or runs toward the foundation.
- Using the wrong base material: anything with high fines content holds moisture and causes frost heaving.
- Underestimating the project size: a patio that's too small for your actual use frustrates you every time you host.
- Forgetting about drainage at the perimeter: water has to go somewhere; if you haven't planned an exit route, it finds one you won't like.
- Cutting pavers dry without respiratory protection: silica dust is cumulative and dangerous.
- Starting without checking permits or HOA rules: work stoppages and tear-downs are expensive and embarrassing.
Keeping Your Patio Looking Good for the Long Haul
The good news about patio maintenance is that most materials are genuinely low-effort if the base was installed correctly. Here's what routine care looks like by surface type.
Pavers (Concrete or Natural Stone)
The main ongoing task with pavers is the joint sand. blank" rel="noopener noreferrer">Polymeric joint sand, like products in the QUIKRETE HardScapes line, resists weed growth and erosion and is worth using over plain sand. One 35-pound bag covers roughly 50 square feet, so a 300-square-foot patio needs about six bags when you resand. QUIKRETE’s polymeric jointing sand literature also notes coverage of about 50 to 55 square feet per 50 lb bag depending on joint conditions blank" rel="noopener noreferrer">QUIKRETE’s polymeric jointing sand coverage of 50 to 55 square feet per 50 lb bag. Resand when joints look thin or weeds start finding purchase, typically every three to five years. Sealing pavers with a film-forming 'wet look' sealer every two to three years protects color and makes cleaning easier. Use a pressure washer on a low setting for annual cleaning, and avoid high-pressure direct streams on joints.
Poured Concrete and Stamped Concrete
Power wash in spring to remove winter grime and salt residue, then reseal stamped or decorative concrete approximately every three to four years. Plain broom-finish concrete is more forgiving but still benefits from sealing every few years to reduce moisture infiltration and freeze-thaw cracking. Fill hairline cracks with a flexible concrete crack filler before they widen.
Permeable Pavers
Permeable systems have one specific maintenance requirement that regular pavers don't: sediment clogging the pores. Sweep or vacuum the surface annually to clear sediment, and check that drain outlets are clear. Replenish jointing stone as needed. If permeability drops noticeably (water pools instead of soaking in), the joints likely need cleaning and replenishment.
Wood and Composite
Pressure-treated wood needs staining or sealing every one to three years depending on sun and moisture exposure. Composite surfaces mostly need an annual wash. Inspect fasteners and framing annually for rot or rust, especially at ground contact points.
Your Next Steps, Starting Today
Here's the short version of what to actually do today, in order. If you want a fast, local way to compare patio options and materials, consider reaching out to Patios are us for guidance. If you're trying to figure out patio hours today, make sure your installer or supplier’s schedule matches your planned work window. If you need to know right now whether the patio is open today, check the venue's hours or call ahead for confirmation is the patio open today.
- Answer the decision checklist at the top of this article and write down your answers.
- Go outside with a tape measure and measure the space you're working with. Mark it out with stakes and string or chalk so you can see it at scale.
- Pick your top two material options based on budget and maintenance tolerance, then get at least one local quote for installed price so you have a real number to compare against DIY cost.
- Check your municipality's permit requirements for ground-level patios (a quick call or website search takes ten minutes).
- Assess the drainage situation in your target area: does water pool there after rain? Is there a slope toward the house? Flag these issues now so your contractor or your own plan addresses them.
- If you're DIYing, watch two or three installation videos specific to your chosen material before ordering anything. The sequence of steps matters.
- If you're hiring a pro, get three quotes that itemize materials and labor separately, and ask each contractor how they handle base compaction and drainage.
Whether you're in the early dreaming stage or ready to rent a plate compactor this weekend, the process is the same: size it right, prep the base properly, pick a material that matches your real budget and maintenance appetite, and don't skip the drainage planning. A patio built on a solid base with good drainage will look great 20 years from now with minimal effort. One built on shortcuts will frustrate you in three.
FAQ
Can I build patios today over a backyard that still gets muddy or puddles after rain?
Yes, but only if you treat it as a drainage and base problem first. If water is pooling now, a new patio will trap it under the surface. Fix grading and any needed perimeter drains before installing, and confirm the patio’s slope direction so runoff exits the work area, not toward the house.
What expansion gaps or edge details should I plan for when building patios today?
Generally, plan on leaving expansion gaps at edges and around fixed objects (posts, walls, door thresholds). For pavers, edges need edging restraint so the perimeter does not slowly spread, and for concrete you want controlled joints to manage cracking. These gaps and joints are what allow the material to move without heaving the entire surface.
How do I avoid ruining polymeric joint sand after I set pavers for patios today?
If you are using poly-sand, wet it correctly and do not overuse water. Too much water before it cures can wash polymer and weaken binding, while too little can leave gaps. Also, avoid sealing pavers until poly-sand has fully cured, otherwise you can interfere with polymer hardening and future joint stability.
Do I always need a permit for patios today?
Not always. A patio can be permitted based on size, attachment to the home, grade changes, and sometimes distance to property lines or environmental constraints. Before you order materials, ask your local building department whether you need a permit for a free-standing ground-level patio and whether a site plan is required.
What should I include in my material takeoff for patios today so I do not run short?
Budget comparisons should include waste, underlayment, and edge materials, not just square footage. A common mistake is buying exactly what your calculator says, then running short on cuts, corners, and pattern alignment. Add a realistic allowance (often 10 to 15 percent for pavers with layouts, and more for complex borders).
Why does a patios today project often take longer than expected?
For DIY timelines, the biggest trap is underestimating cure and drying time. Concrete work and sealing schedules can force you to wait between steps, and base prep needs time after rain or watering so compaction is effective. Build buffer days for weather and curing so you are not rushing joint sand, sealing, or backfilling.
Can I use the patio right away after installation for patios today?
Yes, but test first. A lot of patio failures are from “washing and walking” new pavers before the base stabilizes or before the joint sand locks in. If you need to walk on it soon, keep traffic off the fresh joints, use temporary boards to distribute weight, and plan that the final look and stability might improve after resanding and settling.
Are patio drainage and material choices different for hot, dry regions versus freeze-thaw climates?
For hot climates, focus on preventing rapid surface temperature swings and ensuring water can escape. Even with the right slope, consider heat and UV when choosing sealers (some look best but can make surfaces hotter). Also keep drainage outlets clear so heavy rain does not saturate the base.
What is the most common maintenance problem with permeable patios today?
Routine maintenance is different for permeable systems. Joint or pore clogging is the most common failure mode, and it usually requires periodic cleaning and sometimes reapplication of jointing stone. If you do not have time to maintain it annually, regular paver systems with proper runoff control may be a safer choice.
What safety steps matter most when cutting materials for patios today?
You should cut pavers and concrete with correct dust control. Use a wet saw or a vacuum shroud setup, keep silica dust out of enclosed areas, and wear respiratory protection appropriate for masonry dust. Also, protect nearby landscaping and cover plastic sheeting to contain dust so cleanup does not become a chronic daily nuisance.
If I use a hybrid approach for patios today, what should I clearly define before work starts?
A hybrid approach can work well, but split decisions must stay with the right person. If the pro handles layout and base compaction, your excavation must match their planned depths and avoid disturbing subgrade. Confirm who sets the final finished elevation and who verifies slope at the low edge before the surface goes down.