
A patio canopy top is the overhead covering element of any canopy or shade structure over your patio, the actual roof material, whether that's fabric, polycarbonate panels, aluminum sheeting, or timber, that blocks sun, sheds rain, and defines how your outdoor space feels and functions. Getting this one component right shapes everything: how comfortable the space is, how much maintenance you'll do, how long the structure lasts, and whether it survives a serious windstorm or a heavy snowfall. This guide walks through every major material option with honest trade-offs, shows you how to measure and size correctly, covers installation, anchoring, permits, fire safety (including fire pit clearance), and gives you the tools to decide whether to DIY or call a pro.
Patio Canopy Top: Types, Sizing, Safety, Checklist & Costs

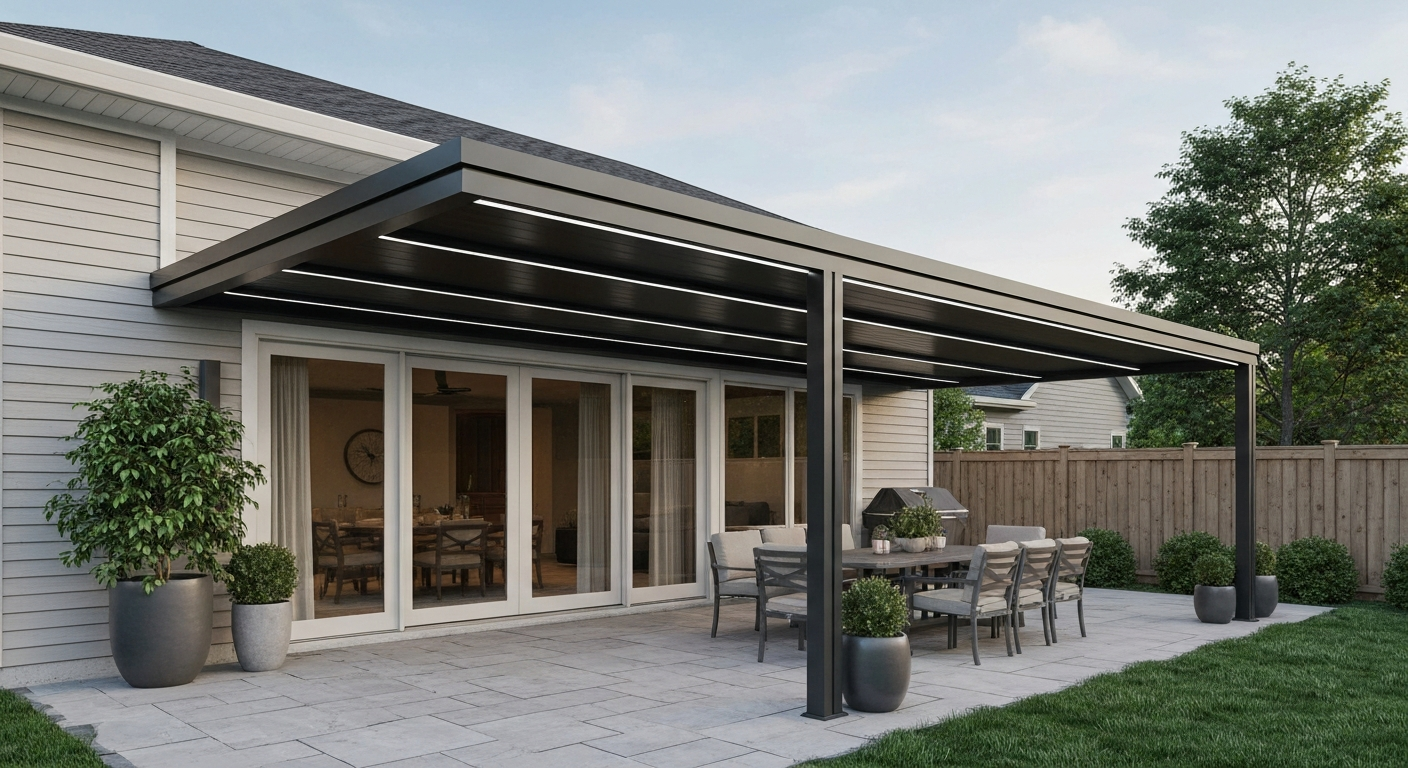
Benefits, limitations, and common use cases at a glance
A good patio canopy top extends your usable outdoor time, shading a seating area on a 95°F afternoon, keeping a dining table dry during a summer shower, and in some climates, adding enough warmth retention to stretch the season by weeks. That said, no canopy top does everything well. Fabric is lightweight and affordable but needs seasonal storage and won't shed heavy snow safely. Polycarbonate lets in diffused light but can be noisy in heavy rain and expands and contracts significantly with temperature swings. Metal is durable and low-maintenance but heavy, and a poorly drained metal roof can create rust streaks and pooling. Wood looks gorgeous but demands the most upkeep. Knowing the limitation of your preferred material before you buy saves real frustration.
- Shade and UV protection for seating, dining, and outdoor kitchen areas
- Rain coverage to extend usable hours during mild weather
- Snow and wind shelter in appropriate climates when properly engineered
- Aesthetic definition — a canopy top anchors the visual identity of an outdoor room
- Partial privacy screening when combined with side panels or curtains
- Protection for outdoor furniture and surfaces from UV fading and water damage
Common use cases range from a simple 10x10 fabric sail shade over a patio table, to a full 20x24 attached aluminum patio cover integrated with the house roofline, to a freestanding polycarbonate pergola kit over a hot tub. Each of those scenarios calls for a different top material and a different installation approach.
The main types of patio canopy top, a quick map
Before diving into each material in depth, here's a plain-language map of what you'll encounter when shopping or planning. Patio canopy tops split into four broad material families, fabric, polycarbonate, metal, and wood, and each comes in both freestanding and house-attached configurations. Retractable systems almost always use fabric or a slatted aluminum panel. Fixed rigid covers use polycarbonate, metal, or wood framing with roofing material on top. The right type depends on your climate, budget, how much light you want to let through, and how much time you want to spend maintaining it.
Fabric canopy tops: airy, affordable, and flexible
The varieties you'll find
Fabric canopy tops show up in three main forms: stretched shade sails (typically triangular or rectangular panels tensioned between anchor points), retractable awning fabric (rolled or folded when not in use), and fixed canopy covers that clip or tie onto a metal or aluminum frame. The standout material in the fabric category is solution-dyed acrylic, with Sunbrella being the most widely recognized brand. Solution-dyed acrylic fabric carries UV resistance, water resistance, and mildew resistance built into the fiber rather than applied as a coating, and Sunbrella specifies a limited warranty of up to 10 years for fade and strength on their awning-grade fabric. You'll also see polyester and polyethylene mesh options at lower price points, these are functional but typically carry shorter warranties and less UV stability.
Pros, cons, and best uses
- Pros: Lightest weight option, most color and pattern choices, easiest to replace without rebuilding the structure, relatively low cost, retractable versions disappear when not needed
- Cons: Won't support snow load — must be removed or retracted before heavy snow; fabric degrades faster than rigid materials even with UV treatment; retractable awnings should be stowed when gusts reach 20–25 mph unless the product is rated higher (motorized systems with wind sensors like Somfy's Eolis auto-retract to address this); cleaning is required seasonally
- Best uses: Pergolas in mild climates, retractable systems over dining areas, shade sails over play areas, patio table canopies, covered seating where you want seasonal flexibility
Cleaning fabric tops properly matters more than most people realize. Sunbrella's published care instructions call for mild soap and water for routine cleaning, with diluted bleach solutions (1/4 cup bleach per gallon of water with mild soap) reserved for mold and mildew. Rinse thoroughly and let the fabric air dry fully before rolling or storing, storing damp fabric is the fastest way to create a mildew problem you can't fully reverse. For fire performance in commercial or code-reviewed applications, fabric canopy tops should have NFPA 701 test compliance, which is the standard for flame propagation of textiles and films used in architectural applications. Many residential buyers skip this check, but if you're near a fire pit or in a jurisdiction that inspects patio structures, it's worth confirming.
Polycarbonate canopy tops: the light-through option
The varieties you'll find
Polycarbonate panels for patio roofs come in two main profiles: multiwall (hollow channels running the panel length, typically 4 mm to 16 mm thick) and corrugated (single-layer wavy profile, roughly 0.8 to 1.5 mm gauge). Multiwall panels like Palram's SUNLITE line offer better thermal insulation and are common in full patio roof kits. Corrugated panels like SUNTUF are thinner, often more affordable, and a popular choice for DIY pergola and porch roof projects. Both types come with factory-applied UV coatings to prevent yellowing. Temperature performance is wide, Palram documents SUNTUF operating from about -40°F to +212°F, making polycarbonate viable in most North American climates.
Pros, cons, and best uses
- Pros: Transmits diffused natural light (tinted or clear options), very high impact resistance compared to glass, lightweight, handles a wider temperature range than fabric, available as complete kit systems with framing included
- Cons: Expands and contracts significantly — installation must include thermal expansion gaps as specified in manufacturer guides or panels will buckle or crack; can be loud during heavy rain; corrugated panels in particular can creak; may yellow over decades even with UV coating; requires a minimum slope for drainage (check manufacturer specs, typically 5° or more)
- Best uses: Full patio covers where you want rain protection but natural light, greenhouse-style lean-to structures, hot tub enclosures, pergola roof infill panels
Installation details matter a lot with polycarbonate. Palram's installation documentation for both SUNLITE and SUNTUF specifies fastener spacing, flashing requirements at ledger connections, and the thermal expansion gaps needed between panels and at edges. Skipping these details voids the product warranty and can lead to leaks or cracked panels within a season or two. For fire safety, polycarbonate panels are evaluated against ASTM E84 (surface burning characteristics), and manufacturer data sheets will list the flame spread index and smoke-developed index for the specific product. Check the manufacturer's ICC Evaluation Service report (ICC-ESR) if your jurisdiction requires code compliance documentation.
Metal canopy tops: aluminum and steel
The varieties you'll find
Aluminum is by far the more common choice for residential patio canopy tops. Extruded aluminum patio cover systems, often sold as complete kits with posts, beams, and interlocking roof panels, are the workhorse of the attached patio cover market. The panels lock together and typically include internal drainage channels that route water to the posts rather than dripping off the edge. Steel is used more in custom pergola frames and heavy-duty freestanding structures, but it requires proper coating or galvanizing to resist rust. For coastal applications, connectors and hardware should be stainless or hot-dip galvanized, as standard fasteners will corrode rapidly in salt air.
Pros, cons, and best uses
- Pros: Long service life (properly coated aluminum patio covers routinely last 20+ years), very low routine maintenance, solid rain and UV protection, clean modern aesthetic, can support ceiling fans and LED lighting in interlocking panel systems
- Cons: Heavier than fabric and polycarbonate, higher installed cost, provides no light transmission (full shade only), steel requires vigilant coating maintenance to prevent rust, cutting panels on-site requires metal cutting tools and generates sharp debris
- Best uses: Full patio covers attached to the house where permanent rain protection is the priority, outdoor kitchens, poolside cabanas, situations where you want a low-maintenance solution you don't think about year to year
Attached aluminum patio covers are the scenario where permits become most likely. When you bolt a ledger to the house wall and run posts into footings, most jurisdictions classify this as a structure requiring a building permit. The ledger connection is a critical detail, through-bolts or code-approved structural screws are required; toenails are not acceptable for this connection. Simpson Strong-Tie connectors and similar hardware are the industry standard for these attachments, and corrosion-resistant versions are essential in any wet or coastal climate.
Wood canopy tops: pergola-style and timber framing
The varieties you'll find
Wood canopy tops typically mean one of two things: a pergola-style open-rafter top (where the 'top' is spaced rafters or louvers that filter light rather than block it entirely), or a timber-framed structure with actual roofing material, shingles, metal panels, or polycarbonate, laid over the wood framing. Common wood choices are pressure-treated pine (most affordable), cedar (naturally rot-resistant, excellent for exposed conditions), redwood (similar to cedar but increasingly expensive), and engineered wood products like glulam beams for longer spans. Composite decking material is sometimes used for pergola rafters as a low-maintenance alternative to wood.
Pros, cons, and best uses
- Pros: Most aesthetically versatile, integrates naturally with traditional and craftsman architecture, can be built to almost any dimension with basic carpentry tools, allows partial light filtering with open rafter designs, easy to add fabric canopy or polycarbonate infill later
- Cons: Highest maintenance requirement of any option — wood needs sealing, staining, or painting every 2–4 years depending on climate and wood species; susceptible to rot and insect damage if not properly treated and maintained; heavier spans require engineered sizing to avoid deflection; open rafter tops provide shade but not rain protection without adding a secondary covering
- Best uses: Traditional and craftsman-style homes, large shade structures where aesthetics are the priority, projects where the homeowner enjoys periodic maintenance as part of ownership, situations where you want a structure that can evolve — adding fabric, polycarbonate, or a fire pit area underneath over time
If you're planning to place a fire pit under or near a wood canopy, clearance matters significantly. Most fire pit manufacturers and fire codes specify a minimum of 10 feet of horizontal clearance from combustible overhead materials, and that applies to untreated wood rafters and fabric tops. A wood pergola with open rafters at 9 feet of height over a fire pit is a risk, check your local fire code. This is one of those places where the type of patio canopy top you choose directly intersects with fire pit placement decisions.
Materials compared side by side
| Material | Durability / Lifespan | Light Transmission | Rain Protection | Snow Load Capacity | Fire Performance | Maintenance Level | Typical Cost (DIY material) |
|---|---|---|---|---|---|---|---|
| Fabric (solution-dyed acrylic) | 7–15 years (fabric); frame longer | Partial — blocks UV, allows ambient light | Water-resistant, not waterproof in sustained rain | Must remove before heavy snow | NFPA 701 compliance available; check product | Medium — seasonal cleaning and storage | $5–$30/sq ft installed range; fabric alone $8–$20/sq ft |
| Polycarbonate (multiwall or corrugated) | 15–25 years with UV coating | High — diffused natural light | Full waterproof when installed per specs | Moderate — depends on panel thickness and framing | ASTM E84 rated; check manufacturer ICC-ESR | Low — annual cleaning, check fasteners | $3–$12/sq ft panels; kits $15–$35/sq ft installed |
| Aluminum (extruded panel systems) | 25–40+ years | None — full shade | Full waterproof | Good with proper framing | Non-combustible | Very low — periodic wash | $20–$45/sq ft installed |
| Steel (custom fabrication) | 20–35 years with proper coating | None — full shade | Full waterproof | Excellent with proper framing | Non-combustible | Low-medium — coating inspection and touch-up | $25–$60/sq ft installed (custom) |
| Wood (open pergola top) | 10–20 years with maintenance | High — filtered/dappled light | Minimal — open structure only | Low — open tops shed snow but framing must be sized | Combustible — 10 ft clearance from fire | High — sealing/staining every 2–4 years | $8–$25/sq ft DIY materials; full build varies widely |
| Wood (solid timber roof) | 15–30 years with maintenance | None without secondary material | Full if roofed with shingles or panels | Depends on framing engineering | Combustible — clearance required | High | $20–$50/sq ft installed |
The recommendation for most homeowners wanting a low-effort, long-life solution is an aluminum patio cover system if full shade and rain protection are the goal, or a polycarbonate panel system if you want to preserve natural light. For homeowners in Calgary looking specifically for rooftop solutions and local code considerations, see roof top patios Calgary. Fabric tops are the right call if you want flexibility and seasonal use, and wood is the choice when aesthetics and architectural character matter more than maintenance minimalism.
How to size your patio canopy top correctly
Measuring incorrectly is the most common source of expensive problems in canopy top projects, panels ordered too narrow, fabric that doesn't tension properly, or a structure that leaves the table half in the sun. Here's a straightforward measurement process you can do in about 20 minutes with a tape measure, a piece of paper, and a helper.
Step-by-step measurement checklist
- Define the coverage zone: Set out all the furniture you intend to shade. Measure the footprint of that grouping — length and width at the outermost edges. Add at least 2 feet on each exposed side to prevent edge glare and rain spray from reaching seated occupants. This is your minimum coverage area.
- Measure the available structure space: If attaching to the house, measure along the wall where the ledger will attach (width) and out from the wall to where the outer posts will stand (projection depth). Note any obstructions — windows, doors, hose bibs, electrical boxes.
- Check ceiling or eave height: Measure from your finished patio surface to any overhead obstruction — eave, soffit, window header. Your canopy top must clear these with enough slope to drain. Typical minimum finished height under a patio cover is 7 feet, with 8–9 feet being more comfortable.
- Establish slope requirements: Measure the drop you have available. A minimum 1/4 inch per foot of slope is commonly required for drainage in manufacturer guides for polycarbonate and aluminum panel systems. For a 12-foot projection, that's 3 inches of drop minimum.
- Measure post locations: If freestanding, identify where posts can be anchored without crossing underground utilities, drain lines, or irrigation systems. Call 811 (USA) before any digging.
- Account for overhangs and drip edge: Add 2–4 inches to your panel dimensions for overhang past the outer beam or rafter to direct water away from posts and footings.
- Confirm material module widths: Polycarbonate panels and aluminum patio cover panels come in fixed widths (commonly 24 inches, 26 inches, or similar). Design your structure width to be a clean multiple of your panel width to minimize cutting waste.
- Document everything with a sketch: Draw the footprint to scale (even a rough scale) with all dimensions labeled, noting the house wall, post locations, slope direction, and coverage area. You'll need this for material ordering, permit applications, and contractor quotes.
Common measurement mistakes to avoid
- Measuring from the finished wall surface rather than the face of the ledger or bracket — this can make your projection 3–6 inches shorter than expected
- Forgetting to account for fascia board, trim, or eave overhang above the attachment point, which limits how far the canopy can be raised
- Not checking for buried utilities before selecting post locations — always call 811 before digging
- Ordering fabric shade sails based on the anchor-point distance rather than the fabric panel dimensions — shade sails are typically smaller than the distance between anchor points to allow proper tensioning
- Ignoring the slope requirement and ordering panels that won't drain — ponding water on a flat polycarbonate roof will leak at seams and accelerate panel degradation
- Measuring only the desired coverage zone without adding the 2-foot perimeter buffer — this almost always results in a canopy that feels too small in use
Installation approaches: freestanding, attached, and retractable
How your canopy top attaches, or doesn't attach, to your home is as important a decision as the material itself. Each approach has different structural requirements, permit implications, and installation complexity.
Freestanding structures
A freestanding patio canopy is self-supporting with its own posts and footings, with no structural connection to the house. If you're considering a freestanding option for a patio on top of grass, plan for proper footings or ground anchors to prevent settling and uplift. This is simpler from a code perspective in many jurisdictions, the ledger connection to the house is often the part that triggers the most scrutiny. Freestanding structures still require adequate footings. The IRC requires exterior footings to be placed at least 12 inches below undisturbed ground surface, and they must extend below the frost line in freeze-thaw climates. In much of the northern US, that means footings 36–48 inches deep, which is a real digging job. Prescriptive footing tables in IRC Section R507 give post size and footing dimensions for common spans and loads, but if your design is outside those tables (large span, high snow load, high wind zone), you need an engineer to size the footings.
Attached (house-connected) structures
Attached patio covers tie a ledger board or beam directly to the house framing. This shares structural load with the house and means the connection quality is critical. Through-bolts or code-approved structural screws are the right fasteners here, toenails are not acceptable for ledger connections. Industry guidance and Simpson Strong-Tie connector standards are the reference point for these connections. In coastal or wet climates, use stainless steel or hot-dip galvanized hardware throughout; standard zinc-plated fasteners will corrode. Attached structures almost always require a building permit because they modify the building envelope.
Retractable systems
Retractable awnings and retractable louvered pergola tops give you maximum flexibility, open when you want sun, covered when you want shade or rain protection. Motorized retractable awnings from manufacturers like Somfy integrate wind sensors that auto-retract the awning when gusts hit roughly 20–25 mph, which protects the fabric and frame from damage. Manual retractable systems rely on you to retract in time, which matters more in gusty climates. The IBC and IFC treat retractable awnings somewhat differently from rigid fixed canopies, and the authority having jurisdiction may require different documentation depending on size and attachment method.
Anchoring, structural requirements, and permits
Here's the honest reality of permits: most homeowners want to skip them, and in some cases you legally can. The IRC model code exempts many one-story detached accessory structures from a building permit if they're under a size threshold, the model code cites 200 square feet, but many jurisdictions reduce that to 120 square feet or even less. You need to check your specific local code, not assume the model code applies. Attached structures connecting to the house almost always require a permit regardless of size. The consequences of skipping a required permit aren't just theoretical, unpermitted structures can create problems when you sell the home, complicate insurance claims after storm damage, and potentially require demolition if discovered.
For wind and snow load design, ASCE 7 is the U.S. standard that model building codes reference. Engineers and code officials use site-specific wind speed and ground snow values from ASCE maps or the ASCE Hazard Tool to calculate required structural capacity. ASCE, ASCE 7 (design loads) and the ASCE Hazard Tool supply the site wind speed, exposure category, importance factor, and ground‑snow values engineers and code officials use to compute required roof design loads ASCE — ASCE 7 (design loads) and ASCE Hazard Tool (site‑specific parameters). If you're in a high-wind zone (coastal areas, tornado-prone regions) or a heavy snow area, this isn't something to estimate informally. A structural engineer can review your design for a few hundred dollars and tell you definitively whether your framing, posts, and footings are adequate, this is money well spent before building, not after a collapse.
Fire safety, wind, and snow guidance
Fire safety for patio canopy tops comes down to two things: the fire performance rating of the material itself, and clearance from ignition sources like fire pits and outdoor grills. For fabric, look for NFPA 701 test compliance, this is the textile flame propagation standard used for architectural fabric applications. For polycarbonate and other plastics, the relevant test is ASTM E84 (surface burning characteristics), and some engineers also reference ASTM D635 for rate of burning. Metal tops are non-combustible and have no issue here. Wood is combustible and needs adequate clearance, a general rule is 10 feet of horizontal clearance from an open flame to any overhead combustible material, though your local fire code may specify differently.
Wind is the most common cause of patio canopy damage. Retractable fabric systems should be stowed when wind gusts reach 20–25 mph unless specifically rated higher. For fixed structures, wind loading is a design calculation, not a guessing game, the ASCE Hazard Tool lets you input a specific address and get the design wind speed for that location. Snow load is equally site-specific. A 10x16 patio cover roof in Buffalo, New York faces a very different ground snow load than the same structure in Atlanta. If you're in a climate with meaningful snow, your framing design needs to account for that load, polycarbonate and fabric tops especially have limits that solid metal and wood roofs don't.
DIY vs hiring a pro: when each makes sense
I'll be direct: fabric shade sails, small pergola kits (under 12x12), and retractable awning replacements are genuinely reasonable DIY projects for someone with basic tools and confidence. The instructions are clear, the materials aren't dangerous to work with, and the consequences of a minor mistake are fixable. Where DIY starts to get risky is with attached structures requiring ledger connections to the house, any structure requiring footings below the frost line, designs in high-wind or heavy-snow zones, and any project over the permit threshold in your jurisdiction. For those, getting a pro involved, even just for engineering review and permit filing, is worth it.
- DIY-appropriate: shade sails and fabric canopy replacement, small freestanding pergola kits on level ground in mild climates, retractable awning fabric replacement, polycarbonate panel replacement on an existing structure
- Consider a pro: any structure attached to the house requiring a ledger connection, structures requiring footings below frost line, projects in high-wind or heavy-snow zones, any project requiring a building permit, aluminum patio cover systems over 200 sq ft
- Definitely hire a pro: engineered custom structures, second-story or rooftop patio canopies, commercial-adjacent or HOA-scrutinized projects, any situation where structural load calculations are outside prescriptive IRC tables
Routine maintenance, repair, and seasonal care
A patio canopy top that gets basic seasonal attention will outlast one that's ignored by years, sometimes decades. The tasks vary by material but the principle is the same: catch small problems before they become expensive ones.
Fabric tops
Clean fabric tops at the start and end of season with mild soap and water. For mold or mildew, Sunbrella's published procedure uses 1/4 cup bleach per gallon of water with mild soap, let it soak, scrub gently with a soft brush, and rinse thoroughly. Before any winter storage, make sure the fabric is completely dry. Store in a breathable bag or container, not sealed plastic, trapped moisture creates mildew even in a dry garage. Inspect seams, grommets, and attachment points annually for fraying or corrosion.
Polycarbonate tops
Clean panels annually with mild soap and water, avoid abrasive cleaners and solvents, which damage the UV coating. Inspect the expansion gaps and fasteners after the first winter to confirm no buckling or fastener pull-through occurred. Check flashing at the house ledger connection each spring, and re-seal any gaps in caulking before the rainy season. Clear debris from internal drainage channels in multiwall panels if you live in an area with heavy leaf fall.
Metal and wood tops
Aluminum patio covers need almost nothing, a periodic wash with a garden hose and inspection of the gutter channels is typically all that's required. For painted aluminum, touch up any chips promptly to prevent corrosion starting at the break. For selecting the right protective finish, see our guide to patio top coat for options, application tips, and maintenance intervals. Steel structures need an annual inspection of the coating, with touch-up paint applied to any scratched or chipped areas before rust can take hold. Wood requires the most consistent attention, inspect for soft spots, rot, or insect activity each spring, and plan to re-apply a water-sealing stain or paint every 2–4 years depending on your climate and wood species. A pressure wash before re-coating is essential for good adhesion.
Cost ranges and what to budget
Costs vary enormously based on size, material, region, and whether you're DIYing or hiring out. The numbers below are ballpark installed ranges for a typical 12x16 patio canopy project in the US as of mid-2026, use them for planning, not final budgeting.
| Material / System | DIY Material Cost (12x16) | Professionally Installed Estimate | Key Cost Variables |
|---|---|---|---|
| Fabric shade sail or canopy cover | $150–$600 | $400–$1,500 | Hardware quality, anchor post installation, size |
| Retractable awning (motorized) | $800–$2,500 (kit) | $2,000–$5,000+ | Motorization, width, projection depth, brand |
| Corrugated polycarbonate over existing pergola | $300–$700 | $800–$2,000 | Panel thickness, framing condition, flashings |
| Polycarbonate kit system (freestanding) | $1,500–$4,000 | $3,500–$8,000 | Size, foundation work, permit fees |
| Aluminum patio cover kit (attached) | $2,000–$5,000 | $5,000–$15,000 | Size, ledger connection complexity, permit, fans/lights |
| Wood pergola (open rafter top) | $800–$2,500 DIY lumber | $4,000–$12,000 | Wood species, span, footings, finish work |
| Custom timber or steel structure | $3,000–$8,000+ materials | $10,000–$30,000+ | Engineering, custom fabrication, foundation, finish |
Permit fees typically run $100–$500 for residential patio structures, though they vary widely by jurisdiction. If your project requires engineered drawings, budget an additional $500–$1,500 for a structural engineer's stamp depending on your region and project complexity. Don't omit this from your planning budget.
Buying checklist: what to confirm before you order
- Confirm your local permit threshold and whether your project requires a permit (don't assume the IRC model code threshold applies locally)
- Check your HOA rules if applicable — many HOAs have specific requirements for patio cover height, color, and materials
- Verify the design wind speed and ground snow load for your specific address using the ASCE Hazard Tool or a local engineer
- Confirm panel module widths and design your structure dimensions to be multiples of those widths to minimize waste
- For fabric products, confirm NFPA 701 compliance if you're near a fire pit or in a jurisdiction that reviews this
- For polycarbonate and metal products, obtain the manufacturer's ICC Evaluation Service report number if required by your jurisdiction
- Confirm fastener and connector corrosion ratings are appropriate for your climate (coastal or high-moisture environments require stainless or hot-dip galvanized hardware throughout)
- Order 10–15% extra material for cuts, waste, and future repairs
- Get at least two contractor quotes if hiring out, and ask each contractor to confirm their licensing, insurance, and permit-pulling responsibility
- Plan seasonal maintenance before you buy: if you don't want to re-coat wood every few years, don't choose a wood top
FAQ
What is a patio canopy top and how does it differ from an awning or pergola?
A patio canopy top is the overhead covering that shelters an outdoor seating area; it can be fabric, rigid panels, metal, or wood. An awning is typically a lightweight framed covering attached to a building and often retractable. A canopy (per IBC/IFC definitions) can be a rigid projection supported by stanchions or a framed cover. A pergola is a structural open‑roof assembly (rafters/slats) that may be covered but is primarily a rigid architectural structure.
What common materials are used for canopy tops and what are their pros and cons?
Fabric (solution‑dyed acrylic, polyester): lightweight, good UV/mildew resistance if specified (e.g., Sunbrella); inexpensive and available in retractable systems but less durable in high wind and may need seasonal removal. Polycarbonate (multiwall or corrugated): high impact resistance, good light transmission, factory UV coatings, lightweight; needs proper slope, thermal expansion gaps and correct fasteners. Metal (aluminum, steel): durable, good wind/snow capacity if engineered, rust‑protected options available; heavier and may need structural support. Wood (solid decking or tongue‑and‑groove): attractive, structural, can match beams but requires ongoing maintenance and is heavier—may require engineered supports. Choose based on climate, expected loads, appearance and maintenance tolerance.
How do I size a canopy top and what measurements do I need?
Measure the usable patio area (length and width) plus desired overhang (6–24 in typical). For attached canopies, measure ledger height and distance to property lines or obstacles. Record roof slope/clearance to gutters and door/headroom (minimum 7 ft recommended for walkable clearance). Note existing structural points (posts, beams) and where you can attach to the house. Create a simple sketch with all dimensions and obstructions to use for ordering or engineering.
What step‑by‑step measurement checklist should I follow before buying?
1) Measure patio length and width. 2) Decide desired overhang on each side. 3) Measure from house wall to furthest point for projection. 4) Measure ledger location and available attachment height. 5) Check clearance to doors/windows and gutters. 6) Locate underground utilities and overhead lines. 7) Note slope/grade and distance to property lines for permit/code setbacks. 8) Record local wind/snow climate values (use ASCE Hazard Tool or local code office).
What installation options exist and how do I choose?
Freestanding: canopy supported by posts—best when you cannot attach to the house or want a movable footprint. Attached (ledger‑hung): connects to house via ledger—efficient use of materials but needs correct flashing and secure structural attachment. Retractable: motorized or manual fabric/metal; offers flexibility but limited wind tolerance and usually requires automation/wind sensors for safety. Choose based on desired permanence, structural constraints, local codes and wind/snow exposure.
When is DIY installation appropriate vs hiring a professional?
DIY is reasonable for small, lightweight canopies or modular kits when you have basic carpentry tools and follow manufacturer instructions: typical tasks include post‑setting, ledger bolting, and panel installation within prescriptive load limits. Hire a professional when: local codes require engineered drawings; canopy spans or loads exceed prescriptive tables; attachment to structural framing is complex; you need roof/ledger modifications or flashing; site has challenging soil/frost conditions; or you lack experience with structural fasteners or power tools. If in doubt, consult a licensed contractor or structural engineer.