
Before you buy a single paver or call a contractor, you need to know whether your patio project requires a permit, whether your property's zoning and setbacks allow it where you're planning to put it, and whether your HOA or landlord needs to sign off first. The honest answer is: it depends on your jurisdiction, your project scope, and your lot's recorded restrictions, but this guide walks you through every layer of that process so you can move forward with confidence and avoid costly surprises later.
Patio Legal Guide: Permits, Codes, HOA Rules & Checklist

Miles Sutton
10 Aug 2026
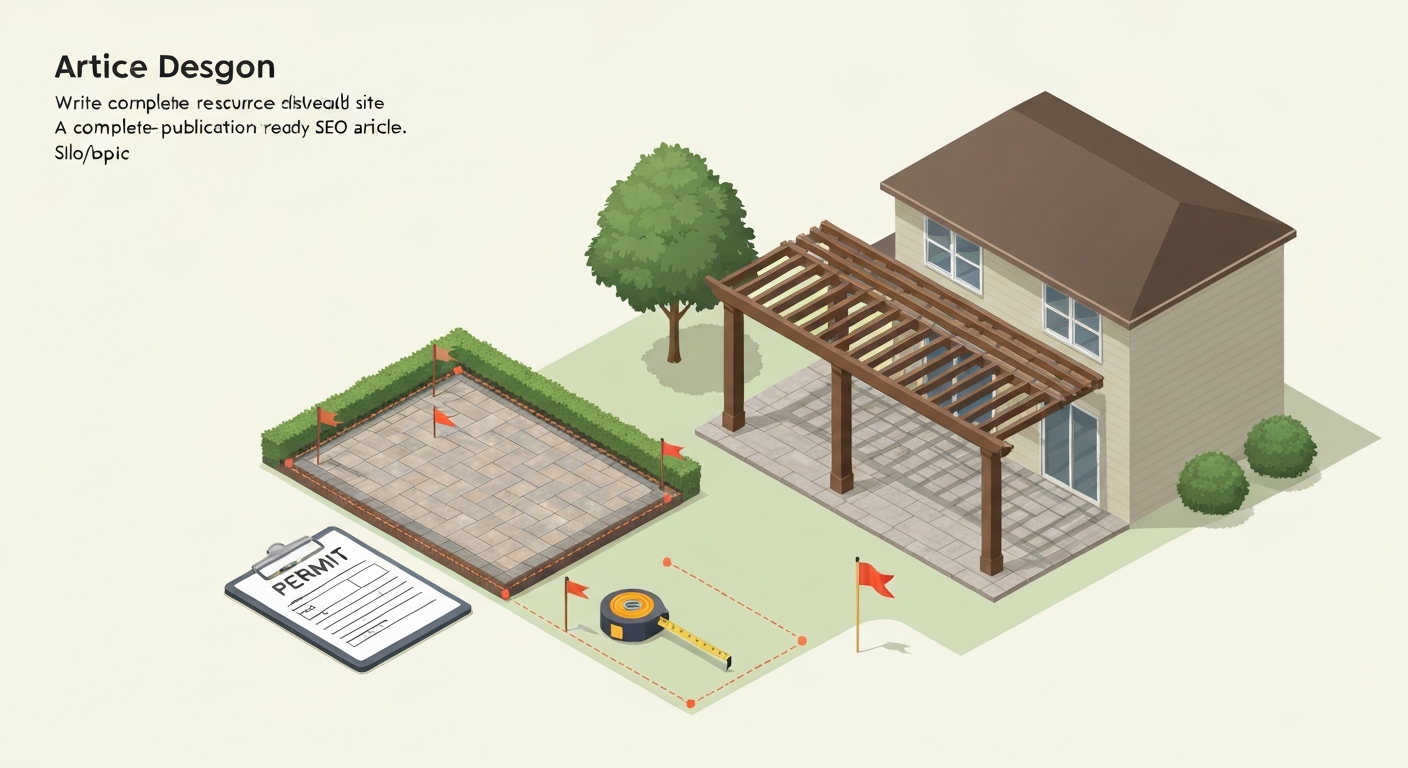
Who This Guide Is For and What It Covers
This article is written for DIY homeowners planning a new patio, property owners hiring a contractor, and renters who want to know what's actually allowed before they start digging. If you've ever wondered whether you need a permit for a simple concrete slab, what happens if you build too close to your property line, or whether your HOA can force you to tear out a finished patio, you're in the right place. We cover permit triggers, the step-by-step approval process, zoning and setback checks, building-code requirements for guardrails and stairs, gas and electrical rules, drainage obligations, contractor licensing, and what to do if something goes sideways during inspections or enforcement.
The Quick Rule-of-Thumb: Does Your Patio Need a Permit?
In most U.S. jurisdictions, a simple uncovered, at-grade patio with no structural changes is the least likely to require a building permit. That said, there are very common features that flip the switch and make a permit mandatory. Run through this list before you assume you're in the clear.
- The patio is covered by a permanent roof, pergola with a solid roof, or attached structure
- The project requires grading, cut-and-fill earthwork, or a retaining wall (especially one taller than about 4 feet of exposed height)
- The surface is elevated more than 30 inches above grade at any point, triggering guardrail requirements
- Stairs are part of the design
- You're adding permanent gas lines, outdoor electrical outlets, or a fixed gas fire feature
- The total square footage exceeds your municipality's exempt threshold (thresholds vary widely — some cities set it at 200 sq ft, others at zero)
- The patio adds significant impervious surface, which can trigger stormwater or grading permits in many counties
- The project is within a flood zone, hillside overlay, or other special district
The safest move is always to call or visit your local building department's public counter before you finalize plans. Ask specifically: 'Is an at-grade uncovered patio of [your square footage] at [your address] exempt from a building permit?' Get the answer in writing if you can, or at minimum note the date, the staff member's name, and what was said. Many jurisdictions also post exemption lists online, but online information can lag behind code amendments, so a direct confirmation is worth the ten-minute phone call.
Step-by-Step: Getting Your Patio Permit Approved
The permit process looks roughly the same across most U.S. municipalities, even though timelines and fees differ. Here's a realistic walkthrough from the moment you decide you need a permit to the day you get final sign-off. For a step-by-step patio process including permit milestones and inspection checkpoints, see patio process.
- Pre-application review (optional but smart): Many building departments offer a free or low-cost pre-application meeting where a plans examiner looks at your concept and flags problems early. This step can save you multiple resubmittal cycles later — worth doing for any covered patio, elevated structure, or project involving retaining walls.
- Prepare your application documents: At minimum, expect to submit a site plan drawn to scale showing the patio's location, dimensions, distance to property lines and structures; a floor plan or layout drawing; section drawings if there's any elevation change, retaining wall, or roof framing; and a description of materials. For engineered work (retaining walls over the local threshold, elevated structures with significant loads), you'll need stamped drawings from a licensed structural engineer.
- Submit the application and pay the plan check fee: Submission can often be done online through the city's permit portal, by mail, or in person. You pay a plan check fee at submission — this is separate from the permit issuance fee you pay later.
- Plan check and corrections: A plans examiner reviews your drawings for code compliance. They may send back a correction list (sometimes called a 'comment letter') requiring revised drawings or additional information. This cycle can happen once or multiple times depending on complexity.
- Permit issuance: Once plans are approved, you pay the permit issuance fee and receive your permit card or digital permit number. Post the permit card visibly at the job site — inspectors will look for it.
- Staged construction and inspections: Most permits require at least a footing or foundation inspection before you pour concrete, and a final inspection when work is complete. If there's framing, electrical, gas, or drainage work, each trade will have its own inspection point. Do not cover or bury work before the inspector signs off on it.
- Final inspection and certificate of occupancy (or final approval letter): The inspector walks the completed project and either approves it or issues a punchlist of corrections. Once approved, you receive a final sign-off. Keep this document with your property records.
One thing I've seen trip people up: they treat the permit as the finish line and then skip the final inspection. Without a final sign-off, the permit stays 'open' in the city's system, which can complicate a property sale or refinance years later. Always close out your permits.
Timelines, Fees, Inspections, and What Fines Look Like
Exact numbers vary dramatically by jurisdiction, but these ranges give you a realistic planning baseline.
| Item | Typical Range | Notes |
|---|---|---|
| Plan check turnaround | 1 to 6 weeks | Over-the-counter same-day review is common for simple projects in smaller cities; large metro areas can take 4 to 8 weeks or more |
| Permit fee (simple patio) | $50 to $400+ | Based on project valuation; covered patios and structural work push fees higher |
| Permit fee (covered/structural) | $200 to $1,500+ | Depends on valuation and local fee schedule; engineering review adds cost |
| Inspection scheduling lag | 1 to 10 business days | Varies by department workload; some cities offer next-day online scheduling |
| Correction cycle delay | 1 to 3 weeks per cycle | Each resubmittal resets the clock; minimize by submitting complete drawings |
| Fine for building without a permit | $200 to $5,000+ per violation | Many jurisdictions charge double or triple the normal permit fee retroactively, plus investigation fees |
| Stop-work order penalty | Varies; work halted immediately | Can require demolition of non-compliant work at owner's expense |
If you discover that unpermitted patio work was done by a previous owner, the practical path is usually to apply for a retroactive or 'after-the-fact' permit. The inspector will evaluate the existing work, and you may need to open up sections to verify footings or framing. It's not fun, but it's far better than having it surface during a home sale inspection report when you're under contract pressure.
How to Check Zoning, Property Lines, Setbacks, and Easements
This is the step most homeowners skip, and it's the one that produces the most expensive surprises. Zoning rules govern what you can build and where on your lot. Setbacks are the required minimum distances between a structure and your property lines, neighboring structures, streets, and sometimes watercourses. Easements are rights held by someone else (a utility company, a neighbor, a municipality) to use a portion of your property, and you typically cannot permanently obstruct an easement area.
Finding Your Zoning Rules
Start by identifying your parcel's zoning designation. Most counties and cities maintain a free online GIS parcel viewer where you can enter your address and see zoning, lot dimensions, and sometimes setback overlay information. Once you have the zone designation (for example, R-1, RS-2, or similar), search that designation in your jurisdiction's municipal code (most are on Municode or your city's website) to find the specific setback requirements and lot-coverage rules for patios and accessory structures. Important distinction: many codes exclude uncovered, unroofed patios and decks from lot-coverage calculations, but covered patios, roofed pergolas, and permanent pavilions typically do count toward maximum lot coverage. Check your zone's definition section carefully.
Locating Property Lines and Recorded Easements
Your property lines are shown on the recorded subdivision plat (also called a final map or plat of survey), which is filed with the county recorder or registrar of deeds. You can often find plat maps through the county assessor's GIS portal or by searching the recorder's online document index. Easements, deed restrictions, rights-of-way, and CC&Rs are recorded separately and will appear in your chain of title. Larger counties often allow online document searches by parcel number; smaller counties may require an in-person visit or a paid document order. See How to find Los Angeles recorded property documents (guide referencing Recorder/Assessor roles) for a county-specific example of recorder and assessor searches and online document availability. If you have a title insurance policy from when you purchased the property, the title report lists known easements and encumbrances, that's a useful starting point, though it may not reflect more recent recordings.
Common easement types that affect patio placement include utility easements (usually running along the rear or side of lots), drainage easements, shared driveway or access easements, and slope-maintenance easements. Placing a permanent patio over a utility easement is almost always prohibited and can result in a forced removal at your expense if the utility company needs access.
Sample Questions to Ask Your Local Planning or Building Department
- What are the rear, side, and front setbacks for an uncovered/covered patio in my zoning district?
- Does an uncovered at-grade patio count toward my lot's maximum lot coverage?
- Are there any special overlays on my parcel (hillside, flood zone, fire hazard severity zone, historic district) that add requirements?
- What impervious surface thresholds trigger a stormwater or grading permit for this project?
- Is there a square-footage threshold below which a patio is exempt from a building permit in this jurisdiction?
When You Need a Licensed Surveyor or Engineer
Not every patio project requires professional engineering, but there are clear indicators that point to when it's necessary rather than optional. Treating these as 'nice to have' is how homeowners end up with structures that fail inspections, get condemned, or cause injury.
Hire a Licensed Land Surveyor When...
- You cannot confidently locate your property corners from existing stakes, iron pins, or a recent survey
- You're building close to a setback line (within a few feet) and need a legally defensible measurement
- Neighbor disputes about the fence or property line exist
- The recorded plat dimensions don't match what you're seeing on the ground
- Your county recorder has no reliable boundary survey on file for your parcel
Hire a Structural or Geotechnical Engineer When...
- Your retaining wall will exceed approximately 4 feet of exposed height (this is the IRC threshold that triggers engineered design requirements, and your jurisdiction may set it lower)
- The patio is on a sloped lot with unstable soils, expansive clay, or a history of erosion or landslide
- The covered structure spans more than about 20 feet or carries significant roof loads (snow, tile, green roof)
- You're building over or adjacent to an existing retaining wall, fill material, or a slope steeper than about 3:1
- The building department's plan check comments specifically request an engineer's stamp
- A geotechnical (soils) report is required by your jurisdiction for hillside or grading work
Engineering fees vary, but a structural engineer's review for a modest covered patio or single retaining wall typically runs $500 to $2,000 depending on complexity and your region. That's real money, but it's substantially less than fixing a wall that moves, settling a neighbor dispute, or dealing with an injury liability claim.
Building-Code and Safety Requirements for Patios
Most U.S. jurisdictions base their residential building codes on the International Residential Code (IRC), often with local amendments. Here's a practical overview of the code areas that directly affect patio construction. Always verify the specific edition your jurisdiction has adopted and whether local amendments change these numbers.
Retaining Walls
Under IRC Section R404, retaining walls that exceed about 4 feet of exposed height (measured from the bottom of the footing to the top of the wall) or that support a surcharge (the weight of soil, vehicles, or structures above) must be designed using accepted engineering practice, which means stamped engineered drawings. Local jurisdictions often adopt a lower threshold, some require engineering for walls over 3 feet. Retaining walls also commonly require a separate grading or building permit regardless of height.
Drainage and Stormwater
Adding a patio increases impervious surface on your lot, which means more stormwater runs off instead of soaking in. Many municipalities under EPA MS4 (NPDES) stormwater permits require Low Impact Development (LID) mitigation when a project exceeds a certain threshold of new impervious area, commonly somewhere in the range of 500 to 2,500 square feet depending on the jurisdiction. See Green Streets Handbook, EPA (LID/stormwater treatment guidance) for federal guidance on LID practices and stormwater treatment requirements tied to MS4 permits Green Streets Handbook — EPA (LID/stormwater treatment guidance). LID measures can include permeable pavers, gravel infiltration trenches, or bioswales. Your grading plan may also need to show that the patio slopes away from the house (minimum 2% slope is a common requirement) and doesn't sheet-flow onto neighboring properties.
Electrical: Outdoor Outlets and Lighting
The National Electrical Code (NEC/NFPA 70) requires Ground Fault Circuit Interrupter (GFCI) protection for all outdoor receptacles. The 2023 NEC edition expanded GFCI coverage requirements further. Any new outlet added to a patio must be on a GFCI-protected circuit, and the work must be done by (or at minimum inspected as part of) a permitted electrical project. If your jurisdiction has adopted a newer NEC edition, the requirements may be stricter than you expect. Hiring a licensed electrician and pulling an electrical permit is the right move here, outdoor wiring near water features, fire pits, and cooking areas is a meaningful safety issue.
Gas Lines and Fire Features
Permanent gas lines for an outdoor kitchen, fire pit, or gas fireplace fall under the International Fuel Gas Code (IFGC) and/or NFPA 54 (the National Fuel Gas Code). This work requires a mechanical or gas permit, must be performed by a licensed gas fitter or plumber (depending on your state), and requires a pressure test before the line is concealed and approved. Portable propane setups have fewer permit requirements but still fall under fire code clearance rules. Under the International Fire Code (IFC), portable outdoor fireplaces are often required to maintain a minimum 15-foot clearance from structures and combustible materials. During declared burn bans, all open burning including gas fire pits may be prohibited by your local fire authority, check before you light up.
Guardrails, Stairs, and Fall Protection: The Measurements That Matter
This is the area where I see the most DIY errors, and it's one where the stakes are genuinely high. Falls from elevated patios and decks cause real injuries. The IRC sets minimums that most jurisdictions follow, though local amendments can be stricter.
| Requirement | IRC Minimum / Standard | Common Local Variation |
|---|---|---|
| Guard (guardrail) required when surface is above grade | 30 inches above grade | Some jurisdictions require guards at 24 inches or less |
| Guard height (walking surfaces) | 36 inches minimum for residential | 42 inches often required for commercial or higher elevations |
| Maximum opening in guardrail balusters | 4 inches (sphere cannot pass through) | 4 inches is the standard; no common variation more lenient than this |
| Maximum stair riser height | 7-3/4 inches | Many jurisdictions adopt 7 inches or 7-1/4 inches maximum |
| Minimum stair tread depth | 10 inches (with nosing) | 11 inches is a common local amendment |
| Stair handrail required when | 4 or more risers | Some jurisdictions require handrail at 3 risers |
| Handrail height | 34 to 38 inches above tread nosing | Consistent across most jurisdictions |
A practical note on guardrail design: decorative horizontal-rail designs can look great but may not pass inspection if they create a 'ladder effect' that children can climb. Many codes explicitly prohibit horizontal rails that are climbable. If you're designing your own guardrail system, run the design by your building department before fabricating, that conversation costs nothing and can save a complete redo.
HOA Approval, Landlord Consent, and Rental Considerations
Even if the city approves your permit, your HOA or landlord may have a parallel approval process that is equally binding. These are contractual obligations, not optional courtesies.
HOA Architectural Review
Most HOAs require written approval from an Architectural Review Committee (ARC) or Architectural Review Board (ARB) before you begin any exterior modification, including patios, pergolas, retaining walls, fire features, and privacy screens. The process typically involves submitting a written application with drawings, material samples, and sometimes neighbor notification. Review timelines vary but are often 30 to 60 days under the CC&Rs. Building without HOA approval can result in fines, a stop-work demand, and potentially a court-ordered removal of the completed structure. Read your CC&Rs carefully before submitting, some associations have specific rules about patio materials, colors, and features that go well beyond what the city requires.
Renters: Get It in Writing Before You Dig
Renters thinking about adding a patio face a fundamental constraint: almost all standard leases prohibit structural or permanent exterior modifications without the landlord's prior written consent. A concrete patio, pavers set in mortar, a pergola attached to the structure, or any work involving grading or utilities almost certainly qualifies as a permanent modification. Doing this work without written consent is a lease violation that can justify eviction and a claim for remediation costs. If you want to pursue a patio as a renter, put the full scope of the project in writing, get the landlord's written approval before you do anything, and clarify in writing who owns the improvement at the end of the tenancy.
Hiring a Contractor: Licensing, Insurance, and Red Flags
State contractor licensing laws generally require a licensed contractor to perform work that requires a building permit or that exceeds a dollar threshold, in California, for example, the Contractors State License Board (CSLB) requires a license for projects over $500 in combined labor and materials. Other states have their own thresholds and license classifications. Before you hire anyone, verify the contractor's license status directly with your state's licensing board website (not just from a business card) and confirm that their general liability insurance and workers' compensation coverage are current. An uninsured contractor working on your property creates direct liability for you if someone is injured.
Practical contractor checklist before you sign anything:
- Verify license number on your state licensing board's website and confirm it's active and in good standing
- Ask for a certificate of insurance naming you as an additional insured — call the insurance company to confirm it's active
- Get at least three written bids with a detailed scope of work, materials spec, and payment schedule
- Confirm in writing who is responsible for pulling the permit — the contractor should pull it, not you
- Avoid contractors who ask for more than 10 to 15 percent down before work begins, or who demand large cash payments
- Get a written contract with a change-order clause requiring written approval for any scope or cost changes
- Ask for references from projects completed in the last 12 months and actually call them
Inspections, Appeals, and Enforcement: What to Expect
If an inspector fails your work, you typically receive a written correction notice specifying exactly what needs to be fixed. You make the corrections and schedule a re-inspection. Most jurisdictions allow at least one free re-inspection; additional re-inspections may carry a fee (often $50 to $150 each). If you disagree with an inspector's interpretation of the code, you have the right to appeal to a Board of Building Appeals (or equivalent) in almost every jurisdiction. This is a formal process but it's real and available, document your position clearly and cite the specific code section you're relying on.
Enforcement actions for unpermitted or non-compliant construction can include a notice of violation, a stop-work order, a mandatory retroactive permit application, fines assessed per day of non-compliance, and in serious cases, a court order to remove or demolish the structure. Municipalities handle complaints from neighbors, so if your neighbor reports your unpermitted patio, expect an inspector to show up. The cost of dealing with enforcement after the fact is almost always higher than the cost of doing it right from the beginning.
Your Pre-Construction Compliance Checklist
Use this before you break ground on any patio project. It works whether you're doing it yourself or managing a contractor.
- Confirm your parcel's zoning designation and setback requirements from the municipal code or planning department
- Check lot-coverage rules and whether your patio type (covered vs. uncovered) counts toward the maximum
- Pull the recorded plat and title report to identify easements, deed restrictions, and CC&Rs
- Contact the building department to confirm permit requirements and exemption thresholds for your specific project
- Check HOA CC&Rs and submit an ARC application if required — do this before starting the permit process so both tracks run in parallel
- Get landlord written consent if you're a renter
- Confirm whether your project triggers stormwater or grading permits (check local impervious-area thresholds)
- Determine whether a land surveyor is needed to verify property lines
- Determine whether a structural or geotechnical engineer is required (retaining walls, elevated structures, challenging soils)
- Verify contractor license and insurance before signing any contract
- Confirm who pulls the permit — it must be the licensed contractor or the homeowner-builder (if your jurisdiction allows it)
- Schedule and pass all required inspections before covering or concealing any work
- Obtain the final inspection sign-off and keep it in your property records
How to Find Local Resources and Officials
The most reliable local resources for patio compliance are your municipal building and planning departments (search '[your city] building permit' or '[your county] planning department'), your county assessor or GIS parcel viewer for zoning and property data, and your county recorder or registrar of deeds for easements and recorded documents. For related outdoor-living products and accessory ideas, see patio diet cola. Your state's contractor licensing board has a public license lookup tool for verifying contractor credentials. For fire pit and burning rules, contact your local fire marshal's office directly. For HOA rules, start with your CC&Rs and your HOA management company. For complex projects, a real estate attorney or a local permit expeditor can be worth the cost, permit expediters know the local process well and can cut weeks off the timeline in busy jurisdictions.
Patio projects range from a simple afternoon of laying pavers to multi-trade construction projects that touch building, electrical, gas, and stormwater codes simultaneously. The legal layer doesn't have to be intimidating if you work through it systematically. Check your local rules first, get the right approvals in the right order, and you'll end up with a patio you can enjoy without a notice of violation showing up in your mailbox. For a detailed walkthrough of the permitting and approval steps, see patio process silver. For low-maintenance design ideas and materials that minimize upkeep, see patio diet.
FAQ
Rule of thumb: when does a patio usually need a permit?
Uncovered, at‑grade patios that do not change grade and lack stairs or structural elements are often exempt in many U.S. jurisdictions. Permits are commonly required when the patio is: covered/roofed; raised above grade or includes steps/guards; alters drainage or requires grading/retaining walls; adds significant new impervious surface beyond local thresholds; has gas or permanent electrical work; or exceeds a local square‑foot or lot‑coverage threshold. Always confirm with your local building department — local codes and thresholds vary.
Step‑by‑step permit and approval process (practical workflow)
1) Preliminary check: call or use the municipal permit portal for project classification and checklist. 2) Pre‑application (optional): submit concept for early feedback. 3) Submit application: complete forms, site plan, scope, fee. 4) Plan check/review: building, zoning, fire, stormwater may review; expect correction cycles. 5) Permit issuance: pay fees and receive permit card. 6) Inspections: schedule staged inspections (footing/foundation, rough trades, retaining/drainage, final). 7) Final approval: pass final inspection; obtain final sign‑off or certificate. Timeframes and required submittals differ by locality — ask the permit office for typical review times.
How can I check zoning, setbacks, easements and property lines before planning?
1) Find your parcel on the county/city GIS or zoning map viewer. 2) Look up the parcel’s zoning district and permitted uses, setback and lot‑coverage rules in the local zoning code. 3) Search recorded documents (deeds, plats, CC&Rs) in the county recorder/registrar for easements or restrictions. 4) Confirm property lines: use the deed legal description and assessor map; for ambiguous boundaries or projects close to lines, hire a licensed surveyor to locate corners and easements. 5) If an easement or recorded restriction appears, contact the easement holder or your planning department for guidance.
What building‑code and safety requirements commonly apply to patios?
Typical code items used by most jurisdictions (often based on the IRC/local amendments): guards where walking surface is more than about 30 in. above grade (guard height commonly 36 in.); stair minimums (maximum riser ~7‑3/4 in., minimum tread ~10 in. — check local values); engineered design and permit for retaining walls above near 4 ft exposed height or supporting surcharge; proper footing/foundation for raised patios; slip‑resistant surfaces and required illumination; and proper drainage to prevent runoff to neighboring properties. Verify local amendments and the edition of the residential code adopted locally.
What do I need to know about drainage, stormwater and impervious area?
Many jurisdictions limit new impervious surface or require Low‑Impact Development (LID) measures once a project exceeds local thresholds (or disturbs certain area). Expect requirements such as: on‑site infiltration, permeable paving, directing runoff away from structures and neighbors, and erosion control during construction. Check your municipal stormwater or public works office and local MS4/NPDES requirements early; include drainage details in permit submittals when required.
Rules for utilities, electrical, gas and fire features
Electrical: outdoor receptacles generally require GFCI protection per the adopted NEC; hardwired lighting or circuits typically require an electrical permit and licensed electrician. Gas: permanent gas lines or fixed burners (firepits, outdoor kitchens) usually require a mechanical/gas permit, installation by a licensed gas fitter/plumber and pressure testing per the adopted fuel‑gas code (NFPA 54/IFGC). Fire features: local fire code and fire department regulate open flames, clearances (examples often ~15 ft from structures for portable devices), and when permits or prohibitions apply (e.g., burn bans). Check the edition of NEC/IFGC/IFC your jurisdiction enforces and consult local fire and building departments.