Yes, you can absolutely build a great patio where a pool used to be, but the old pool site will throw a few curveballs that a standard patio project won't. The main concerns are soft or poorly compacted fill left behind from the removal, leftover concrete shells or footings, lingering moisture in the subgrade, and drainage paths that no longer exist now that the pool plumbing is gone. Get those four things right and you can lay pavers, pour a slab, or set natural stone that will stay flat and dry for decades. Skip them and you'll be pulling up sunken pavers or patching cracked concrete within a few years.
Patio Where Pool Used to Be: Rebuild Guide and Options

Miles Sutton
24 Jun 2026
What to check first after pool removal
Before you buy a single paver or bag of concrete mix, walk the site carefully and treat it like a detective scene. Pool removal contractors don't always leave a pristine subgrade behind, and what's lurking under the surface determines almost everything about your patio build.
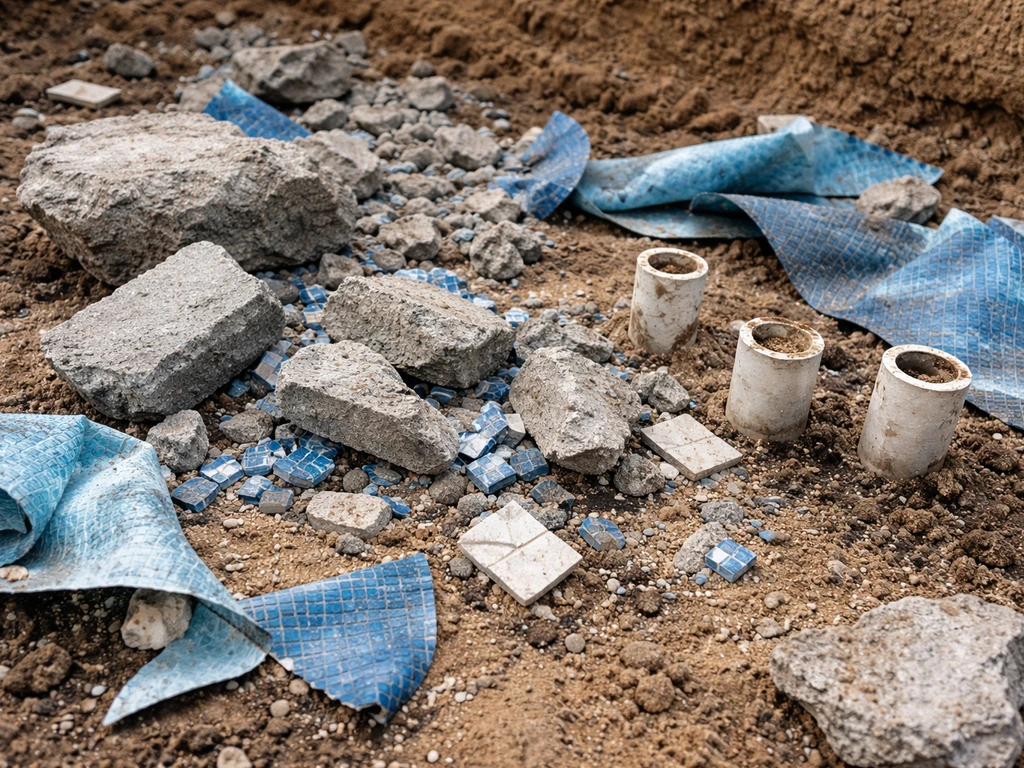
Debris and leftover material
Look for broken gunite or concrete chunks, pool tile scraps, flexible liner pieces, old plumbing lines, and electrical conduit stubs. Even a reputable demo crew can leave debris buried in the fill, especially if they did a partial demolition (punching holes in the shell rather than full removal). Probe the fill with a rebar stake every few feet. If it slides in with almost no resistance, the fill is loose and needs serious attention before you build anything on top of it.
Subgrade condition
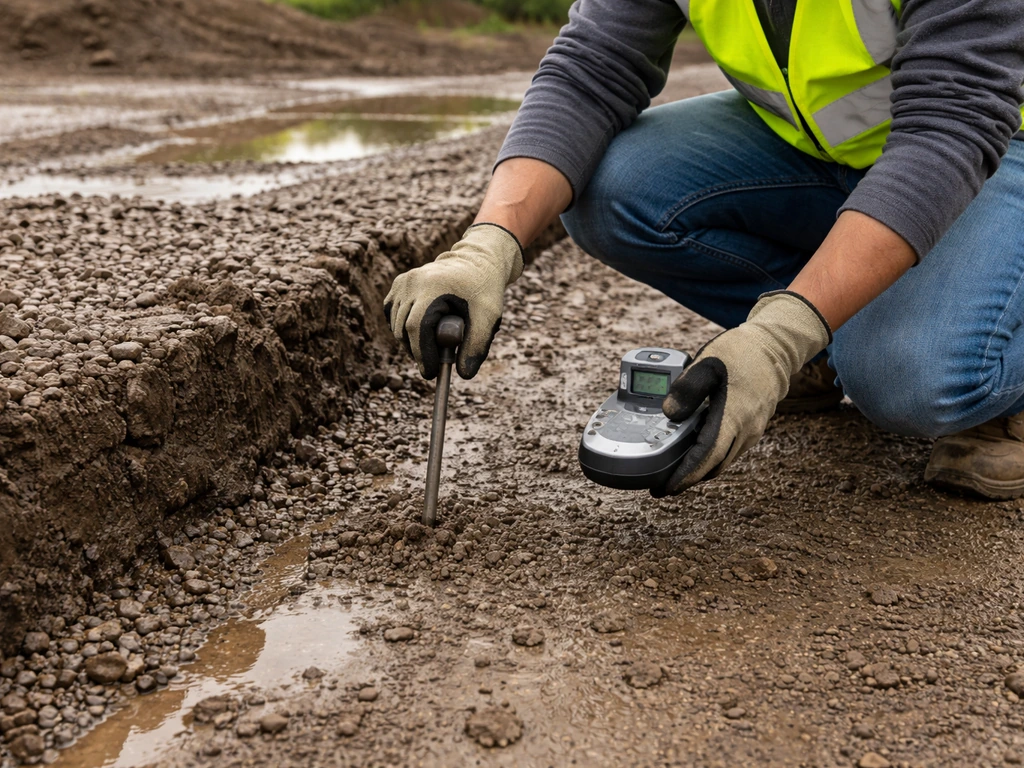
The soil directly beneath where the water sat is often the weakest point. Pools hold thousands of gallons, and even a slow leak over years saturates the surrounding soil. If the pool was recently removed, the subgrade may still be wet and compressible. Push a stake or a thin steel rod into the exposed base at several points. It should meet firm resistance within the first couple of inches. Soft spots that give way easily are future settlement zones, plain and simple.
Moisture and water table
Check the site after a rain, and if possible, revisit it 48 hours later. Any area that stays wet or shows standing water is telling you the natural drainage pattern was disrupted when the pool and its plumbing were removed. The pool's drain system likely moved water off the site for years. Now that it's gone, you need a replacement drainage plan before laying your patio base, not after.
Site prep: inspection, grading, and base setup
Solid site prep is where most homeowners either save a project or doom it. This step is more important on a reclaimed pool site than on a virgin lawn because you're dealing with disturbed, filled ground rather than undisturbed native soil.
Get a proper inspection first
Have a soil engineer or experienced excavation contractor probe the fill and assess compaction before you spend money on materials. A proper field density test using the sand-cone method (ASTM D1556) can tell you exactly how well the fill was compacted. The target for most residential patio applications is at least 95% of Standard Proctor maximum dry density (ASTM D698). If the fill doesn't come close to that number, you either need to excavate and recompact it in lifts or you're building on a sponge.
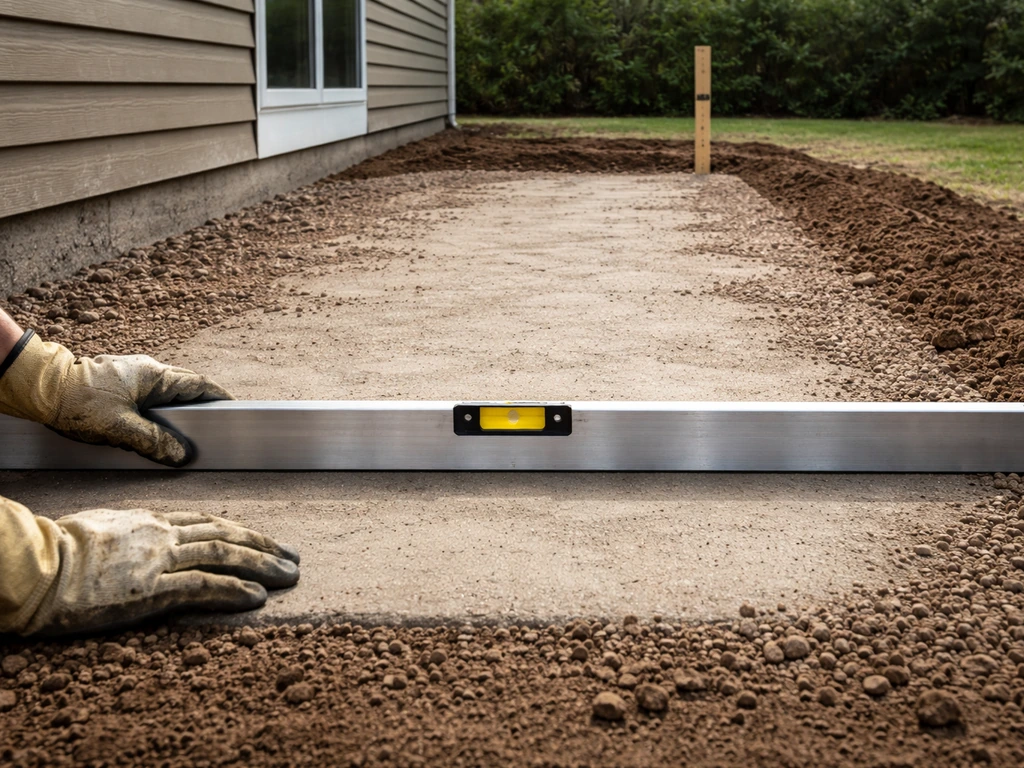
Grading for drainage
The finished patio surface needs to slope away from your house at a minimum of 1/8 inch per foot, and ideally 1/4 inch per foot. That slight grade is what keeps water from pooling on the surface and migrating toward your foundation. Establish the grade at the subgrade level, not just at the surface, so the entire base structure drains consistently. If the pool area sits lower than the surrounding yard, you may need to bring in fill to raise the grade before compacting.
Compacting fill in lifts
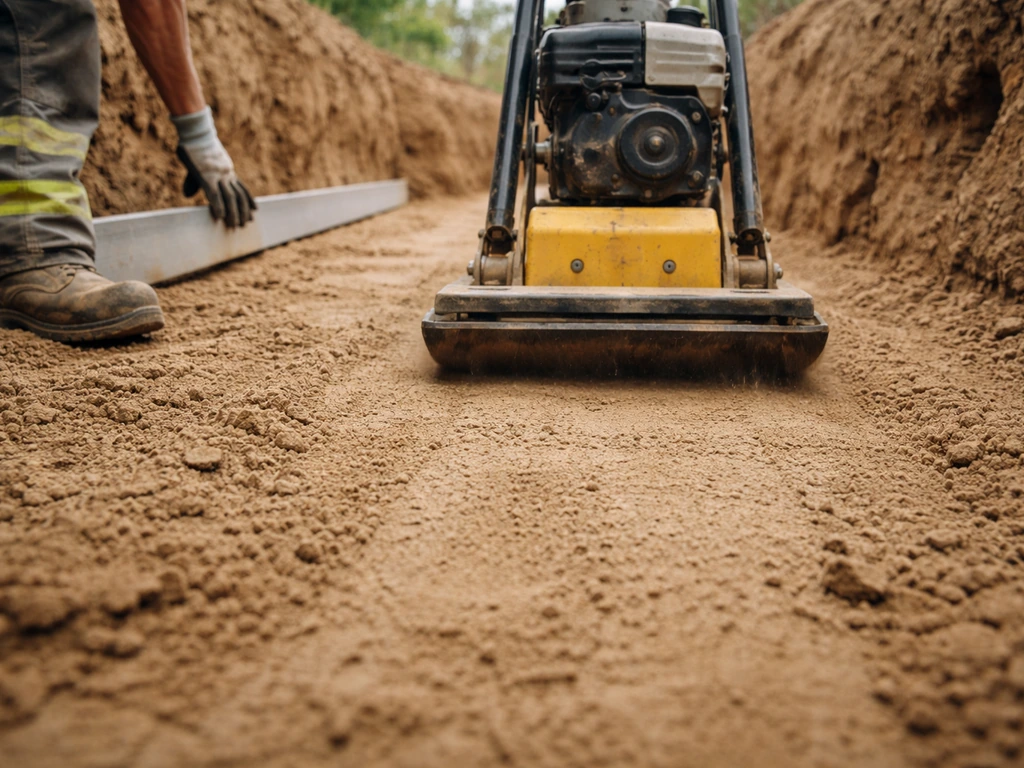
If the existing fill is soft or debris-laden, excavate it, remove junk material, and replace it with clean compactable fill placed in horizontal lifts no deeper than 6 to 8 inches each. Compact each lift before adding the next. This layered approach is the only way to get uniform density throughout the fill column. A plate compactor handles this well for most residential work. Skipping lift-by-lift compaction and just dumping fill is the single most common reason pool-site patios sink.
Dealing with leftover pool concrete and footings
Old pool shells, coping footings, and equipment pads don't just disappear, and they create real problems if you build around them without a plan. Here's how to handle the most common scenarios.
Partial versus full shell removal
A full removal means the entire concrete or gunite shell came out, which is the cleanest situation. A partial removal (also called a knockdown or abandonment) means the top 18 to 24 inches of the shell were broken up, holes were punched in the bottom for drainage, and the whole thing was backfilled. Partial removals are cheaper, but they leave a large concrete mass underground that can create uneven settlement as the fill around it shifts. If you're on a partial removal site, have the contractor identify the shell footprint precisely so you know exactly where the unstable fill zone is.
Cutting and removing protruding concrete
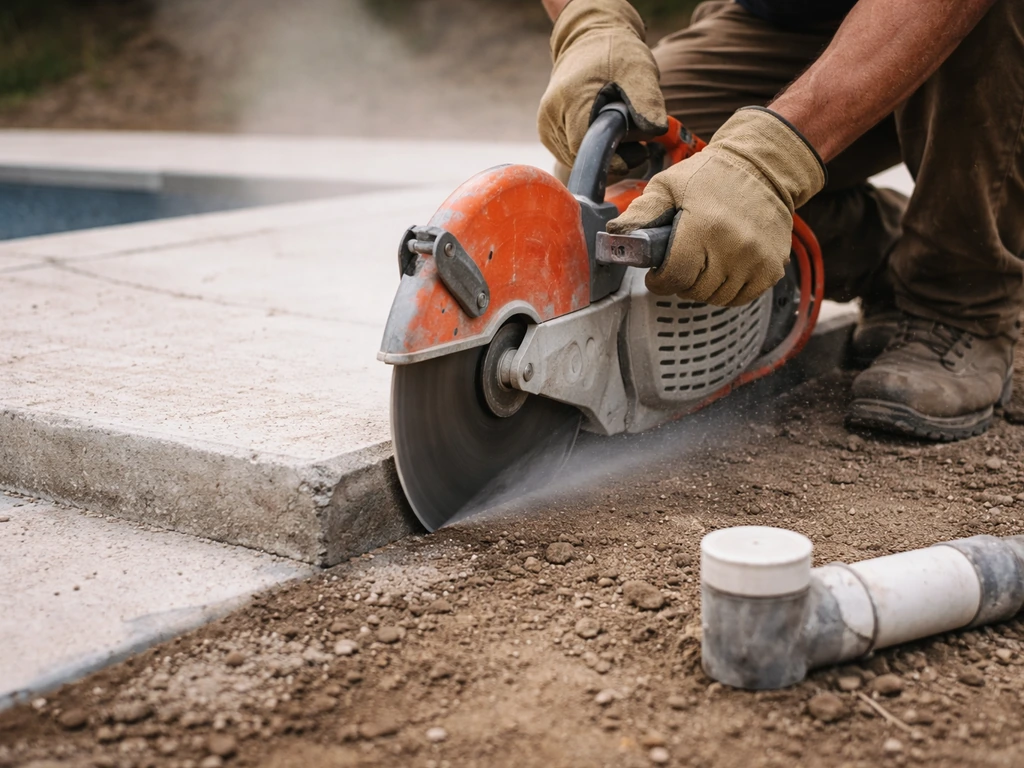
Any concrete footing, coping base, or slab edge that sticks up above your planned finish grade needs to come out or be cut flush. Leaving a buried stub that's only a few inches below grade is risky because it creates a rigid edge against flexible fill material, which encourages cracking right at that joint. Use a concrete saw or jackhammer to cut protruding sections flush or 6 inches below finish grade. If you can excavate and remove the full footing, do it. Haul the debris out rather than burying it, since large chunks in fill create voids as they shift.
Old plumbing and electrical stubs
Cap all old pool plumbing lines at or below finish grade. Any pipe left open becomes a pathway for water to channel directly into the fill. On the electrical side, all wiring and conduit that served the pool pump, lights, and heater must be properly disconnected and terminated, not just cut at the surface. In most jurisdictions, this requires a licensed electrician and a permit inspection to confirm the circuits are dead and capped to code. Don't assume the demo crew handled it, verify it yourself or have an electrician confirm before you build over the area.
Patio build options that work on reclaimed pool sites
You have more choices than you might think, and the right one depends on the condition of your subgrade, your budget, and the look you want. Here's a practical breakdown of the main options and how they perform on pool-site conditions. If you are also dealing with law pools and patio planning, make sure your drainage and subgrade strategy matches the way the patio will be used pool-site conditions.
| Option | Base Requirement | Best For | Settlement Risk on Pool Sites | Relative Cost |
|---|---|---|---|---|
| Concrete pavers | 4–6 in compacted aggregate + 1 in bedding sand | Flexible, repairable surface | Low if base is right (individual units can be reset) | Moderate |
| Poured concrete slab | 4–6 in compacted gravel sub-base | Clean, seamless look | Moderate (cracks if fill settles unevenly) | Moderate |
| Stamped concrete | Same as poured slab | Decorative finish | Same as poured slab, harder to repair | Moderate-high |
| Natural stone (flagstone) | 4–6 in compacted aggregate + 1 in sand | Premium look, flexible | Low (individual stones can be releveled) | High |
| Compacted gravel/decomposed granite | Compacted native soil or sub-base | Budget-friendly, great drainage | Very low | Low |
| Floating deck (wood/composite) | Pier footings or concrete pad | Works over uneven or unstable fill | Low (adjust post heights) | Moderate-high |
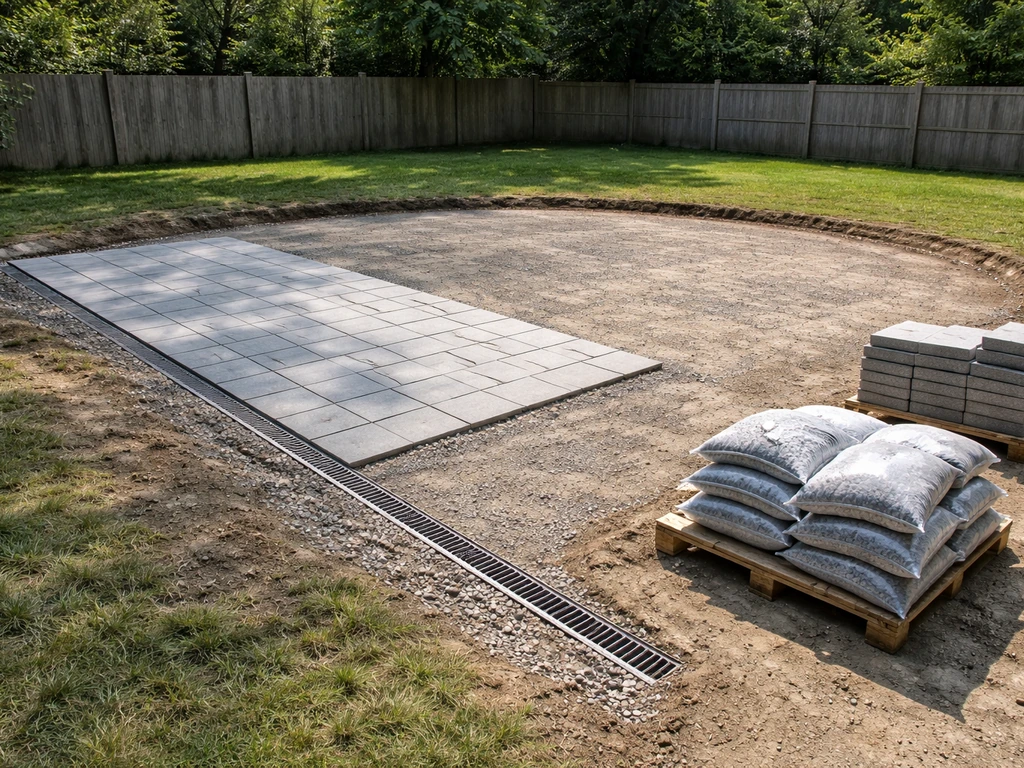
Pavers: the most forgiving choice
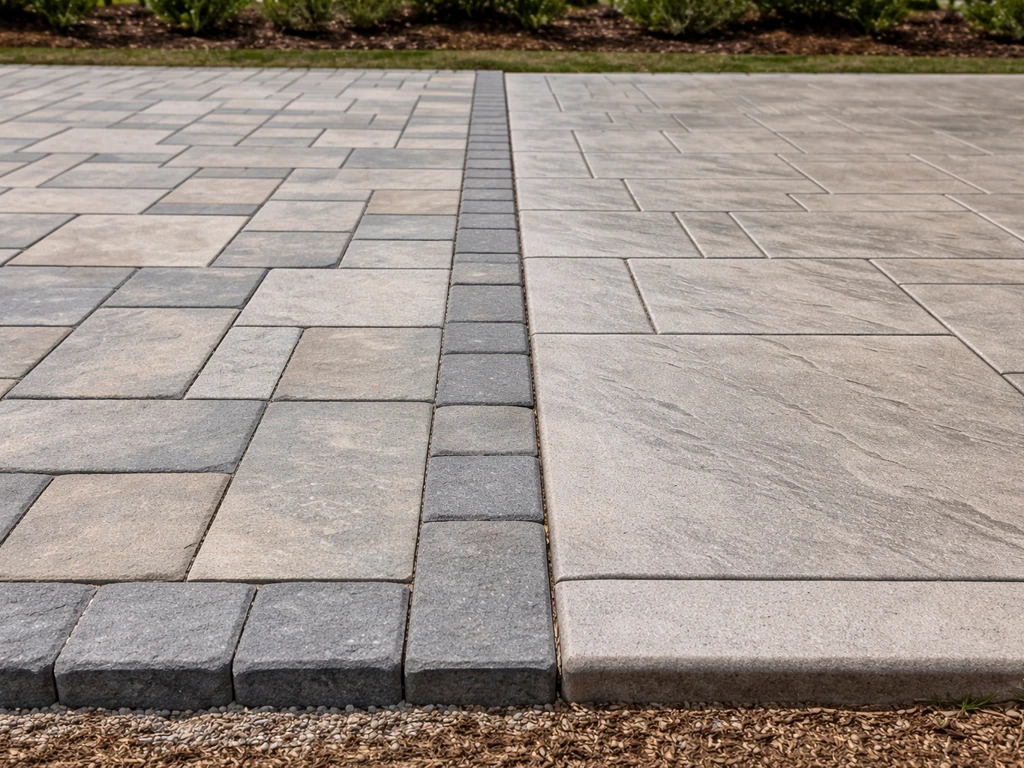
Concrete or natural stone pavers are genuinely the safest choice for a reclaimed pool site. If a section settles slightly, you lift those pavers, add a bit of bedding sand, and reset them. No jackhammers, no patching, no visible seam. The base needs to be right: a compacted granular aggregate layer 4 to 6 inches deep, then at least 1 inch of coarse bedding sand, then the pavers. Edge restraints are non-negotiable. Without them, the perimeter pavers migrate outward, the bedding sand follows, and the whole surface destabilizes. Set the edge restraint before you lay bedding sand, not after.
Poured and stamped concrete: beautiful but less forgiving
A poured slab looks clean and handles heavy loads well, but it does not forgive subgrade movement. If any section of the pool fill settles even half an inch, the slab cracks. This doesn't mean you can't pour concrete on a pool site, it means your subgrade preparation has to be flawless. Plan for contraction joints spaced no more than 10 feet apart for a 4-inch slab, 12.5 feet for a 5-inch slab, or 15 feet for a 6-inch slab. Isolation joints at every wall or structure edge are also critical to control where cracking happens. A 4-inch slab is the practical minimum. If you're in a cold climate with freeze-thaw cycles, consider 5 to 6 inches and add rebar or fiber reinforcement.
Sizing and layout considerations
A standard inground pool footprint ranges from roughly 12x24 feet to 20x40 feet, which gives you a generous patio canvas. Plan the patio to extend at least 6 inches beyond your base layer perimeter so the structural base doesn't end right at the edge of the surface material. Mark utilities before any excavation, and stake out the patio footprint to confirm it fits with any existing structures, gates, or landscaping.
Drainage and waterproofing that actually work
This is the section most DIY guides gloss over, and it's exactly where pool-site patios fail. The pool used to manage water on that part of your property. Now you have to replace that function with intentional drainage design. That means your drainage, compaction, and surface choices should work together for quality pools and patios that stay stable and functional.
Surface drainage
Every patio surface needs at least 1/8 inch per foot of slope away from the house and toward an appropriate outlet: a lawn area, a planted bed, or a catch basin. Don't slope toward a neighbor's property or a fence line that holds water. For large patios over 300 square feet, consider a channel drain or area drain near the low point to move water off the surface quickly during heavy rain. Position it before you pour or set your surface material.
Subsurface drainage
If your site has a high water table or consistently wet soil, a perimeter French drain around the patio base is worth the investment. Use a 4-inch perforated drain pipe wrapped in filter fabric, bedded in washed gravel, and wrapped again in geotextile to prevent the surrounding soil from silting up the gravel over time. The pipe needs a minimum slope of 1/8 inch per foot toward its discharge point, which should daylight at least 10 feet from any foundation, or connect to a drywell or storm sewer. A drain pipe with no slope becomes a water storage pipe, which is the opposite of what you want.
Moisture barriers and sealing
For poured concrete slabs, a 6-mil polyethylene vapor barrier placed on top of the compacted sub-base before pouring helps prevent moisture vapor from wicking up through the slab. For pavers, the compacted aggregate base itself provides enough drainage if installed correctly. Once the patio surface is complete, sealing concrete or natural stone every 2 to 3 years protects against staining, freeze-thaw spalling, and water penetration. Use a penetrating sealer for natural stone and a film-forming sealer for poured or stamped concrete.
Preventing heaving in cold climates
Heaving happens when water in the subgrade freezes and expands. The fix is twofold: drain water away from the base before it can freeze there, and use a granular base material that doesn't hold water. Clean crushed stone drains freely and resists frost heave far better than sand or clay-heavy fill. In freeze-thaw climates, bring your base depth up to 8 to 12 inches of compacted crushed stone for pavers or a thick-slab pour with rebar.
Permits, safety checks, and when to call a pro
Pool removal almost always requires a demolition permit, and many jurisdictions require a follow-up inspection after backfill. If your pool removal was permitted properly, there should be a record of what inspections were done and whether utilities were capped to code. Pull those records from your local building department before you start patio work. If the removal was done without permits (more common than you'd think), you may face complications when you try to permit the patio.
Utility and electrical checks
Pool electrical systems run at 120V and 240V and can be lethal if improperly abandoned. Gas lines for heaters must be capped and pressure-tested. Do not assume these are safe until a licensed professional has confirmed it in writing. Call 811 (the national dig-safe line) before any excavation to mark all underground utilities. On a pool site, also check with your pool removal contractor for a map of the old pool plumbing if you have one.
What to DIY and what to hire out
Experienced DIYers can handle paver installation, minor grading, base compaction, and surface sealing without much trouble. The jobs worth hiring out include: excavating and hauling old concrete (requires equipment and disposal logistics), compaction testing (requires a density gauge or lab test), electrical disconnection and capping, French drain installation in complex drainage situations, and poured concrete work over 200 square feet (getting the mix, pour timing, and finishing right is harder than it looks). The cost of a bad subgrade repair after the fact almost always exceeds the cost of doing it right the first time.
Realistic costs, timelines, and keeping it all low-maintenance
What you're starting from: pool removal costs
If the pool hasn't been removed yet, expect to pay somewhere between $6,000 and $15,000 for professional concrete pool removal, depending on pool size, access constraints, whether it's a full or partial removal, and local concrete disposal rates. Concrete recycling charges can add a few hundred to over a thousand dollars to the total depending on tonnage. Fill dirt, if needed, runs roughly $10 to $50 per cubic yard depending on your market. These numbers are national averages for 2026. Tight equipment access, such as a narrow side gate, can push costs higher.
Patio construction costs on top of that
Once the site is prepped, patio build costs depend heavily on material and whether you hire out labor. Here are rough 2026 ranges for a 400-square-foot patio on a prepped site.
| Patio Type | DIY Material Cost (approx.) | Pro Installed (approx.) | Notes |
|---|---|---|---|
| Concrete pavers | $1,500–$3,000 | $5,000–$10,000 | Base, sand, pavers, restraints |
| Poured concrete slab (4 in) | $1,200–$2,000 | $4,000–$8,000 | Includes sub-base and finishing |
| Stamped concrete | $1,500–$2,500 (materials) | $7,000–$14,000 | Labor-intensive; hard to DIY well |
| Natural flagstone | $2,000–$5,000+ | $8,000–$16,000+ | Material cost varies widely by stone |
| Compacted gravel/DG | $500–$1,200 | $1,500–$3,500 | Edging and compaction critical |
| Composite floating deck | $3,000–$6,000 (materials) | $8,000–$18,000 | Good option over problem fill |
Timeline expectations
From the end of pool demolition to a finished patio, plan for 4 to 12 weeks depending on scope. Site prep and fill compaction alone can take 1 to 2 weeks if you need to let freshly compacted fill settle before pouring or laying surface material. Permitting can add 2 to 4 weeks in busy municipalities. Concrete cure time is 28 days to full strength, though you can typically walk on it after 7 days. Paver and stone patios can be used almost immediately after completion.
Maintenance for the long haul
A well-built patio on a properly prepared pool site needs relatively little maintenance. For more ideas on your pool and patio outlet options, compare fixtures and drainage accessories that help keep water away from the slab or pavers. Reseal concrete or natural stone every 2 to 3 years. Check paver joints annually and add polymeric sand if joints have washed out. Inspect the patio surface each spring for any low spots, cracking, or signs of settlement, and address them early before small issues compound. Keep gutters and downspouts directed well away from the patio edge. If you planted beds around the patio, make sure roots from trees or large shrubs won't eventually heave the base from below.
If you're also exploring broader outdoor living designs or want to see what combinations of pools and patios look like before committing to a full patio conversion, there's a lot of inspiration available from quality pools and patios resources and from today's pool and patio outlet-style design guides. But for a reclaimed pool site, the practical groundwork covered here is what separates a beautiful, lasting patio from an expensive repair project five years down the road.
FAQ
How soon after pool removal can I start building the patio where pool used to be?
If you need imported fill or recompact existing material, wait until the site is dry enough to achieve proper compaction, not just “looks dry.” In many cases that means letting reworked areas rest for several days to a couple of weeks after rain, then verifying density and stability before you place base and bedding.
Is compacting the fill with a plate compactor enough for a patio where pool used to be?
It can be, if the area is small to moderate and you can work in full lifts (6 to 8 inches) with multiple passes per lift. If the reclaimed zone is deep, irregular, or has thick concrete remnants underneath, you may need a larger roller or excavation adjustments to reach uniform density across the full column.
What if probing reveals soft spots even after excavation and re-fill?
Re-check the extent of the weak zone. Soft patches often expand outward from the original pool footprint or the path of the old drain plumbing. The fix is usually more excavation beyond the first soft area, then re-fill and recompact in lifts, followed by a density check before you lay any base.
Should I worry about leftover steel rebar or wire mesh in the old pool area?
Yes, but the action depends on exposure. If steel is protruding or close to the surface, remove it or cut it flush well below finish grade to prevent creating rigid points that can lead to cracking. If it is fully embedded deep in the reclaimed fill, compaction quality and drainage matter more than removing it.
Do I need to remove the entire pool shell even if the patio will be above it?
Not always, but the risk is higher on partial removals because buried concrete can settle unevenly. The practical approach is to map the shell footprint, identify unstable zones, excavate and replace any material that will be under your base, and plan your base thickness accordingly.
How can I tell if drainage is still working on a patio where pool used to be?
Do a simple field test. After a rain, observe water flow for 48 hours, then mark any lingering wet areas or channels. If water collects where it should not, plan the drainage additions first (slope corrections, drains, or a perimeter French drain), before you install base and pavers.
What slope should the patio have on a reclaimed pool site?
The same outward goal applies as on other patios, at least 1/8 inch per foot, ideally 1/4 inch per foot. The extra caution on a pool site is to establish grade at the subgrade level so settlement does not undo your surface slope.
Can I install pavers directly over the old pool concrete?
Usually no. Even if it seems level, old shell material and fill around it can move at different rates, creating unevenness. The safer method is to excavate debris and unstable concrete, then rebuild the base (compacted aggregate plus bedding sand) over stable, uniformly compacted ground.
How do I handle old plumbing lines that are still in the ground on a patio where pool used to be?
Cap all abandoned lines at or below finish grade and ensure they cannot channel water into the fill. For anything that could still be connected to active systems, verify disconnection with the appropriate utility or licensed professional before you cover it permanently.
What’s the biggest mistake people make with patios built where pools used to be?
Skipping lift-by-lift compaction and density verification. Dumping fill and hoping it stabilizes later often leads to settlement, which shows up as sunken pavers or cracked slabs. A quick density test can prevent this expensive rework.
Do I need a vapor barrier under a slab patio on a pool site?
Often yes, especially if the area has a history of moisture. A 6-mil polyethylene barrier placed over compacted sub-base can reduce moisture vapor migration into the slab, which helps with durability and freeze-thaw performance, but it only works if the drainage and grading are correct too.
How close can the patio base extend to the pool area footprint edges?
Plan for a margin beyond the structural base perimeter so the base does not end at a surface edge. A common approach is extending the patio finish at least about 6 inches beyond the base layer boundary, so minor edge movement does not create a weak seam.
Is a channel drain or area drain always required for large patios where pool used to be?
Not always, but it becomes more likely for large surfaces (for example, over about 300 square feet) or when the low point is hard to keep draining with slope alone. If you expect heavy runoff, placing the drain before surface installation prevents rework and keeps water away from joints.
What maintenance differences should I expect after building a patio where pool used to be?
Besides resealing (concrete or stone every 2 to 3 years), pay special attention to settlement indicators like changes in joint lines, recurring low spots, or water staining along specific edges. Address small issues early, because reclaimed fill can settle subtly over the first seasons even after compaction.
Can I DIY the prep work for a patio where pool used to be?
DIY can work for pavers, minor grading, and sealing, but heavy equipment excavation, disposal of concrete debris, density testing, and complex drainage are better handled by pros. If you want to DIY, at minimum hire help for the compaction verification and for any electrical, gas, or permit-required components.