
A functional, well-built patio costs anywhere from under $1,500 for a simple gravel or decomposed granite pad to $30,000 or more for a large natural-stone or stamped-concrete space with a pergola and built-in lighting. Most homeowners land somewhere in the $3,000 to $12,000 range for a modest to mid-size patio, but what you actually spend depends on size, materials, site conditions, and how many tasks you handle yourself. This guide walks you through every stage of that decision: setting a realistic budget, understanding line-item costs, choosing materials, comparing contractor quotes, avoiding common mistakes, and planning a phased build that keeps cash flow manageable.
Patio Design Budget Tips for Homeowners: Plan Costs, Save Smartly

Miles Sutton
16 Jul 2026
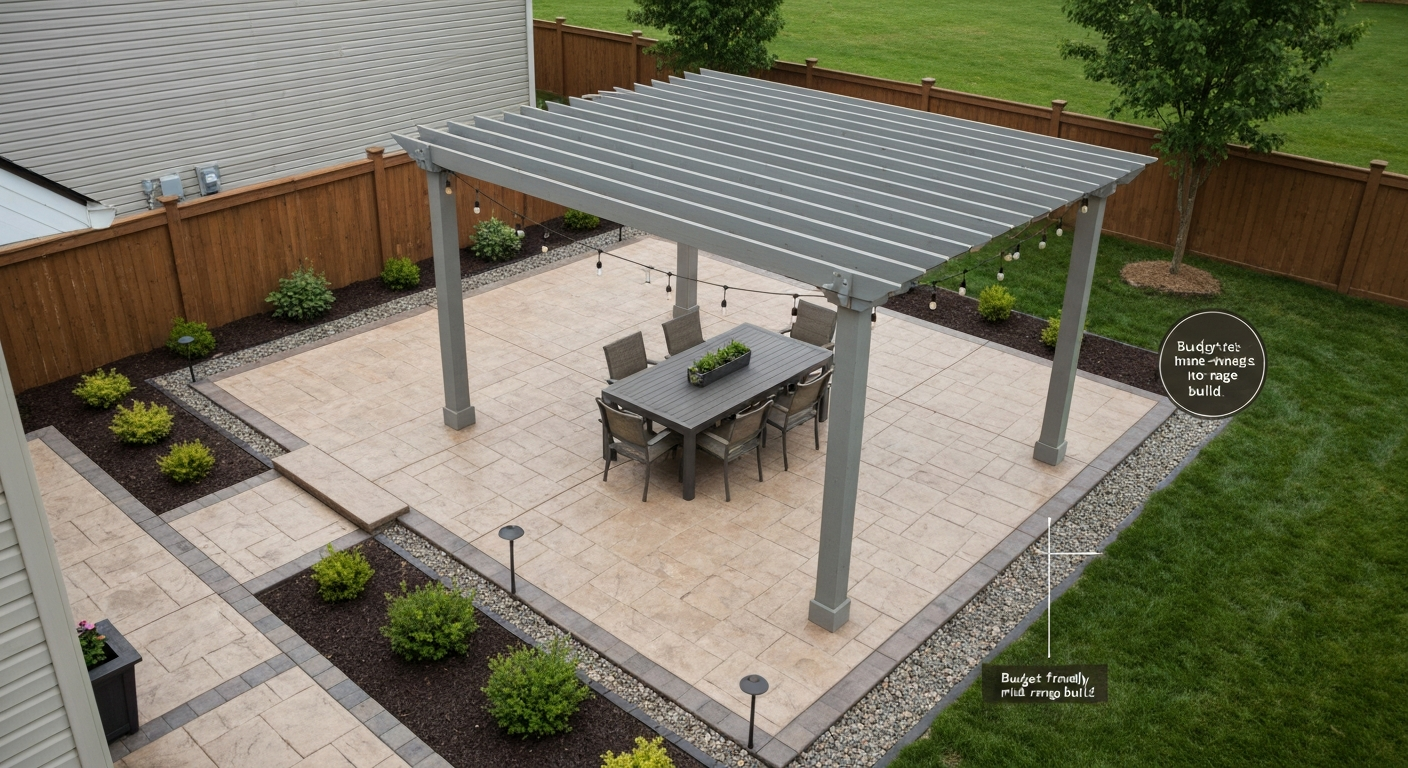
What This Guide Covers and Who It's For
Whether you're planning to break ground yourself, hire a hardscape crew, or mix the two, the core challenge is the same: you need enough accurate cost information to make confident decisions before a single shovel goes in the ground. This guide is for homeowners at the planning stage, people who want a real number to work with, not a vague range they can't act on. It pulls in current 2026 cost data, practical sizing and layout guidance, a line-item breakdown of every cost category, sample budgets at three project scales, and a checklist for comparing contractor quotes. If you're trying to figure out where your money actually goes and how to stretch it further, this is where to start.
Step 1: Define Your Goals Before You Set a Number
The most common budgeting mistake I see is working backward, picking a number first and then trying to cram a design into it without knowing what that number actually buys. Instead, start by listing what you want the patio to do. Will it be your main outdoor dining space for six to eight people? A quiet reading nook off the bedroom? A party zone with a fire pit and bar? Each use case has very different size and feature implications, and those drive the cost more than almost anything else.
Once you have a use list, sort it into three columns: must-haves (dining area, decent surface material), nice-to-haves (pergola, string lights), and future phases (built-in kitchen, fire pit). This exercise alone can cut initial project scope by 30 to 40 percent without sacrificing the parts that matter most. It also gives you a logical phasing plan, something we'll come back to in the financing section. At this stage, write down a realistic budget range, not a single number, and add a 15 to 20 percent contingency from the start. Surprises during excavation, buried concrete, poor drainage, tree roots, are common enough that the contingency should be non-negotiable.
Step 2: Size and Layout, How Dimensions Drive Your Total Cost
Patio size is the single biggest lever on total project cost, so it's worth getting specific early. For a dining table that seats six, you need at least a 12-by-12-foot pad (144 sq ft) to move chairs comfortably, and 14-by-16 feet (224 sq ft) is more practical. A conversation seating area for four needs roughly 100 to 120 square feet minimum. A combined dining-and-lounge space starts around 300 to 400 square feet. The moment you add a pergola or fire pit zone, plan for at least 500 to 600 square feet total to avoid a cramped result.
Layout shapes matter for cost too. A simple rectangle is the cheapest to build, less cutting, simpler formwork, faster labor. Curves, angles, and multi-level designs add labor time and material waste, which translates directly to higher per-square-foot costs. An L-shaped patio that wraps a corner can add 15 to 25 percent to labor compared to a same-area rectangle. If you're working with a garden patio setup where the space needs to integrate with planting beds or a lawn border, plan the transition zones carefully, they look simple but require edging, grading, and sometimes drainage work that adds up. For detailed layout approaches that go with specific garden styles, a garden patio how-to resource is worth reading alongside this guide before you finalize dimensions. See the garden patio how to guide for step-by-step planting, edging, and layout advice that pairs with these sizing recommendations.
Line-Item Cost Breakdown: Where Every Dollar Goes
Breaking a patio budget into categories is the fastest way to spot where you can save and where you shouldn't cut corners. Here's a realistic line-item list for a professionally installed patio project, with current 2026 cost benchmarks for each category.
| Cost Category | Typical Range / Unit | Notes |
|---|---|---|
| Excavation & demolition | $2–$6/sq ft; $400–$1,200+ per small job | Includes haul-away; larger removals priced per truckload (~$400–$600/load) |
| Compacted aggregate base | $30–$75/cu yd (bulk materials) | 4–6 inch depth standard per ICPI; compaction labor separate |
| Surface materials (concrete) | $4–$30/sq ft installed | Plain concrete at low end; stamped/colored at $10–$25+/sq ft |
| Surface materials (pavers) | $8–$30/sq ft installed | Concrete pavers at low end; premium natural stone at high end |
| Surface materials (natural stone) | $15–$38/sq ft installed | Flagstone, travertine, limestone — higher than pavers |
| Surface materials (gravel/DG) | $1–$6/sq ft installed | Lowest-cost option; DG with stabilizer at higher end |
| Surface materials (tile) | $10–$30+/sq ft installed | Porcelain/ceramic; substrate prep adds cost on soft ground |
| Drainage (French drain) | $25–$65/linear ft installed | Critical on sloped or clay-soil sites |
| Drainage (catch basin) | $50–$210/unit installed | Used where surface runoff concentrates |
| Permits | $50–$500+ depending on municipality | Required in most areas for patios over a certain size or attached structures |
| Edging & borders | $3–$12/linear ft | Aluminum, steel, concrete, or stone edging |
| Lighting (low-voltage) | $200–$800 for basic kits | In-ground, post, or string; professional wiring adds labor |
| Furniture | $500–$5,000+ | Wide range; weather-rated sets last longer and cost less over time |
| Fire pit (prefab) | $200–$1,500 installed | DIY kit at low end; gas line hookup adds $300–$800 |
| Pergola (prefab kit) | $1,500–$6,000 installed | DIY-friendly; custom-built pergolas run $5,000–$15,000+ |
| Contractor labor (paver crew) | $50–$80/hr per crew member | Skilled hardscape installers billed hourly on small/repair jobs |
A few items on that list deserve extra attention. The aggregate base is a non-negotiable investment, ICPI standards call for a 4 to 6 inch compacted crushed-stone base with subgrade compaction targeting 95 to 98 percent Standard Proctor density. Compacted aggregate base materials commonly cost roughly $30–$75 per cubic yard in 2026 (bulk, regional variation); see Gravel cost per yard guide for 2026 projects for regional pricing and base material guidance. Skimping here is the top cause of sunken or shifting pavers down the road. Drainage is another area where cutting corners creates expensive problems: if your yard has any slope toward the house or sits on clay soil, budget for a French drain or catch basin from the start rather than retrofitting it after water damage appears.
Typical Cost Ranges and Why Your Numbers May Vary
National averages are a useful starting point, but they hide significant regional variation. Labor rates in San Francisco, Boston, or Seattle can run 40 to 60 percent higher than national midpoints. Conversely, in large parts of the South and Midwest, installed costs often come in at the low end of published ranges. Material costs also shift regionally, natural stone quarried locally in some parts of the Southeast or Southwest can be cheaper than shipping it to a coastal city. As a rule, add 20 to 30 percent to published national ranges if you're in a high cost-of-living metro, and subtract 10 to 15 percent if you're in a rural area with competitive local labor.
Seasonal timing affects pricing too. Spring and early summer are peak season for hardscape contractors, expect higher quotes and longer lead times. Jobs scheduled for late summer or fall often get slightly more competitive bids because crews are filling gaps in their schedules. If you have flexibility on start date, mentioning a fall timeline when collecting quotes can sometimes move the needle 5 to 10 percent on labor.
Sample Budgets: Small, Medium, and Large Patio Projects
Real budget scenarios are more useful than ranges alone, so here are three fully scoped examples based on 2026 cost data. Each includes scope, realistic assumptions, and the main trade-offs.
Small Patio: $2,500–$4,500
Scope: A 10-by-12-foot (120 sq ft) concrete paver patio in a flat backyard. Includes excavation, 4-inch compacted gravel base, mid-range concrete pavers installed, simple soldier-course border, and basic edging. No drainage work needed (flat, well-draining soil). No permits required (under local threshold). DIY-friendly furniture from a big-box store. Trade-offs: simple rectangular layout keeps labor low; no add-ons keep the budget tight. A project like this is entirely manageable as a weekend DIY job for a physically capable homeowner, which would push total cost down to $800–$1,500 in materials only.
Medium Patio: $7,000–$14,000
Scope: A 16-by-20-foot (320 sq ft) professionally installed stamped concrete patio with a standard pattern in one color, a simple step down from the back door, a basic permit ($150–$250), and a low-voltage lighting kit installed around the perimeter. No pergola or fire pit in Phase 1. Mid-grade outdoor furniture set ($1,200–$1,800). Trade-offs: stamped concrete at $12–$16/sq ft hits this sweet spot well; adding a second color or a more complex pattern pushes toward $16–$20/sq ft and can add $1,500 to $3,000 to the total. Stamped decorative concrete patios typically cost about $10–$20+ per square foot in 2026 Stamped decorative concrete patios typically cost about $10–$20+ per square foot in 2026.. Drainage work, if needed, adds another $800 to $2,000 depending on site.
Large Patio: $18,000–$35,000+
Scope: A 500+ sq ft natural stone flagstone patio (at $20–$30/sq ft installed), a prefab pergola with post anchors ($3,500–$5,000 installed), a gas fire pit with a propane line ($1,800–$3,000), low-voltage pathway and accent lighting ($1,200–$1,800), a permit and engineering sign-off where required ($300–$600), and a French drain along one edge ($1,200–$1,800 for 30–40 linear feet). Quality furniture budget $2,500–$4,000. Trade-offs: natural stone at this size is a premium investment but adds meaningful resale appeal; choosing large-format concrete pavers instead of flagstone at this scale could save $3,000 to $6,000 without a significant visual downgrade.
Design Decisions That Move the Price Tag
Material choice is the most obvious cost driver, but several design decisions layer on top of it. Here's what I've seen consistently push costs higher on real projects.
- Pattern complexity: Running bond (stacked) pavers cut and lay quickly. Herringbone requires 45-degree cuts at every edge, increasing waste by 10–15% and labor time by 20–30% compared to a simple grid.
- Decorative borders and banding: A contrasting soldier course or double-row border adds material cost plus additional cutting labor — typically $3–$8 per linear foot extra.
- Surface finish on concrete: Broom finish is the baseline. Exposed aggregate, acid staining, and multi-color stamping each add cost in ascending order, from $2–$4/sq ft extra for exposed aggregate to $8–$12/sq ft extra for premium stamped multi-color work.
- Grades and slopes: A sloped yard requires more excavation to establish a level pad, retaining edges, or stepped levels — each adds labor and potentially material. A grade change of just 12 inches across a 16-foot run can add $1,500–$3,000 to excavation and base work.
- Access constraints: Narrow side-gate access means equipment can't get in, forcing manual excavation and wheelbarrow material delivery — which can double labor time on base and excavation tasks.
- Transitions and thresholds: The connection between the patio and the house (door threshold, step down, or flush transition) is a detail that contractors price separately and often varies by $500–$1,500 depending on complexity.
Concrete Cost-Control Strategies That Actually Work
Saving money on a patio project isn't about cutting corners, it's about making smart substitutions and knowing which tasks are genuinely DIY-friendly versus which ones need professional execution. Here's a task-by-task breakdown.
Material Swaps Worth Considering
Swapping flagstone for large-format concrete pavers (24-by-24-inch or similar) saves $8–$15 per square foot installed while delivering a clean, modern look. Decomposed granite or compacted gravel patios cost $1–$6 per square foot installed, a fraction of stone or concrete, and work beautifully in casual garden settings or as Phase 1 while you save for a permanent surface. Prefab pergola kits in aluminum or vinyl run $1,500–$4,000 installed versus $8,000–$15,000 for a custom-built cedar pergola, and the quality gap has narrowed significantly in recent years.
DIY vs. Hiring a Pro: A Task-by-Task Guide
| Task | DIY-Friendly? | Why It Matters |
|---|---|---|
| Demolition of old surface | Yes, with rentals | Renting a jackhammer or plate compactor is straightforward; save $400–$1,000 |
| Excavation (small area, hand tools) | Yes for under ~150 sq ft | Larger areas need a mini-excavator rental ($350–$500/day) |
| Aggregate base installation & compaction | Yes with plate compactor rental | Critical to do correctly — follow ICPI depth standards |
| Concrete forming & pour | Moderate — flat slabs OK; stamping is not DIY-friendly | Stamped concrete requires professional timing and skill; mistakes are costly |
| Paver installation (simple layout) | Yes for rectangular, running-bond patterns | Complex patterns or curves are better left to experienced crews |
| Natural stone setting | No for most homeowners | Requires experience; poor setting leads to settling and trip hazards |
| Drainage (French drain) | Moderate — trenching is DIY-able | Pipe slope and outlet placement must be correct; consider a pro for complex sites |
| Electrical/low-voltage lighting | Yes for low-voltage (12V) systems | Line-voltage (120V) outdoor circuits require a licensed electrician |
| Permit application | Yes — homeowners can self-apply in most jurisdictions | Saves contractor markup; allow 2–6 weeks for approval |
| Pergola kit assembly | Yes for most prefab kits | Instructions are generally clear; two people needed for beam work |
Phasing the build is one of the most underused cost-control tools. You can install a solid gravel or concrete base patio now for $2,000 to $3,500, use it for a season, and overlay pavers or tile the following year when budget allows. Many hardscape contractors will price a base installation that's designed for a future surface upgrade, which avoids redoing excavation work. This is especially smart if you're not certain yet which surface material you want, living with the space for a season almost always clarifies priorities.
Repurposing is worth exploring before buying new. Reclaimed brick, salvaged bluestone, and used concrete pavers are sold through architectural salvage yards, Craigslist, and Facebook Marketplace, often at 30 to 60 percent below new material cost. The caveat: matching color and thickness requires patience, and some salvaged stone needs more cutting and fitting time, which can offset savings if you're paying a contractor. For a DIY project, though, salvaged materials can cut material cost significantly.
Getting and Comparing Contractor Quotes
A verbal estimate is almost worthless for budget planning. You need written, line-item quotes from at least three contractors before you can compare them meaningfully. When you request quotes, give each contractor the same written scope document: a site sketch with dimensions, a list of materials you've researched (or ask them to specify their proposed materials), and a list of deliverables. If you leave scope open-ended, each contractor will assume different things and the quotes won't be comparable.
Questions to Ask Every Contractor
- What is the proposed base depth and compaction method, and does the quote include a compaction test or plate-compactor pass record?
- Is excavation and haul-away included, or is that a separate line item?
- Who pulls the permit, and is the permit fee included in the quote or billed separately?
- What is the proposed drainage solution, if any, given the site conditions?
- What is the warranty on labor, and what materials brand/grade are you specifying?
- What is the payment schedule — and how much is the deposit (anything over 30% upfront is a red flag)?
- How many crew members will be on site, and who is the lead installer?
- What is your projected timeline, including cure time before the surface can be used?
Red Flags to Watch For
- No written contract or only a one-line invoice — no detail means no accountability
- Deposit requests over 30–35% of total project cost before work begins
- No mention of permit requirements on a project that clearly needs one
- Vague base specification ('we'll put down some gravel') with no depth or compaction standard cited
- Drastically lower bid than all others without a clear explanation — usually means something is excluded
- No proof of liability insurance or contractor's license (ask for certificate of insurance)
Permit requirements vary widely by municipality. Some areas require a permit for any paved surface over 200 square feet; others only require one for attached structures like pergolas or covered patios. Most jurisdictions make permit requirements searchable online through the building department's website. Allow 2 to 6 weeks for permit approval in most areas, and note that some municipalities require inspections at the base layer before the surface is installed, plan your timeline accordingly.
Common Mistakes That Inflate Patio Costs
Most blown budgets I've seen trace back to one of a handful of avoidable errors. Knowing them in advance is genuinely useful, these are not hypothetical risks, they're regular occurrences on DIY and contractor-built projects alike. For a deeper look at common pitfalls and how to avoid them, see our guide to patio design mistakes.
- Inadequate base depth or compaction: The most common cause of paver settlement and cracking. A 2-inch base that should be 4–6 inches will shift within 2–3 seasons, requiring full excavation and reinstallation. The fix costs as much as the original job.
- Ignoring drainage before building: Water that pools under or around a patio erodes the base, heaves surfaces in freeze-thaw climates, and directs water toward foundations. Adding a French drain after the fact costs $25–$65/linear ft — budget for it upfront if your site needs it.
- Choosing materials for looks without checking maintenance requirements: Porous natural stone like travertine or certain limestones needs annual sealing, especially in wet climates. Unsealed stone stains, spalls, and erodes. If you're not willing to seal annually, choose a lower-maintenance surface.
- Underestimating the step and threshold detail: The connection between the patio and the house door is often the last thing homeowners think about and the first thing contractors underbid. A sloppy threshold creates a trip hazard and a water infiltration point.
- Skipping a site survey on sloped land: Building a level patio on a slope without proper grading and retaining work leads to undermining and erosion. If your yard drops more than 6 inches across the patio footprint, you need engineered grading — not just extra base material.
- DIYing stamped concrete without experience: Stamped concrete has a very narrow working window. Timing the stamp application to concrete set time requires experience; a mistake means a permanently marred surface with no easy fix.
- Over-scoping Phase 1: Trying to build the full dream patio in one shot when budget is tight often means compromising on base quality or drainage to afford the pergola. It's better to build Phase 1 right and phase features later.
Many of these issues are covered in detail in articles on patio building tips and patio design mistakes, both worth reviewing before you finalize your plan, especially if you're taking on any portion of the work yourself.
Maintenance Costs and Lifecycle Thinking
The cheapest patio to build isn't always the cheapest patio to own. A gravel patio costs $1.50 to $4.50 per square foot to install but needs a top-up of fresh gravel every 2 to 3 years and ongoing weed management, roughly $200 to $500 per year for a medium-size surface. Concrete pavers need periodic joint sand replenishment (every 3 to 5 years, roughly $100 to $300 depending on size) and resealing every 3 to 5 years ($200 to $600 for a typical surface). Plain poured concrete needs crack monitoring and may need sealing every 2 to 3 years ($150 to $400 for a 300–400 sq ft surface). Natural stone with a quality sealer job is one of the lowest ongoing-maintenance surfaces if the original installation was done properly.
| Surface Material | Install Cost (Installed, per sq ft) | Avg. Annual Maintenance Cost | Typical Lifespan |
|---|---|---|---|
| Gravel / decomposed granite | $1.50–$6 | $150–$500/yr (replenishment + weeding) | Indefinite with upkeep |
| Plain poured concrete | $4–$10 | $50–$200/yr (sealing, crack fill) | 25–40 years |
| Stamped concrete | $10–$25+ | $100–$400/yr (sealing essential) | 20–30 years |
| Concrete pavers | $8–$18 | $75–$300/yr (joint sand, sealing) | 30–50+ years |
| Natural stone (flagstone, etc.) | $15–$38 | $100–$400/yr (sealing, re-pointing) | 50+ years properly maintained |
| Porcelain/ceramic tile | $10–$30+ | $50–$200/yr (grout maintenance, sealing) | 15–30 years (climate dependent) |
| Composite decking | $30–$60+ | $100–$300/yr (cleaning, inspection) | 25–30 years (manufacturer warranty) |
One often-overlooked maintenance cost is furniture replacement. Budget outdoor furniture rated for full sun and rain exposure lasts 3 to 5 years; mid-grade powder-coated aluminum or quality teak lasts 10 to 20 years with basic care. Buying cheap furniture twice almost always costs more than buying mid-grade once. On seasonal maintenance tasks, winterizing water features, covering furniture, checking drainage outlets, a routine patio maintenance guide will walk you through the annual checklist in detail. For step-by-step patio maintenance tips, see our patio maintenance tips resource.
Financing, Phasing, and Contingency Planning
For most homeowners, the practical financing options for patio work fall into four categories: cash savings, a home equity line of credit (HELOC), a home improvement personal loan, or a contractor payment plan. HELOCs typically carry the lowest interest rates for this type of project because the loan is secured against home equity, worth exploring if the project will add meaningful outdoor living value. Personal home improvement loans are unsecured and carry higher rates (currently 7 to 15 percent APR in 2026 depending on credit), but they don't require home equity and fund quickly. Some larger hardscape contractors offer in-house financing or referrals to third-party lenders; those are convenient but often carry the highest rates, so compare carefully.
Phasing is the most underrated budget tool. A well-designed phased build means Phase 1 delivers a fully usable, properly built patio, and Phase 2 adds the premium features when you're ready. A typical phasing sequence: Phase 1, full surface, base, drainage, basic edging ($3,000–$8,000). Phase 2, pergola or shade structure ($2,000–$6,000). Phase 3, fire pit, built-in lighting, or kitchen ($2,000–$10,000+). Design Phase 1 with Phase 2 and 3 in mind, for example, run conduit for future lighting during Phase 1 excavation (adds $50 to $150 in materials but saves $500 to $1,000 in future trenching costs).
On contingency: I recommend holding 15 percent of total project budget as a contingency for projects under $10,000, and 10 to 15 percent for larger projects. If you finish under budget, the contingency becomes your Phase 2 seed fund. Hidden site conditions, buried concrete, unexpected water table, unstable fill soil, show up on a meaningful percentage of residential patio projects, and having the contingency pre-planned means you make a calm decision rather than a panicked one.
Your Practical Next Steps: Budget Template and When to Call a Pro
Before you contact a single contractor or buy a single bag of sand, run through this pre-planning checklist. It takes about an hour and will make every subsequent conversation sharper and faster.
- Sketch your patio footprint with rough dimensions and mark the house connection point, any grade changes, and existing trees or obstacles.
- List your must-haves, nice-to-haves, and future-phase items from Step 1 — and write a one-sentence use statement ('This patio is primarily for outdoor dining for 6 people and occasional morning coffee.').
- Calculate your square footage and multiply by your target material's installed cost range to get a rough surface cost estimate.
- Add line-item estimates for base, excavation, drainage (if needed), edging, and permit using the ranges from this guide.
- Add your furniture and feature budget (fire pit, pergola, lighting) as separate line items.
- Total your line items, then add 15% contingency on top.
- Check your municipality's building department website for permit requirements — 10 minutes now can save a stop-work order later.
- Prepare a one-page written scope document (dimensions, material preference, features required) before contacting contractors.
- Collect at least three written, line-item quotes and compare them against the same scope document using the question list above.
- Decide which tasks you'll DIY versus hire out using the task-by-task table in this guide, and get separate material quotes for the DIY portions.
Call a pro when: the site has significant grade changes (more than 8 to 10 inches across the patio footprint), drainage problems are present, the project requires a permit with inspections, or you're using natural stone or stamped concrete. These are situations where the cost of a mistake equals or exceeds the cost of professional labor. DIY confidently when: the layout is a simple rectangle, the site is flat and well-draining, you're using a forgiving material like gravel or concrete pavers in a running-bond pattern, and you have a free weekend plus a plate compactor rental.
Your Decision Roadmap to a Patio That Fits Your Budget
The path from idea to finished patio isn't complicated, but it does have a sequence. Start with use and size, because those two decisions set the floor and ceiling on everything else. Choose your material based on lifecycle cost and maintenance honesty, not just install price. Build your budget from line items up, add a 15 percent contingency, and then find the design that fits that number, not the other way around. Phase ambitiously but build Phase 1 right. Get written, itemized quotes, ask the hard questions, and don't let a low number replace a clear scope of work. A well-built patio on a modest budget outperforms an under-built one at any price, and starting with a solid plan is the single biggest factor in getting there.
FAQ
What primary cost data should I collect to produce an accurate patio-budget article?
Gather installed cost ranges (materials + labor) for common patio surfaces: poured concrete ($4–$30/sq ft; typical $6–$20), stamped concrete ($10–$25+/sq ft), segmental pavers ($8–$30/sq ft), natural stone ($15–$38/sq ft), gravel/pea gravel ($1–$4.50/sq ft), decomposed granite ($2–$6/sq ft installed), tile ($10–$30+/sq ft), and wood/composite decking ($15–$60+/sq ft). Also collect line-item unit costs: excavation/demolition ($2–$6/sq ft or $400+ per small job), base materials ($30–$75/yd³), drainage (French drain $25–$65/lf), labor wage benchmarks (BLS & local OEWS), and typical contractor crew/hour ranges ($50–$80/hr per skilled installer). Use multiple sources and note regional variation.
Which authoritative organizations and data sources should I cite for technical standards and labor rates?
Cite Interlocking Concrete Pavement Institute (ICPI) for base-depth and compaction standards; Bureau of Labor Statistics (BLS/OEWS) for masonry, concrete, and landscaping wages; local building-department codes for permit and setback requirements; trade publications (ConcreteNetwork, Angi) for cost ranges; and manufacturer/installer guides for product-specific warranties and installation details.
What local and regulatory information is essential to verify for homeowners?
Confirm local building-permit triggers and costs, setback/impervious-surface rules, HOA restrictions, utility-locate requirements, required inspections, stormwater/drainage regulations, and local contractor licensing/insurance rules. Sources: local municipal building department website, county planning or public works, and HOA governing documents.
What line-item cost categories must be included in a homeowner-focused budget breakdown?
Include: site prep/demolition, excavation & haul-away, compacted subbase (material and compaction), surface materials, edge restraints/edging, concrete finishing/stamping, paver-setting sand & jointing, natural-stone bedding, drainage solutions (French drains, catch basins), grading, permits & inspections, electrical/lighting, built features (fire pit, pergola), furniture & cushions, delivery fees, and contractor overhead/profit plus contingency.
How should I present sample budgets and caveats for small, medium, and large projects?
Provide three example budgets with square footage and surface type (e.g., 150 sq ft gravel small project $300–$1,000; 300 sq ft paver medium project $2,400–$9,000; 500 sq ft natural stone large project $7,500–$19,000). Always flag regional variability and site-condition modifiers (slope, access, utility conflicts, required retaining walls) and state the sources used for the ranges.
What concrete cost-saving tactics should be recommended and sourced?
Recommend lower-cost materials (gravel, decomposed granite, basic concrete), phased builds (start with base patio now, add pergola/firepit later), repurposing materials (reclaimed pavers/stone), prefab components (prebuilt firepit kits, pergolas), selective DIY for tasks like demolition, compaction, sealing, and hiring pros for structural, electrical, or complex drainage work. Cite cost guides and pros/consumer advice (Angi, HomeGuide) and safety/permit rules for DIY limits.