
A patio design guide needs to do one thing well: take you from a bare patch of yard to a finished outdoor space without wasting your time or money. Whether you're pouring a simple 12x16 concrete slab this weekend or hiring a contractor to build a multi-zone flagstone retreat, the same fundamentals apply. You need to assess your site, nail down a realistic budget, choose the right materials for your climate and soil, understand what permits your town actually requires, and decide honestly whether your skills and schedule match a DIY build or whether it's time to call a pro. This guide walks through every one of those steps with real numbers, standard specifications, and practical checklists so you leave with a plan you can actually execute.
Patio Design Guide: Step-by-Step Planning, Materials & Costs

Miles Sutton
26 Jul 2026
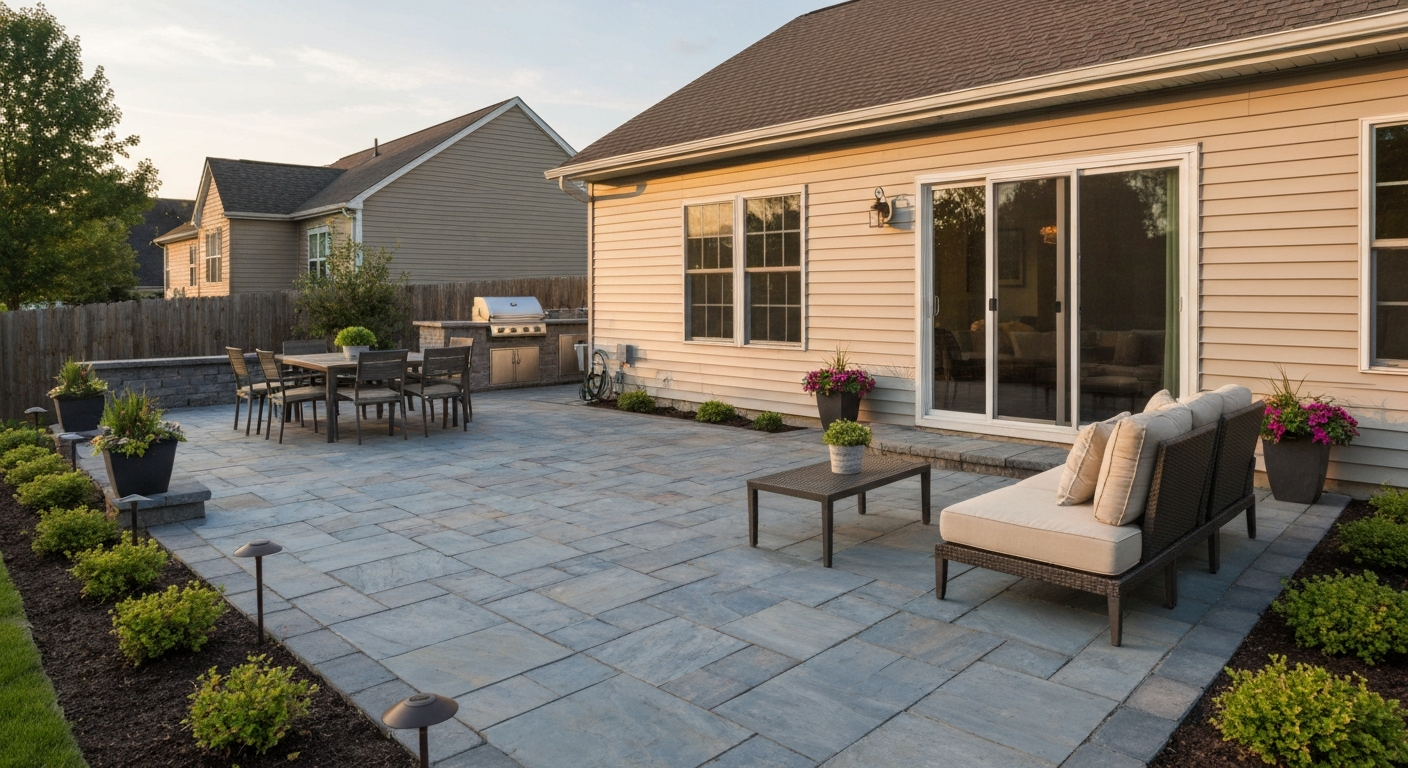
Who this guide is for and what you'll accomplish
This patio design guide is written for homeowners at any stage: people who have never laid a paver, experienced DIYers ready to tackle a complex project, and anyone in between who just wants to make smart decisions before calling a contractor. If you're comparing material quotes, trying to figure out whether you need a permit, or wondering why your neighbor's pavers shifted after two winters, the answers are here. By the end you'll know how to size and lay out your patio, which materials make sense for your budget and climate, what a realistic cost breakdown looks like, and how to finish the space so it actually gets used.
Quick-start decision checklist before you plan anything
Before you sketch a single layout or order materials, run through these questions. Your answers will shape every decision that follows.
- DIY or hire? Be honest about your free weekends, physical capacity, tool access, and tolerance for a project that can take two to three weeks for a mid-size patio. If you own a plate compactor or can rent one, and you're comfortable working with a laser level, pavers and concrete slabs are realistic DIY projects. Stone cutting, significant grading, drainage systems, or anything requiring permits and inspections often tips the scale toward a professional.
- Must-haves vs. nice-to-haves: Write down the non-negotiables first (size, access from kitchen, shade, low maintenance) before adding features like built-in seating or lighting. It's easier to add features later than to rebuild a foundation.
- Minimum viable budget: Installed costs in 2026 range from roughly $5/ft² for basic poured concrete up to $45+/ft² for premium natural stone. A 200 ft² concrete patio can cost as little as $1,000 in materials-only DIY work; the same size in installed bluestone runs $3,000–$9,000 depending on region and complexity.
- Timeline: Do you need the patio done before a specific date? That affects whether you DIY (slower) or hire (faster but requires contractor scheduling, which in summer can mean 4–8 week lead times).
- Site constraints: Is the ground level? Does water pond there after rain? Are there tree roots, underground utilities, or an existing structure to work around? These aren't dealbreakers but they add cost and complexity.
- Permit check: Call or check your local building department website before any design work. Some municipalities require permits for any paved area over a certain size or that changes impervious-surface coverage. Others waive permits for uncovered patios entirely. Getting this wrong can mean fines or required removal.
Step-by-step planning workflow
Start with a site assessment
Walk your yard at different times of day and take notes. Where does morning sun hit? Where does afternoon shade fall from the house or trees? Sun exposure will influence whether you need a pergola or shade sail, and it affects material choices: dark porcelain tile in full afternoon sun in Phoenix gets hot enough to burn bare feet, while the same tile works beautifully in a shaded Wisconsin yard. Check slope with a long level and a tape measure. The International Residential Code requires impervious surfaces within 10 feet of your foundation to slope a minimum of 2% away from the building (that's 1/4 inch per foot). If your yard currently slopes toward the house, you'll need to address grading before anything else. Also note access points: where will foot traffic flow from the house, the yard, and any gates? Mark those with stakes before you design.
Check your soil type early. The USDA NRCS Web Soil Survey (available free at websoilsurvey.sc.egov.usda.gov) gives you parcel-level soil maps including hydrologic soil group, drainage class, and frost susceptibility. Expansive clay soils or soils with shallow restrictive layers will affect base depth and drainage design significantly. If you're in a frost-prone region, a well-drained granular base is non-negotiable: frost heaving under a thin, poorly drained base is the most common cause of paver and slab failure in northern climates.
Also check FEMA's Flood Map Service Center (msc.fema.gov) if your property is near a waterway or in a low-lying area. Building in a Special Flood Hazard Area triggers additional permitting requirements and may restrict what you can build.
Define your goals clearly
A patio used primarily for a dining table, four chairs, and a grill has very different size, layout, and material requirements than a multi-use space with a seating area, a fire pit zone, and a hot tub. Write down your primary activity (dining, lounging, entertaining, cooking) and your secondary ones. List who uses the space: adults only, kids, elderly family members with mobility considerations, dogs. This list will directly inform your layout zones, surface texture choices (smooth vs. textured for slip resistance), and furniture footprint calculations.
Set a realistic budget
Build your budget in layers. Start with the surface material cost, then add base and subbase materials, then labor (if hiring), then drainage, edging, permits, and finishing touches like lighting or landscaping. A common mistake is budgeting only for the surface and running out of money halfway through the base work. For a rough sanity check: a 200 ft² patio at the low end (DIY concrete) might run $500–$800 in materials; the same footprint in installed concrete pavers with a contractor runs $2,000–$6,000; in premium natural stone installed professionally, $3,000–$9,000. Getting actual quotes from local contractors is the only way to get precise numbers for your region, labor rates, material availability, and local code requirements vary considerably across the country.
Sizing and layout: how big does your patio actually need to be?
Calculating the right size
The most common mistake homeowners make is building a patio that's too small. A 10x10 patio sounds generous until you put a 4-person dining table on it and realize you can barely pull a chair back without stepping off the edge. Use furniture footprints as your sizing anchor. A standard 4-person outdoor dining set needs roughly 10x12 feet of clear space including chair pull-out room. A 6-person table needs 12x14 feet minimum. A 2-3 person conversation set (sofa and chairs around a coffee table) needs at least a 12x12 area. Add 3 feet of circulation path on any side that connects to another zone or a door. Add 5 feet around a grill for safe working clearance.
Traffic flow and activity zones
Plan traffic flow before you finalize shape. The path from the back door to the grill should not require walking through the seating area. Fire pits need at least 7-10 feet of clear space in every direction and should not be directly under overhangs or trees. Hot tubs are heavy (average 3,000-5,000 lbs when filled) and may need reinforced base sections or separate footings. Think of your patio layout the same way an interior designer thinks about a living room: you're zoning space, managing flow, and making sure each activity area has enough room to function without crowding another.
Four common layout plans
Here are four layout configurations that cover most residential situations. Each can be adapted to your specific dimensions.
- The Single-Zone Rectangle (10x16 ft, 160 ft²): The simplest plan. One dining or seating area directly off the back door. Best for smaller yards or modest budgets. Works well in concrete, pavers, or tile. Add a 2-foot planting border on three sides to soften the edges.
- The L-Shape (12x20 ft with a 10x12 arm, approx. 360 ft²): Wraps a corner of the house and creates two distinct zones: dining near the door and a lounge or fire pit zone at the far end. The change in direction naturally defines each area without requiring a wall. Works especially well on corner lots or homes with two rear exits.
- The Multi-Zone Rectangle (16x24 ft, 384 ft²): Divided into three zones side by side: dining (12 ft), lounge (8 ft), and grill/prep (4 ft). Traffic flows along one long edge. This is the most popular mid-size patio plan for entertaining households. Consider a change in material or pattern at zone transitions to visually define each area.
- The Tiered or Split-Level Plan (varies, typically 300-500 ft²): Used on sloped sites. One level sits closer to the house (dining/cooking), a second level steps down 1-2 feet to a lounge or lawn transition zone. Requires careful drainage planning between tiers and may trigger permit requirements for retaining walls depending on height.
Style inspiration: finding a look that fits your house
The most expensive design mistake I see is choosing a patio style in isolation from the house. A sleek, large-format porcelain tile patio looks stunning in a magazine photo, but if it's attached to a 1970s brick ranch with a natural wood fence, the clash is jarring. Start with your house's architectural style and exterior palette, then choose patio materials and colors that either match or intentionally contrast in a controlled way.
- Traditional or Colonial homes: Brick pavers, natural bluestone, and tumbled concrete pavers in earth tones (tan, buff, charcoal) fit naturally. Herringbone and running-bond patterns reinforce the classic character.
- Craftsman or bungalow: Natural flagstone, irregular slate, or warm-toned concrete pavers with simple borders. Avoid very geometric or highly polished surfaces. Earthy reds, warm grays, and mossy greens in the plantings tie it together.
- Modern or contemporary: Large-format porcelain pavers (24x24 or 24x48), polished or honed concrete, or clean-edged rectangular stone. Charcoal, white, and light gray palettes with minimal joint width. Linear patterns run in one direction for a clean look.
- Mediterranean or Spanish Colonial: Terra cotta tile, Saltillo tile, travertine, or warm-toned concrete pavers in a running or diagonal pattern. Warm sand, rust, and cream palettes. Curved edges and decorative tile insets work well.
- Farmhouse or cottage: Tumbled bluestone, irregular fieldstone, or warm wood-tone composite decking. Natural, worn-looking textures. Mix materials purposefully: a flagstone patio edging into wood deck steps feels organic and intentional.
- Transitional (the most common U.S. home style): Concrete pavers in a clean rectangle pattern, medium gray or warm beige tones, simple straight edge restraints with a decorative border course. Nearly universally compatible and the easiest to resell with.
Color palette tip: pull a color from your house's exterior (brick color, siding tone, trim color) and use it as your anchor. The patio material doesn't need to match exactly, but it should not compete. When in doubt, go neutral on the patio and add color through furniture, cushions, and plantings, all of which are easy to change later.
Materials comparison: what to build it from
Material choice is where most homeowners spend the most time, and rightly so. It affects upfront cost, long-term maintenance, how the patio performs in your climate, and whether your DIY skills are up to the task. Here's an honest breakdown of every major option.
| Material | Installed Cost (2026, /ft²) | Durability | Maintenance | DIY Difficulty | Best For |
|---|---|---|---|---|---|
| Poured Concrete | $5–$16 | High if properly jointed; prone to cracking without control joints | Low; reseal every 2–3 years; crack repair as needed | Moderate (requires forms, mix management, finishing) | Budget builds, clean modern look, large flat areas |
| Concrete Pavers (Interlocking) | $10–$30 | Very high; individual units replaceable | Low–Medium; re-sand joints every few years, re-level settled areas | Moderate–High (base prep is labor-intensive) | Most climates, DIY-friendly surface once base is set |
| Natural Stone (Flagstone/Bluestone/Travertine) | $15–$45 | Very high if properly set; irregular flagstone can shift | Medium; seal stone annually or biannually; re-mortar joints | High (cutting, irregular fitting, mortar work) | Premium look, unique character, long-term investment |
| Wood Decking (at-grade) | $8–$25 | Medium; rot and insect risk without proper ventilation and treatment | High; annual sealing or staining, board replacement over time | Moderate (framing skills needed) | Warm aesthetic, raised or ground-level transitions |
| Composite Decking | $15–$50 | High; resistant to rot, insects, and fading | Very Low; occasional washing only | Moderate (same as wood framing) | Low-maintenance priority, families with kids or pets |
| Porcelain Tile/Pavers (2cm) | $15–$40 | Very high; resistant to staining, frost (if rated), and UV | Very Low; wash with mild detergent | High (precise base, grout management, cutting) | Modern aesthetics, pool surrounds, covered patios |
Base and subbase requirements by material
No matter how beautiful your surface material is, it will fail without the right base underneath it. This is the single most overlooked part of a DIY patio project. Here's what each material requires.
For interlocking concrete pavers, the Interlocking Concrete Pavement Institute (ICPI) prescribes a minimum compacted aggregate base of 4 inches for pedestrian patios and walkways, increasing to 6 inches for residential driveways and 8-12 inches for areas with heavy vehicular use. In frost-affected regions or on poor subgrades, increase base depth accordingly. On top of the aggregate base goes a uniform 1-inch bedding layer of coarse concrete sand (ASTM C33), screeded level before placing pavers. Never make the bedding layer thicker than 1 inch: a thicker sand layer compresses unevenly under traffic and causes settling. Edge restraints are mandatory per ICPI technical specs: manufactured plastic or concrete restraints with a minimum 1-inch vertical restraining surface against the paver edge, anchored into the base. Missing or inadequate edge restraints are the leading cause of pavers spreading laterally over time.
For poured concrete, the standard residential detail is a 4-inch slab on grade for pedestrian use, with an air-entrained mix in any climate that sees freeze-thaw cycles. Control joints must be cut to a depth of at least 1/4 of the slab thickness (1 inch for a 4-inch slab) and should be sawed within 4-12 hours of pour completion (before 24 hours at the latest, per ACI guidance) to control where shrinkage cracks form. Spacing rule of thumb: joint spacing in feet equals 2-3 times the slab thickness in inches. Concrete control joint spacing guidance (practical rule; ACI 302.1R cited), RemodelCalculators Concrete control joint spacing guidance (practical rule; ACI 302.1R cited) — RemodelCalculators. For a 4-inch slab, cut joints every 8-12 feet, keeping panels roughly square. Skipping or spacing joints too far apart is why so many concrete patios develop random cracks within the first few winters.
For porcelain pavers (2cm thick), a rigid mortar bed over a concrete substrate is standard for most residential applications. Outdoor porcelain intended for wet pedestrian use must meet ANSI A137.1 and ANSI A326.3 standards; check the product's technical data sheet for a reported DCOF (dynamic coefficient of friction) value suitable for wet exterior use. Using interior-grade tile outdoors, or using porcelain without checking freeze-thaw ratings in cold climates, is a common and expensive mistake.
Construction overview: DIY vs. hiring a contractor
The key project stages
- Site prep: Mark layout with stakes and string lines. Call 811 (national one-call service) to have underground utilities marked before any digging. Excavate to the required depth: for a 4-inch paver patio with a 4-inch base and 1-inch sand, you're removing about 9-10 inches of soil. Remove all organic material from the subgrade.
- Subgrade compaction: Compact the native subgrade with a plate compactor before adding any base material. This step is skipped by most DIYers and causes settling later.
- Base installation: Install compacted aggregate base in 2-3 inch lifts, compacting each lift. Do not pour the full base depth at once without compacting in layers.
- Bedding layer (pavers) or forms and reinforcement (concrete): For pavers, screed the 1-inch sand layer flat. For concrete, set forms at the correct slope (minimum 2% away from the house), add wire mesh or rebar if desired, then pour.
- Surface installation: Lay pavers to pattern, or pour and finish concrete. For pavers, work from one corner and maintain consistent joint spacing. For concrete, work quickly after the pour and address finishing before the surface sets.
- Edging and restraints: Install edge restraints for pavers immediately after laying the field. For concrete, remove forms once the slab can support itself (typically 24-48 hours) and backfill edges.
- Joint filling: For pavers, sweep polymeric sand into joints and compact lightly. Follow the manufacturer's wetting instructions exactly: most polymeric sands require a fine mist to activate the binder without washing it out.
- Drainage and grading check: Verify slope with a level after installation. Water should sheet off the surface away from the house at a minimum 2% grade.
- Finishing: Install any border plantings, landscape edging, lighting, or step transitions.
Realistic time and skill estimates
A 200 ft² paver patio built by two capable DIYers working most weekends will typically take two to three full weekends including material delivery, excavation, base work, laying, and finishing. The base work is the most physically demanding part. Renting a plate compactor ($60-90/day) and a laser level ($40-60/day) is worth every penny. A professional crew of three experienced installers can complete the same project in two to three days. The time gap is significant: if you need the patio done by a specific date, factor this in.
Common pitfalls to avoid
- Insufficient base depth: Going shallow to save time is the single most reliable predictor of future failure. Follow ICPI minimums at a minimum; add depth in frost-prone or clay-heavy soils.
- Skipping subgrade compaction: Compacting only the aggregate base while leaving the native soil loose creates a false sense of stability. The subgrade compresses under load and the whole system settles.
- Wrong sand in the bedding layer: Using masonry sand (fine) instead of coarse concrete sand (ASTM C33) in the paver bedding layer causes rutting. The grain size matters.
- No edge restraints: Pavers without edge restraints will migrate laterally within a few freeze-thaw cycles, no matter how tightly they were set initially.
- Control joints too far apart on concrete: Random cracking is almost always the result of joints spaced too widely or cut too late after pouring.
- Slope toward the house: Always verify grade direction before and after installation. Water running toward a foundation causes long-term damage that costs far more to fix than getting the slope right during construction.
- Using porcelain tile without checking freeze-thaw ratings: Not all porcelain is rated for outdoor use in freeze-thaw climates. Check the product's water absorption rating and manufacturer outdoor/frost rating before purchasing.
Permits, codes, drainage, and site prep
When do you need a permit?
Permit requirements vary significantly by jurisdiction and there is no universal rule. Some municipalities waive building permits entirely for uncovered patios that don't constitute a structure. Others require permits when a patio changes impervious surface coverage beyond a certain threshold, when the project includes electrical work (outdoor lighting, outlets) or plumbing (outdoor kitchen, irrigation), when a retaining wall exceeds 3 feet in height, or when land disturbance exceeds 2,500 square feet. Covered patios (pergolas with solid roofs, screened enclosures) almost universally require permits. The only reliable way to know your specific requirements is to contact your local building or zoning department directly before starting design work. Getting a permit retroactively, or worse having unpermitted work flagged during a home sale, is significantly more expensive and stressful than getting it right up front.
Grading and drainage requirements
The IRC requires that ground adjacent to a foundation slope at least 5% (1 inch per 20 inches) for the first 10 feet away from the structure. Any impervious patio surface within that 10-foot zone must slope a minimum of 2% (1/4 inch per foot) away from the building. These aren't suggestions; they're minimum code requirements intended to prevent water from pooling against your foundation. In practice, 2% is the floor, and 3-4% is more forgiving to construct accurately.
If your site has significant slope, poor drainage, or clay soils, consider installing a French drain or channel drain at the low edge of the patio to capture runoff and route it away from the structure and property boundaries. If you're interested in reducing stormwater runoff, Permeable Interlocking Concrete Pavement (PICP) is a legitimate option: it uses an open-graded reservoir base sized for expected runoff, and when subgrade infiltration is limited, an underdrain is added. The design standard is ASCE/ICPI 68-18. The U.S. EPA also endorses permeable pavement systems as a green infrastructure strategy for reducing stormwater volume and pollutant load, though site conditions (soil type, proximity to contamination sources, maintenance capacity) need to be evaluated before committing to a permeable system.
Site prep checklist before you break ground
- Call 811 at least three business days before digging to have underground utilities located and marked at no cost.
- Check FEMA's Flood Map Service Center to confirm whether your property or the project area is in a Special Flood Hazard Area.
- Look up your parcel on the USDA NRCS Web Soil Survey to understand soil drainage class, hydrologic group, and frost susceptibility before finalizing base depth.
- Verify your local permit requirements with the building/zoning department, including any impervious surface limits or stormwater management triggers.
- Check setback requirements: most municipalities prohibit structures (and sometimes paved surfaces) within a minimum distance of property lines, easements, or utilities.
- Test existing grade with a long level and stakes. Identify where water currently flows and confirm your new patio layout won't redirect it toward the foundation or a neighbor's property.
- Identify tree roots within the excavation zone. Large root systems near paving surfaces will heave pavers or crack concrete over time; plan layout or material choice accordingly.
- If the project involves significant grading or a retaining wall, verify whether a geotechnical or erosion control plan is required by your municipality.
Cost estimating and sample quote breakdown
Professional estimators use databases like blank" rel="noopener noreferrer">RSMeans (Gordian) to build line-item unit costs for concrete, masonry, paving, and labor, adjusted by local market factors. You don't need access to RSMeans to build a reasonable budget, but understanding how professional quotes are structured helps you evaluate what you're being charged for and catch omissions. For detailed local quote examples and how to compare contractor bids, the patio quote example resource on this site walks through a real line-item breakdown. Here's a representative cost structure for a 300 ft² concrete paver patio installed professionally in a mid-cost U.S. market in 2026.
| Line Item | Unit | Qty | Est. Unit Cost | Est. Total |
|---|---|---|---|---|
| Excavation and disposal (8 in. depth) | ft² | 300 | $1.50–$2.50 | $450–$750 |
| Compacted aggregate base (4 in., delivered and installed) | ft² | 300 | $2.00–$3.50 | $600–$1,050 |
| ASTM C33 bedding sand (1 in.) | ft² | 300 | $0.50–$1.00 | $150–$300 |
| Concrete pavers (mid-grade, installed) | ft² | 300 | $8.00–$14.00 | $2,400–$4,200 |
| Edge restraints and spikes | ln ft | 70 | $1.50–$3.00 | $105–$210 |
| Polymeric sand (joint fill) | ft² | 300 | $0.50–$1.00 | $150–$300 |
| Permits and inspections | lump sum | 1 | $100–$400 | $100–$400 |
| Drainage (basic slope grading; no French drain) | lump sum | 1 | $0–$500 | $0–$500 |
| Total estimated range | $3,955–$7,710 |
A few things this table illustrates: excavation and base work together often represent 30-40% of total project cost. That's the part homeowners most often underestimate when comparing material prices alone. Regional labor rates, soil conditions, material availability, and project complexity all shift these numbers. The Homewyse mid-tier benchmark for brick paver patio installation runs approximately $20-$26/ft² installed, which aligns with the mid-to-upper range of the table above. Always get at least three itemized quotes from licensed local contractors and ask each one to specify base depth, material spec, and drainage plan. A quote that looks cheap because it omits base work is not actually cheap.
Finding and vetting local contractors
Getting a quote is easy. Getting a good quote from a contractor who will actually show up, do the work correctly, and stand behind it requires a bit more effort. Ask for proof of license and insurance (general liability and workers' comp) before discussing price. Ask for two or three references from patio projects completed in the past 18 months and actually call them. Ask each contractor to specify base depth, edge restraint type, material brand and spec, drainage plan, and warranty terms in writing. Vague quotes that list only a total price and a material category are red flags. The construction guide section of this site covers specific stages and what to expect at each phase of a professionally managed project, which helps you have informed conversations with contractors before signing anything.
Finishing touches that make the patio actually livable
The hardscape is the foundation, but the finishing details are what transform a paved surface into a space people want to spend time in. Start with lighting: low-voltage LED path lights along the patio perimeter, recessed step lights if you have level changes, and string lights or overhead pendant fixtures for ambient evening light are all straightforward DIY additions that dramatically change how the space feels after dark. Landscape edging between the patio and lawn or planting beds prevents grass encroachment into joints and defines the space visually. A simple steel or aluminum edging strip, set flush with the patio surface, handles this cleanly. For privacy, fast-growing screening shrubs (arborvitae, holly, ornamental grasses for lower screening) planted along the patio perimeter in the first season will establish significant privacy within two to three years at a fraction of the cost of a fence. Furniture selection should happen before construction is complete: knowing your table footprint and chair clearance helps you verify the layout is right before the concrete sets.
Maintenance and troubleshooting
Patios are low maintenance, not no maintenance. Here's what each material type needs and what to do when things go wrong.
| Material | Annual Maintenance | Common Problem | Fix |
|---|---|---|---|
| Concrete pavers | Sweep polymeric sand into joints as needed; wash surface | Settled or shifted pavers | Remove affected pavers, re-level base or sand layer, reset |
| Concrete pavers | Reseal if desired (every 3–5 years) | Weed growth in joints | Apply polymeric sand; herbicide treatment for existing growth |
| Poured concrete | Reseal every 2–3 years; inspect control joints | Random cracking | Route and seal crack; for structural cracks, consult a pro |
| Natural stone | Reseal annually (porous stone); check mortar joints biannually | Efflorescence (white residue) | Clean with diluted masonry acid wash; improve drainage |
| Wood decking | Clean and restain or reseal annually; inspect for rot and loose fasteners | Boards warping or rotting | Replace individual boards; improve drainage and ventilation under deck |
| Composite decking | Wash with mild soap and water twice yearly | Staining or mold in shaded areas | Clean with composite-specific cleaner; trim shade sources if possible |
| Porcelain tile/pavers | Wash with mild detergent; inspect grout lines annually | Cracked tile | Replace individual tile; check base for settling |
For paver patios specifically, the most common long-term issue is localized settling: a small section sinks or rocks. The fix is straightforward if you catch it early: pull the affected pavers (they lift out without tools if edge restraints are intact), add or re-level the sand bed, and reset the pavers. Polymeric sand re-treatment every three to five years keeps joints stable and weed-resistant. For concrete patios, the most important ongoing task is keeping control joints clean and sealed so water doesn't infiltrate and freeze, expanding the crack. A tube of self-leveling polyurethane joint sealant applied every two to three years handles this in an afternoon.
If you're planning a project in a specific region, local building departments, climate conditions, and contractor availability all shape what a realistic patio design and build looks like in practice. See the Toledo patio guide for local building department contacts, climate-specific material advice, and contractor recommendations. The regional guides on this site, including the Toledo patio guide and the Cap Times patio guide, offer location-specific context on codes, climate considerations, and contractor landscape that generic national guides can't capture. Whatever your starting point, a patio project planned carefully from site assessment through finishing touches will deliver years of use, and this guide gives you the framework to get there without the common and expensive mistakes.
FAQ
What primary authoritative data sources and standards should I consult when creating a comprehensive patio design & planning guide?
Key authoritative sources: RSMeans (Gordian) unit‑cost databases for localized installed pricing; ICPI/CMHA technical guides for interlocking paver design and base/edge restraint specs; ACI (e.g., ACI 301/302.1R) for concrete slab detailing, mix and joint practices; ASCE/ICPI standard (e.g., ASCE/ICPI 68‑18) for Permeable Interlocking Concrete Pavement design; ASTM standards for material acceptance (ASTM C936, C140, C1552); ANSI A137.1/A326.3 for exterior porcelain tile performance (DCOF); U.S. EPA guidance on permeable pavements and green infrastructure; IRC/local building code excerpts for grading, drainage and impervious‑cover rules; FEMA Flood Map Service Center for flood‑zone checks; USDA NRCS Web Soil Survey for soil and infiltration data. Use manufacturer technical data sheets (TDS) and local utility/municipal permitting resources for site‑specific requirements.
What cost benchmarks and installed‑price ranges should be included so readers can estimate patio budgets (U.S., 2026)?
Provide national installed cost ranges (labor + materials + basic base work) by finished material as benchmarks: poured concrete $5–$16/ft²; concrete pavers/interlocking $10–$30/ft²; natural stone (flagstone/bluestone/travertine) $15–$45/ft²; wood decking (at‑grade) $8–$25/ft²; composite decking $15–$50/ft²; outdoor porcelain tile/pavers (2cm) $15–$40/ft². Note these are broad ranges; cite RSMeans/Homewyse and local labor/market adjustments. Advise readers to request localized line‑item quotes and use contingency (10–20%) for unforeseen site issues.
What installation and assembly details must be specified for common patio materials?
Include minimum structural/base details per material: concrete slab‑on‑grade: typical min 4 in. thickness for pedestrian patios, air‑entrained mix in freeze‑thaw regions, sawed control joints (spacing ≈ 2–3 × slab thickness in inches); concrete pavers: compacted aggregate base (min 4 in. for pedestrian patios; 6 in. for residential driveways), 1 in. screeded bedding sand (ASTM‑spec), and mandatory edge restraints anchored to base; permeable pavers: open‑graded reservoir base sized to runoff/infiltration rates or an underdrain per ASCE/ICPI PICP design; natural stone: compacted granular base and setting bed (thin mortar or sand depending on species/finish), attention to thickness and leveling for flagstone; wood/composite at‑grade: pressure‑treated sleepers on granular base or pedestal systems, ventilation/clearance and fastening per manufacturer; porcelain pavers (2cm): pedestal or sand/aggregate installations using manufacturer’s recommended bedding and edge restraints. Highlight soil, frost, and drainage impacts on base depth and required geotechnical tests when site conditions are poor.
Which regional rules and permit triggers should homeowners check before starting a patio project?
Advise contacting the local building/land‑development department. Common permit triggers include: covered or roofed patios, electrical or plumbing work, changes to impervious surface ratios or stormwater runoff, retaining walls >3 ft, significant grading/land disturbance (varies; e.g., >2,500 ft² in some jurisdictions), and work in regulated floodplains or conservation overlays. Emphasize checking adopted local edition of the IRC for grading slopes (e.g., foundation‑adjacent slope requirements) and municipal stormwater/impervious‑cover rules. Use FEMA’s FIRM maps to determine special flood hazard areas. Provide an example list of local questions to ask permitting staff.
What site assessment data should be gathered up front and which tests are recommended?
Collect: property topography and relationship to house (distance, grade), drainage patterns, existing utilities (call 811), local frost depth, exposure (sun/wind), soil characterization (USDA NRCS WSS for preliminary soils), presence of shallow rock or high groundwater, site use (furniture, grill, planters, vehicles), and nearby trees/roots. Recommended tests: localized infiltration/percolation test for permeable systems, shallow geotechnical or soil‑bearing evaluation if soil is poor or heavy loads expected, and utility locates. Photograph and sketch existing conditions and note dimensions for preliminary layout.
What sample layout sizes and practical rules of thumb should be provided for patios?
Give sample layout sizes and use cases: 8–10 ft² per person for dining with table/chairs (6‑person table ~10 ft × 10 ft footprint = 100 ft²), 10–25 ft² per person for lounge areas, 144–225 ft² for common backyard seating + grill, 200–400 ft² for combined dining + lounging + pathway access. Layout rules: keep main circulation paths 3 ft minimum (4–5 ft comfortable), allow 6–8 ft clear between furniture and walls/railings, position dining within 6–10 ft of kitchen access for convenience. Suggest common shapes (rectangle, flagstone irregular, L‑shape against house, circular focal patio) and provide simple ASCII or image suggestions: top‑view diagrams showing dimensions and furniture placement.