
Toledo is a genuinely tough place to build a patio. You get roughly 33 inches of rain per year, 37 inches of snow, lake-effect bursts from Lake Erie, a first frost typically around mid-October, and a last frost that can hang on into late April. Below that, you're sitting on some of the most poorly drained clay-heavy soils in the Midwest. Get the foundation wrong and no amount of beautiful paver work or elegant concrete will save you from heaved slabs and crumbling edges by spring. This guide walks you through every major decision, from reading your own backyard to pulling a permit to picking the right contractor, with real numbers and Toledo-specific details at every step. For a step-by-step patio design guide tailored to Toledo conditions, see the patio design guide. See our comprehensive guide to patio construction for step-by-step details and Toledo-specific recommendations. For a locally focused walkthrough and additional Toledo-specific checklists, see the cap times patio guide.
Toledo Patio Guide: Design, Costs, Permits & DIY Steps

Why Toledo deserves its own patio guide
Generic patio guides are written for some average American yard that doesn't exist. Toledo homeowners face a specific combination of challenges that most national guides gloss over: freeze-thaw cycling that can happen dozens of times per winter, lacustrine clay soils left behind by ancient Lake Erie that drain poorly and hold frost longer than sandy or loamy soils, and lake-effect snow events that dump unexpected loads on pergola roofs and patio furniture covers. On top of that, City of Toledo permitting, stormwater rules, and Ohio building code requirements all add layers that a purely DIY-focused guide won't prepare you for. Whether you're planning a modest 10x12 concrete pad off the back door or a full outdoor living space with a fire pit and built-in seating, the decisions you make in the planning phase are what separate a patio that lasts 25 years from one that needs major repairs in five.
Toledo climate and what it means for your patio
Toledo Express Airport (NOAA station USW00094830) records show average annual precipitation of about 33 inches, average snowfall around 37 inches, and temperature swings from single digits in January to the low 90s in July. The freeze-thaw cycle is the main structural threat. Toledo typically sees its last spring frost in late April and its first fall frost around mid-October, which gives you roughly a 170-day growing season but means your patio base can go through repeated freeze-thaw events from November through March. Each cycle pushes water in and out of soil pores, and in Toledo's clay-heavy subsoils, that movement can generate significant upward pressure on any slab, paver, or footing that isn't properly isolated from the frost zone.
The frost depth for northwest Ohio typically runs 24 to 36 inches depending on soil conditions and how wet the season has been. Toledo's dominant soil series, including Hoytville, Latty, Parkhill, and Tappan, are lacustrine clay loams with seasonal high water tables that can sit within 12 to 24 inches of the surface. Saturated soil freezes more aggressively than dry soil, so frost heave is a bigger risk here than in areas with the same air temperatures but better-draining soils. Your paver base and slab subgrade need to account for this, which I'll get into in the drainage and base section.
Lake-effect snow from Lake Erie can mean localized, heavy dumps in parts of the Toledo metro, particularly on the eastern and northern edges of the city. For localized lake‑effect and weather summaries and neighborhood tree‑canopy/microclimate context, consult NWS Cleveland (regional weather summaries) and Forward Toledo / local GIS (microclimate and tree‑canopy context)%20and%20local%20GIS/Metroparks%20tree%20canopy%20datasets%20referenced%20in%20Forward%20Toledo%20materials.). Wind is also a real factor. Prevailing winds come generally from the southwest in summer (which helps with comfort) but shift northwest in winter, making an exposed northwest-facing patio feel brutal by October. If you're planning a three-season space, orienting seating away from the northwest and adding a pergola, privacy fence, or evergreen screen on that side makes a measurable difference in how much you actually use the space.
How to assess your own site before you design anything
Spend at least a week observing your yard before you draw a single line on paper. Walk the space in the morning, at midday, and in the evening. Watch where water pools after rain. Check where shade falls at different times of day. This isn't filler advice: Toledo's clay soils mean that a low spot that looks fine in July can sit in standing water from March through May. Building a patio over a poorly drained area without addressing the drainage first is the single most common and expensive mistake I see Toledo homeowners make.
Site survey checklist
- Sun exposure: note full sun, partial shade, and full shade zones at 9am, noon, and 4pm across multiple days
- Slope and grade: use a level and measuring tape or a line level to determine fall direction and percentage across your intended patio footprint
- Drainage: observe where water collects 30 minutes after a 1-inch rain event; flag those areas
- Soil type: dig a test hole 18 inches deep in the center of your intended patio area; if you hit dense clay or standing water, plan for a modified base
- Utilities: call 811 (Ohio One-Call) at least 3 business days before any digging; this is a legal requirement in Ohio and it's free
- Tree roots: identify any roots within 10 feet of your planned footprint; roots can heave pavers and compromise slab integrity over time
- Existing structures: measure setbacks from the house foundation, fences, and property lines; Toledo zoning requires minimum setbacks for accessory structures
- Access: identify how equipment and materials will reach the backyard; note gate widths (most standard residential gates are 36 to 48 inches)
- Overhead clearances: check for overhead utility lines before planning any pergola or elevated structure
- Soil survey: look up your parcel on the USDA NRCS Web Soil Survey (websoilsurvey.sc.egov.usda.gov) to identify your soil series and review drainage class and seasonal high water table depth
The 811 call is non-negotiable. Ohio One-Call connects you to all utilities with lines in your area, and they'll mark locations within 3 business days. Even a 6-inch-deep paver excavation can cut a buried cable or gas line if you skip this step. Contractors are required to call 811 before digging, but homeowners doing their own work are equally responsible under Ohio law.
Sizing and layout: how big should your patio be?
The most common complaint I hear from homeowners who built their own patio is that they built it too small. A patio that seats four adults comfortably needs a minimum of 12 by 16 feet (192 square feet) for a simple table-and-chairs setup with enough circulation room to pull chairs back without stepping off the edge. If you're adding a grill station, plan for an additional 5 by 7-foot zone. A fire pit area with four chairs needs at least a 12-foot diameter clear space. Add those zones together and you're looking at 300 to 400 square feet for a well-functioning outdoor living space, which is more than most homeowners initially budget for.
For shape, rectangular patios are the most material-efficient and the easiest to install for DIYers. L-shaped layouts work well for corner lots or for separating a dining zone from a lounge area. Curved edges add visual interest but significantly increase labor time and material waste on cut pavers or formed concrete. If you're doing this yourself, stick with straight lines for your first project. A well-executed 14-by-20 rectangle will look better than a poorly cut freeform curve.
Access matters more than most guides acknowledge. You need at least 36 inches of clear pathway from the patio to any door, and 48 inches is much more functional for carrying food, furniture, or equipment. Think about whether you want direct access from the kitchen, the living room, or both. A step down from the door threshold also needs to be planned into your grade: the finished patio surface should sit at least 1 inch below the door threshold and 6 inches below wood siding or framing to prevent water intrusion into the house.
Style inspiration and design directions that fit Toledo homes
Toledo's housing stock is diverse, ranging from late-19th-century brick Victorians in Old West End, to mid-century ranch homes in Sylvania Township, to newer construction in Perrysburg. The patio style that works best visually is generally one that echoes the materials and scale of the house. Brick homes look fantastic with tumbled brick pavers or natural clay-toned concrete pavers. Ranch homes with horizontal lines tend to work well with large-format concrete pavers or stamped concrete in a simple pattern. New construction with contemporary profiles often suits clean-edged porcelain tile on a concrete slab, though porcelain requires a well-reinforced base and is less forgiving of movement in Toledo's freeze-thaw climate.
For planting context, Toledo's native landscape includes prairie remnants, oak savannas, and wetland edges. Incorporating native plantings like switchgrass, coneflower, or black-eyed Susan around patio borders not only looks appropriate to the regional character but also aligns with stormwater best practices encouraged in Toledo-Lucas County's Forward Toledo comprehensive plan, which emphasizes reducing impervious surface runoff. A permeable paver system with planted joints or a gravel border can contribute meaningfully to stormwater management on a typical residential lot.
Popular functional layouts in Toledo yards include the classic back-door dining patio with a detached fire pit area connected by a stepping stone path, the wraparound side patio for narrow lots, and the elevated deck-to-patio combination where a wood or composite deck connects the house to a lower patio pad at grade. That last option is common on homes with a walkout basement or a split-level that puts the back door 4 to 6 feet above grade.
Material guide: what to use and when
Material choice in Toledo is not just a style question. It's a freeze-thaw durability question first, then a cost question, then an aesthetics question. Here's an honest breakdown of the main options.
| Material | Freeze-Thaw Performance | Typical Installed Cost (per sq ft) | DIY Difficulty | Best Use Case |
|---|---|---|---|---|
| Concrete pavers (ICPI-spec) | Excellent if base is correct | $15–$25 | Moderate | Most Toledo patios; versatile, repairable |
| Poured concrete (air-entrained) | Good with proper mix and curing | $8–$15 | Low-moderate (slab forming) | Large simple areas, driveways, budget projects |
| Natural stone (bluestone, limestone) | Variable; check freeze-thaw rating | $25–$45 | Moderate-high | Premium aesthetic on well-drained sites |
| Brick pavers (clay) | Good if vitrified/low absorption | $18–$30 | Moderate | Historic/traditional homes, Old West End character |
| Pressure-treated wood deck | Good with proper fasteners and stain | $20–$35 (deck) | Moderate | Elevated transition areas, limited patio budgets |
| Composite decking (Trex, TimberTech) | Excellent; low maintenance | $30–$55 (deck) | Moderate | Elevated structures, high-traffic use, low upkeep priority |
| Porcelain tile on slab | Risky without reinforced, stable slab | $30–$50 | High | Contemporary homes, covered areas only |
Concrete pavers
Concrete pavers are my top recommendation for most Toledo homeowners. When installed to ICPI standards with a properly compacted aggregate base, bedding sand, and edge restraints, they handle freeze-thaw cycling well. The key advantage over a poured slab is repairability: if a section heaves, you pull the affected pavers, re-grade the base, and re-lay them. You can't do that with a slab. The ICPI requires a minimum 6-inch compacted aggregate base for residential pedestrian applications in freeze-thaw climates, and Toledo's clay soils and high water tables often justify going to 8 inches. Never install pavers on a frozen or saturated base, as ICPI technical specs are explicit about this.
Poured concrete
A poured concrete slab is cheaper per square foot than pavers and faster to install, but it demands more from the mix and the cure. For Toledo's climate, ACI 306R (Guide to Cold Weather Concreting) recommends air-entrained concrete with 5 to 7 percent air content for freeze-thaw exposure. If you pour in weather below 50 degrees Fahrenheit, you need to protect the slab with insulated blankets and monitor curing temperature. A concrete patio poured without air entrainment in a Toledo winter will spall within a few seasons. Specify air-entrained mix explicitly when ordering from a ready-mix supplier, not just a standard 3,500 or 4,000 PSI mix.
Natural stone
Natural stone is beautiful, and Ohio limestone has genuine regional character. The issue is that not all stone handles freeze-thaw well. Bluestone and dense sandstones perform reasonably well if they have low water absorption. Softer limestones and sandstones can flake and crack after a few Toledo winters. Always request freeze-thaw test data or a Natural Stone Institute certification before specifying natural stone for an exposed patio in this climate. It also demands a stable, well-drained base because it does not flex like a paver system.
Wood and composite decking
Wood and composite decking are structural products and fall under different code requirements than ground-level patios. They require footings, ledger connections to the house (which triggers a building permit under Ohio's Residential Code), and guard rails at specific heights. Pressure-treated lumber is viable but requires annual inspection and periodic re-staining or sealing in Toledo's wet climate. Composite decking from manufacturers like Trex or TimberTech is significantly lower maintenance, carries manufacturer warranties of 25 to 30 years, and doesn't require staining. The premium upfront cost typically pays off over 10 to 15 years compared to pressure-treated with maintenance costs factored in.
Drainage, grading, and frost protection: the unglamorous stuff that matters most
This is where Toledo patios succeed or fail. The Toledo-Lucas County Stormwater Management Standards require positive drainage away from structures, and that standard is not just a bureaucratic formality: it reflects the reality of building on flat, clay-heavy lots where water has nowhere to go quickly. Your finished patio surface needs a minimum 1 percent slope (1/8 inch per foot) away from the house foundation, with 2 percent preferred for open patio areas. That means a 12-foot-wide patio should drop at least 1.5 inches from the house edge to the outer edge.
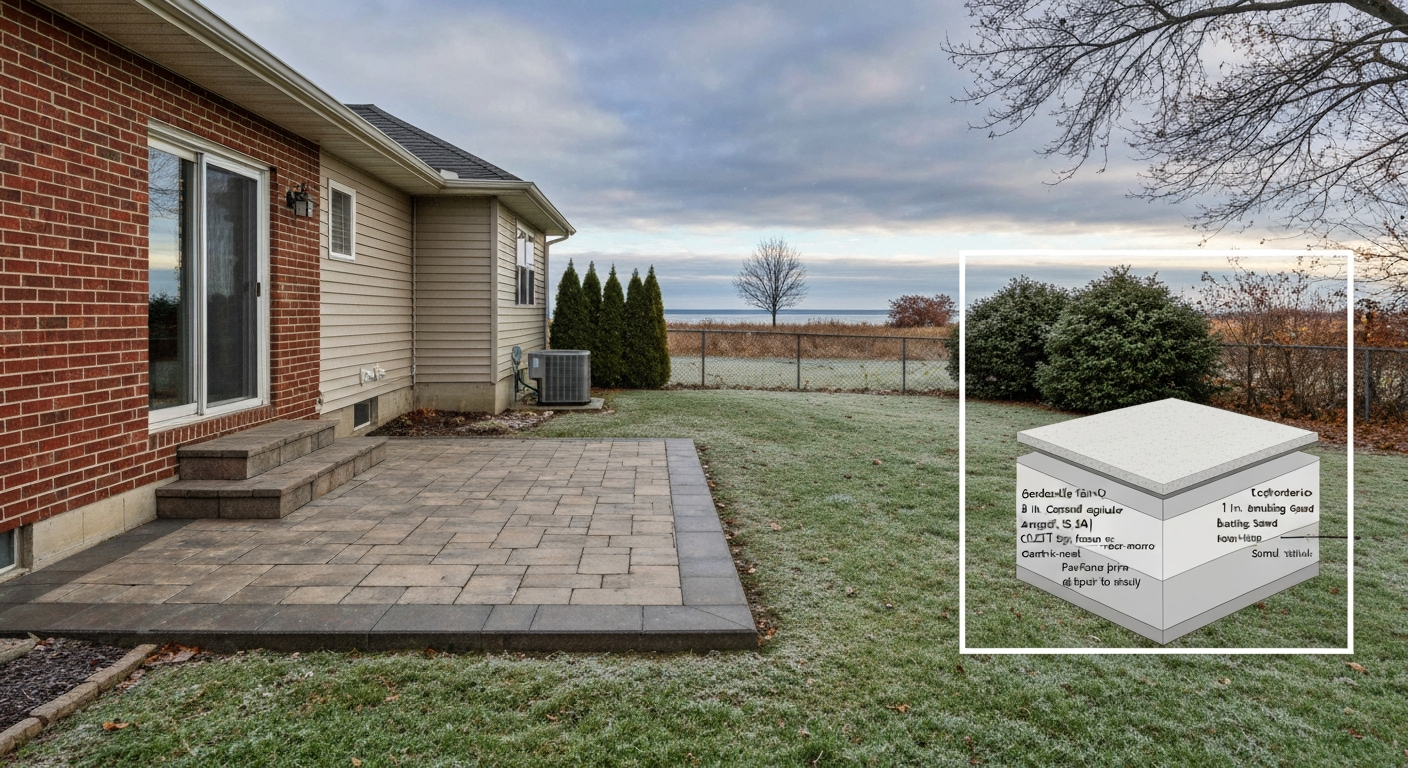
For paver patios on Toledo's clay soils, a proper base typically looks like this: excavate to 10 to 12 inches below finished grade, install a geotextile fabric on the subgrade to separate the aggregate from the clay (this prevents migration and maintains drainage over time), then compact 6 to 8 inches of angular crushed stone (ODOT No. 304 or equivalent, not pea gravel or rounded aggregate), top with 1 inch of coarse concrete sand (ASTM C33), then set pavers. Edge restraints, either spiked plastic or aluminum, go on all exposed edges before the sand bedding is placed and must be secured into the aggregate base, not into soft soil.
On the worst-draining lots (seasonal water table within 18 inches, persistent wet spots), a 4-inch perforated drain pipe wrapped in geotextile sock, running along the low edge of the patio and daylighting to a dry well or swale, can dramatically reduce frost heave and standing water. This adds cost (typically $8 to $15 per linear foot installed) but can be the difference between a patio that lasts and one that needs annual repairs.
For slab construction, the frost protection approach is different: the slab floats on a compacted gravel base and is designed to crack and move slightly, which is why control joints are cut into the slab at intervals of roughly 10 to 12 feet. A 4-inch slab minimum, reinforced with #3 rebar on 18-inch centers or fiber reinforcement, on a minimum 4-inch compacted gravel base is the baseline for Toledo residential work. Thicker slabs (5 to 6 inches) and deeper base layers (6 to 8 inches) are warranted on poorly drained sites.
Permits and code requirements in Toledo
The City of Toledo Building Inspection division enforces the Residential Code of Ohio (RCO), which references the International Residential Code. Consult the Ohio Board of Building Standards / state guidance (to confirm licensed/certified/vendor expectations) and combine that with local business registration and ICPI installer certification checks Ohio Board of Building Standards / state guidance (to confirm licensed/certified/vendor expectations) — combine with local business registration and ICPI installer certification checks. For ground-level patios (pavers or poured concrete at grade), a permit is generally not required if the patio is not attached to the house structure and does not create a covered structure. However, zoning rules still apply: setback requirements from property lines (typically 5 feet minimum for accessory hardscape in residential zones, but verify with Toledo City Planning), impervious surface coverage limits, and stormwater rules from Toledo-Lucas County's management standards.
A permit is required in Toledo for: any deck attached to the house (ledger connection), any structure with a roof (pergola with roofing material, covered patio), retaining walls over 4 feet in height (measured from bottom of footing), and electrical work such as outdoor outlets, lighting circuits, or a sub-panel for a hot tub. If your project crosses any of these thresholds, budget for permit fees (typically $75 to $200 for a simple residential permit in Toledo as of mid-2026, but confirm the current schedule with the Building Inspection office), and plan for at least one inspection visit.
Permit and safety checklist
- Call 811 at least 3 business days before any excavation
- Verify your lot's zoning district and applicable setbacks at the Toledo City Planning office or Toledo's online zoning portal
- Confirm whether your project triggers a building permit with Toledo Building Inspection (419-245-1220 or the city's online permit portal)
- Check impervious surface coverage limits for your zoning district; large patios can push a lot over the allowable impervious percentage
- If adding electrical, a licensed Ohio electrical contractor and a separate electrical permit are required
- If building an attached deck, submit structural plans including footing design, ledger connection detail, and guard rail specifications
- Confirm final inspection is scheduled and passed before removing safety barriers and fully opening the space
Step-by-step construction: DIY workflows for common patio types
Paver patio (12 x 16 feet, approximately 192 square feet)
This is the most manageable first patio project for a capable DIYer with access to a plate compactor (rent for about $75 to $125 per day in Toledo). Budget two to three weekends for a first-time project of this size. Here's how the phases break down:
- Phase 1 — Layout and utility locate (Day 1, 2 to 4 hours): Call 811 three days before. Once lines are marked, stake out your patio perimeter with batter boards and string lines. Confirm dimensions, square (3-4-5 triangle or diagonal check), and check for any grade conflicts at the house threshold.
- Phase 2 — Excavation (Day 1 to 2, 4 to 8 hours): Excavate to 10 to 12 inches below finished grade. For a 12x16 patio this means removing roughly 4 to 6 cubic yards of soil. Rent a mini-excavator ($200 to $350/day) or hire it out for this phase. Remove all topsoil and organic material. Do not leave soft spots in the subgrade.
- Phase 3 — Subgrade prep and geotextile (Day 2, 2 hours): Compact the subgrade with the plate compactor in multiple passes. Install woven geotextile fabric across the full area, overlapping seams by 12 inches and running it up the sides of the excavation.
- Phase 4 — Aggregate base (Day 2 to 3, 4 to 6 hours): Install ODOT No. 304 crushed aggregate in 3- to 4-inch lifts, compacting each lift to 95 percent Proctor density with the plate compactor. Total compacted depth: 6 to 8 inches. Check for level and slope with a long straightedge and level.
- Phase 5 — Edge restraints (Day 3, 1 to 2 hours): Install plastic or aluminum edge restraints on all sides that don't abut the house foundation, securing spikes into the compacted aggregate base at 12-inch intervals. This step is commonly skipped by DIYers and is a leading cause of paver spread and joint failure.
- Phase 6 — Bedding sand (Day 3, 2 to 3 hours): Spread 1 inch of ASTM C33 coarse concrete sand over the aggregate base. Screed to a consistent 1-inch depth using screed rails and a straight board. Do not compact the sand at this stage.
- Phase 7 — Paver installation (Day 3 to 4, 6 to 10 hours): Lay pavers from a corner, working outward. Use a string line to maintain courses. Cut pavers along edges with a wet saw or angle grinder with a diamond blade. Maintain consistent 1/16-inch joint spacing. Avoid walking on unrestrained pavers.
- Phase 8 — Compaction and jointing sand (Day 4, 2 to 3 hours): Run the plate compactor (with a rubber pad or paver protector attached) over the full surface in two perpendicular passes. Sweep polymeric sand (not regular playground sand) into joints, then compact once more, then sweep and blow off excess. Lightly mist with water to activate the polymeric binder.
Common errors to avoid: using pea gravel or rounded aggregate instead of angular crushed stone (rounds don't lock together and the base shifts), skipping the geotextile on clay soil (clay migrates up into the base over time), using regular sand in joints instead of polymeric sand (regular sand washes out and allows weed growth), and failing to install edge restraints on all free edges.
Poured concrete patio (12 x 16 feet)
- Phase 1 — Layout, locate, and permits (Day 1, 2 to 4 hours): Same 811 process as above. Confirm no permit is required for your specific project with Toledo Building Inspection.
- Phase 2 — Excavation (Day 1 to 2, 3 to 6 hours): Excavate 8 to 10 inches below finished grade. Remove all topsoil. Compact subgrade.
- Phase 3 — Gravel base (Day 2, 3 to 4 hours): Install 4 to 6 inches of compacted #57 or #304 stone. Check slope (minimum 1 percent away from house).
- Phase 4 — Form setting (Day 2, 2 to 4 hours): Set 2x4 or 2x6 lumber forms at finished grade elevation. Stake forms every 2 feet. Check for level and slope. Oil forms lightly for removal.
- Phase 5 — Rebar (Day 3, 1 to 2 hours): Place #3 rebar on 18-inch grid, supported 1.5 inches off the gravel with rebar chairs. Tie intersections with wire.
- Phase 6 — Concrete pour (Day 3, 2 to 4 hours for placement, requires a crew of 3 to 4 people): Order air-entrained 4,000 PSI concrete from a Toledo ready-mix supplier. Specify 5 to 7 percent air entrainment for freeze-thaw exposure. Do not pour if air temperature is below 40 degrees Fahrenheit or if base is frozen. Strike off, bull float, and edge immediately. Wait for bleed water to disappear before finishing.
- Phase 7 — Finishing and control joints (Day 3, 2 to 4 hours): Finish surface with a broom finish (provides traction). Cut control joints with a grooving tool or early-entry saw at 10- to 12-foot intervals in both directions. Control joints must be at least one-quarter the slab depth (1 inch for a 4-inch slab).
- Phase 8 — Curing (Days 4 through 10, passive): Apply a chemical curing compound immediately after finishing, or wet-cure by covering with burlap and keeping moist for 7 days. Do not allow pedestrian traffic for 48 hours, vehicle traffic for 7 days. In cold weather, maintain slab temperature above 50 degrees for a minimum of 5 days per ACI 306R guidance.
Common errors to avoid: ordering standard mix without specifying air entrainment (spalling follows within 2 to 3 winters), pouring on a frozen or wet subgrade, finishing the surface while bleed water is still present (this weakens the surface layer and leads to scaling), and skipping control joints or cutting them too shallow.
Cost breakdown and sample patio quote
Costs below are based on mid-2026 regional pricing for the Toledo metro area, drawing on typical contractor bids and regional construction cost data for northwest Ohio. Your actual quote will vary based on site conditions, material selection, and market demand. The sample below covers a 12-by-16-foot (192 square foot) concrete paver patio with basic drainage, professionally installed. See a patio quote example for the 12-by-16 paver patio below.
| Line Item | Unit | Quantity | Unit Price | Total |
|---|---|---|---|---|
| Mobilization and layout | lump sum | 1 | $250 | $250 |
| Utility locate (811) | lump sum | 1 | $0 (required, free) | $0 |
| Excavation and soil disposal (10 in. depth) | sq ft | 192 | $3.50 | $672 |
| Woven geotextile fabric | sq ft | 220 | $0.45 | $99 |
| ODOT No. 304 aggregate base (8 in. compacted) | ton | 7 | $38 | $266 |
| ASTM C33 bedding sand (1 in.) | ton | 1.5 | $45 | $68 |
| Concrete pavers (standard 4x8, including cuts) | sq ft | 210 | $6.50 | $1,365 |
| Polymeric jointing sand | bag | 8 | $28 | $224 |
| Plastic edge restraint with spikes | linear ft | 55 | $3.25 | $179 |
| Perforated drain with geotextile sock (along low edge) | linear ft | 16 | $12 | $192 |
| Labor (installation, 2-person crew) | hours | 18 | $75 | $1,350 |
| Equipment rental / depreciation | lump sum | 1 | $300 | $300 |
| Permit fee (if applicable) | lump sum | 1 | $0–$150 | $0–$150 |
| TOTAL (excluding permit) | $4,965–$5,115 |
For comparison, a poured concrete version of the same 192-square-foot patio typically runs $2,500 to $4,000 professionally installed, depending on finish type and site conditions. Stamped concrete adds $4 to $8 per square foot over plain broom finish. DIY on a paver patio can cut the labor cost significantly, but materials alone for a properly built paver patio will run $1,800 to $2,500 before equipment rental. Getting three competitive written bids from Toledo-area contractors is the best way to calibrate any sample quote to your actual project and current market rates.
DIY vs. contractor: how to decide honestly
DIY makes sense for paver patios and ground-level concrete pads when you have a reasonably flat site with adequate drainage, you can rent equipment, you have 3 to 4 free weekends, and you're comfortable with physical labor and reading a level. It does not make sense when you have significant grade changes (over 12 inches across the patio area), a severely poorly drained lot, any structural elements (attached deck, retaining wall over 3 feet), or electrical work involved. The risk of doing drainage or structural work wrong in Toledo's climate is high enough that the money saved on labor can easily be wiped out by a failed base or heaved slab within five years.
How to vet Toledo patio contractors
- Verify current Ohio Secretary of State business registration at OhioBusinessCentral.gov
- Confirm the contractor holds a valid City of Toledo contractor registration (required for permitted work) — check with Toledo Building Inspection
- Ask for a current Certificate of Insurance showing General Liability (minimum $1 million per occurrence) and Workers' Compensation coverage; verify the policy is active by calling the insurer
- Ask whether the installer holds ICPI (Interlocking Concrete Pavement Institute) certification for paver work — not universal but indicates formal training
- Check Ohio Better Business Bureau (toledo.bbb.org) and Google reviews; look for patterns in complaints about drainage failures or warranty non-response
- Require a detailed written scope of work including: exact materials with manufacturer and spec, base depth and method, drainage provisions, edge restraint spec, and warranty terms
- Require a written change-order clause so any scope changes are documented and priced before work proceeds
- Do not pay more than 10 to 30 percent upfront; final payment should follow your inspection of the completed work
Seasonal maintenance for Toledo's climate
A well-built patio in Toledo needs modest but consistent maintenance to last. The freeze-thaw season creates the most stress, and how you treat the surface in winter has a direct effect on long-term durability.
Spring (March to May)
Walk the full patio after the last hard frost (typically by mid-April in Toledo) and look for: raised or sunken pavers, cracked slab sections, joint sand washout, and any edge restraint failures or shifted borders. Minor paver settling can be corrected by lifting affected units, adding or removing bedding sand, and re-laying. Top up polymeric sand in any joints that have lost material, as this is the primary defense against weeds and ant intrusion. Spring is also the right time to clean the surface with a light detergent wash before deciding on sealing.
Summer (June to August)
If you plan to seal pavers or concrete, late spring or early summer is ideal: the surface needs to be dry and above 50 degrees Fahrenheit. For concrete pavers, ICPI recommends a penetrating sealant every 3 to 5 years rather than a film-forming sealer, which can trap moisture and peel in freeze-thaw conditions. For poured concrete, a penetrating silane-siloxane sealer applied every 2 to 3 years significantly reduces moisture absorption and extends surface life in Toledo's climate.
Fall and winter (September to February)
Deicer selection matters enormously. Avoid rock salt (sodium chloride) on concrete pavers, poured concrete, and natural stone: it accelerates freeze-thaw spalling and damages joint sand. ICPI guidance and most paver manufacturers recommend calcium chloride or magnesium chloride-based deicers as less damaging alternatives, and sand or fine grit for traction on pavers. Even with safer deicers, rinse the surface thoroughly in early spring to remove residue. Keep drains and drain outlets clear of leaves before winter sets in, as blocked drainage is a leading cause of ponding ice and frost damage on patio edges.
Pulling it all together for your Toledo project
The throughline in everything above is that Toledo's clay soils, high water tables, and freeze-thaw cycles are manageable, but only if you design for them from the start. A thicker base, proper geotextile, adequate slope, and the right deicer choices aren't overbuilding: they're the minimum for a patio that still looks good a decade from now. Whether you're taking the full DIY route or hiring a contractor, the planning steps are the same. Observe your site, locate your utilities, understand your soil, size the space for how you'll actually use it, and get the drainage right before you think about which paver color matches your house. The rest, from material selection to style choices, is much more forgiving once the foundation is solid.
FAQ
What climate and freeze/thaw data should be researched for Toledo and where to get it?
Obtain local climate normals, monthly temps, precipitation, snowfall, and first/last frost dates from NOAA/NCEI and the NWS (Toledo Express AP station via NWS Cleveland/NCEI summaries) to quantify freeze/thaw exposure and seasonal windows for work and material selection.
Which soil and groundwater information is essential and which sources provide it?
Use USDA NRCS Web Soil Survey and local NRCS/Soil Conservation District maps and ecological site descriptions to identify local soil series, clay content, permeability, seasonal high water tables, and areas with poor drainage that affect base depth, underdrains, and frost‑heave risk.
What local stormwater and impervious‑surface rules must be checked?
Review the Toledo‑Lucas County Stormwater Management Standards Manual and city planning documents (Forward Toledo) to learn required positive drainage, BMPs, impervious limits, and any incentives/requirements for permeable surfaces or runoff mitigation.
Which local building, zoning and permit rules are needed for patios in Toledo?
Verify municipal code and permitting triggers with the City of Toledo Building Inspection/Permitting office and the City Code (adopted State building codes). Confirm when permits/inspections are required, permit fees, and submittal requirements under the Residential Code of Ohio/OBC references.
What cold‑weather concrete and paver installation standards should be consulted?
Consult ACI guidance for cold‑weather concreting (ACI 306R) and ICPI/permeable interlocking pavement guides for pavers (manufacturer or ICPI specs) to set mix, air‑entrainment, curing, base preparation, and installation timing in freeze‑thaw climates.
Which manufacturer and industry installation/maintenance documents are required for material recommendations?
Collect installation and maintenance literature from ICPI, PCA/ACI, Natural Stone Institute, and decking manufacturers (e.g., Trex, TimberTech) to cite freeze‑thaw ratings, deicer compatibility, recommended clearances, drainage, and maintenance intervals for chosen materials.