
A patio guide worth following starts with one honest truth: the gap between a patio you love and one that cracks, floods, or costs twice what you expected comes down almost entirely to planning. Whether you are laying 120 square feet of concrete pavers yourself over a weekend or hiring a contractor to build a 600-square-foot natural stone outdoor room, the decisions you make before a single shovel breaks ground determine how the whole project goes. This guide walks you through every step, from the first site survey to the final maintenance schedule, so you can move forward with real numbers and a clear head.
Patio Guide: Complete Planning, Materials & DIY Steps and Hiring Pros

Miles Sutton
20 Jul 2026
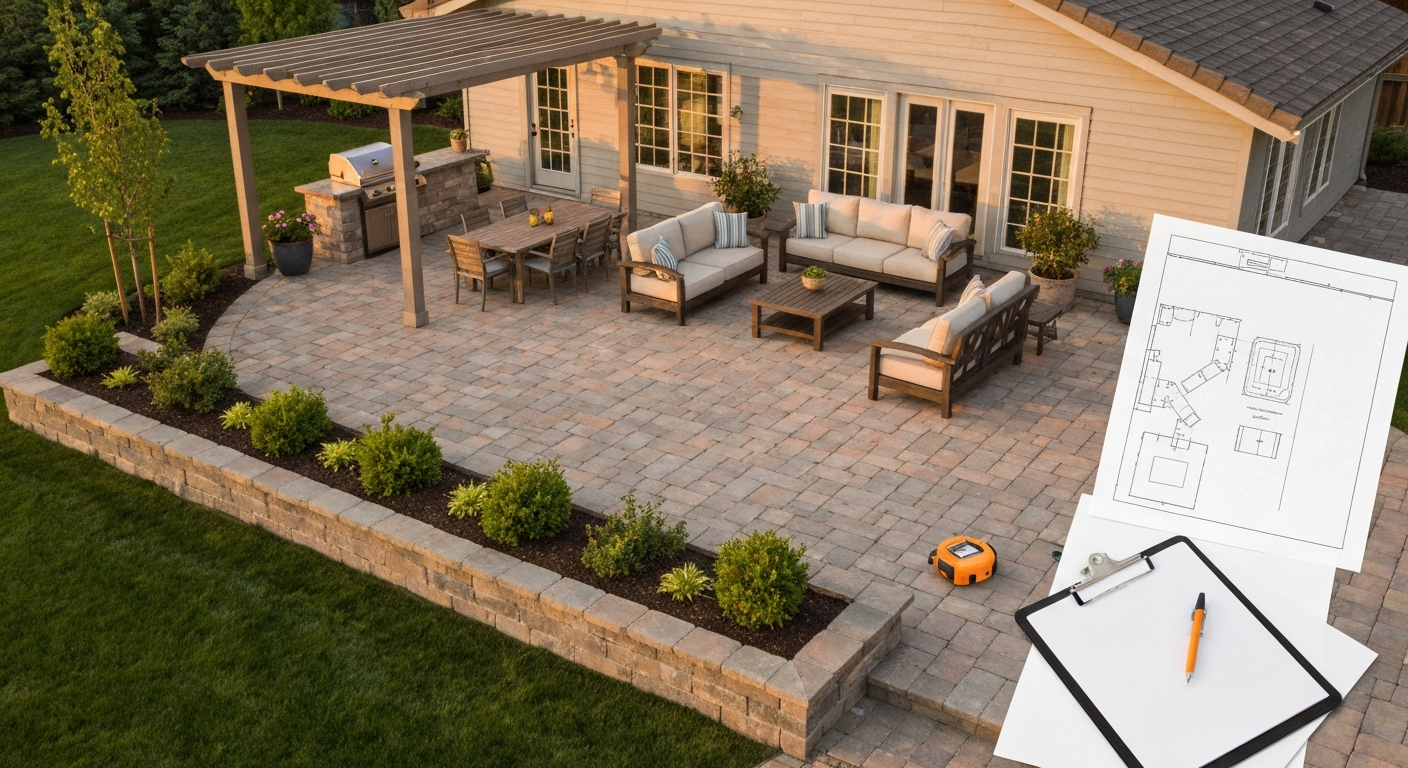
Who This Guide Is For
I built this guide for three types of people. First, the hands-on DIYer who wants a step-by-step process and enough technical detail to avoid the classic mistakes (skipped base compaction, wrong slope, no edge restraint). Second, the homeowner who is hiring a contractor but wants to understand what they are paying for so they can evaluate bids intelligently and avoid being oversold. Third, the person still deciding whether a patio or deck makes more sense, which material fits the budget, and whether a permit is needed. You do not need a construction background to follow this. I use plain language, real cost ranges, and specific measurements throughout.
The article covers initial planning and checklists, the patio-versus-deck decision, sizing and layout, material comparisons, foundations and sub-base, drainage, design principles, budgeting and sample quotes, contractor hiring, permits, safety, maintenance, and troubleshooting. Use the section headings to jump to wherever you are in the process.
Your Initial Planning Checklist
Good planning takes maybe two or three evenings and saves weeks of frustration later. Work through each item on this checklist before you contact a contractor or buy a single bag of sand.
- Define your scope and usage: Will the patio host large gatherings, a permanent grill station, a hot tub, or just a couple of chairs? Write it down. The intended use dictates size, load requirements, and base depth.
- Do a site survey: Measure the space accurately. Note any existing slopes using a long level and tape measure. Record where downspouts, AC units, and garden beds sit.
- Check soil and subgrade: Clay-heavy or consistently wet soil needs a deeper base and possibly additional drainage work. Probe a few spots with a screwdriver or rod to check for soft spots.
- Plan equipment and delivery access: A skid steer or pallet of pavers needs at least 8 to 10 feet of clear access. Tight side yards or fenced lots may limit your material choices.
- Call 811 before you dig: This is not optional. Call 811 (in the US) at least three business days before excavating. Utilities mark buried lines for free and prevent dangerous, costly accidents.
- Set a budget and a contingency: Decide on your total number, then hold back 10 to 15 percent as a contingency. Surprises underground (old concrete, high water table, root systems) are common.
- Choose your timeline: Concrete and pavers need temperatures above freezing to install and cure properly. In most of the US, late spring through early fall is ideal. Avoid scheduling around rain-heavy seasons if you can.
- Check permits and HOA rules: An on-grade patio often does not need a permit under the 2021 IRC Section R105.2, but local jurisdictions amend that baseline frequently. Adding a covered structure, exceeding impervious-surface limits, or working near a setback almost always triggers a permit requirement. Check with your building department before you start.
- Plan your drainage and runoff strategy: Where will water go when it rains? Patios must slope away from the house at a minimum of 1 to 2 percent (roughly 1/8 to 1/4 inch per foot). Plan this before laying out the design.
- Collect site photos: Photograph the existing space from multiple angles, including the house wall, yard edges, and any existing grades. These are invaluable when reviewing contractor bids or ordering materials.
Patio vs. Deck: Which One Makes Sense for Your Yard
This question comes up constantly, and the answer depends on your specific site more than personal preference. Patios sit at or near grade and are built on a prepared ground base. Decks are elevated structures built on footings and framing. Each has a real set of trade-offs.
| Factor | Patio | Deck |
|---|---|---|
| Best for | Flat or gently sloped yards (up to about 1 ft of grade change) | Sloped yards, raised entry doors, or elevated views |
| Typical installed cost | $5–$50/ft² depending on material | $15–$45/ft² for pressure-treated wood; higher for composite |
| Permit likelihood | Often exempt for on-grade slabs (IRC R105.2); check locally | Almost always requires a permit and inspections |
| Longevity | 20–50+ years for pavers/stone/concrete with proper base | 15–30 years for pressure-treated wood; 25–40 for composite |
| Maintenance | Low to moderate (sealing, joint sand, occasional repair) | Moderate to high (annual cleaning, periodic staining/sealing, board replacement) |
| DIY difficulty | Moderate: physical labor, base prep is critical | Moderate to high: requires framing, footings, structural connections |
| Drainage | Must be actively sloped or use permeable materials | Natural drainage through deck boards |
| Feel and aesthetic | Solid, grounded, integrates well with garden landscaping | Open, airy, feels elevated; better views on sloped lots |
My general recommendation: if your yard is relatively flat and you want to integrate planting beds, fire pits, or a seamless outdoor room feel, a patio almost always delivers more value per dollar. If your back door sits four feet above grade or the yard drops steeply away from the house, a deck is the more practical answer and fighting grade with fill material would likely cost more than building up.
Sizing Templates and Layout Planning
One of the most common regrets I hear from homeowners is building a patio that is too small. When you add furniture, a grill, and a few people standing around, space disappears fast. Use these standard dimensions as a starting floor, not a ceiling.
Standard Patio Size Guidelines
| Use Case | Minimum Size | Comfortable Size | Notes |
|---|---|---|---|
| Bistro table for 2 | 6 ft × 6 ft (36 sq ft) | 8 ft × 8 ft (64 sq ft) | Allow 3 ft clearance behind chairs |
| Dining table for 4–6 | 12 ft × 12 ft (144 sq ft) | 14 ft × 16 ft (224 sq ft) | Need 3 ft on all sides for chair pull-out and walkway |
| Dining + lounge combo | 16 ft × 16 ft (256 sq ft) | 20 ft × 20 ft (400 sq ft) | Most commonly recommended 'primary patio' size |
| Sofa/lounge area only | 10 ft × 12 ft (120 sq ft) | 12 ft × 16 ft (192 sq ft) | Leave 18 in. between seats and coffee table |
| Hot tub pad (6-person) | 10 ft × 10 ft (100 sq ft) | 12 ft × 14 ft (168 sq ft) | Add 3 ft service clearance on at least two sides |
| Grill station zone | 5 ft × 8 ft (40 sq ft) | 6 ft × 10 ft (60 sq ft) | Separate from primary seating by at least 5–6 ft |
Furniture Footprints and Traffic Flow
Before you finalize dimensions, sketch a rough furniture layout to scale on graph paper (or use a free app like Planner 5D or RoomSketcher). Place your largest items first: dining table, sofa grouping, or hot tub. Then work outward, leaving a minimum 36-inch walkway through any primary traffic path and at least 18 to 24 inches of clearance behind dining chairs when pulled out. Mark where your door swings, where the grill needs to sit relative to windows and overhangs, and where guests would naturally walk from the yard. That exercise usually reveals whether your initial size estimate is realistic or optimistic.
If you want a downloadable grid template to plan your layout to scale, look for printable 1/4-inch graph paper templates online and mark each square as 1 foot. Standard outdoor furniture dimensions to plan around: a 60-inch round dining table needs roughly a 10-foot-diameter clear circle; a standard 3-seat outdoor sofa is typically 84 to 96 inches wide and 36 inches deep; a rectangular 6-person dining set typically occupies a 36-by-72-inch table footprint plus chair clearance on all sides.
Design and Layout Principles
Patio Styles and Zones
Think of your patio in zones rather than as a single undifferentiated slab. A well-designed outdoor space usually has a dining zone, a lounging or conversation zone, and a utility zone (grill, storage, potting bench). Separating these with low walls, changes in material, or planting beds makes the space feel intentional and usable rather than like a parking lot.
- Contemporary/modern: Clean rectangular shapes, large-format pavers (24×24 or 24×48 inches), limited planting, neutral palette. Best paired with modern architecture.
- Traditional/formal: Symmetrical layout, brick or tumbled concrete pavers, defined borders, often centered on a focal element like a fire pit or fountain.
- Rustic/natural: Irregular flagstone, organic edges, mixed plantings between joints, wood elements. Works well on larger lots and cottage-style homes.
- Transitional: Combines clean lines with warm materials (travertine, large-format concrete tile). The most common choice for newer suburban homes.
- Multi-level: Two or more patio areas at different grades connected by steps. Excellent for sloped sites and adds visual interest.
Orientation, Sun, and Shade
A south- or west-facing patio gets the most afternoon sun, which feels great in spring and fall but brutal in July in most of the US. Before settling on a location, observe where shade falls at different times of day and in different seasons. A pergola, shade sail, or existing tree can make a west-facing patio comfortable all summer long. North-facing patios stay cool and are ideal in hot climates but can feel damp and shaded in northern states. East-facing is often the sweet spot for morning coffee spaces. Integrate your sun and shade observations into the design early rather than retrofitting a structure afterward.
Integration with the House and Yard
The patio should feel like an extension of the interior, not a separate afterthought. Match or complement the material of your home's foundation, steps, or facade. Align the patio edge with interior flooring lines where the door threshold permits. Keep the patio surface at least 6 inches below the finished floor elevation of the house to prevent water intrusion and satisfy most IRC waterproofing requirements. Where the patio meets planting areas, use a clean transition with metal or plastic edging, or a row of larger border stones.
Material Comparison: Choosing the Right Surface
Your surface material is the single biggest driver of both initial cost and long-term satisfaction. Each option below has a legitimate case for being the right choice depending on your budget, aesthetic, climate, and skill level. Here is an honest breakdown.
| Material | Installed Cost (per sq ft) | Longevity | Maintenance Level | DIY Friendly | Best For |
|---|---|---|---|---|---|
| Poured concrete | $4–$20 (basic to stamped) | 25–40 years with proper jointing | Low–moderate (seal every 2–3 yrs) | Moderate (mixing/forming requires skill) | Budget builds, clean modern look, large flat areas |
| Concrete pavers | $8–$40 | 30–50+ years | Low (reseal joints, reset settled units) | Yes (most DIY-friendly option) | Most homeowners; flexible, repairable, good drainage option |
| Natural stone/flagstone | $15–$50+ | 50–100 years | Moderate (sealing, joint maintenance) | Possible but physically demanding | High-end aesthetics, unique character, long-term investment |
| Brick | $10–$30 | 30–50+ years | Low (reset, repoint) | Yes | Traditional homes, walkway integration, classic look |
| Composite/wood decking used as patio tiles | $10–$30 | 20–30 years (composite) | Low–moderate | Yes | Rental properties, quick installs, balconies, overlay applications |
| Porcelain/ceramic tile | $15–$35 | 20–40 years outdoors | Low (grout maintenance in freeze-thaw) | Moderate | Modern aesthetic, covered or mild-climate patios |
| Gravel/decomposed granite | $1–$4 | Ongoing top-up needed | Low (raking, weed control) | Yes (easiest) | Informal areas, budget builds, permeable solutions |
| Pervious/stamped concrete | $10–$28 (stamped) | 20–35 years | Moderate (vacuuming voids, sealing) | No, professional only | Areas with stormwater constraints or decorative priority |
A Closer Look at the Top Three Choices
Concrete pavers are my default recommendation for most homeowners because they combine durability, repairability, and DIY accessibility. If a paver settles or cracks, you lift it, regrade the bedding sand, and reset it. With poured concrete, a crack typically means grinding, patching, or eventually replacing the whole slab. The ICPI (Interlocking Concrete Pavement Institute) has established the construction standard for sand-set pavers, and following it closely produces a surface that outlasts most poured slabs.
Natural stone delivers unmatched character and longevity. Properly laid Pennsylvania bluestone or Tennessee crab orchard stone will outlive the house. The trade-off is cost (often $20 to $50 per square foot installed), the physical challenge of cutting and setting irregular pieces, and the need to seal some stone types annually to prevent staining. If budget allows and you want a patio that improves with age, natural stone is worth it.
Poured concrete is the most budget-friendly option for larger areas and works beautifully with a brushed, exposed-aggregate, or stamped finish. The critical limitations are cracking over time if control joints are improperly placed or the sub-base settles, and the fact that any significant crack or heave requires professional repair. For large, flat, open areas on stable soil with a good base, poured concrete is hard to beat on value.
Foundations, Sub-Base, and Site Preparation
This is the part most DIYers underestimate. A beautiful surface on a bad base is going to heave, settle, crack, or drain poorly within a few seasons. The base is not glamorous, but getting it right is the whole job.
Excavation Depth
For a sand-set paver patio, your total excavation depth is: compacted base depth + 1-inch bedding sand + paver thickness. A standard residential patio using 2 3/8-inch pavers over a 4-inch compacted base and 1-inch sand bed requires approximately 7 to 8 inches of total excavation. In cold climates, areas with clay soils, or consistently wet ground, increase the compacted base to 6 inches, bringing total excavation to 9 to 10 inches. For a 4-inch concrete slab, excavate deep enough to accommodate 4 inches of base plus the 4-inch slab, or 8 inches total.
ICPI Base Depth Standards
ICPI Tech Spec 2 sets the industry standard for base depths. For pedestrian-only residential patios on good, stable subgrade: 4 inches of compacted aggregate base. For residential driveways: 6 inches minimum. For vehicular or light-traffic areas: 8 to 12 inches. In cold, wet, or weak-soil conditions, increase base depth by 50 to 100 percent. These are compacted depths, not loose material depths. Crushed stone typically compacts by about 20 to 25 percent, so order and install accordingly.
Sub-Base Materials and Compaction
Use a well-graded crushed aggregate base (typically referred to as crusher run, Class II base, or 3/4-inch crushed stone with fines) that compacts well and provides good drainage. Do not use rounded pea gravel or bank sand as a base material. These do not interlock under compaction and will shift. Compact the base in lifts of no more than 4 inches using a plate compactor, making at least two passes in perpendicular directions. Compact the native subgrade first before adding base material. The goal is a firm, unyielding surface that does not deflect when you walk on it.
Bedding Sand and Surface Prep for Pavers
ICPI specifies a uniform 1-inch (25 mm) screeded layer of coarse concrete sand (ASTM C33 gradation) as the bedding layer for interlocking pavers. Do not use fine masonry sand or stone dust, which retain moisture and can compress unevenly. Do not use more than 1.5 inches, as excess sand depth allows pavers to wobble and depress over time. Screed the sand flat with screed pipes set at your target elevation, pull a 2x4 across the pipes to create a smooth, consistent surface, then lay pavers without walking on the screeded sand.
Concrete Slab Construction Notes
For poured concrete patios, the IRC and ACI 302.1R set a practical minimum slab thickness of 4 inches for residential slabs on grade. Increase to 5 or 6 inches if the patio will see vehicle access or very heavy loads. Use welded wire reinforcement (6x6 W1.4xW1.4) or rebar (#3 or #4 at 18 inches on center) to limit crack width; fiber-reinforced mixes help control plastic shrinkage cracking but do not replace structural reinforcement. Reinforcement options commonly used for residential concrete patios include welded-wire reinforcement (6×6 W1.4×W1.4) or a single mat of rebar (#3 or #4 at about 18 inches on center); fiber-reinforced mixes (polypropylene or steel fibers) help control plastic-shrinkage but do not replace structural reinforcement where required How to Reinforce a Concrete Slab (industry guidance). Space contraction joints at a maximum of 24 to 36 times the slab thickness in inches, which works out to roughly 8 to 10 feet for a 4-inch slab. Sawcut joints to one-quarter slab depth as soon as the concrete is firm enough to cut without raveling, typically within 4 to 12 hours of finishing.
Slope and Grading
Every patio needs to drain. The minimum slope is 1 percent (1/8 inch per foot). The practical standard most contractors use is 2 percent (1/4 inch per foot) away from the structure. Set this slope into your base and verify it with a long level before you pour concrete or lay the first paver. A 16-foot-deep patio at 2 percent should drop 4 inches from the house edge to the outer edge. If your yard is flat, that drop has to go somewhere, so plan a drainage outlet at the low end.
Drainage Solutions and Stormwater Management
Drainage is the issue that causes the most expensive post-installation problems. Water that cannot escape will undermine your base, erode joints, flood the house foundation, and create an unusable mud zone in your yard. Plan drainage before you lay a single stone.
Surface Slope: The First Line of Defense
A 2 percent slope (1/4 inch per linear foot) away from the house is the non-negotiable baseline. This alone handles routine rainfall on most sites. Check the slope with a 4-foot level placed on a straightedge: at 2 percent, a 4-foot level should show a 1/2-inch gap at the low end when the bubble reads level. Verify this during base preparation, not after you have laid everything.
French Drains and Catch Basins
When surface slope alone is not enough (because of surrounding grade, adjacent structures, or high precipitation), a French drain or catch basin moves water underground and away from the patio. A French drain is a trench filled with gravel around a perforated pipe, installed at the patio's low edge and routed to daylight, a dry well, or a storm sewer inlet. A catch basin (also called a yard drain) is a small grated inlet set flush with the patio surface, connected to a solid pipe routed to an outlet point. Catch basins are ideal for tight enclosed spaces where a French drain trench would not have room to daylight. Both options require a clear outlet point at a lower elevation.
Permeable Paving Options
Permeable interlocking concrete pavers, pervious concrete, and porous asphalt are all recognized by the U.S. EPA as stormwater best management practices (BMPs) that allow rainfall to infiltrate directly through the surface into the ground. These systems use an open-graded structural section (a storage layer of No. 2 or No. 3 stone, a choker layer of No. 57 stone, and a No. 8 stone bedding layer) rather than compacted dense-graded aggregate and sand. ICPI Tech Spec 18 governs permeable paver systems in detail. The trade-off is ongoing maintenance: joints must be vacuumed periodically to prevent clogging with fine sediment, and permeable systems are not appropriate in areas with petroleum spills or heavy vehicle use. Where your municipality credits permeable pavement for stormwater management, it can also reduce impervious-surface restrictions on your lot, which may affect what you are allowed to build without a permit.
Troubleshooting Ponding Water
If water is pooling on your existing patio after rain, the fix depends on the cause. First, verify the surface slope: use a level to confirm the patio actually drains away from the house. If slope is adequate but ponding persists at one spot, the base under that area may have settled or compacted unevenly, creating a low point. For paver patios, this is a straightforward repair: pull the pavers in the low zone, re-grade the base, reset the pavers, and re-compact. For concrete patios, you can use a concrete grinder to remove the high spots around a depression, or apply a polymer-modified cementitious overlay to rebuild the slope. If the whole patio is draining correctly but water is backing up from the yard side, you need a catch basin or French drain at the patio's low edge to intercept yard runoff before it reaches the patio.
Budgeting, Cost Ranges, and a Sample Patio Quote
Cost is the question I get most often, and the honest answer is: it depends heavily on size, material, and site conditions. National averages from HomeAdvisor (updated June 2026) put the typical patio installation range at $2,028 to $6,088 total for a standard residential project, with per-square-foot installed costs ranging from $5 to $50 depending on material, finish, and site prep. Regional variation can shift those ranges by 20 to 40 percent: Northeast and West Coast markets run higher; South and Midwest markets run lower.
Sample Line-Item Patio Quote: 16 x 20 ft Concrete Paver Patio (320 sq ft)
| Line Item | Unit | Quantity | Unit Cost (Est.) | Total (Est.) |
|---|---|---|---|---|
| Excavation and haul-off (8 in. depth) | sq ft | 320 | $2.50 | $800 |
| Compacted aggregate base (4 in., crushed stone) | sq ft | 320 | $1.80 | $576 |
| ASTM C33 bedding sand (1 in.) | sq ft | 320 | $0.60 | $192 |
| Concrete pavers (mid-range, 2 3/8 in.) | sq ft | 352 (10% waste) | $4.50 | $1,584 |
| Polymeric joint sand | sq ft | 320 | $0.50 | $160 |
| Plastic edge restraint + spikes | ln ft | 72 | $1.25 | $90 |
| Labor (base prep, lay, compact, finish) | sq ft | 320 | $7.00 | $2,240 |
| Equipment rental (plate compactor, skid steer) | lump sum | 1 | $350 | $350 |
| Contingency (10%) | lump sum | 1 | $599 | |
| Estimated Total | $6,591 |
This estimate is illustrative and based on mid-range national unit costs. Your actual quote will vary by region, contractor, and site conditions. Use RSMeans (Gordian) unit cost data if you want to build a regionally adjusted line-item estimate for your zip code. When reviewing contractor bids, make sure each line item is spelled out rather than quoted as a single lump sum. A bid that just says '$6,500 for a paver patio' tells you nothing about what base depth you are getting, how many pavers include waste, or whether edge restraint and polymeric sand are included. Related resources on this site cover patio quote examples and what to look for in contractor proposals. See a sample patio quote example for a 16×20 paver patio to understand typical line-item pricing and inclusions. See the guide to patio construction for step-by-step tutorials and downloadable templates.
Hiring a Contractor: How to Find, Vet, and Compare Bids
Contractor Hiring Checklist
- Get at least three written bids from licensed contractors. Make sure all three are bidding on the same scope and specifications so you can compare them accurately.
- Verify the contractor's license for your state and municipality. Check their license number against your state's contractor licensing board database.
- Confirm general liability insurance (minimum $1 million per occurrence) and workers' compensation coverage. Ask for certificates of insurance naming you as an additional insured.
- Check references: ask for three recent jobs of similar type and size, then actually call them. Ask specifically whether the base prep was thorough, whether the crew showed up on schedule, and whether the final grade and drainage performed well after rain.
- Review the contract carefully: it should specify material types (paver brand, base material, bedding sand spec), base depth, slope specification, start and end dates, payment schedule, and warranty terms.
- Do not pay more than 10 to 30 percent upfront. A legitimate contractor does not need 50 percent before breaking ground.
- Confirm who pulls permits. The contractor should pull permits in their name, not ask you to do it as the homeowner.
- Ask about ICPI or manufacturer certification for paver installers. Certification indicates training to industry standards, not just general experience.
Red Flags in Contractor Bids
Be cautious of any bid that is dramatically lower than the others without a clear explanation. In most cases, the savings come from a shallower base, lower-quality materials, or skipping permits. Also watch for vague language like 'install base as needed' or 'standard installation' with no specified depth. If a contractor resists putting the base depth and material type in writing, that tells you something important.
Permits, Codes, and Local Considerations
The 2021 International Residential Code (IRC Section R105. See What Can You Build Without a Permit? (PermitDeck, summarizes IRC R105.2) for a concise summary of how IRC R105.2 treats on‑grade patios and how local jurisdictions commonly amend those exemptions What Can You Build Without a Permit? (PermitDeck — summarizes IRC R105.2). 2) commonly exempts on-grade, at-grade patios and slabs from a building permit, but this is a model code baseline that most local jurisdictions amend. Adding any kind of roof, awning, pergola attached to the house, outdoor kitchen with gas or electrical, or a structure within a setback almost always triggers a permit requirement regardless of what the IRC says. Impervious-surface limits tied to lot coverage rules in zoning codes are another common trigger: once you exceed a certain percentage of paved or covered area on your lot, you need approval. Always call your local building department before starting. The call takes ten minutes and prevents significant fines or forced removal later.
HOA rules add another layer. Many HOAs require design approval for any new hardscape, regulate material colors and styles, and set their own setback requirements that are more restrictive than local codes. Get HOA approval in writing before signing a contractor contract.
Regional guides can give you jurisdiction-specific context that a national article cannot. See the Toledo patio guide for northwest Ohio homeowners for city-specific permit info, climate considerations, and local contractor notes. For Wisconsin readers, the Cap Times patio guide is a helpful local resource for site-specific tips and permit notes (resource id 96da4267-f3d6-4bb6-9e8f-a2f0354e3dc2). Resources like local newspaper patio guides (for example, the Cap Times patio coverage for Wisconsin readers) or city-specific guides (such as a Toledo patio guide for northwest Ohio homeowners) often reflect local permit offices, climate conditions, and contractor markets that differ meaningfully from national averages.
Safety Considerations
- Gas lines for outdoor kitchens or fire pits must be run by a licensed plumber or gas fitter and inspected. Do not DIY gas connections.
- Electrical outlets, lighting circuits, and any wiring within 6 feet of a water feature must use GFCI-protected circuits and weatherproof covers per NEC requirements.
- Hot tubs and spas have specific electrical requirements (typically a dedicated 240V/50A GFCI-protected circuit with a disconnect panel within sight of the tub) and require a permit and inspection in virtually every jurisdiction.
- Patio structures attached to the house (pergolas, covered patios) must be structurally connected per code. Verify ledger connections and post-footing requirements with your building department.
- Surface slope away from the house keeps water out of the foundation and prevents ice buildup near entry doors in winter. The 2 percent minimum is both a drainage standard and a safety standard.
- Fire pits must maintain minimum clearances: typically 10 feet from structures and combustible materials for wood-burning pits. Check local fire codes and HOA rules before installation.
Lighting and Hardscape Features
Outdoor lighting extends usability into the evening hours and significantly affects how the space feels. Low-voltage LED systems are the most practical choice for most homeowners: they are safe for DIY installation, energy-efficient, and available in a wide range of fixture styles. Plan the lighting layout before the patio is built, because running conduit under a paver patio is far easier before the base is laid. Key zones to light: the perimeter edge (step lights or bollards), the dining area (overhead string lights or a pendant on a pergola), and pathways from the house to the patio.
Fire pits and fireplaces are the most requested patio feature after seating. A simple in-ground wood-burning ring can be a DIY weekend project for a few hundred dollars. A built-in gas fire pit or outdoor fireplace with a stone surround typically costs $1,500 to $10,000 installed depending on complexity and materials. Pergolas (freestanding or attached) add shade, define the space, and provide a mounting point for lights and ceiling fans. A pressure-treated wood pergola kit for a 12x16-foot span typically runs $1,200 to $3,000 in materials; a custom cedar or composite pergola with professional installation will be significantly more.
Routine Maintenance and Seasonal Care
Annual Maintenance Schedule
| Season / Timing | Task | Applies To |
|---|---|---|
| Spring (after last frost) | Inspect for heaved, cracked, or settled units; reset as needed | Pavers, stone, concrete |
| Spring | Re-apply polymeric joint sand to any depleted joints | Pavers |
| Spring | Clean surface with pressure washer (1,500–2,000 PSI max) | All hard surfaces |
| Spring | Check and clear drainage outlets, catch basins, French drain inlets | All |
| Spring/Summer | Apply sealer to natural stone or concrete if overdue (every 2–3 years typically) | Natural stone, concrete, pavers |
| Summer | Inspect grout or joint sand after heavy storms; top up if eroded | Tile, pavers |
| Fall (before first frost) | Remove organic debris (leaves, dirt) from joints to prevent weed seed germination | All |
| Fall | Drain and disconnect water features and irrigation connections to patio | Water features |
| Fall | Apply concrete sealer on stamped/decorative concrete if approaching 2-3 year interval | Stamped/decorative concrete |
| Winter | Use plastic snow shovels on pavers and stone; avoid metal blades that scratch | Pavers, natural stone, tile |
| Winter | Use sand or kitty litter for traction rather than rock salt, which damages stone and concrete | All |
Troubleshooting Common Patio Problems
| Problem | Likely Cause | Fix |
|---|---|---|
| Paver settling or low spots | Inadequate base compaction or base depth; erosion of bedding sand | Pull pavers in affected area, re-grade base, reset and compact |
| Concrete cracking | Control joints too far apart; inadequate base; temperature stress | Rout and fill cracks with polyurethane or epoxy; sawcut and add joints if needed |
| Ponding water on surface | Inadequate slope; settled low point; clogged drain | Re-grade base under pavers; install catch basin; clean or add French drain |
| Weeds in paver joints | Depleted or non-polymeric joint sand; organic debris in joints | Remove weeds, clean joints, re-apply polymeric joint sand |
| Efflorescence (white haze on pavers/concrete) | Salt migration from base materials or water | Clean with efflorescence remover; improve drainage to reduce moisture |
| Frost heave on concrete | Water in subgrade freezing and expanding | Core-drill drain holes; improve sub-base drainage; in severe cases, remove and re-build with deeper base |
| Spalling concrete surface | Freeze-thaw cycles; deicing salt damage; poor finish | Apply penetrating sealer; patch with polymer-modified mortar; avoid salt-based deicers |
Putting It All Together
A patio project done right is one of the highest-return improvements you can make to a home, both in daily enjoyment and resale value. The materials and construction standards covered here are not complicated once you understand the logic behind them: a properly compacted base prevents settling, adequate slope prevents flooding, and the right jointing prevents cracking. None of that requires a construction background. It requires patience, attention to the details that are easy to skip, and the self-awareness to know when a task (gas lines, electrical, complex grading) needs a professional. Start with the planning checklist, nail down your size and material, and build the base the way it is meant to be built. Everything else follows from that. For a step-by-step patio design guide that follows the planning checklist and construction standards above, see our detailed patio design guide.
FAQ
What primary authoritative standards and industry references must be cited to make a patio guide publication-ready?
Cite national and trade standards and technical guidance: ICPI tech specs (paver systems, bedding, permeable design), ACI/ACI 302.1R (concrete slab, jointing, reinforcement), EPA permeable pavement BMP fact sheet, RSMeans/Gordian unit-cost data for line-item estimating, and applicable model-code references (IRC R105.2) plus local municipal/agency pages for permit interpretations. Where available, reference municipal project docs or DOT guidance for local joint/edge/grade expectations. Use peer-reviewed or government sources for stormwater/drainage (EPA) and call-811 utility-location guidance for safety.
Which factual data and numeric design parameters are required for technical accuracy?
Include the following numeric values with source citations: typical base depths (ICPI: 4" compacted for pedestrian patios, 6"+ for vehicular), bedding sand depth (ICPI: 1" screeded, ASTM C33), concrete slab thickness (ACI/industry: 4" minimum for patios; 5–6" for heavier loads), control-joint spacing (ACI: ≈24–36× slab thickness; ~8–10 ft for 4" slab), recommended slope for drainage (1–2% away from structure), permeable-system layer specs (ICPI/EPA: open-graded joints, engineered storage layer), and typical installed cost ranges (industry summaries: concrete $4–$20/ft²; pavers $8–$40/ft²; natural stone $15–$50+/ft²; gravel $1–$4/ft²) with regional-variation notes.
What expert inputs should be obtained or quoted to strengthen credibility?
Obtain brief inputs or quoted guidance from: a licensed landscape architect or civil engineer (grading/drainage and stormwater best practices), an ICPI-certified paver installer or concrete contractor (installation tolerances, common failure modes), a municipal permitting official (local permit triggers and typical conditions), and a certified electrician/gas technician for lighting and fireplace connections. Use these inputs to validate tolerances, materials selection, and safety procedures; identify where local amendments override national guidance.
What step-by-step construction methods must the guide include for publication readiness?
Provide tested sequences with critical tolerances for the common patio types: 1) Concrete slab-on-grade: mark/grade, excavate to required depth, compact subgrade, place and compact base, set forms, place reinforcement/fibers if required, pour and finish concrete, sawcut control joints to 1/4 depth at prescribed timing, cure. 2) Sand-set concrete pavers: mark/grade, excavate, compact subgrade, install compacted aggregate base to specified depth, screed 1" bedding sand, lay pavers, install edge restraints, sweep polymeric sand or specify permeable joints, plate-compact. 3) Mortared or dry-laid natural stone: set compacted base or concrete slab as needed, set stones with mortar or bedding sand, check jointing and drainage. For each method list minimum equipment, typical crew-hours per 100 ft², QC checks, and troubleshooting steps for common defects.
What checklists and templates must be included for homeowner planning and contractors?
Provide: - Initial planning checklist (scope, use, site survey, slope, soil type, access, utilities locate 811, budget, timeline, permits/HOA, drainage strategy). - Site-prep checklist (stakes/strings, grade stakes, erosion control, tree/roots decision matrix). - Contractor-hiring checklist (licenses, insurance, references, written estimate format, change-order policy, lien waiver, schedule, warranty). - Permit checklist (documents to submit, drawings required, impervious-surface calculations). - Maintenance checklist and seasonal schedule. - Traffic-flow and sizing templates (common patio sizes and suggested furniture fits: 8×8 bistro, 12×12 4-person dining, 16×20 6–8 person lounging) with clearance and walkway width minimums.
What sample quote/table and line-item estimator elements are required?
Include a publication-ready sample estimate table with line items: site survey/markout, demo/excavation, hauling/disposal, subgrade compaction, crushed-aggregate base (unit depth/area), bedding sand (unit depth/area), pavers/stone/material cost (unit/ft²), edge restraint, polymeric sand or jointing, concrete pour/finishing (if applicable), reinforcement, drainage features (trench drain, catch basin, downspout tie-in), lighting (fixtures/wiring), hardscape features (fire pit, pergola foundations), labor, permits/inspections, contractor O&P, contingency (10–20%). Show sample quantities and unit prices and totals for a 200 ft² and 400 ft² patio using RSMeans-like cost lines and national typical $/ft² ranges.