
A patio top coat is a protective and decorative finish layer applied over concrete, pavers, tile, stone, wood, or composite decking to shield the surface from water, UV rays, stains, and wear. The right product can double the life of your patio, improve grip underfoot, and make colors pop, the wrong one peels within a season. Whether you are sealing a freshly poured slab, refreshing weathered pavers, or waterproofing a rooftop deck, picking the correct chemistry and prepping the surface properly are the two decisions that determine everything else.
patio top coat: Complete guide to selection, prep & care

Miles Sutton
18 Jul 2026
What a patio top coat actually is
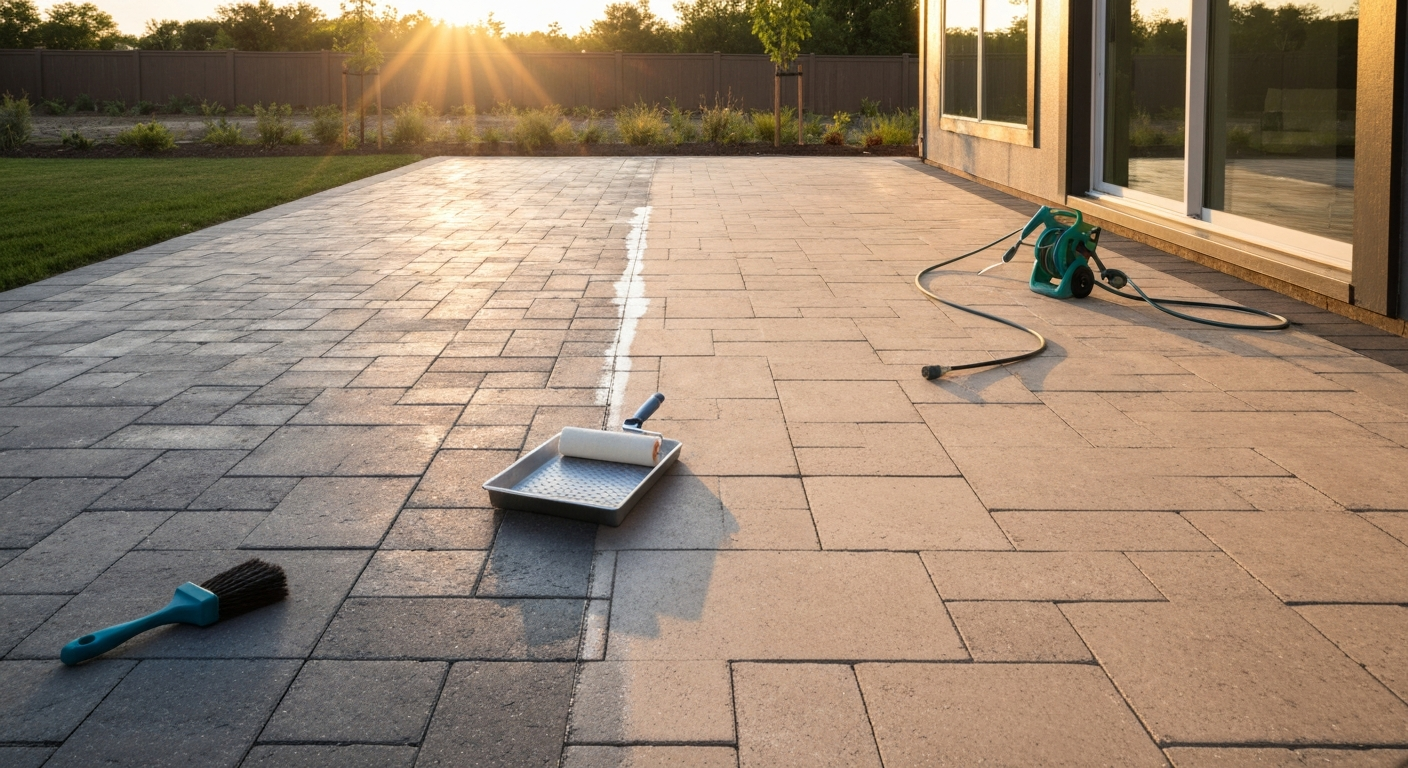
The term 'top coat' is used loosely in the patio world. Technically it refers to the final finish layer in a coating system, but homeowners and many product labels use it interchangeably with 'sealer,' 'deck coating,' or 'protective finish.' For this guide I am treating patio top coat as any product you apply over a finished patio surface to protect, enhance, or waterproof it. That broad definition covers everything from a thin penetrating water repellent on flagstone to a thick pigmented polyurethane on a rooftop deck.
Why does it matter? An uncoated concrete slab absorbs water, salts, and oils. Freeze-thaw cycles force absorbed water to expand inside the pore structure, causing spalling and surface pop-outs. UV radiation bleaches and degrades binders in wood and composite materials. A well-chosen top coat interrupts all of these failure modes, and for a surface you plan to sit on, entertain on, or sell your home above, that protection is worth every bit of the effort to apply it correctly.
The main types of patio top coats
Six chemistry families cover nearly every patio situation. They differ in film thickness, breathability, durability, and the substrates they bond to. Choosing the wrong family for your substrate or environment is the most common expensive mistake I see homeowners make.
Sealants (film-forming acrylics and urethane-modified acrylics)
Film-forming acrylics are the most widely sold patio sealers and the easiest for DIYers to apply. Water-based versions typically carry VOCs under 200 g/L and cover about 160 to 240 square feet per gallon. They dry tack-free in 30 to 60 minutes and accept foot traffic within 24 hours. They enhance color noticeably on concrete and pavers and resist mild staining. The trade-off is durability: plan to reapply every one to three years depending on sun exposure and traffic. Urethane-modified acrylic hybrids last somewhat longer and resist yellowing better than straight acrylics.
Epoxy coatings
Two-component epoxies bond hard to properly prepared concrete and deliver excellent chemical and abrasion resistance. They are the product of choice for garage floors and commercial patios where spills, heavy furniture, and foot traffic are constant. Epoxies are sensitive to moisture and temperature during application, they yellow in UV if formulated without UV stabilizers, and pot life is short at warm temperatures. Products like Sikafloor-264 FS are mixed at strict component ratios, applied within the working time window, and need mechanical surface preparation to achieve the concrete surface profile (CSP) the manufacturer specifies. Epoxies are a strong DIY stretch, not impossible, but unforgiving if you skip the prep steps.
Polyurethane top coats
Aliphatic (UV-stable) polyurethane is the go-to top coat when you need both durability and color retention outdoors. Applied as a single or two-component finish coat over primer or epoxy base coats, it resists yellowing, handles foot traffic and furniture loads well, and cleans up easily. On rooftop decks it is often specified as the final wear layer over a waterproofing membrane. Single-component moisture-cure polyurethanes exist for simpler projects but require careful humidity management during application.
Penetrating sealers (silanes and siloxanes)
Penetrating sealers do not form a surface film. They soak into the substrate pores and react chemically to repel water without changing the surface appearance much. PROSOCO Siloxane PD is a representative product: VOC under 30 g/L, coverage ranging from 50 to 200 square feet per gallon depending on substrate porosity, shelf life of one year, and a freeze point of 32°F. These products are ideal for natural stone, textured pavers, and any surface where you want water bead-off without a sheen. The important limitation: they do not fill cracks, they do not add slip resistance, and they cannot bridge surface damage. You are treating the substrate, not coating it.
Concrete stains and decorative coatings
Acid-based and water-based concrete stains penetrate the surface and create translucent color that is more durable than paint because the color is inside the slab rather than sitting on top. They are almost always finished with a sealer or top coat over the stain layer. Overlays, thin polymer-modified cement toppings, let you resurface a damaged slab and accept stamping, staining, or scoring before sealing. Specialty anti-skid coatings contain broadcast aggregate or rubber particles mixed in to target specific coefficient-of-friction requirements for ramps and pool decks. ASTM D2047‑25 Standard Test Method for Static Coefficient of Friction (ASTM store listing) is one accepted SCOF test; ADA guidance has historically recommended around 0.6 as a benchmark for accessible level walking surfaces, so specify the SCOF/DCOF method and wet-condition criteria in project specifications.
Polyaspartics
Polyaspartic coatings are a relatively newer family that cure fast (sometimes in under an hour), tolerate a wider temperature range than epoxies, and show significantly lower Taber abrasion loss (ASTM D4060) than thin acrylics in side-by-side lab tests. They are commonly used in professional floor coating systems as a single-day install. The fast cure is a double-edged sword for DIYers: working time can be as short as 20 to 30 minutes in warm weather, which requires a practiced application speed.
Real benefits worth knowing, and one caveat
Every coating product promises a list of benefits. Here is what each claim actually means in practical patio terms, and where the limits are.
- Waterproofing vs. water repellency: Film-forming coatings (epoxies, polyurethanes) physically block water penetration when intact. Penetrating sealers repel water but are vapor-permeable — important on slabs that need to breathe moisture upward. Calling either one '100% waterproof' is marketing shorthand; any crack or coating defect breaks the barrier.
- UV protection: Aliphatic polyurethanes and UV-stabilized acrylics resist fading on colored concrete and prevent degradation of wood and composite binders. Aromatic epoxies yellow within months outdoors — always confirm 'aliphatic' or 'UV-stable' in the product description for any exterior top coat.
- Slip resistance: Bare polished or wet concrete can test below SCOF 0.5. ADA guidance has historically referenced an SCOF of about 0.6 as a recommended benchmark for accessible level walking surfaces using ASTM D2047. Anti-skid additives (aluminum oxide, broadcast sand, polymer grit) mixed into the top coat or broadcast into the wet film bring COF values up. Ask your product supplier for the tested wet COF before specifying for a ramp or pool surround.
- Color enhancement: Acrylic wet-look sealers are the most dramatic — they darken and saturate concrete and paver color the way wet stone looks. Penetrating sealers produce a more natural, low-sheen effect. If you want the color to stay vivid long-term, a UV-stable top coat over the sealer is the practical solution.
- Heat and stain resistance: Epoxies and polyurethanes resist common patio stains (oils, tannins, food) far better than acrylics. Near fire pits and grills, standard acrylic sealers can soften and discolor from radiant heat — more on this in the special situations section.
- Breathability: This is the caveat most product marketing glosses over. Dense film-forming coatings on slabs in contact with soil or over a high-moisture substrate trap vapor, causing blistering and delamination. If your slab sits on grade with no vapor barrier beneath it, a penetrating sealer or a moisture-vapor-tolerant epoxy primer is the safe choice.
How to pick the right product before you buy
Five questions narrow the field fast. Work through them before comparing product labels or prices.
- What is the substrate? Concrete, pavers, natural stone, tile, wood, and composite decking each have different porosity, movement, and chemical compatibility requirements. A product that bonds beautifully to concrete may peel from a flexible composite board.
- What is the exposure level? Fully exposed south-facing patios experience extreme UV and temperature swings. Covered or shaded surfaces see less UV but may trap moisture. Rooftop decks face wind, ponding water, and thermal cycling. Match the product's rated exposure class to your actual conditions.
- Is there a heat source nearby? A fire pit, built-in grill, or chiminea raises surface and ambient temperatures significantly. Standard acrylic sealers are not rated for sustained heat. Confirm the product's temperature resistance rating before applying near any heat feature.
- What look do you want? Wet look (high gloss), satin, matte, natural, or tinted/colored. Film-forming sealers offer the most sheen options. Penetrating sealers stay close to the natural surface look. Stains plus a sealer give color flexibility.
- What are the VOC limits and manufacturer compatibility rules? If you have an existing coating you are going over, check the new product's technical data sheet (TDS) for compatibility with the existing system. Some products require a specific primer from the same manufacturer to maintain warranty eligibility. VOC limits also vary by region — California and certain Northeast states impose stricter limits than federal rules.
One thing I always do before finalizing a product: download the actual Technical Data Sheet (TDS), not the marketing page. The TDS is where you find real coverage rates, pot life, application temperature range, cure windows, and the moisture limits the manufacturer actually warranties. If a manufacturer does not publish a TDS, that is a red flag.
Matching the top coat to the substrate
| Substrate | Recommended Top Coat Types | Key Requirement | Avoid |
|---|---|---|---|
| Concrete (on-grade slab) | Penetrating silane/siloxane; moisture-tolerant epoxy primer + polyurethane; acrylic sealer (low-moisture slabs) | Moisture vapor test before any film-forming product; CSP 2–3 for epoxy/PU systems | Aromatic epoxy as UV-exposed finish coat; high-gloss acrylic over damp slab |
| Concrete pavers | Penetrating sealer; water-based acrylic (wet-look or natural); polyurethane finish | Joint sand stabilization before sealing; test one paver for sheen before full application | Solvent-based products over interlocking pavers with polymeric sand (can soften sand binders) |
| Porcelain and ceramic tile | Water-based acrylic or polyurethane (grout-sealing focus); specialty tile sealer | Grout lines need compatible penetrating grout sealer; verify product adheres to glazed tile | Epoxy floor coatings not designed for tile profiles; acid-based stains (will not react with porcelain) |
| Natural stone (travertine, slate, flagstone) | Penetrating silane/siloxane; impregnating stone sealer; natural-look or enhancing sealer | Stone must be fully dry; enhancing sealers change appearance — test a small patch first | Film-forming coatings that trap vapor in porous stone; acid-based cleaners before sealing |
| Wood (pressure-treated, hardwood) | UV-stable semi-transparent stain + water repellent; clear penetrating wood sealer; two-component polyurethane | Allow new wood to dry/weather 30–60 days before sealing; sand between coats | Epoxy floor coatings (too rigid for wood movement); film-forming products that peel as wood expands and contracts |
| Composite decking | Manufacturer-approved composite deck sealer or cleaner/brightener system; UV protectant | Many composite manufacturers void warranty if non-approved coatings are applied — check warranty first | Solvent-based stains; film-forming epoxy or polyurethane coatings on most composites |
One detail worth expanding on for concrete: film-forming coatings over a slab with high moisture vapor emission will blister and delaminate. If you have a slab on grade without a vapor barrier, or the concrete is newer than 28 days, run a moisture test before you buy anything. Penetrating sealers are the forgiving option for slabs with borderline moisture levels because they let vapor pass through.
Special situations: fire pits, canopies, grass-based patios, rooftops, and table aesthetics
Fire pits and heat-bearing areas
Standard acrylic sealers soften, discolor, and emit fumes when exposed to sustained radiant heat from a fire pit or grill. For any paved area within two to three feet of a fire feature, choose a heat-rated product: high-temperature epoxy coatings, silicone-based high-heat paint, or simply leave the immediate surround unsealed with natural uncoated stone or concrete that you clean periodically. If you are planning a built-in fire pit on a covered patio or a rooftop, there are also serious code considerations. For detailed siting, code considerations, and coating compatibility for a fire pit on top of patio, see the related guidance (internal link). D.C. Municipal Regulations, Section 12‑H308 (Open Flames) quoting IFC §308.1.4 prohibits charcoal and other open‑flame cooking devices on combustible balconies or within 10 feet of combustible construction; confirm local AHJ amendments and NFPA 1 requirements (which often require recreational fires to be at least 25 feet from structures) before installing a fire pit blank" rel="noopener noreferrer">D.C. Municipal Regulations — Section 12‑H308 (Open Flames) quoting IFC §308.1.4. Under IFC Section 308.1.4, many jurisdictions prohibit open-flame devices on combustible balconies or within 10 feet of combustible construction. NFPA 1 generally requires recreational fires to be located at least 25 feet from structures or combustible material, though local amendments and AHJ interpretations vary considerably. Many municipalities also require a non-combustible ring of at least 36 inches around a portable fire pit. Before you seal the zone around a fire pit, confirm your local fire code requirements, because the coating choice is secondary to the placement and clearance question.
Patio canopy tops
Fabric, polycarbonate, and aluminum canopy panel materials each need different protection strategies. For fabric canopy tops, a UV-blocking, water-shedding spray treatment (silicone-based or fluoropolymer) extends life significantly, most need reapplication every one to two seasons. For polycarbonate panels, manufacturer-approved UV-protective coatings prevent yellowing and hazing, but abrasive cleaners scratch the surface and remove the factory UV layer. Any canopy top over a patio also creates a drainage consideration: make sure water sheds away from the patio surface below rather than pooling at the canopy perimeter and dripping onto an unsealed slab edge. For product options and installation tips for a patio canopy top, consult the canopy manufacturer’s recommendations and follow compatibility and reapplication guidance.
Patios built over grass
Permeable paver systems, gravel grids, or pavers laid directly over ground cover create a different coating challenge: moisture migration from below is essentially constant. Penetrating sealers that allow vapor transmission are almost always the right call here. For detailed design and drainage guidance for a patio on top of grass, consult the patio on top of grass resource. Film-forming coatings over permeable systems will trap moisture and fail quickly. If you are sealing the perimeter concrete edging of a grass-based patio, make sure drainage is not compromised by coating runoff into the permeable fill.
Rooftop patios
Rooftop patios involve an existing waterproofing membrane, typically a built-up roof, TPO, EPDM, or modified bitumen system. Any coating or paver system placed on top must be compatible with that membrane. This matters enormously: applying an incompatible solvent-based coating directly to a TPO membrane can degrade the membrane and void the roofing warranty. Most roofing membrane manufacturers (Firestone and others) require a documented protection layer between the membrane and pedestal or paver system, and many require a combined warranty from the membrane manufacturer, paver supplier, and installer. Before applying any top coat to a rooftop patio assembly, get written compatibility confirmation from your membrane manufacturer. For local options and installers in Calgary, see roof top patios calgary. Structurally, IBC Chapter 15 and Table 1607.1 govern live load design for occupiable rooftop areas, and a licensed structural engineer needs to confirm that your roof structure can carry the added weight of pavers, pedestal systems, furniture, and people before anything goes up there.
Table-top view aesthetics
If the design goal is a patio surface that looks great in overhead or near-eye-level photography (for a listing, a design presentation, or social media), the finish sheen and color consistency of the top coat matter as much as its protective qualities. For more on styling and photographing surfaces, see our patio table top view guide for choosing sheen, color, and texture that photograph best. High-gloss acrylic wet-look sealers show every texture and depth variation dramatically, beautiful on stamped or exposed aggregate concrete, unforgiving on a rough or patchy slab. A satin or matte finish is more forgiving on imperfect surfaces and photographs with less glare in direct sunlight. If you are going for a specific aesthetic in a defined outdoor living space, apply the sealer to a test section and photograph it in both shade and direct sun before committing to the full pour.
Surface prep: the step everyone under-invests in
Every coating failure I have seen on patios traces back to surface prep. The coating itself is rarely the culprit. A product that passed lab tests and worked on someone else's patio will peel from yours if you skip any of the following steps.
Pre-application inspection checklist
- Clean thoroughly: Remove all dirt, mold, mildew, efflorescence, and surface contaminants. Pressure washing at 2,000 to 3,000 PSI with a surface cleaner attachment handles most exterior concrete and pavers. Allow the surface to dry fully — minimum 24 to 48 hours after washing, longer in humid conditions.
- Degrease: Oil, grease, and rubber marks require a dedicated degreaser applied, scrubbed in, and fully rinsed before any sealer contacts the surface. A diluted TSP substitute or commercial concrete degreaser works on most substrates. Confirm the degreaser is compatible with your planned coating — some leave residues that inhibit adhesion.
- Remove old coatings if necessary: A failing or incompatible existing coating must come off. Chemical strippers, mechanical grinding, or shot blasting achieve this depending on the coating type and thickness. ICRI Guideline 310.2R defines the Concrete Surface Profile (CSP) scale from 0 to 10. Penetrating sealers need CSP 0 to 2 (essentially a clean, open surface). Thin film coatings need CSP 1 to 3 (light acid etch or light diamond grind). High-build polymer overlays need CSP 4 to 7 (shot blast or scarify). Match the achieved profile to your product's TDS requirement — this is where most DIYers fall short.
- Repair cracks and joints: Hairline cracks (under 1/8 inch wide) can be filled with an elastomeric crack filler or polyurethane caulk compatible with your top coat. Structural cracks wider than 1/4 inch need evaluation — sealing over a moving crack will just move the crack through the coating. Control and expansion joints must be maintained through the coating system, not bridged.
- Moisture testing (critical for concrete): Run a plastic sheet test as a quick field check: tape a 24-by-24-inch polyethylene sheet to the dry clean slab, seal all edges, and leave it for 16 to 24 hours. Condensation or darkening under the sheet indicates a moisture issue worth quantifying. For any film-forming coating, follow up with a formal test. ASTM F1869 (calcium chloride MVER test) gives you pounds of moisture emission per 1,000 square feet per 24 hours. Most coating manufacturers require MVER at or below 3 lb/1,000 ft²/24h. ASTM F2170 (in-situ relative humidity probe) measures the RH inside the slab — manufacturers commonly require 75 to 80% RH or below, though some moisture-tolerant products claim higher tolerances. Always verify the specific limit in your product's TDS. If your slab fails the moisture test, a two-component epoxy moisture-mitigation coating (products like ARDEX MC, MAPEI Planiseal, or LATICRETE moisture barriers) applied first can reduce MVER to acceptable levels before the decorative or protective top coat goes down.
- Check substrate conditions for acceptance: Surface must be structurally sound, free of delamination, and within the product's allowed temperature range at time of application. Most coatings specify both an air and surface temperature range (commonly 50°F to 90°F) and require that the surface temperature is at least 5°F above the dew point to prevent condensation under the coating. Document your conditions — photos with timestamps are useful if a warranty question comes up later.
Step-by-step application by product type
Acrylic sealers
- Confirm surface is clean, dry, and within the temperature window in the TDS (typically 50–90°F, surface above dew point).
- Stir the product gently — do not shake, which introduces bubbles into a film-forming sealer.
- Apply the first coat by roller (3/8-inch nap for smooth concrete, 1/2-inch nap for textured or paver surfaces) or low-pressure pump sprayer in thin, even passes. Coverage is typically 160–240 ft²/gal for the first coat; a second coat will cover more efficiently.
- Allow tack-free cure: typically 30–60 minutes depending on temperature and humidity.
- Apply second coat at 90 degrees to the first coat direction. Two thin coats outperform one thick coat and reduce bubbling and milky hazing.
- Allow 24 hours before foot traffic, 72 hours before furniture and full load.
- Recoat interval: 1–3 years depending on UV exposure, traffic, and visible wear.
Epoxy coatings
- Achieve the manufacturer-specified CSP (typically CSP 2–3 for thin-film epoxy). Document profile with a replica or profile comparator before mixing anything.
- Confirm moisture test results are within product limits. If not, apply the manufacturer's recommended moisture-mitigation primer first and allow full cure.
- Mix Part A and Part B at the exact ratio stated in the TDS — no guessing, no eyeballing. Use a calibrated mixing paddle for 2–3 minutes until streak-free.
- Note your pot life. In ambient temperatures above 80°F, working time can drop to 20–30 minutes for standard epoxies. Stage the product in smaller batches if working on a large area.
- Apply by squeegee and back-roll with a 3/8-inch nap roller. Work in sections. Do not thin the product unless specifically allowed by the TDS.
- Recoat window: epoxies have a critical overcoat window (often 8–24 hours at 70°F). Coat outside that window and you may need to sand or abrade the surface for the next coat to bond.
- Foot traffic: typically 12–24 hours at 70°F; vehicle traffic 48–72 hours. Verify against your product's TDS.
- If a topcoat of UV-stable aliphatic polyurethane is specified, apply it within the recoat window or after light sanding.
Polyurethane top coats
- Apply over a compatible primer or epoxy base coat within the specified overcoat window.
- For single-component moisture-cure polyurethanes: apply at 40–90°F with relative humidity between 30–80% (humidity drives cure in moisture-cure products — very low humidity slows cure significantly).
- For two-component aliphatic polyurethanes: mix per the TDS ratio, note pot life (typically 2–4 hours at 70°F), and apply by brush, roller, or spray.
- Apply in thin coats — 2–3 mils wet film thickness per coat. A common finish system is 2 coats of epoxy at 4–6 mils each, plus 1–2 finish coats of aliphatic polyurethane at 2–3 mils each.
- Allow full cure before heavy traffic — typically 24–48 hours for foot traffic, 7 days for full chemical resistance.
Penetrating sealers (silane/siloxane)
- Surface must be clean and dry — penetrating sealers applied to a damp surface will not soak in properly and may form a hazy surface residue.
- Apply by low-pressure pump sprayer or roller in a wet-on-wet technique: apply liberally, keep the surface wet for 5–10 minutes, then apply a second pass before the first dries. This ensures full penetration depth.
- Remove any surface puddles or streaks with a dry roller before the product dries on the surface — dried surface residue is difficult to remove and looks white or hazy.
- Coverage varies widely: 50–200 ft²/gal depending on substrate porosity (PROSOCO Siloxane PD, for example, lists this range in its TDS). Porous stone will drink up product; dense concrete will not.
- Allow 24–48 hours before exposing to rain or heavy use. The product needs to react with the substrate chemistry to become effective.
- Reapplication: typically every 3–7 years for silane/siloxane systems on exterior concrete, though visible water-bead testing is the most practical indicator of when to reapply.
Stains (decorative base layer, always finished with a sealer)
- Acid stains: Apply to clean, uncoated concrete with a plastic sprayer (acid will corrode metal). Allow reaction time of 4–8 hours. Neutralize with a baking soda solution, rinse thoroughly, and allow to dry completely before sealing.
- Water-based stains: Apply by sprayer or brush. Multiple thin coats build color depth. Allow 2–4 hours between coats.
- After staining, apply your chosen sealer (acrylic, epoxy, or polyurethane) per the sealer's TDS. The stain layer is not protective on its own.
Maintenance and recoat schedules
| Top Coat Type | Typical Recoat Interval | Signs It Needs Recoating | Maintenance Cleaning |
|---|---|---|---|
| Acrylic sealer | 1–3 years | Water no longer beads; surface looks chalky or worn in high-traffic paths | pH-neutral cleaner; avoid solvent-based cleaners that strip the film |
| Epoxy coating | 5–10 years (varies with traffic) | Peeling, chipping, or worn-through spots; loss of gloss in traffic areas | Neutral detergent; avoid harsh acids or strong solvents |
| Aliphatic polyurethane | 5–10 years as topcoat | UV hazing, scratch accumulation, loss of sheen | Mild soap and water; occasional light buff with a compatible polish |
| Penetrating silane/siloxane | 3–7 years | Water no longer beads on the surface after cleaning | Pressure wash; reapply when bead test fails |
| Concrete stain + sealer | Sealer: 1–3 years; stain is permanent | Sealer layer worn; color looks faded or chalky | Non-acid cleaner; reseal without stripping if stain is intact |
| Polyaspartic | 5–10 years | Deep scratches, loss of gloss, adhesion failure at edges | Neutral pH cleaner; do not use abrasive pads |
Troubleshooting common application failures
- Peeling or delamination: Almost always a surface prep failure — residual oil, existing incompatible coating, or insufficient surface profile. Strip the failing coating, re-prep to the correct CSP, and reapply. If moisture is the cause, address the vapor issue before recoating.
- Milky white hazing (acrylic sealers): Usually caused by applying a solvent-based sealer over a damp surface, or trapping moisture during cure. Thin the affected section with a small amount of compatible solvent, or remove and reapply. Always check dew point before applying any acrylic sealer.
- Bubbling in the film: Over-application in thick coats, or off-gassing from an unsealed concrete substrate. Apply thinner coats, ensure the substrate has been allowed to cure and dry, and check the product's maximum wet film thickness.
- Yellowing of epoxy finish: Aromatic epoxy used in UV-exposed location. Strip and recoat with an aliphatic (UV-stable) polyurethane or hybrid finish coat.
- Tackiness that never fully cures: Incorrect mix ratio (two-component products), out-of-date product, or application below minimum temperature. Remove the uncured coating, confirm product shelf life and temperature conditions, and reapply.
- Uneven sheen or lap marks: Roller speed inconsistency or failure to maintain a wet edge during application. On large slabs, work with a partner — one person rolling, one maintaining a wet edge. For pavers, spray application reduces lap marks.
Removing an existing patio top coat
Sometimes the right move is starting over. Chemical strippers designed for concrete coatings soften most acrylic and epoxy films for mechanical removal, follow the product dwell time, scrape, and neutralize before recoating. For stubborn multi-layer systems, shot blasting or diamond grinding is the professional approach and achieves a consistent CSP at the same time. If you are removing a penetrating sealer, there is nothing to strip, the effect simply diminishes over time and can be renewed with a fresh application. Always test a small area with the intended stripper chemistry before committing to the full surface.
Cost ranges and when to hire a professional
| Scope of Work | DIY Material Cost (approximate) | Professional Installed Cost (approximate) | Pro Recommended? |
|---|---|---|---|
| Acrylic sealer on standard concrete patio (500 ft²) | $60–$150 in materials | $300–$600 installed | Optional — manageable DIY |
| Penetrating silane/siloxane sealer (500 ft²) | $80–$200 in materials | $250–$500 installed | Optional — very DIY-friendly |
| Two-component epoxy system (500 ft²) | $200–$500 in materials | $800–$2,000+ installed | Recommended for first-timers |
| Full epoxy + polyurethane top coat system (500 ft²) | $400–$900 in materials | $1,500–$4,000+ installed | Strongly recommended |
| Moisture mitigation coating (per issue area) | $150–$400 in materials | $500–$1,500+ | Strongly recommended |
| Concrete stain + sealer (500 ft²) | $150–$350 in materials | $600–$1,800 installed | Optional — DIY viable with prep |
| Rooftop deck waterproofing system | $500–$1,500+ in materials | $3,000–$10,000+ | Always hire a licensed pro |
Honestly, the substrate prep is where most DIYers underestimate the work and the cost. Renting a concrete grinder or shot blaster for a 500-square-foot patio typically runs $150 to $300 per day, and you need to factor that into the DIY budget. For a standard acrylic seal on a well-maintained slab, DIY makes complete economic sense. For a two-component epoxy system on a large or complex surface, or any rooftop waterproofing project, the cost of a professional application failure, membrane damage, warranty loss, or a delaminated surface after one season, makes the professional installation price look very reasonable.
Safety, VOCs, and working conditions
Solvent-based coatings and two-component systems require respiratory protection, chemical-resistant gloves, and good ventilation. Even on an open patio, pools of solvent-based product in still air can exceed safe inhalation thresholds quickly. Water-based products are much more forgiving but still require eye protection and gloves. Read the Safety Data Sheet (SDS) for every product before opening the container, the SDS lists required PPE, flammability, and first-aid information specific to that product. Dispose of unused mixed epoxy and solvent-contaminated rags per your local hazardous waste guidelines: mixed two-component epoxy is a reactive material that generates heat as it cures in the container.
Adhesion testing: knowing if the coating actually stuck
If you are applying a coating to a commercial or high-stakes surface, or if you have had a previous coating failure and want assurance the new system is performing, ASTM D4541 pull-off adhesion testing is the field standard. A dolly is glued to the cured coating, allowed to cure, and then pulled off with a calibrated gauge. For general service applications, a commonly referenced acceptance threshold is 200 psi (about 1.4 MPa) with cohesive failure (the concrete breaks, not the coating-concrete interface). Heavy-duty or service-critical systems often specify 400 psi or 'concrete substrate failure on 95% of the coupon area' as the pass criteria. This test is worth specifying in a professional contract as a measurable acceptance criterion, it takes the subjectivity out of the warranty conversation.
FAQ
What is a patio top coat and why use one?
A patio top coat is a protective and/or decorative finish applied to patio surfaces (concrete, pavers, tile, wood, composite) to provide waterproofing, UV resistance/color enhancement, abrasion and chemical protection, improved slip resistance, and easier maintenance. Choose a top coat to extend substrate life, reduce staining and freeze/thaw damage, enhance appearance, or meet safety (slip) and heat/chemical exposure needs.
What main types of top coats are available and where are they best used?
Common types: 1) Penetrating silanes/siloxanes — water repellents for concrete/pavers; breathable, don’t form a film. 2) Water‑ or solvent‑based acrylic sealers — clear/film former for concrete, pavers, tile; decorative, inexpensive, recoat every 1–3 years. 3) Epoxy coatings — durable, chemical resistant, low‑porosity; best for concrete, not UV‑stable by itself (use UV topcoat). 4) Polyurethane / polyaspartic top coats — UV‑stable, tough, fast cure; good over epoxies for exterior exposure. 5) Concrete stains/colored coatings (acrylic or epoxy mortars) — color and surface protection. 6) Deck finishes (oil‑based/alkyd or water‑based) — for wood and composite materials. Select by substrate, exposure to UV/heat, and traffic.
How do I choose the right product for each substrate?
Selection criteria: - Concrete/pavers: penetrating silane/siloxane for breathability and water repellency; acrylics for color/gloss; epoxy + UV topcoat or polyaspartic for high wear. - Tile: grout‑compatible acrylics or urethanes for gloss/protection; avoid coatings that trap moisture under impervious tiles. - Wood/composite: exterior deck stains/finishes rated for substrate; for composites, use manufacturer‑approved coatings. - Rooftop/over‑grass patios: pick low‑weight systems, membrane‑compatible coatings approved by roof manufacturer and breathable (or approved moisture‑mitigation system). - Fire pit areas: use noncombustible surfaces and coatings rated for elevated temperatures; avoid combustible film formers under potential flame/embers. Always confirm product technical data sheet (TDS) for substrate compatibility, required surface profile, temperature limits and warranty.
What measurable pre‑application tests and surface prep are required?
Key measurable requirements: - Moisture tests for slab‑on‑grade/rooftop concrete: ASTM F1869 (calcium chloride MVER) and/or ASTM F2170 (in‑situ RH). Common manufacturer limits: MVER ≤3 lb/1000 ft²/24 hr and RH ≤75–80% — verify the product TDS. - Surface profile: follow ICRI 310.2R CSP recommended by the coating manufacturer (e.g., sealers CSP 0–2; thin film coatings CSP 1–3; overlays CSP 4–7). Document with replica or profile gauge. - Cleanliness: concrete should be free of oil, curing compounds, laitance — use mechanical means (shotblast/grit, diamond grind) to the specified CSP. - Adhesion acceptance: plan ASTM D4541 pull‑off tests after cure with project acceptance criteria (example ≥200 psi and concrete failure). - Temperature and humidity: follow TDS application limits (typical 50–90°F and <85% RH; specific products vary).
What are step‑by‑step measurable application methods for common systems (example concrete acrylic sealer and epoxy/polyurethane system)?
Acrylic sealer (concrete): 1) Test moisture (ASTM F1869 or F2170) and verify limits. 2) Clean surface; repair cracks/joints. 3) Achieve CSP per TDS (often broom clean to CSP 0–2). 4) Apply at manufacturer recommended coverage (e.g., 160–240 ft²/gal) using low‑nap roller or sprayer in uniform coats. 5) Allow tack‑free time (30–60 min typical) and follow recoat window per TDS. 6) Wait specified cure before foot traffic (commonly 24 hrs). Epoxy + polyurethane topcoat: 1) Test moisture and profile substrate (CSP per TDS, often 2–3). 2) Mechanically profile (shotblast/grind) and vacuum. 3) Prime with epoxy primer per mix ratio; respect pot life and ambient temp. 4) Broadcast aggregate or apply bodycoat to specified DFT. 5) After epoxy cure, apply UV‑stable polyurethane or polyaspartic topcoat at specified mils. 6) Perform adhesion tests (ASTM D4541) and allow full cure before load per product cure schedule. Always follow TDS mix ratios, pot life, and temperature limits; measure wet film thickness and calculate DFT.
How do I maintain patio top coats and what are recoat schedules?
Maintenance: sweep regularly, rinse with mild detergent; remove stains promptly. Recoat intervals: - Penetrating repellents: reapply every 3–8 years depending on exposure and coverage. - Acrylic sealers: typically every 1–3 years. - Epoxy/polyurethane systems: full maintenance/spot repair every 5–10+ years depending on wear; topcoat refreshes may be every 3–7 years. Verify product TDS for recommended maintenance. Inspect annually for delamination, cracking, loss of slip resistance, and recoat or repair as required. Keep documentation of original product TDS and lot numbers for warranty purposes.