The rules that actually matter for patio design come down to a handful of practical constraints: size the patio to fit your furniture with room to move, slope the surface away from the house at 1/8 to 1/4 inch per foot for drainage, keep setbacks from property lines (usually 5 to 10 feet, but check locally), maintain a minimum 36-inch clearance on walkways and around traffic paths, and build on a compacted, stable base so the surface doesn't shift or crack over time. These outdoor patio rules will help you plan a space that is safe, comfortable, and built to last The rules that actually matter. Get those fundamentals right and nearly every other decision, materials, shape, layout, becomes much easier.
Patio Design Rules: Planning, Sizing, Layout, and Build

Miles Sutton
28 Jun 2026
Core patio design principles: function, flow, and comfort
Before you pick a paver color or measure anything, figure out what the patio actually needs to do. A patio that hosts weekend dinner parties for eight people has completely different requirements than one that serves as a quiet morning coffee spot for two. Start by listing your primary use cases: dining, lounging, grilling, kids' play, entertaining, or some combination. That list drives every decision that follows.
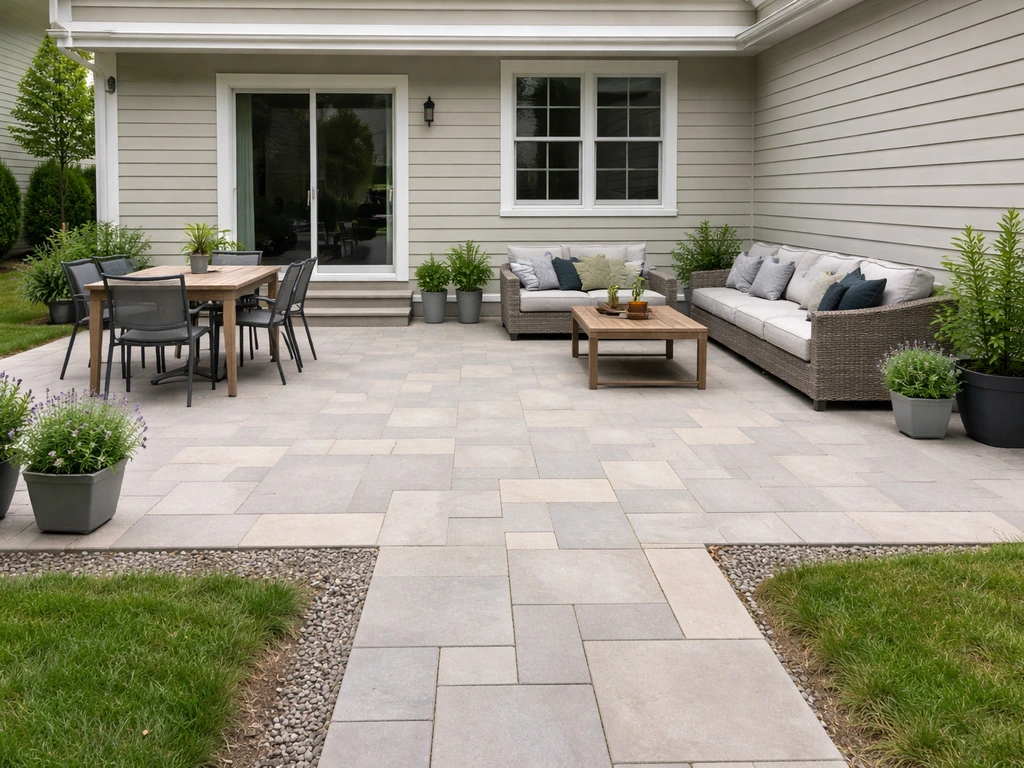
Flow is the next big principle. Your patio should connect naturally to the interior of your home and to the yard beyond it. Ideally, you want a direct, logical path from the kitchen or living room door to the primary seating or dining area. Avoid layouts that force people to squeeze around corners or navigate furniture just to get from the door to a chair. Think of the patio as an extension of your floor plan, not an obstacle course.
Comfort means accounting for sun, shade, wind, and privacy at the same time. A beautifully sized patio that bakes in direct afternoon sun from May through September will sit empty most of the time. Likewise, a patio that's perfectly shaded but exposed to prevailing winds becomes uncomfortable. Zoning your patio, a shaded dining zone, a sunny lounging zone, a sheltered corner for the grill, lets you design for multiple conditions at once rather than optimizing for just one.
Sizing and layout rules: measurements, zones, and clearances
The most common patio sizing mistake is going too small. A patio that looks generous on paper shrinks dramatically once furniture goes on it. Here are the practical minimums you should work from:
- Dining area for 4 people: minimum 12 x 12 feet (144 sq ft), with 14 x 14 feet being much more comfortable
- Dining area for 6 to 8 people: plan for at least 16 x 16 feet (256 sq ft)
- Lounge seating (sofa + two chairs + coffee table): minimum 10 x 12 feet, 12 x 14 feet preferred
- Grill station with clearance to work safely: allow a dedicated 4 x 6 foot zone minimum, positioned away from foot traffic
- Combined dining and lounge zones: 20 x 20 feet is a practical starting point for a multi-use patio
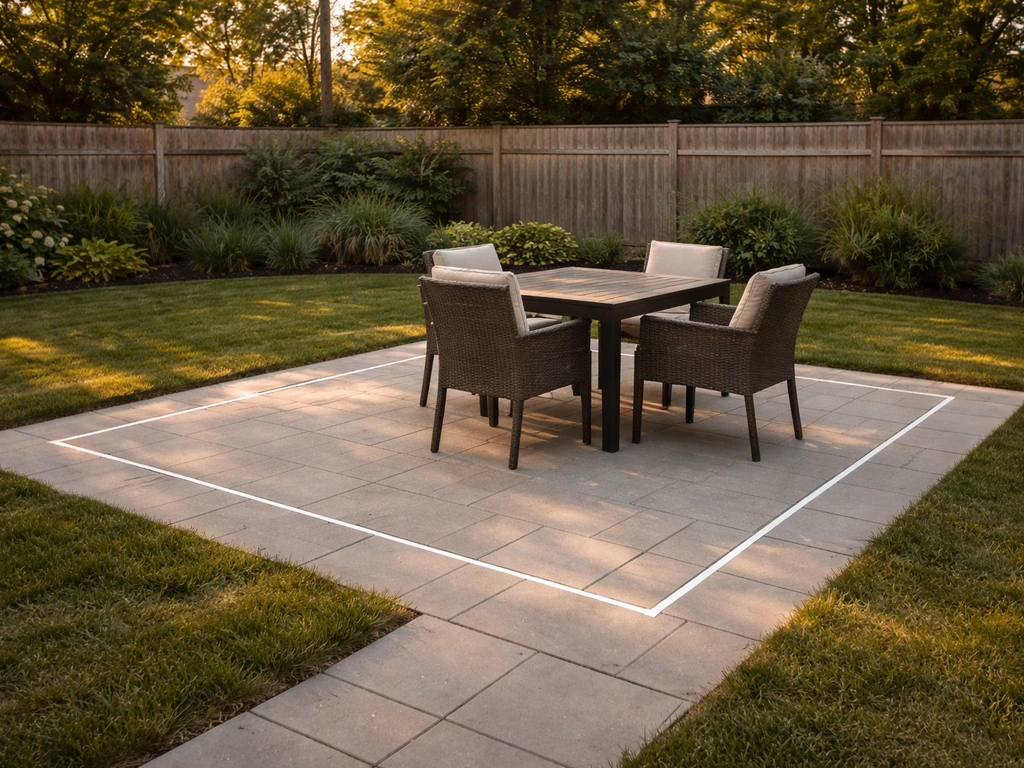
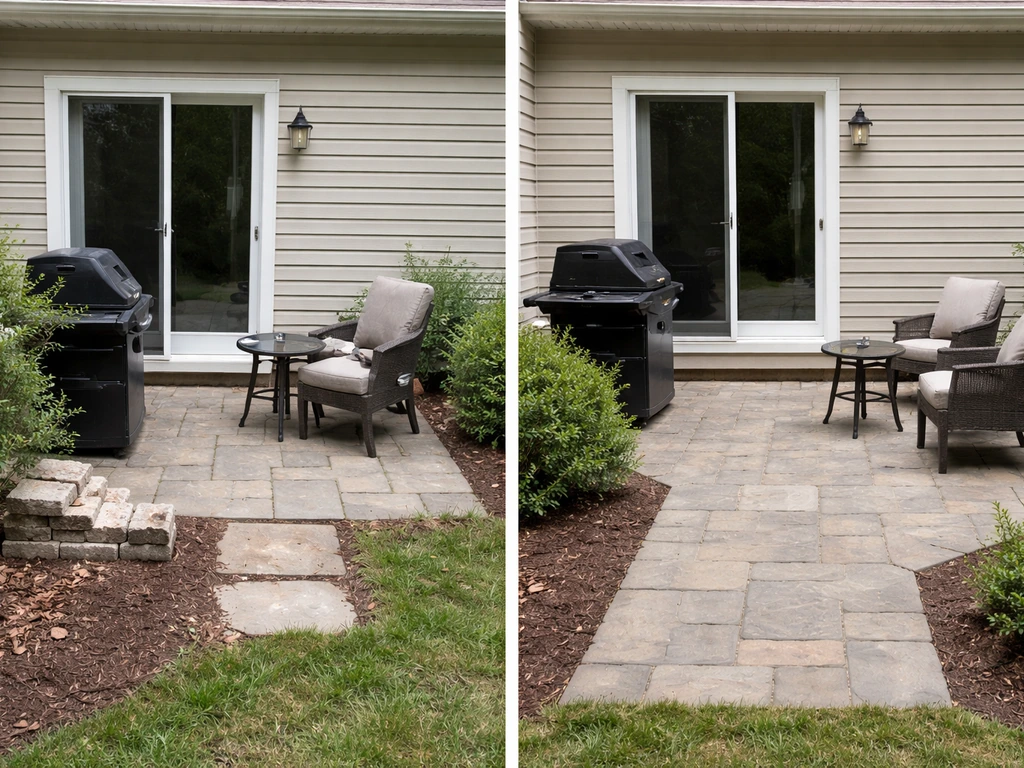
Walkway and circulation clearances are non-negotiable. Patio rules SVG graphics can help you communicate clearance and zoning requirements clearly during planning and installation. You need at least 36 inches (3 feet) of clear, unobstructed width for any main path through or around the patio, that's the same minimum required for accessible routes under ADA standards and blank" rel="noopener noreferrer">matches residential egress requirements under the IRC. For ADA accessible routes, the minimum clear width is 36 inches (915 mm), except at doors or short point, and a single wheelchair passage can be 32 inches (815 mm) for a limited distance ADA accessible routes require a minimum clear width of 36 inches. Between a dining table and a wall, fence, or railing, keep a minimum of 36 inches so people can pull chairs out and move around without bumping into things. If you're tight on space, 32 inches is an absolute minimum at a pinch point like a doorway, but don't plan an entire circulation route at that width.
For layout shapes, rectangles and squares are the most efficient use of space and the easiest to tile or pave. L-shaped layouts work well when you want to wrap a corner of the house or separate two functional zones visually. Curved or freeform patios look great but cost more to build (more cutting, more waste) and complicate furniture placement. If you're DIYing, stick to rectangular unless you're confident with layout math. Zoned layouts, where you designate specific areas for dining, lounging, and cooking, are the best strategy for patios over 300 square feet.
| Layout Type | Best Use Case | DIY Difficulty | Trade-off |
|---|---|---|---|
| Rectangular/Square | Most households, efficient furniture fit | Easy | Can feel plain without design detail |
| L-Shape | Wrapping a corner, separating zones | Moderate | Requires precise angle layout |
| Multi-zone (connected) | Large spaces, entertaining + lounging | Moderate | Needs careful traffic flow planning |
| Curved/Freeform | Design-forward, organic look | Hard | Higher material waste and cut time |
| Split-level | Sloped yards, dramatic visual interest | Hard | Structural complexity, often needs permit |
Placement rules: sun, shade, privacy, wind, and access
Orientation is one of the most underrated patio design decisions. A south-facing patio gets maximum sun all day, great in cooler climates, potentially brutal in hot ones. East-facing patios get morning sun and afternoon shade, which suits most climates well for a primary dining or lounging space. West-facing patios get afternoon and evening sun, which is nice for sunsets but hot during prime outdoor time in summer. North-facing patios are naturally shaded, sometimes too much so. Before you lock in a location, track the sun across your yard at different times of day during the season when you'll use the patio most.
Identify your prevailing wind direction and plan accordingly. In most of the US, prevailing winds come from the southwest in summer and the northwest in winter. A patio that opens directly into prevailing winds can be uncomfortable even on otherwise pleasant days. Use the house itself, a fence, a pergola, or planted screening to break wind without completely blocking air circulation. Solid walls stop wind but can create turbulence on the other side; open lattice or spaced boards reduce wind speed without that effect.
Privacy from neighboring properties matters more than most people anticipate during the planning stage. Once you're sitting on your patio, you notice sightlines you never thought about. Check line-of-sight from neighboring windows and yard positions before you finalize placement. Even a 6-foot privacy fence on one side, a raised planter, or a pergola with draping can solve most privacy concerns without enclosing the space entirely.
Access from the house should be direct and logical. The best patio placement keeps the primary door (usually a back door from the kitchen or dining room) within a step or two of the patio surface. If you're placing a dining patio far from the kitchen, every trip out with food or dishes becomes a minor annoyance that adds up fast. When multiple doors exit to the patio, designate one as the primary traffic door and make sure its circulation path is clear and wide.
Surface, materials, and finish selection rules
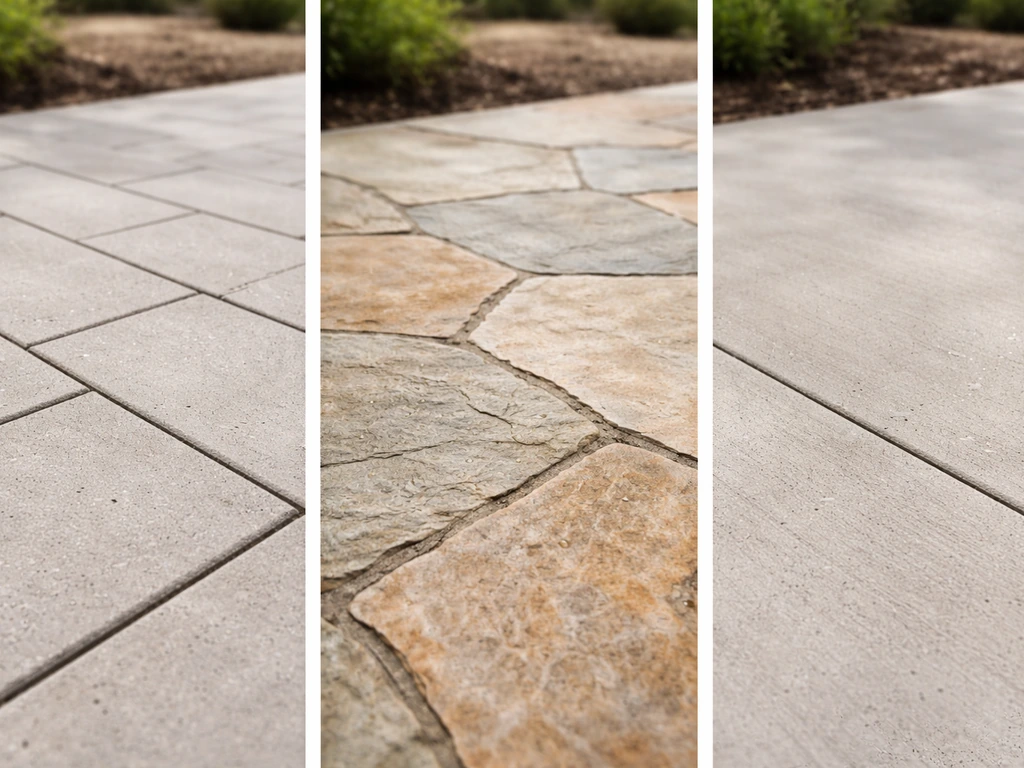
Your choice of surface material affects durability, maintenance, cost, heat absorption, slip resistance, and how the patio looks over time. There's no single right answer, the best material depends on your climate, budget, how much maintenance you're willing to do, and the overall look you're after. Here's an honest breakdown of the most common options:
| Material | Avg. Cost (installed, per sq ft) | Durability | Maintenance | Best For |
|---|---|---|---|---|
| Concrete (plain) | $6–$10 | High | Low (seal every 2–3 yrs) | Budget builds, clean modern look |
| Stamped concrete | $12–$20 | High | Moderate (reseal regularly) | Decorative look at mid-range price |
| Concrete pavers | $10–$20 | Very high | Low–Moderate | DIY-friendly, replaceable sections |
| Natural stone (flagstone, slate) | $20–$35+ | Very high | Moderate (occasional resealing) | Upscale, natural aesthetic |
| Brick | $10–$20 | High | Low–Moderate | Classic look, good for traditional homes |
| Porcelain tile | $15–$30 | High (frost-rated needed in cold climates) | Low | Modern look, easy to clean |
| Gravel/decomposed granite | $2–$5 | Moderate | Low | Informal areas, budget builds |
| Composite/wood decking (attached) | $25–$45+ | Moderate–High | Moderate–High | Raised or mixed patio-deck combos |
A few material selection rules to apply: In freeze-thaw climates, avoid standard ceramic tile and unsealed natural stone, they absorb water and crack. Porcelain rated for outdoor/frost use is the exception. For hot climates, lighter-colored surfaces stay cooler underfoot; dark pavers in full sun can get hot enough to be uncomfortable barefoot. Always choose a slip-resistant finish or texture for any patio surface, especially near a pool or in a rainy climate. A smooth polished finish looks sharp indoors but becomes a hazard outdoors when wet.
Concrete pavers are the most DIY-friendly option for a reason: individual units can be replaced if they crack or shift, installation doesn't require mixing concrete, and they come in a wide range of styles and colors. If you're a first-time builder, interlocking concrete pavers over a compacted gravel and sand base is the most forgiving system to work with.
Drainage, grading, and base construction rules
This is where most DIY patios fail. A beautiful surface on a poorly prepared base will shift, crack, puddle, and frost-heave within a few seasons. The drainage and base rules are not optional, they're the reason professional patios last 20 years and amateur ones need repairs after two.
Grading and slope
The patio surface must slope away from the house foundation at a minimum of 1/8 inch per foot, with 1/4 inch per foot being the standard recommendation. Over a 10-foot-wide patio, that means a 1.25 to 2.5 inch drop from the house edge to the outer edge. This seems small but it's enough to move water reliably off the surface. Never slope a patio toward the house, even a slight pitch toward the foundation will direct water against your siding and into your basement over time.
Base depth and compaction
The required base depth depends on your climate and soil type. In freeze-thaw climates (most of the northern US), you need a deeper base to prevent frost heaving. In stable, non-freeze climates, a shallower base is acceptable. Here are the practical guidelines:
- Non-freeze climate, stable soil: 4 inches of compacted crushed gravel base under pavers or stone
- Freeze-thaw climate: 6 to 8 inches of compacted crushed gravel base minimum
- Sand bedding layer over gravel (for pavers): 1 inch of coarse bedding sand, screeded level
- Poured concrete slab: 4-inch slab minimum over 4 inches of compacted gravel subbase; 6 inches in freeze-thaw or heavy-load areas
- Soil must be excavated to the required depth, then gravel added in 2 to 3 inch lifts and compacted with a plate compactor at each lift — not just dumped in all at once
Organic material like topsoil and roots should be removed from the base area entirely. Organic material compresses and rots over time, causing surface settlement. If your soil is expansive clay, you may need to go deeper or add a layer of geotextile fabric to separate the clay from the gravel base. When in doubt about your soil type, dig down 18 inches and look at what you've got before committing to a base depth.
Drainage at the edges
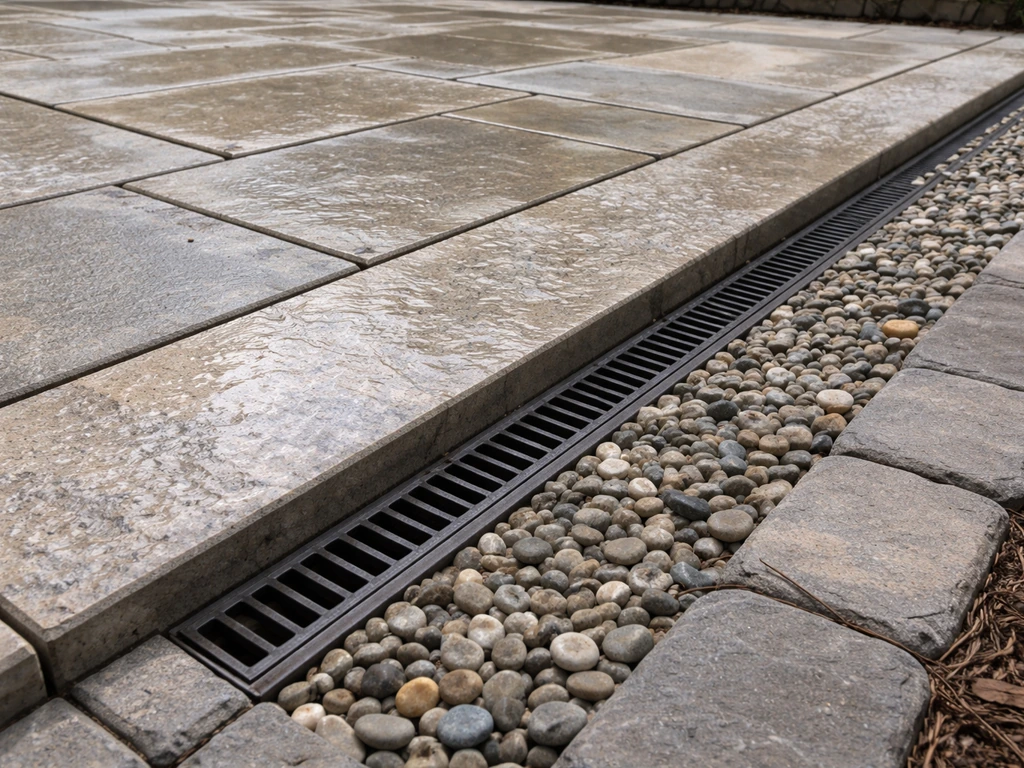
If your patio sits in a low area, is surrounded by landscaping berms, or abuts a wall on the downhill side, surface slope alone won't be enough. In those cases, you need a channel drain, French drain, or catch basin at the low edge to carry water away. Plan drainage routing before you build, not after, retrofitting drainage once a patio is installed is expensive and disruptive.
Safety, code, and permitting considerations
Many homeowners skip the permit step thinking a ground-level patio is always exempt. That's often true for simple slabs, but it's not a universal rule. Requirements vary significantly by municipality. Here's what you actually need to check before you start digging:
- Zoning permits: Many jurisdictions require a zoning permit before installing or expanding a patio, even at grade level. This typically involves verifying setback compliance from property lines (commonly 5 to 10 feet, but varies).
- Building permits: Usually required if the patio is raised, attached to the house structure, or has a roof/pergola. Some localities require them for any hardscape over a certain square footage.
- Guardrail requirements: If any portion of the patio surface is more than 30 inches above grade, guardrails are required under IRC standards. Typical guardrail height is 36 inches minimum for residential use.
- Egress clearance: Don't block egress doors. Any door used as a means of egress must maintain clear passage — minimum 36-inch clear width on the path from the door to the yard.
- HOA rules: If you're in an HOA, check their design guidelines before submitting to the city. Many HOAs have stricter setback, material, or size requirements than local code.
- Utility locates: Always call 811 (US) before excavating. Hitting a buried utility line during patio prep is dangerous and costly.
The safest approach: call your local building or planning department before any work begins. Explain what you're building, where it's located, and its approximate size. Most jurisdictions will tell you on the spot whether a permit is needed. It takes 10 minutes and can save you from having to tear out finished work. If you want to dig into specific code language around patio slopes and setbacks, the patio slope code and outdoor patio rules topics on this site cover those details in more depth. For additional guidance on typical patio requirements, review our patio rules sign recommendations as well patio slopes and setbacks.
Common patio design mistakes to avoid
These are the mistakes I see most often on patio projects, and almost all of them are avoidable with a little upfront planning:
- Building too small. The single most common complaint after a patio is finished is that it's not big enough. Add at least 10 to 20 percent to your initial size estimate before committing — furniture, pots, and people take up more space than they look like they will on paper.
- Skipping proper base preparation. Putting pavers directly on dirt or on an uncompacted base is a guarantee of sinking, shifting, and cracking within a few years.
- Forgetting the slope. A flat patio looks right but directs water toward the house. Always build in that 1/8 to 1/4 inch per foot slope away from the foundation.
- Placing the grill in a traffic zone. The grill needs its own dedicated zone with 3 feet of clear space on all working sides and should never be positioned where it interrupts foot traffic between the door and the seating area.
- Ignoring afternoon sun. Planning a dining area on the west side of the house without shade coverage means it'll be unusable at dinnertime on summer evenings.
- Choosing decorative over functional surface finishes. Smooth, polished, or high-gloss surfaces look beautiful in photos and become slip hazards when wet. Always choose a surface with a textured or matte finish.
- Overlooking privacy until after construction. A sightline problem is much harder to fix after the patio is built. Walk the space and check views from neighbor windows before you finalize placement.
- Not accounting for furniture dimensions before sizing. Measure your actual furniture (or the furniture you plan to buy) and lay it out on the ground with chalk or string before you pour anything.
Maintenance rules and when to go pro
Keeping your patio in shape
A well-built patio doesn't need much maintenance, but what it does need is consistent and timely. Ignoring small problems turns them into expensive repairs.
- Inspect and re-sand paver joints every 1 to 2 years. Polymeric sand washes out over time, and gaps invite weeds, ants, and edge creep.
- Seal concrete, stamped concrete, and natural stone every 2 to 3 years. Unsealed surfaces absorb staining, moisture, and freeze-thaw damage faster.
- Check slope and drainage each spring. Look for low spots where water pools after rain. A pooling spot that wasn't there before means something has settled.
- Pull weeds from joints promptly. Once weeds establish root systems under pavers, they accelerate shifting and cracking.
- Clean surfaces annually. A pressure washer on a low to medium setting removes organic staining, mold, and moss that make surfaces slippery. Don't use high pressure on soft brick or natural stone — it damages the surface.
- Inspect for cracked, chipped, or rocking pavers each spring and replace them before small problems spread.
When it makes sense to hire a professional
DIY patio installation is genuinely achievable for most homeowners on simple, ground-level projects with pavers or poured concrete. But there are situations where hiring a professional is the smarter call, even if you're comfortable with physical work.
- Significant grading or drainage work is required. Moving large amounts of soil, installing French drains, or correcting major drainage issues involves equipment and expertise that most DIYers don't have.
- The patio is elevated or attached to the house structure. Any raised patio, split-level design, or structure attached to the house framing requires engineering knowledge and typically a permit inspection.
- You're working with natural stone or large-format porcelain tiles. These materials are heavy, fragile during cutting, and unforgiving of base imperfections — professional installation gets a much better result.
- You're in a freeze-thaw climate and the project is large. Errors in base depth and drainage get amplified by freeze-thaw cycles, and a professional who knows local soil conditions is worth the investment.
- The project involves retaining walls, pergola footings, or outdoor electrical or gas lines. These are areas where mistakes have real safety consequences.
A practical hybrid approach works well for many homeowners: hire a professional to handle the base preparation, grading, and drainage, then do the surface installation yourself. You get the structural work done right while controlling costs on the more straightforward labor. If you are looking for the specific UCF patio code requirements that affect placement and construction, check the latest campus and permitting guidance before you start. When getting quotes, ask specifically about what's included in base prep, that's where the quality difference between contractors shows up most clearly.
Your patio planning checklist
Use this as your starting framework before anything gets measured or ordered. Check off each item before moving to the next phase of the project. If you're wondering how to apply these details without missing anything, start with a clear set of patio rules for size, slope, clearances, and materials.
- Define primary use cases (dining, lounging, grilling, entertaining) and number of people to accommodate
- Measure available space and mark setback lines from property boundaries and house foundation
- Check local permit and zoning requirements before any design work
- Track sun patterns and identify shade needs, prevailing wind direction, and privacy gaps
- Sketch 2 to 3 layout options to scale, including furniture placement with actual dimensions
- Confirm all circulation paths are at least 36 inches wide, with egress doors fully unobstructed
- Select surface material based on climate, budget, maintenance tolerance, and slip resistance
- Plan drainage: confirm 1/8 to 1/4 inch per foot slope away from house, identify any low points needing channel or French drains
- Determine base depth based on climate and soil conditions (minimum 4 inches gravel, 6 to 8 inches in freeze-thaw zones)
- Call 811 before excavating to locate underground utilities
- Get at least two professional quotes if any part of the project exceeds your skill level or involves structural elements
FAQ
How do I measure the patio size correctly so I do not end up with a space that feels cramped after furniture is placed?
Start with a “clear around seating” plan, measure your dining table footprint plus the chair swing radius, then add the 36-inch circulation path to each side people use. If you use a sectional or lounge set, add clearance for people to stand and pass behind the chairs, not just the walking lane from door to seating.
What is a practical way to decide the best patio slope if my yard is not level or I have a low corner?
Pick the drainage “exit point” first, then create a gradual fall toward that outlet (channel drain, catch basin, or a discharge area that is already managed). Use the 1/8 to 1/4 inch per foot away from the house as your minimum target, and confirm you can still keep water from pooling at the low end of the slab after installation.
Can I slope the patio toward a garden bed or down to grass instead of adding a drain?
Sometimes, but only if the patio discharge area can actually absorb the runoff without creating new puddling or soil erosion. If the receiving area is bermed, frequently muddy, or sits downhill against a foundation, plan a dedicated drain route instead of relying on surface flow.
What should I do if I cannot get 36 inches of clearance everywhere because of doors, steps, or tight corners?
Use 36 inches on the main route you expect people to traverse most, then narrow only at short pinch points to 32 inches if unavoidable. Avoid placing furniture so it reduces clearance more than expected when chairs are pulled out, and verify the route does not require squeezing through between table legs and walls.
How far from property lines should my patio be, and what if local rules conflict with the “usual” setbacks?
Always follow your municipality’s actual required setback for the specific structure type and lot configuration, because rules can vary by zoning and whether any portion is considered a structure (for example, attached cover). If you are unsure, ask the building department whether a ground-level patio is treated differently from decks or covered areas.
Do I need to worry about frost heave even if my base preparation looks solid?
Yes, especially in freeze-thaw climates, because frost damage is driven by subgrade and moisture, not just surface appearance. Ensure all organic material is removed, use the appropriate base depth for your soil, and do not skip geotextile or soil separation if you have expansive clay.
What is the most common “hidden” base prep mistake that shows up as shifting or cracking later?
Leaving settlement-prone material in the base zone, like roots, topsoil, or uncompacted fill, or failing to compact the base in lifts. Another frequent issue is using an underbuilt sand layer or insufficient edge restraint, which lets pavers migrate over time.
Should I seal concrete pavers or natural stone, and how does that affect slip resistance?
Sealing can reduce staining but it can also change traction, especially when it darkens and creates a smoother finish when wet. If slip risk matters (near a pool or in rainy climates), choose a sealant and finish that maintain a textured, slip-resistant surface rather than a glossy or polished look.
How can I reduce heat buildup on a south- or west-facing patio without changing the entire design?
Use lighter-colored pavers or a reflective surface, add a shaded zone with a pergola or umbrella, and consider spacing for airflow (avoid enclosing the patio with solid walls on all sides). Planning where the lounging set sits during afternoon sun is often more effective than changing materials alone.
What privacy solutions work best if I want privacy but I do not want a boxed-in feeling?
Prefer partial-height solutions and filtered sightlines, like a pergola with draping, tall planters, or a fence with spaced boards, then place them where sightlines actually hit. This gives privacy without blocking air movement, which is helpful for comfort in breezy areas.
Do patio design rules change if I include a grill, fire feature, or built-in seating?
Yes, because heat clearance and safe access become part of the layout, and the patio surface must be able to handle concentrated heat. Plan the grill zone so pathways remain unobstructed for carrying hot items, and confirm any clearance requirements with the manufacturer or local code for that appliance.
If I am hiring a contractor, what should I specifically ask about to avoid paying for the wrong work?
Ask what they include for grading, excavation depth, soil conditions assessment, base materials, compaction method, and drainage routing (including where water will go after it leaves the patio). In quotes, prioritize base preparation details, since it is the phase most directly tied to long-term shifting, puddling, and cracking.
When is it smarter to use the hybrid approach (pro base, DIY surface), and when should I go fully pro?
Hybrid is often best when the site needs correct grading, drainage, and base depth in tricky soil or slope conditions, but the surface installation is straightforward. Go fully pro if you have complex drainage constraints, major grade changes near the foundation, or you are unsure about soil type and frost-risk depth requirements.