For most residential patios, the standard is a minimum 2% slope (about 1/4 inch per foot) away from your house, maintained for at least the first 10 feet out from the foundation. That comes from the International Residential Code (IRC), which is the baseline most local jurisdictions adopt. Some municipalities tighten that requirement or add their own language, so the exact number for your property depends on where you live. But if you build to 2% and direct water away from the structure, you'll meet the code in the vast majority of US jurisdictions and pass inspection without issue.
Patio Slope Code Guide: Measure, Verify, and Pass Inspection

Miles Sutton
18 Jun 2026
What 'patio slope code' actually means
The phrase 'patio slope code' doesn't refer to a single universal rulebook. It's shorthand for wherever your local authority has drawn the line on how much a patio must slope for water to drain away from your home. That standard can come from three different places: your local municipal code, your state or provincial building regulations, or widely adopted model codes like the IRC or IBC that most jurisdictions use as a foundation.
The 2018 IRC (Section R401.3) says impervious surfaces within 10 feet of the building foundation must slope a minimum of 2% away from the building. The 2024 IBC goes a step further for commercial construction, requiring a 5% slope (1 unit rise per 20 units of run) for ground adjacent to the foundation, also for the first 10 feet. Residential projects almost always fall under the IRC standard, but your city or county may have adopted amendments that change the numbers. A quick call to your local building department, or a search on your municipality's website using the terms 'grading requirements,' 'site drainage code,' or 'patio permit requirements,' will tell you exactly what applies to your address.
If your patio connects to a public walkway or includes an accessible route, ADA and PROWAG standards also come into play. blank" rel="noopener noreferrer">For standard sidewalks and patio walkways, the cross slope (the side-to-side drainage angle) should not exceed 2%, and the running slope should not exceed 5% (1:20). Those limits exist specifically to balance drainage with accessibility, so if you have a blended transition or curb ramp as part of your patio design, plan for those thresholds from the start.
How to find your jurisdiction's specific requirement
- Go to your city or county's official website and search 'building code,' 'residential site grading,' or 'patio permit.'
- Call the local building department and ask: 'What slope is required for a patio or impervious surface within 10 feet of my foundation?'
- If you're pulling a permit, the permit application often lists applicable code sections or the plan reviewer can point you directly to the relevant standard.
- For projects in HOA communities, check CC&Rs as well, since HOA drainage rules sometimes exceed local code.
How to calculate and measure patio slope
Slope is expressed as either a percentage or a ratio of rise to run. A 2% slope means you drop 2 inches for every 100 inches of horizontal distance. In practical terms for a patio, that's 1/4 inch of drop for every foot of run (12 inches). So a 12-foot-deep patio should have a total drop of about 3 inches from the house edge to the outer edge. That's the number to aim for.
| Patio Depth | Required Drop at 2% | Required Drop at 1% | Required Drop at 5% |
|---|---|---|---|
| 8 feet | 2 inches | 1 inch | 4.8 inches |
| 10 feet | 2.5 inches | 1.25 inches | 6 inches |
| 12 feet | 3 inches | 1.5 inches | 7.2 inches |
| 16 feet | 4 inches | 2 inches | 9.6 inches |
| 20 feet | 5 inches | 2.5 inches | 12 inches |
Step-by-step slope measurement with basic tools
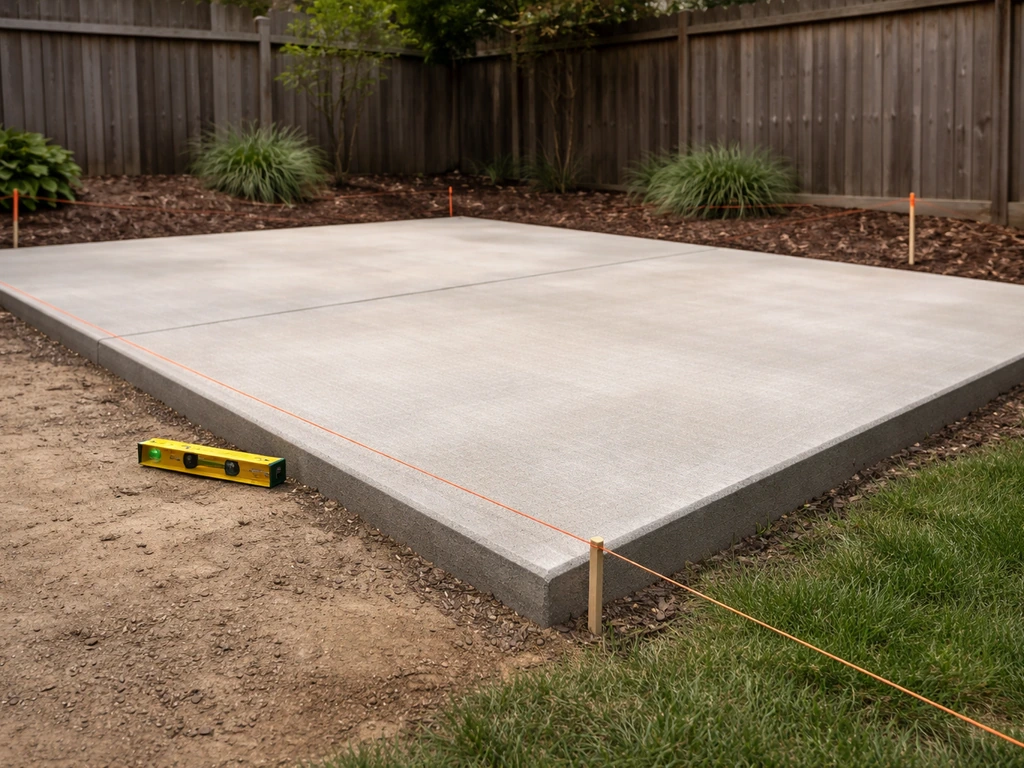
- Drive a stake at the high point (the house-side edge of the patio) and another at the low point (the outer edge). Run a string line between them at a known height.
- Use a line level or a 4-foot carpenter's level set on a straight board to confirm the string is level. Adjust until level, then measure the height of the string at both ends.
- Calculate the rise: the difference in height between the two string ends equals your total drop. Divide by the run (total horizontal distance in inches) and multiply by 100 to get the slope percentage.
- Alternatively, place a 4-foot level flat on the surface. Raise one end until the bubble centers, then measure the gap under the raised end. That gap over 48 inches gives you your slope. A 3/4-inch gap over 4 feet equals about 1.5%, which is just under code minimum.
- For a faster and more accurate check, a digital level or laser level set at the house wall will project a reference line across the entire slab so you can measure drop at any point along the patio.
The most common mistake is measuring slope only at one spot. Check it every 4 to 6 feet across the width of the patio. Low spots, crowning, and side-to-side variation are all failure points that inspectors will flag and that cause ponding in real rain events.
Code requirements by patio type
The 2% minimum applies broadly to impervious surfaces near the foundation, regardless of material. But the construction type affects how you achieve and maintain that slope over time. If you are planning an ACNH patio design, you can apply the same slope-and-drainage logic so your build looks right and stays consistent with code-style requirements.
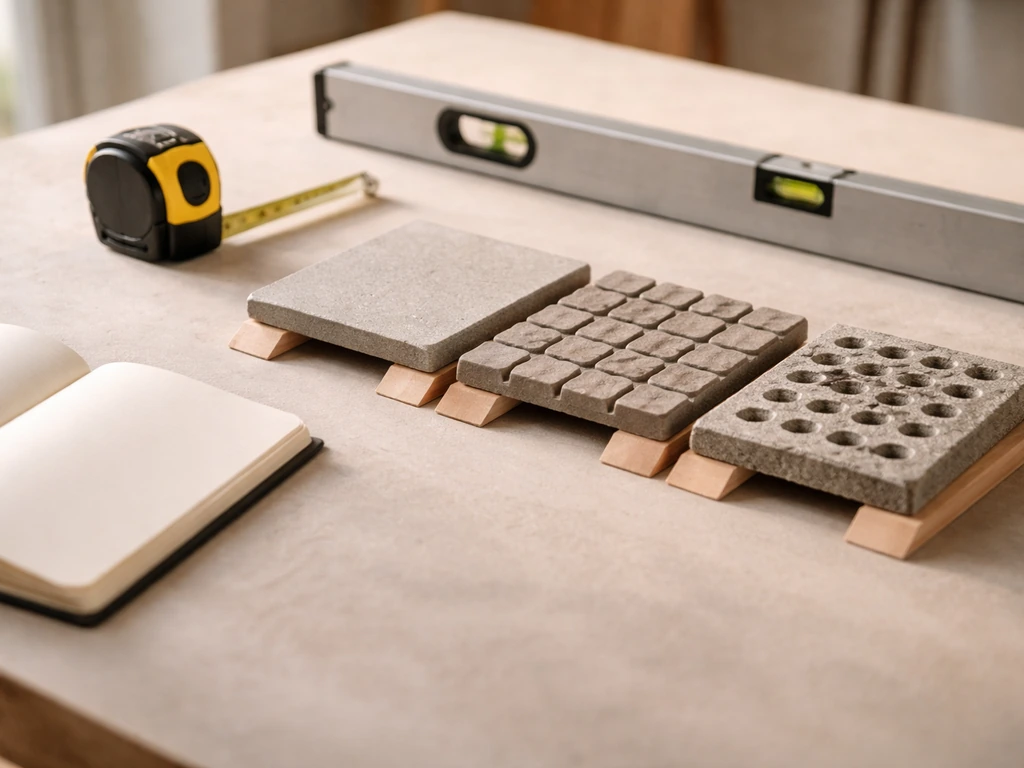
| Patio Type | Minimum Slope (typical IRC) | Notes |
|---|---|---|
| Poured concrete slab | 2% (1/4 in. per ft) | Slope is set during pour; very hard to correct after curing |
| Concrete pavers | 2% (1/4 in. per ft) | Bedding sand allows minor adjustment; easier to reset if settled |
| Natural stone pavers | 2% (1/4 in. per ft) | Irregular thickness requires extra care at base prep stage |
| Stamped concrete overlay | 2% (1/4 in. per ft) | Existing slab slope carries over; overlay adds thickness, may affect thresholds |
| Permeable pavers | 1–2% recommended | Some jurisdictions allow reduced slope for permeable surfaces; verify locally |
| Brick or clay pavers | 2% (1/4 in. per ft) | Mortar joints can crown over time; check regularly |
| Walkways (residential) | 2% cross slope max, 5% running slope max | ADA/accessibility rules apply if connecting to public routes |
Permeable pavers are worth a separate mention. Because water passes through the joints and into a gravel base rather than running off the surface, some jurisdictions allow a lower surface slope or treat them differently under stormwater rules. Don't assume that applies to your project. Check with your building department before designing around it.
Proximity to the structure matters too. Code drainage requirements specifically address the 10-foot zone closest to the foundation. If your patio extends beyond 10 feet, the drainage standard for the outer section may be less prescriptive, but you still need to ensure water doesn't pond and that the flow path doesn't double back toward the house. If you want to meet local patio rules, focus on how those drainage requirements apply to the whole flow path, not just the first 10-foot zone code drainage requirements.
Edge details, borders, and expansion joints
The edges of your patio are where slope problems most often show up, and where inspectors look first. A raised or misaligned border restraint can act like a dam, trapping water on the surface even if the center of the patio is sloped correctly. Make sure edge restraints sit at or just below the finished paver or slab surface, not above it, on the downhill sides of the patio.
At the door threshold, the relationship between your finished patio height and the bottom of the door frame is critical. Most codes require a maximum 1/4-inch vertical rise at thresholds for accessibility, and the patio surface immediately adjacent to a door should slope away from the threshold, not toward it. If you are planning a patio rules sign for accessibility and drainage expectations, check both the slope limits and any threshold requirements for door access accessible.
A common mistake is setting the patio surface flush with or slightly higher than the door threshold, which channels water directly under the door during rain. Aim to keep the finished patio surface at least 1 inch below the threshold, and make sure that transition slopes outward.
Expansion joints in concrete patios need to be planned with drainage in mind. A joint that runs parallel to the house can inadvertently collect water and channel it along the foundation wall. Where possible, run control joints perpendicular to the house so they act as drainage channels directing water outward. Seal expansion joints with a flexible polyurethane or silicone sealant to prevent water intrusion into the base while still allowing movement.
Downspouts are another edge detail that catches people off guard. If a downspout discharges onto or near the patio, you need to account for that water volume in your drainage design. Either extend the downspout to discharge beyond the patio edge, direct it into a pop-up emitter, or build a channel drain into the patio near the discharge point. Ignoring downspout volume is one of the top reasons patios that technically meet code slope requirements still flood in practice.
Installation best practices to hit the slope and pass inspection
Getting slope right is almost entirely a base preparation issue. If you're also dealing with patio rules svg requirements, make sure the drainage and grading details match what your plan shows before you schedule an inspection Getting slope right. By the time you're placing pavers or pouring concrete, you're too late to make major corrections without a lot of rework. Do it right at the subbase and base layer.
Base and subbase prep

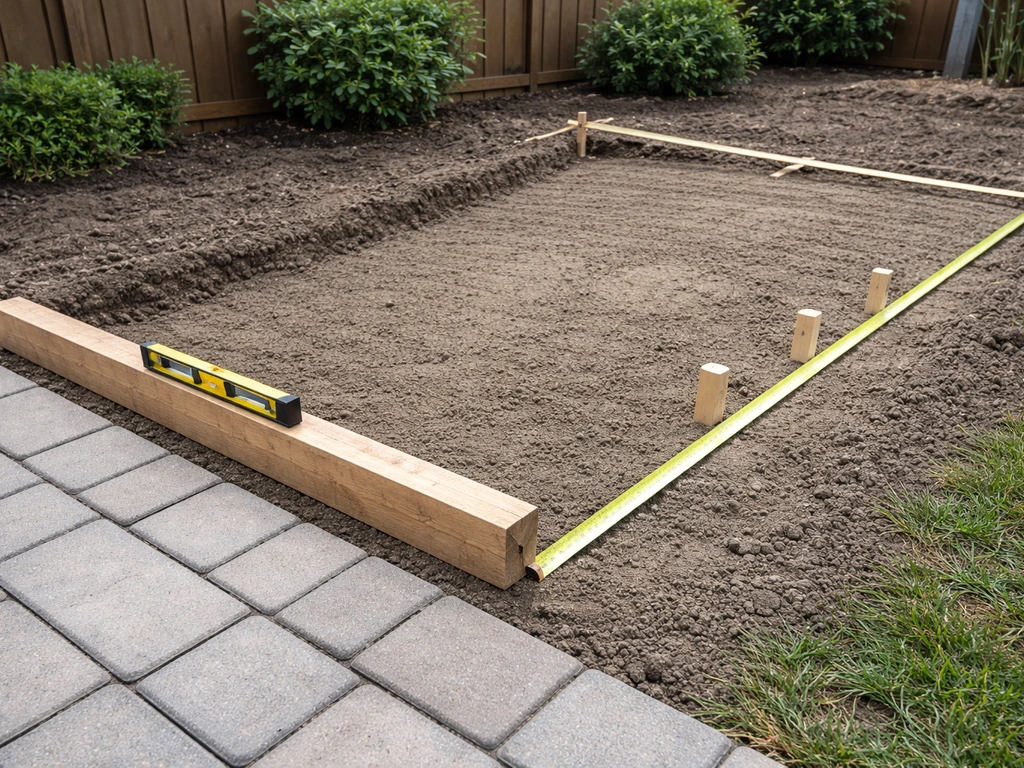
Excavate to the depth required by your patio type, typically 6 to 8 inches for a paver patio (4 to 6 inches of compacted gravel base plus 1 inch of bedding sand) and 4 to 6 inches for a concrete slab. Set your slope in the subgrade itself before adding base material. Use a laser level or long straightedge to verify that the compacted native soil already has the right pitch before you add a single inch of gravel.
- Set a laser level or shoot grades with a hand level at the house edge. Mark the required finished height at intervals across the excavation.
- Add and compact crushed stone base (typically 3/4-inch clean or compactable gravel) in 2- to 3-inch lifts, checking slope after each pass with a compactor.
- For paver patios, spread 1 inch of coarse bedding sand over the compacted base and screed it to the required slope using slope-set screed pipes. Do not compact the sand after screeding.
- For concrete, set your forms at the correct elevation on both sides so the pour naturally achieves the slope. Check form elevations at every stake before placing concrete.
- Use a plate compactor to achieve at least 95% compaction in the base. Inadequate compaction is the number one cause of settling that ruins slope over time.
Setting and leveling the surface
String lines are your friend throughout the entire process. Run strings from the house to the outer edge at the correct slope, and check every paver or screed rail against those strings. A 4-foot level is useful for local checks, but it can fool you on longer distances if the surface has gradual crowning or cupping. Use a long straightedge (8 to 10 feet) to spot low areas and high spots across wider sections.
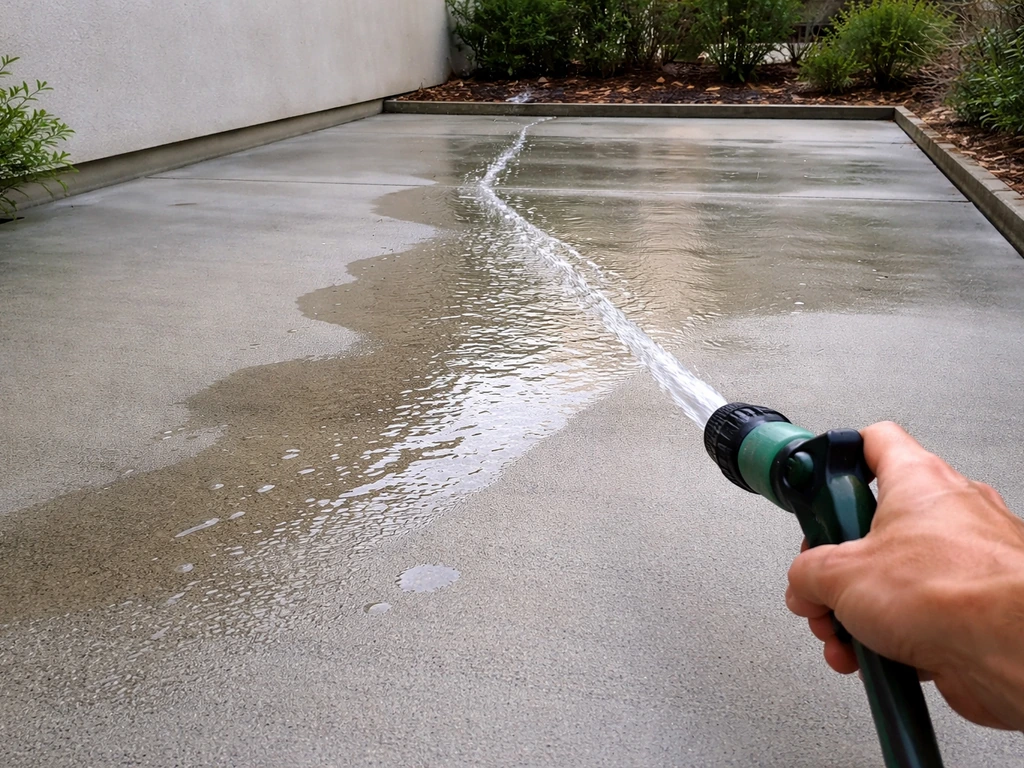
For concrete pours, bull-float and then hand-float with the slope in mind, keeping your tool passes moving in the direction of fall. After finishing, do a water test with a garden hose before the surface sets to confirm flow direction. It sounds simple but it catches problems you can't see by eye.
Testing, inspection, and what to document
Before you call for an inspection, do your own punch list. To stay compliant, review outdoor patio rules with your local building department before you proceed. This saves you the delay of a failed inspection and the headache of rescheduling.
- Run a garden hose or a bucket of water onto the patio surface and watch the flow. Water should move clearly and continuously toward the outer edge, not pool anywhere on the surface.
- Measure slope at a minimum of 3 to 5 points across the width of the patio. Record each measurement. All points should show at least 1/4 inch of fall per foot (2%).
- Check the threshold area at any doors specifically. No water should pool within 18 inches of a door opening.
- Inspect edge restraints and borders to confirm none are raised above the surface on the downhill sides.
- Look for any areas where the surface is within 1/2 inch of level. Those are likely ponding spots.
- Take photos of your measurements, including close-ups of your level readings and any slope calculations noted on paper, and keep them with your permit file.
- If your permit required engineered plans, confirm the as-built slope matches the approved plans before calling for inspection.
Inspectors in most jurisdictions use a straightedge and either a digital level or a simple 4-foot level to verify slope. Some use a 10-foot straightedge to check for surface uniformity and ponding potential. Having your own documentation ready shows you took it seriously and often makes the inspection go faster. If you are trying to meet requirements like the UCF patio code, bring those local expectations to your inspection so everything is documented correctly. Keep photos with timestamps if you can.
Fixing slope problems on an existing patio
If your patio is already built and draining wrong, your options depend on what it's made of. Here's the honest breakdown.
Pavers: lifting and resetting
Pavers are the easiest fix. Pull up the affected section, re-grade the bedding sand, and reset the pavers with the correct slope. This is a realistic DIY project for sections up to about 100 square feet. For larger areas, or where the problem is in the base (not just the sand layer), you'll need to excavate, recompact, and re-lay everything, which is more involved but still within reach for a determined DIYer with a plate compactor rental.
Concrete: grinding and overlay options
Concrete is harder. If the slab has localized low spots, a concrete grinder or angle grinder with a diamond cup wheel can remove high areas to create better flow. For widespread drainage failure, a self-leveling overlay (also called a micro-topping or resurfacer) can build up low areas, but you're limited to about 1/2 to 3/4 inch of overlay depth before adhesion becomes a concern. Deeper corrections require a mud-jacking or polyurethane foam lifting process, which injects material under the slab to raise it. That works well for settled sections, typically costs $300 to $800 per section, and is usually a job for a specialist.
If the whole slab is wrong (sloping toward the house, or flat with no drainage), the realistic options are: grind the high end down if structurally feasible, add a channel drain at the low edge to intercept water before it reaches the house, or in severe cases, break out and repour. Breaking out and replacing is expensive but sometimes the only right answer, especially if the slab is settled against the foundation and pulling water toward it.
When to call a pro
Call a professional if: the drainage problem involves the foundation itself (you're seeing water intrusion into the basement or crawl space), the slab is cracked and settled significantly, the fix requires re-grading a large area around the house, or you're dealing with a permit violation and need engineered documentation. A licensed concrete contractor or hardscape installer can pull the permit, take responsibility for the as-built work, and give you a warranty on the drainage performance. For code compliance issues specifically, getting a licensed contractor on record protects you at resale.
When interviewing contractors for a slope correction, ask specifically: 'What slope will you build to, and how will you verify it before you leave the site?' A contractor who can answer that question with a specific number and a specific tool (laser level, digital slope gauge, or string line with documented measurements) is one who understands the work. A contractor who just says 'it'll drain fine, don't worry' is one to be cautious about.
FAQ
Do inspectors check the slope on pavers or on the subbase?
In many places, slope is measured on the finished surface, but the inspection standard is for achieved drainage (no ponding) within the required distance from the foundation. If you have pavers, the bedding sand thickness and joint setting height can change the final grade, so verify after the last course, not just after base compaction.
What if my patio is close to 2%, but there are puddles in only one spot?
If the patio is flat or nearly flat, the failure is usually “localized” low areas, not the average slope. Fixing one low pocket is often cheaper than redoing everything, but you must re-check slope every 4 to 6 feet across the width after resetting or grinding.
How do I measure patio slope in two directions (run and cross slope)?
String lines and laser levels measure pitch along a path, but a patio can fail due to side-to-side cross slope. For wide patios, check both the main “fall direction” and the cross direction, especially near edges, steps, and any border restraint.
Is a simple garden hose test enough to confirm code compliance?
Do not rely on the garden hose test as the only check. Inspections often look for ponding potential under rain-like flow, so test with a continuous stream from a height and include any downspout discharge point, then confirm water reaches the intended flow path without backing toward the house.
What happens if my gutters/downspouts empty onto the patio?
Yes, if your patio sits under an overhang or roof drip line, you must account for where that concentrated runoff lands. Even with correct 2% slope, a downspout or gutter splash can overwhelm the flow path, so plan a splash pad, extended discharge, or a channel drain at the discharge zone.
Can a correctly sloped center still fail inspection because of the patio edges?
Usually no. Many patios look compliant by average slope but fail when water is “caught” by raised edging, too-high restraints, or joints that act like tiny dams. Confirm edges are at or slightly below the finished surface, and re-check slope right at the border where inspectors look first.
Does the 10-foot foundation zone matter if my patio is longer than 10 feet?
If your patio extends beyond the first 10 feet, the code language may be less strict outside that zone, but you still need a drainage flow path that does not loop back toward the house. Practically, keep the slope consistent enough to prevent new ponding farther out and ensure the runoff exits to a safe discharge location.
How do patio slope rules change when there is an accessible route or a door threshold?
For accessible routes, you need to consider cross slope and running slope limits, but also the door thresholds and transition edges. The surface should slope away from a threshold, and the immediate transition area is where inspectors often find violations even when the overall patio pitch is correct.
Can I use permeable pavers to meet a lower patio slope requirement?
Yes. Permeable pavers sometimes change how stormwater is handled, but jurisdictions that allow alternative treatment still often require you to prevent water from reaching the foundation. Treat permeable systems as an approval-based design option, confirm requirements with your building department before building to a lower slope.
Do concrete expansion joints affect patio slope and inspection results?
Not necessarily. Expansion and control joints can create micro-level changes that trap water if a joint line becomes a trough leading back toward the structure. Plan joint orientation to support outward drainage, and confirm you do not create a continuous water path toward the foundation wall.
What documentation should I bring to the inspection for patio slope code compliance?
Measure and document it. Take photos of your string-line or laser-level setup, record the slope readings at multiple locations, and keep those with your permit paperwork. If the inspector uses a straightedge verification method, your documentation can speed up the process when questions arise.
Which patio material is easier to fix when the slope is wrong?
If you must correct a mistake, pavers are usually the easiest because you can lift, re-grade bedding sand, and reset. With concrete, small localized failures can be ground, but if the slab settled or is widely wrong, grinding alone may not create enough flow, and overlay depth or injection methods may be limited.
What should I ask a contractor to prove they will meet patio slope code?
Ask this question because a contractor may “eyeball” grade, but code compliance depends on measured pitch and verification before installation. A solid answer includes the target slope number, the measurement tool, and how they confirm it after base compaction and after final setting.