If you're searching for an ACNH patio design code, you're looking for shareable custom pattern codes (or QR codes) that let you import tile designs into Animal Crossing: New Horizons and then arrange them, along with furniture and decor, into a clean patio layout on your island. This guide walks you through the full workflow: finding and importing the right codes, planning a layout that fits your outdoor space, placing everything so it looks intentional rather than cluttered, and fixing the alignment and seam issues that trip up most players.
ACNH Patio Design Code: DIY Patterns, Layout Rules

Miles Sutton
2 Jun 2026
Quick clarification: ACNH design codes vs. real patio building codes
Worth flagging upfront: if you landed here because you're building an actual patio and need to know about local permits or construction codes, this article is about the game. Real-world patio projects involve a completely separate set of rules. If you are focused on patio design rules for your in-game layout, this guide stays on the design code side of things real patio projects involve a completely separate set of rules. Local governments, including cities like Portland and Bend, Oregon, blank" rel="noopener noreferrer">require permits for decks, porches, and patio covers when they're covered, elevated, attached to the house, or exceed a certain size. Zoning rules around setbacks and lot coverage are an additional layer on top of building permits. If that's what you're researching, jump to the last section of this article for what to check next. For everyone else who wants to build a gorgeous in-game patio, keep reading.
What you need before you start
Before you place a single tile, make sure you have the right tools and resources lined up. Going in without preparation is how you end up with a half-finished patio and a inventory full of mismatched items.
- Nintendo Switch Online membership: You need this to access the Custom Design Portal in-game (the kiosk in the Able Sisters shop), which is where you enter MA- codes to download other players' patterns.
- Your NookLink app (Nintendo Switch Online app on your phone): This lets you scan QR codes directly from your phone into the game. Without it, you have to manually type in the MA- design code digit by digit.
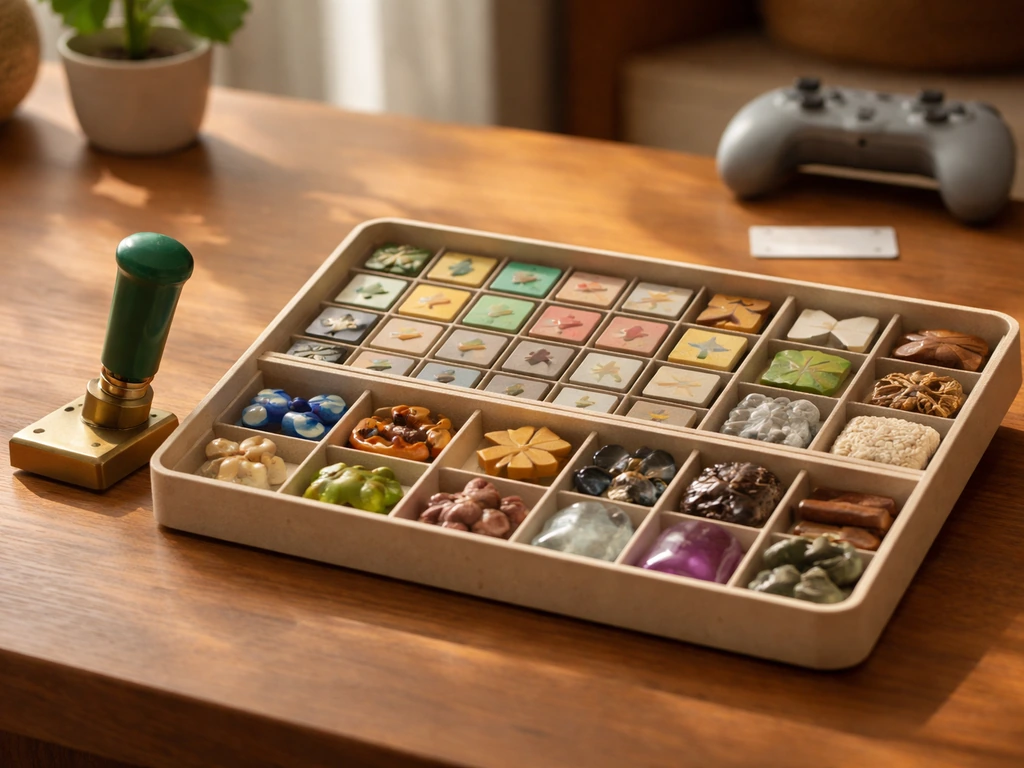
- A shortlist of patio tile codes: Gather 2 to 4 tile patterns before you start, including a primary paving texture (stone, wood plank, concrete), an optional border or trim tile, and a rug or mat design for the seating area.
- A mood board or reference image: Screenshot a patio layout you like from Pinterest, Reddit's r/AnimalCrossing, or YouTube. Having a visual reference while you build saves enormous time.
- The right furniture set already in your storage: Don't start laying tiles until you have the chairs, tables, planters, and lighting you plan to use. Furniture placement determines how much tile you actually need.
- Open, flat terrain: Use your island editor (Island Designer app) to level the ground and remove any unwanted cliffs or water features from the patio footprint first.
How to import a custom design code
- Go to the Able Sisters shop and walk up to the Custom Design Portal kiosk on the right side of the store.
- Select 'Search by Creator ID' or 'Search by Design ID' depending on whether you have an MA- (design) or MO- (creator) code.
- Type in the code manually or, if using NookLink, scan the QR code from your phone to populate it automatically.
- Download the pattern. It goes into your Custom Designs app in your NookPhone.
- Equip it from your NookPhone, then go outside and use it on the ground to place the tile. Hold A to stamp it repeatedly across the area.
Choosing a patio theme and layout that fits your space
The theme you pick should complement your house exterior and the surrounding island terrain. A Japanese zen patio looks odd next to a brightly colored Americana house, and a tropical tiki setup conflicts with a dark cottagecore aesthetic. Think of your house exterior color, the season your island is in, and what kind of furniture you already own before committing to a tile pattern.
For layout sizing, the most common patio footprints in ACNH fall into three ranges. A small patio (3x3 or 4x4 tiles) works for a single seating area with two chairs and a table. A medium patio (5x5 to 6x8) fits a full outdoor dining set plus a couple of accent pieces. A large statement patio (8x10 or bigger) supports multiple zones: a dining area, a lounge corner, and a pathway connecting them. Start with the size that matches the open space directly in front of or behind your house, then choose a layout style.
| Theme | Best tile style | Key furniture pieces | Works best with |
|---|---|---|---|
| Cottagecore | Worn stone or floral path tiles | Wooden table, rattan chairs, flower baskets, lanterns | Green or beige house exterior, woodland surroundings |
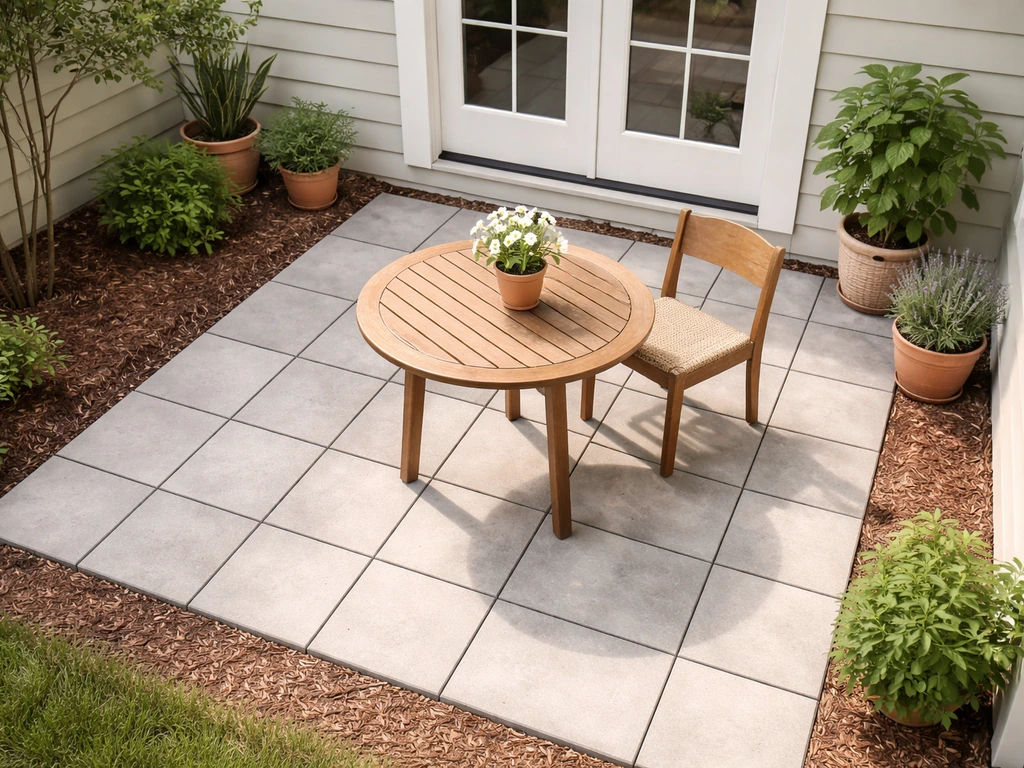
| Modern minimalist | Concrete slab or clean grid tiles | Iron outdoor set, potted succulents, simple lighting | White or gray house exterior, trimmed hedges |
| Japanese zen | Gravel or tatami-style custom tile | Bamboo fence, stone lanterns, bonsai, low table | Dark wood exterior, bamboo or cherry blossom trees nearby |
| Tropical/beach | Sand or weathered wood plank tiles | Hammock, palm planter, tiki torch, beach chairs | Sandy terrain, ocean-adjacent placement |
| Farmhouse | Brick or terracotta tile | Wooden barrel, barrel planter, picnic bench, string lights | Red brick or wood-panel exterior, garden beds nearby |
Once you pick a theme, sketch your layout on paper or in a notes app before going into the game. Mark where the tile field starts, where a border row goes, and where furniture anchors (like the table and chairs) will sit. This prevents you from tiling the whole area and then realizing your furniture blocks the most visible seams.
Step-by-step: build the patio using a repeatable design code workflow
This workflow is repeatable, meaning you can use it for any theme, any size. The logic stays the same whether you're doing a cozy 4x4 or a sprawling 10x12.
- Clear and level the footprint first. Use Island Designer to remove any rocks, flowers, or terrain irregularities in your patio area. Flat ground makes tile alignment clean.
- Place one anchor tile in the corner closest to your house door. This is your starting reference point. Every tile after this should be measured from it.
- Stamp the primary tile across the full interior of your planned patio footprint. Walk in a grid pattern (left to right, row by row) so you don't miss squares or double-stamp.
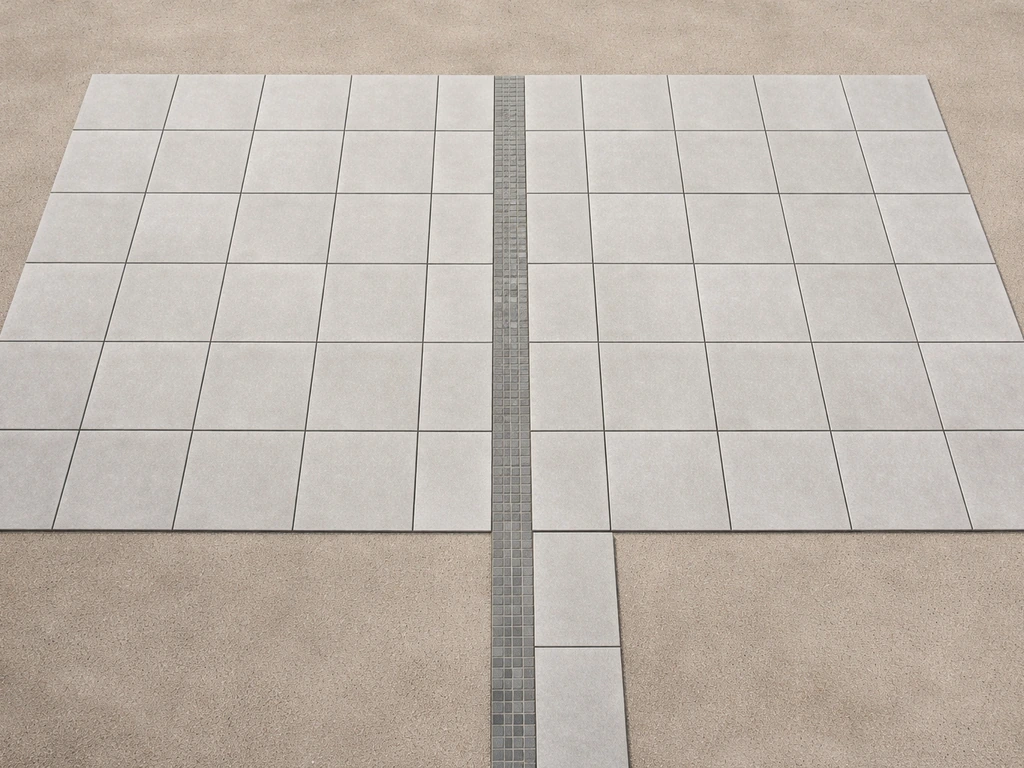
- Add a border tile around the perimeter if your design uses one. A border visually frames the patio and makes repeating interior tiles look intentional rather than random.
- Place your largest furniture piece first (usually a table or outdoor sofa). This anchors the layout and tells you exactly how much floor space is left for accent items.
- Fill in accent furniture working outward from the anchor piece. Leave at least one tile of breathing room between the edge of furniture and the patio border.
- Add vertical elements last: planters, lanterns, fences, and signs. These go on the outer corners or against walls/hedges so they don't block sightlines to the main seating area.
- Walk around and screenshot from multiple angles before calling it done. The camera angle in ACNH can hide misaligned tiles or furniture that clips awkwardly.
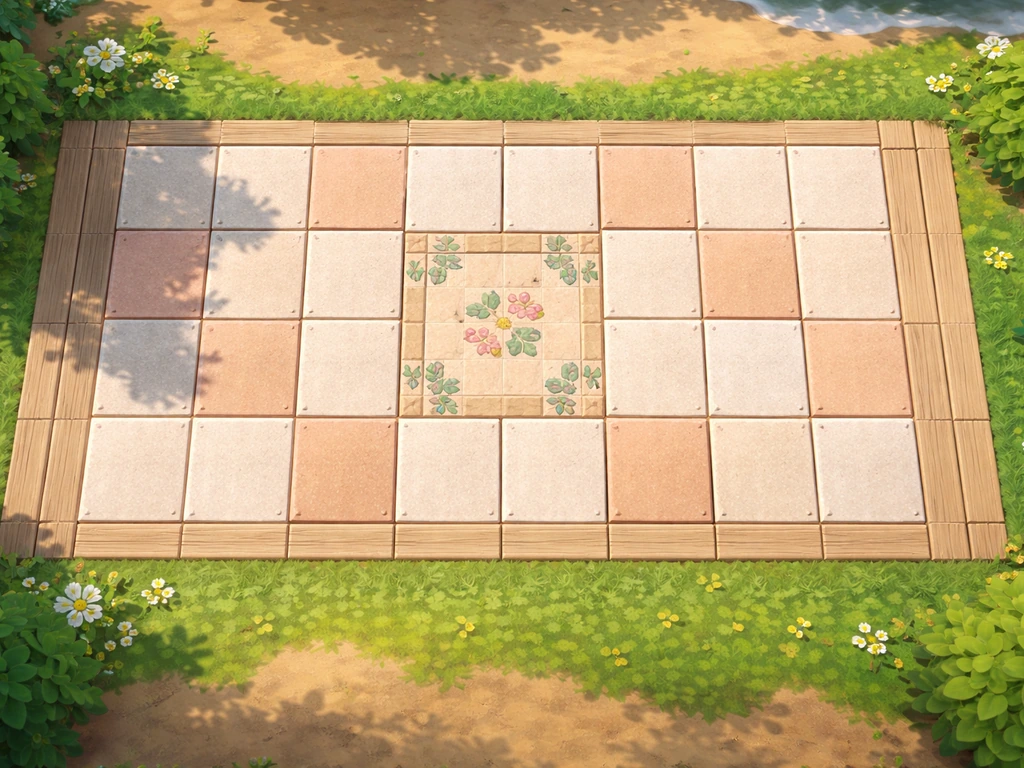
Example ACNH patio design-code layouts
These are ready-to-use layout frameworks. Swap in your own downloaded tile codes and furniture to match your theme. The structure and spacing logic is what matters here.
Small cozy patio (4x4 tile footprint)
Use a single stone or wood-plank tile code for the full 4x4 interior. No border needed at this size since it reads as one clean slab. Place a small round table in the center-back two tiles, with one chair on each side of it. Add a single floor lamp in the back corner and a small potted plant in the front corner diagonal from it. This layout leaves the front two tiles open, which makes the patio feel approachable rather than cramped. Total items: table, 2 chairs, 1 lamp, 1 planter.
Medium outdoor dining patio (5x7 tile footprint)
Use two tile codes here: a primary paving tile for the 3x5 inner area and a contrasting trim tile for a single-tile border all the way around. Place a rectangular outdoor table centered in the inner area with two chairs on the long sides and one chair at each end. Add a lantern on each of the two back corners of the inner area. Put a tall planter or bamboo stalk at each front corner of the border to define the entry point. This reads as a proper dining space with clear visual structure.
Large multi-zone patio (8x10 tile footprint)
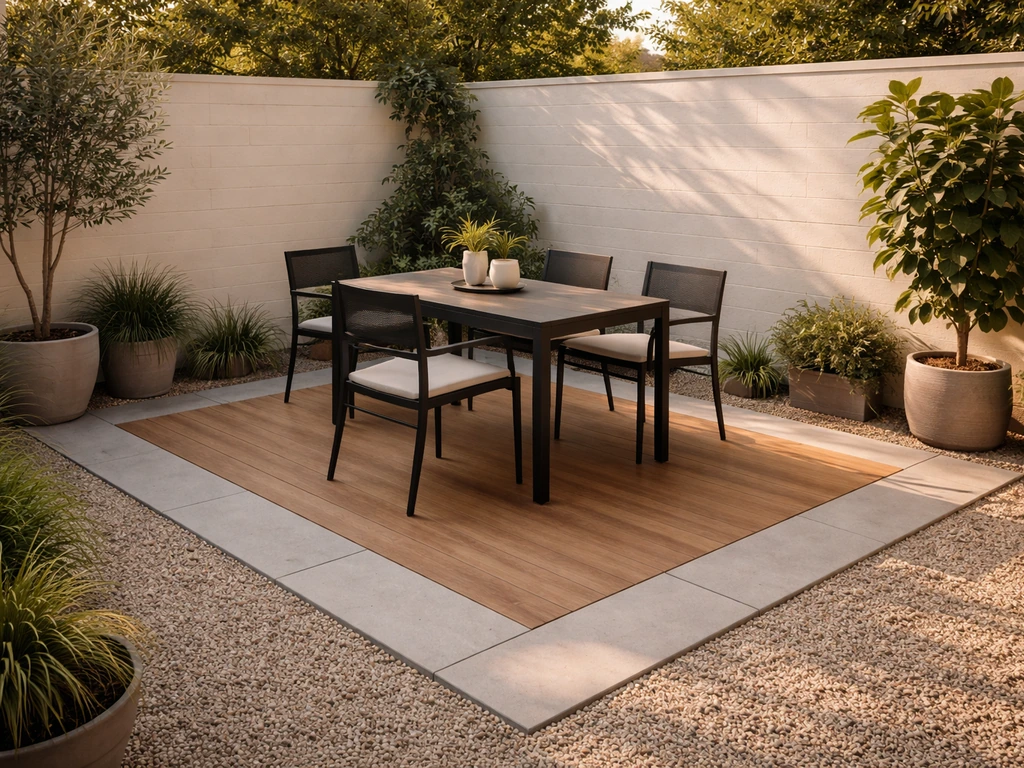
Split the footprint into two zones: a 5x5 dining zone on one side and a 4x5 lounge zone on the other, connected by a 1-tile-wide pathway down the middle using a third accent tile. Use your primary tile in both zones and the accent tile only for the connecting path. In the dining zone, follow the medium layout above. In the lounge zone, place an outdoor sofa against the back edge, a low coffee table in front of it, and one or two floor cushions or chairs facing it. Add string lights using a custom design on the ground between the two zones to simulate overhead ambiance. Planters and fencing can line the outer edges of the whole footprint to unify it.
Troubleshooting and finishing touches
Even a well-planned patio runs into problems. Here's how to fix the most common ones.
Tile seams look obvious or misaligned
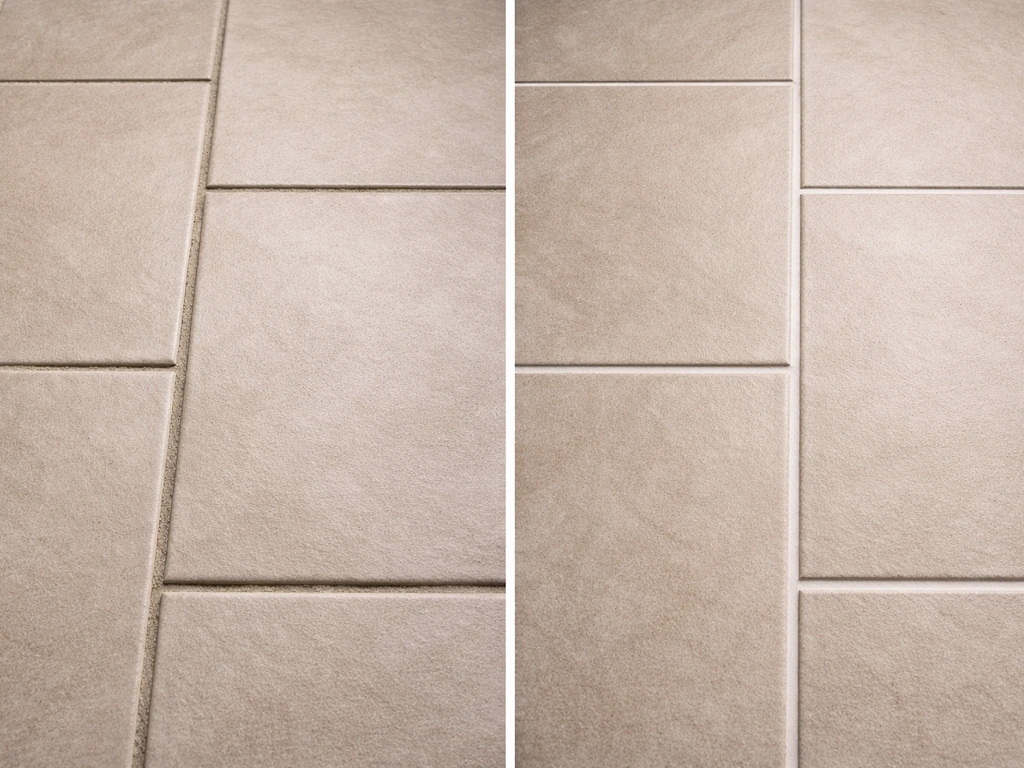
This usually means your tile pattern has a directional repeat that you stamped inconsistently. The fix is to always stamp tiles moving in the same direction, either left to right or top to bottom, never alternating. If the seam is between two different tile codes (like interior and border), try adding a 1-tile overlap zone where the two tiles blend, or use a plain neutral tile (like the plain dirt path) as a visual buffer strip.
Furniture overlaps or clips into each other
ACNH furniture has hidden footprints that don't always match their visual size. When items seem to clip, move one piece two full tiles away and work back in one tile at a time. As a rule of thumb, leave one empty tile between any two standalone furniture pieces and two tiles of clearance behind chairs (for the 'walking path' your character needs).
The patio looks too small or too empty after placing furniture
If it looks empty, add layers rather than more furniture: a custom design rug under the table, a floor lantern in an unused corner, or a decorative sign near the entry. If you want your in-game patio to feel complete, consider adding a patio rules sign near the entry so visitors know where to go and what to follow. If it looks small and cramped, remove the border tile row entirely and extend the primary tile by one row in each direction. This is the fastest way to visually expand the space without rearranging furniture.
Patio looks awkward at an angled house corner
If your house sits at a non-standard angle or your terrain is asymmetrical, use furniture and planters to soften the hard edges rather than trying to align tiles perfectly with the house wall. A row of bushes or tall plants along the irregular edge creates a natural visual buffer. You can also use a custom design to create a 'stepping stone' path that trails off diagonally, which reads as intentional rather than misaligned. If you want the easiest way to plan your in-game space, use the patio slope code workflow so your tiles and paths line up cleanly.
Scaling issues when copying a layout you saw online
Most patio layouts posted online don't specify exact tile counts, so your version ends up either too tight or too spread out. When you see a layout you want to replicate, count the tiles visible in the screenshot (each character roughly occupies one tile of space for reference) and multiply to get your footprint dimensions. Then compare that to your available space before you commit to tiling the whole area.
If you're actually asking about real patio code: what to check next
If you meant local building or zoning codes for an actual patio project, here's where to start. If you're still deciding what to build, start by reviewing outdoor patio rules like zoning limits and permit requirements for your area. Real patio regulations split into two separate tracks: zoning rules and building permits. For example, the City of Rosemount’s patio and slab information distinguishes zoning requirements such as setbacks and placement from building permit requirements blank" rel="noopener noreferrer">Real patio regulations split into two separate tracks: zoning rules and building permits.. Zoning rules cover setbacks (how far the patio must sit from your property line), lot coverage limits, and sometimes height restrictions. Building permits cover structural safety, especially for covered patios, elevated decks, or anything attached to the house. Cities like Portland and Bend, Oregon publish specific permitting guides for decks, porches, and patio covers, and many other municipalities have similar documents on their planning department websites.
The first step is always to call or visit your local building or planning department (or check their website) and ask two questions: does my patio project require a zoning review, and does it require a building permit? The answer depends on whether it's covered, how large it is, whether it's attached to the house, and how high off the ground it sits. Patio slope, drainage, and setback requirements are worth reviewing too, and those topics are covered in related guides on this site covering patio design rules, patio slope code, and general outdoor patio rules to keep your project compliant from the start.
FAQ
What should I check about a tile pattern code before I import it for patio use?
Avoid importing patterns that include transparency holes or mixed backgrounds. For ACNH patios, use tile codes that export as a full, opaque paving surface, otherwise you will see mismatched seams when you repeat the stamp and when furniture partially covers the edges.
How do I handle tile patterns that look different when stamped in opposite directions or at corners?
Decide the “direction” of the repeat first, then keep it consistent across the entire field. If you need a turn or corner, rotate the code only at the zone boundary, not mid-row, so the grain lines and directional textures do not fight at each seam.
When two tile codes meet at a border, what is the best way to prevent the seam from looking obvious?
If you are using multiple tile codes (interior plus trim), build a dedicated 1-tile neutral buffer only where the codes meet, not around the whole border. This keeps the transition intentional while preventing the entire perimeter from looking like a patchwork.
What is the easiest way to make sure my patio layout is walkable and not “clipped” by furniture placement?
Before placing the first chair, confirm clearance behind and between items by temporarily placing them, then testing character movement. A safe rule is two empty tiles behind chairs and one empty tile between separate standalone pieces, especially around tight corners.
My patio looks noisy or busy even though the layout is correct. How can I fix that?
If the ground texture looks too busy, reduce visual noise by removing the accent tile frequency. Use the accent only for a single connector (like one center path) and keep the rest of the footprint on the primary paving code.
My house is angled and the terrain is uneven, should I force the tile grid to line up with the wall?
Use one “anchor edge” as your reference, either the house wall side or the visible entry side. Align furniture and planters to that edge, then accept small tile misalignment on the other side, because viewers read the scene structure more than perfect grid matching.
What is the safest way to expand a patio when it feels small without rebuilding the whole layout?
If you want a clean expansion, remove only the outermost border row or column, then extend the primary tile outward one row at a time. Re-add trim only after you confirm furniture still clears seams and does not block the most visible joints.
How can I avoid getting stuck mid-build because I run out of tiles or furniture pieces?
Do a quick preflight inventory check: count how many custom tiles you need for the footprint and verify you still have enough slots to place all furniture and decor. If you are missing a key item, swap the “anchor” piece first (table or sofa), then re-check spacing before filling in small decor.
How accurate is it to copy a patio footprint from an online screenshot, and how should I translate it to my island?
If you are replicating a layout from a screenshot, account for perspective. Count visible tiles and use a one-character-per-tile estimate only for spacing, then verify with a test placement on your island before tiling the entire area.
How can I make an ACNH patio feel visitor-friendly, not just pretty?
When your in-game patio is for visitors (nook tours, villagers passing by, or a designated area), add a single clear navigation cue, like a sign near the entrance plus a continuous path line from the main walkway. Avoid scattering multiple entry cues that compete with each other.