
For most households, a patio between 12x16 feet and 16x20 feet covers a standard seating group or four-person dining set with comfortable circulation. But the right size for your specific space depends on three things: what you plan to do out there, how much yard you have to work with, and whether the layout leaves enough room to actually move around without bumping furniture every time you walk past. This guide walks you through sizing it all out, from measuring your yard to verifying clearances before a single paver goes down.
Patio Size Guide: How to Plan Dimensions for Your Space

Miles Sutton
29 Apr 2026
Start with your goal and available space
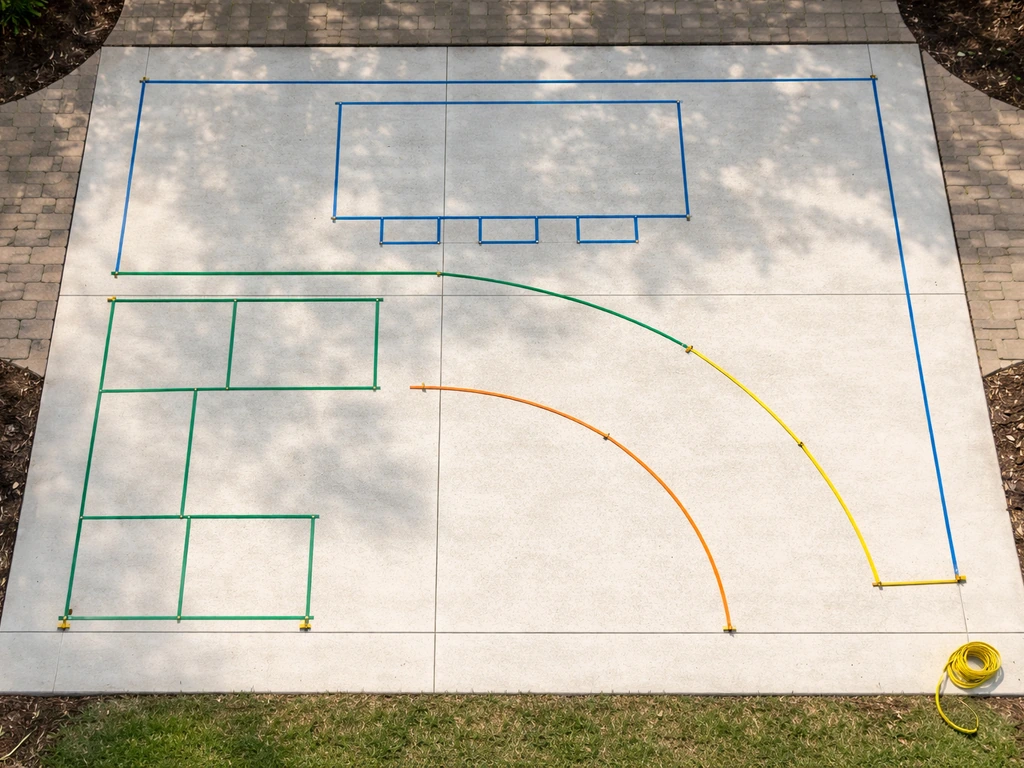
Before you pick a number, get clear on what you want the patio to do. A lounging space with a sofa and fire pit has very different footprint needs than a dining area for six or a grilling station with prep room. Write down your primary use first, then list secondary ones. You might want dining plus a seating conversation area, or a grill zone adjacent to a small bistro setup. Each function needs its own zone, and those zones add up fast.
Then look at your available space honestly. Walk the yard and note what's fixed: the house wall, any doors or steps that swing outward, utility boxes, downspouts, fence lines, and setback requirements from your local municipality (most require at least 5 to 10 feet from a property line for hardscape, but check your local codes). A model-code draft example like Oregon’s Land Conservation and Development Commission (LCD) draft shows how setback concepts are typically written into codes and can vary by jurisdiction, so it’s worth checking your local requirements setback requirements from your local municipality. The space left after those constraints is your real working envelope, not the full yard measurement.
A useful mental model here is to think in zones rather than one big rectangle. A seating zone, a dining zone, and a transition/pathway zone are separate areas that sit next to each other. When you add them up with the spacing between them, that's your patio's total footprint. If the available space can't fit all three comfortably, you'll need to prioritize or consider a two-level or L-shaped design.
Measure the area and account for access and obstructions
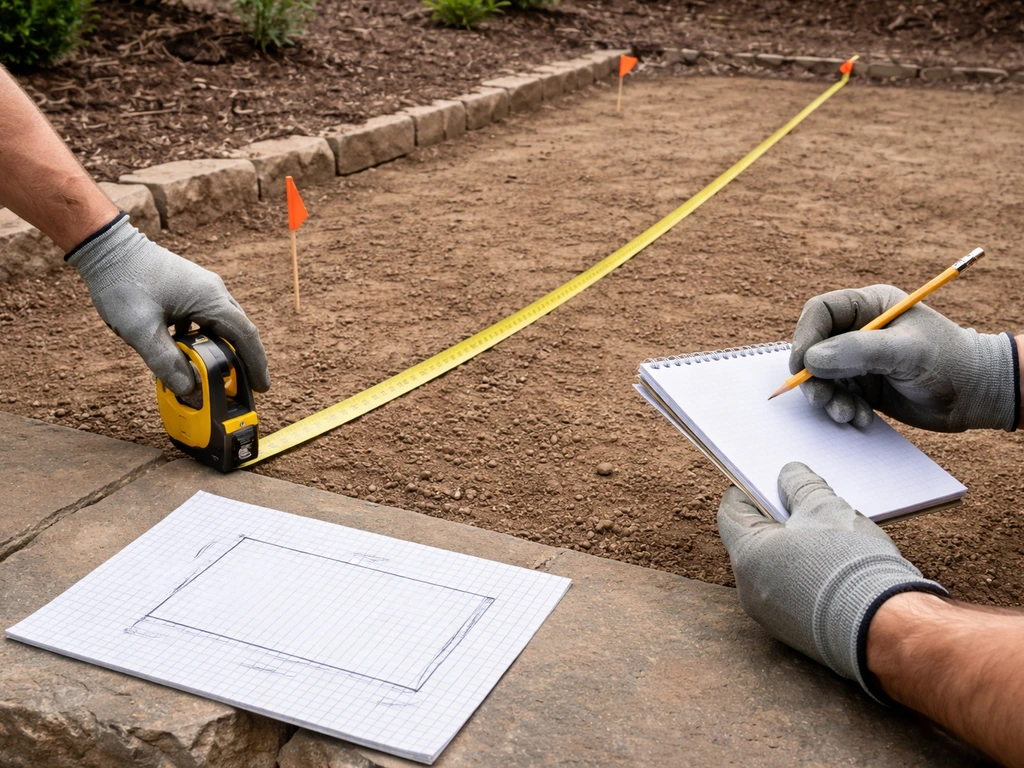
Grab a 25-foot tape measure, a notepad, and ideally a helper. Measure the usable area in both directions and sketch it on graph paper at a consistent scale, something like 1 inch equals 2 feet works well. Mark every obstruction: doors, windows at low height, steps that project outward, garden beds, slopes, and utility covers. These aren't just cosmetic notes; a door that swings outward 30 inches into your patio instantly eats a whole furniture zone.
Pay close attention to grade changes. Even a 2-inch slope across 12 feet affects drainage and whether you can use a simple gravel or paver base or need grading work first. If your ground slopes more than about 1 inch per foot, factor in retaining, leveling, or a raised deck design before you commit to a size. A slightly smaller level patio is almost always more livable than a larger one that pitches toward the house.
For clearance around fixed obstructions, use 36 inches as your minimum passable circulation width. That's the standard accessible route width from ADA guidelines, and it's also just what feels non-claustrophobic in practice. If the patio must serve as an accessible exterior path, some standards push that to 48 inches of clear width. Either way, protruding objects like planters, bench ends, or side tables should never encroach on those walkable corridors.
Sizing for seating: spacing, circulation, and comfort
A standard outdoor sofa runs about 85 to 95 inches wide and 35 to 40 inches deep. A pair of lounge chairs adds roughly 30 to 35 inches each. When you arrange these into a conversation group around a coffee table, the whole cluster typically occupies a footprint of about 10x12 feet minimum, and 12x14 feet if you want people to pull chairs back without hitting anything. For a full sectional or U-shaped configuration, plan on at least 14x16 feet to keep that arrangement from feeling cramped.
The coffee table spacing rule worth knowing: leave 16 to 24 inches between the edge of the coffee table and the front of surrounding seating. Less than 16 inches and people are reaching awkwardly; more than 24 inches and the conversation zone starts to feel disconnected. That single measurement does a lot to make a seating area feel intentional rather than thrown together.
Circulation around the seating group needs at least 36 inches from the outer edge of any furniture to a wall, step, or adjacent zone. That's enough for a person to walk through without turning sideways. If you want two people to pass each other comfortably, bump that to 48 inches. When a seating zone butts up against the house wall on one side, that wall side doesn't need that clearance, but all other sides do.
Sizing for dining and other key layouts
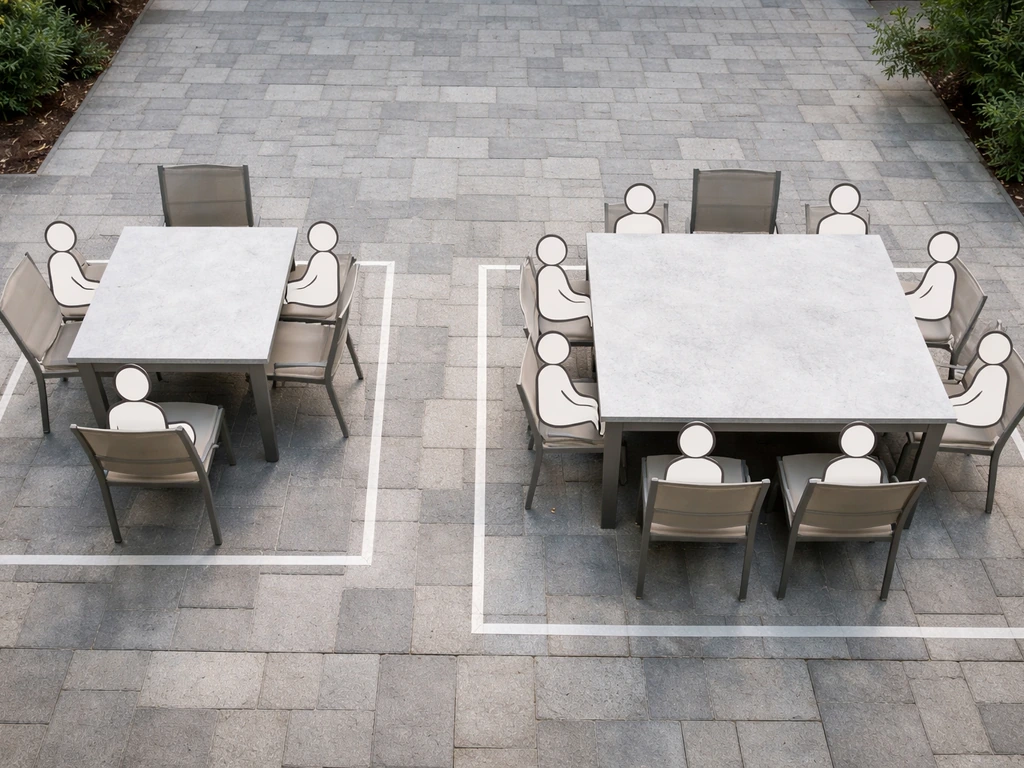
A 36x36-inch table seats two to four people but feels tight. A 48x48-inch square table comfortably seats four. For a rectangular six-person table, plan on roughly 36x72 inches for the table itself. Add chair depth on each end (about 20 inches per chair, pulled out) and the service clearance behind seated chairs, and you get the zone footprint. Service clearance, meaning the space for someone to walk behind a seated person, should be 42 to 48 inches from the table edge to any wall or obstacle. That gives room both for chair pull-out (24 to 30 inches) and a small gap for someone to pass without bumping the seated guest.
| Dining Setup | Table Size | Minimum Patio Zone |
|---|---|---|
| 2-person bistro | 24x30 in | 8x8 ft |
| 4-person square | 48x48 in | 10x10 ft |
| 4-person round | 48 in diameter | 10x10 ft |
| 6-person rectangle | 36x72 in | 12x14 ft |
| 8-person rectangle | 40x84 in | 14x16 ft |
For a grill or outdoor cooking station, clearance is a safety issue as much as a comfort one. The NFPA and various local codes (some municipalities specify at least 10 feet) call for keeping combustible materials, including wooden furniture, umbrellas, and fabric cushions, at least 10 feet from an outdoor fireplace and at least 36 inches of clear non-combustible space around all usable sides of a fire pit. City of Crowley’s fire pit safety guidance says to maintain 15 feet of clearance to combustibles and to not operate portable outdoor fireplaces within 15 feet of a structure or combustible material. Practically, this means a fire pit with seating around it needs a zone of roughly 15 to 18 feet in diameter once you factor in the pit itself plus the seating ring plus the minimum safe clearance. Don't squish a fire pit into a 10x10-foot corner and assume it's fine.
For a grill station without a built-in fireplace, position the grill at the edge of the patio or in a dedicated corner with at least 3 feet of clear space on both cooking sides. Account for the grill lid opening (another 18 to 24 inches), and leave a 36-inch pathway so the cook isn't blocking traffic while working.
Common patio dimension rules of thumb
These aren't universal laws, but they reflect what works in practice across hundreds of real patio layouts. Use them as a starting sanity check before you do the detailed zone math.
- Small patio (8x10 to 10x12 ft): Works for a bistro table and two chairs, or one pair of lounge chairs. Not suitable for large furniture groups.
- Medium patio (12x16 to 16x18 ft): Comfortably fits a four-person dining set or a standard sofa-plus-chairs seating group with room to move.
- Large patio (16x20 ft and up): Handles a combination layout, such as dining and seating zones side by side, or a fire pit area with surrounding chairs.
- Leave at least 3 feet (36 inches) of clear walkway between any furniture edge and the next obstacle.
- Size the patio at least 4 feet wider and 4 feet longer than your furniture footprint, not just 1 or 2 feet, to account for circulation on all sides.
- For a door that opens onto the patio, keep a 5-foot clear landing zone directly outside the door before furniture begins.
- Keep fire pits at least 36 inches clear on all sides; follow local codes, which may require 10 feet from any combustible structure.
A quick example: you want a sofa (90 inches wide, 38 inches deep), two lounge chairs (32 inches wide each), and a coffee table (48x24 inches) in a conversation grouping. The furniture cluster alone spans roughly 11 feet wide by 8 feet deep. Add 3 feet of circulation on the open sides and 4 feet behind the sofa for a walkway, and you're looking at a 17x15-foot minimum seating zone. If you also want a dining table for six adjacent to that, tack on another 12x14-foot zone plus a 3-foot buffer between the two zones, and you're near a 20x28-foot patio. That surprises most people, which is exactly why doing the zone math before ordering materials matters so much.
Mock up the plan and verify clearances before you build
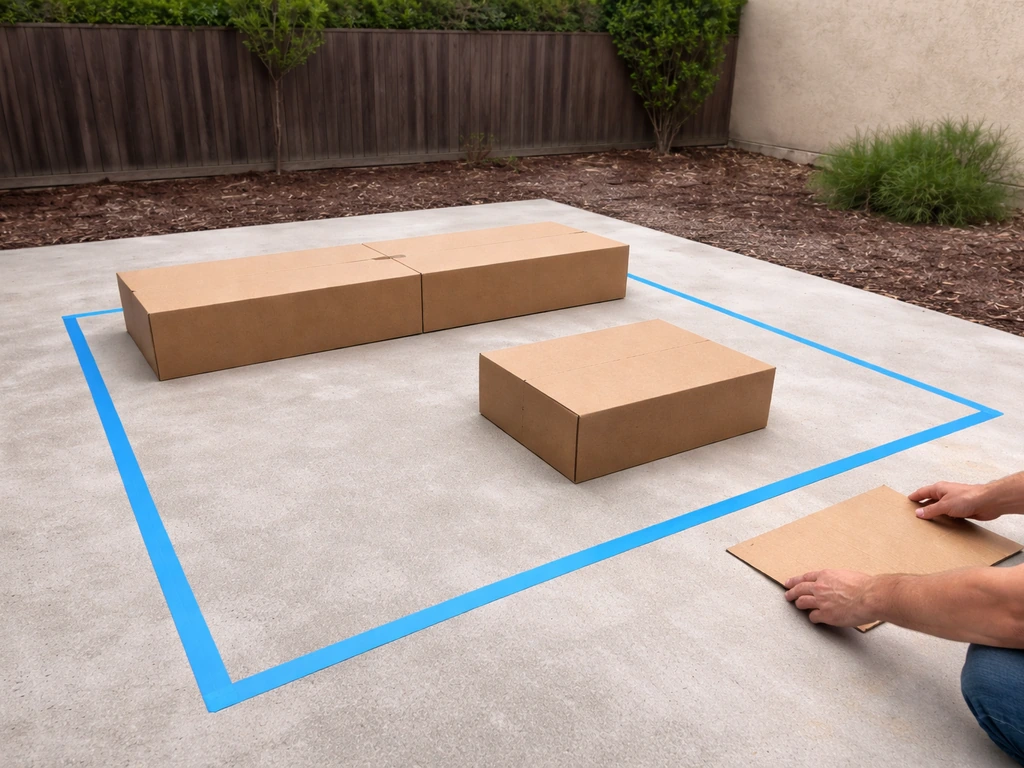
The single best thing you can do before committing to a size is blank" rel="noopener noreferrer">mock it up in the real space. Use painter's tape on the ground to outline the patio perimeter, then use cardboard cutouts or more tape to mark each furniture piece at scale. Walk through it. Sit in imaginary chairs. Try to walk between the sofa and the table. Pull a chair back from the dining table and see what's behind you. This takes about an hour and saves enormous regret.
If you want to go digital, tools like SmartDraw and Decks.com both offer free deck and patio layout designers where you can drag furniture shapes into a scaled plan. These are genuinely useful for checking zone adjacency and visualizing how the overall shape works with your yard. Another method from furniture planning guides: draw the patio area on graph paper, then cut out scaled paper pieces for each furniture item and physically rearrange them until the layout works.
When verifying clearances, check these specifically: the gap between dining chairs and any wall or railing behind them (needs 42 to 48 inches from table edge), the pathway between zones (36 inches minimum, 48 preferred), the clear landing outside any door, and any protruding objects like downspouts, planters, or steps that might shrink your walkable width. If you find that meeting these clearances forces the patio to grow larger than your available space, that's valuable information to have before you pour concrete rather than after.
Final checklist and next steps for DIY vs professional planning
Before you finalize your dimensions and move to materials or permits, run through this checklist:
- Write down your primary and secondary uses, and assign a zone to each.
- Measure your available space and mark all fixed obstructions, doors, and grade changes on a scaled sketch.
- Calculate each zone's footprint using the furniture dimensions plus required circulation clearances.
- Check that all walkways are at least 36 inches wide, or 48 inches for high-traffic areas or accessible routes.
- Verify fire pit or grill clearances meet at least 36 inches on all sides, and check your local code for any stricter requirements.
- Mock up the full layout with painter's tape or cardboard cutouts in the actual yard.
- Confirm the door landing zone (at least 5 feet of clear space outside any door opening onto the patio).
- Check local setback and permit requirements for your patio size and material type.
- Decide whether the layout complexity, grade change, or structural needs warrant hiring a professional.
On the DIY vs professional question: straightforward ground-level patios up to about 200 square feet using pavers or gravel on relatively flat ground are solid DIY territory for someone comfortable with physical work and basic measuring. Once you're looking at large poured-concrete slabs, significant grading, built-in structures like pergolas or fire pits, or any raised platform work, getting a professional involved for at least the design and prep phases is worth the cost. A poorly sized or improperly graded patio is much more expensive to fix than to get right the first time.
If your patio will also need a rug to define zones within the space, or if you're comparing a freestanding patio to a deck addition, both of those involve their own sizing considerations that build directly on the zone math covered here. If you are adding an outdoor patio rug, use a patio rug size guide to match the rug dimensions to your seating or dining zone so everything looks proportional patio will also need a rug. If you want a quick starting point, follow the patio deck size guide to estimate your minimum dimensions before you do the detailed zone math patio size guide. If you want a quick benchmark before you calculate your own zones, review these patio size recommendations alongside the measuring and clearance steps above. The dimensional logic stays consistent: furniture footprint plus required clearances equals minimum zone size, and zone sizes plus buffer spacing equal total patio size. Get that formula right and the rest of the project follows naturally.
FAQ
What’s the best way to choose patio dimensions if I’m not sure whether I’ll prioritize dining or lounging?
For a first-pass plan, start by sizing the largest “must-fit” item (usually the dining table for six or the main seating cluster). Then verify door swing and any step landings still have a clear landing, ideally with a walkway that does not pass behind a door that swings outward. If the door clearance forces your dining zone to shrink, it is often better to reduce the dining footprint and keep circulation intact rather than squeezing furniture into a layout that blocks movement.
Can I use the same patio size guide for a raised deck or platform instead of a ground-level patio?
Yes, but it changes the math. Raised decks typically need extra structural setbacks and the usable walking edge is not the same as the outer deck footprint, especially if stairs, handrails, or a landing sit near the patio edge. Recheck your clearances at the actual walking surface and consider that ramps and stairs can “consume” the transition zone where you would otherwise place buffer spacing.
How do setbacks and codes affect the usable patio size when I add structures like pergolas or built-in grills?
Don’t assume that the setback is only about the overall patio outline. Clearances must also work around posts, pergola columns, fire pit shells, and any built-in planters. Even if the patio rectangle fits setbacks, a pergola or island grill can violate the required spacing to property lines or combustible materials, depending on local rules and materials used.
What common mistakes make the patio size look fine on paper but feel cramped in real life?
Measure for circulation with the items that protrude the most. Examples are chair backs pulled out, grill lids when open, umbrella canopies when angled, and bench arm ends. A layout can pass the 36-inch pathway test in one direction but fail in another when a lid or pulled chair intrudes into the route.
How should I account for drainage when my yard slopes more than the guide’s “about 1 inch per foot” threshold?
If you have a slope, plan drainage early. A common approach is to keep the patio surface as close to level as possible while letting stormwater run off at controlled grades to an approved drainage path. Avoid pitching toward the house foundation unless your drainage plan is designed for it, and be aware that slope may require a larger base footprint for proper grading and edging stability.
If my patio must serve as an exterior accessible path, what should I double-check beyond the clear width number?
If you need an accessible route, treat the 36-inch minimum as the absolute floor for clear width and aim for the larger target in high-traffic areas. Also account for surface changes such as raised edging, planters at the corridor edge, and tight turns near doorways, since turns often require additional space even when the straight run measures correctly.
Can I make a small patio feel larger without changing my overall measurements?
Yes. You can reserve a smaller footprint for furniture and still feel roomy by increasing visual breathing room instead of cutting circulation. Practical options include placing the coffee table slightly offset to keep the walking line open, choosing armless or narrower seating where appropriate, and using rugs to define zones without bringing furniture closer to doors or pathways.
How do I adjust dining patio sizing if I use upholstered or armless chairs, or if I expect people to sit on both ends?
Your “table zone” depends on chair type and how you expect people to enter. If you use dining chairs with arms, towel hooks, or thick backs, add space for chair clearance and consider that chair pull-out space increases if chairs must rotate from the side. For tight yards, consider a smaller table plus two leaf extensions rather than trying to force a six-person fixed table into the full zone size.
Do patio size calculations change if I plan to add an umbrella or shade sail?
Umbrellas and shade structures change usable dimensions because they occupy overhead space and sometimes reduce access around the perimeter. If you plan to add an umbrella, confirm its pole location does not fall in the circulation corridor, and verify that the umbrella canopy does not require furniture to be positioned farther from the edge to keep chairs from bumping it.
What are the most cost-effective layout adjustments if my available space can’t meet the circulation clearances?
The cheapest “fix” is usually changing the layout, not resizing after installation. If your zone math shows you cannot meet the pathway and service clearances, try relocating the dining zone farther from the door swing, swapping a full sectional for two smaller pieces, or using an L-shaped plan where one side becomes a shared boundary that reduces the number of open circulation edges you must satisfy.
How do I choose the rug size so it works with the patio size and chair pull-out space?
Yes, but you should plan the rug to match the zone edges that you want to visually define, not the outer patio. For a conversation set, center the rug under the coffee table and ensure seating front legs land on the rug for at least the first step-in. For a dining zone, confirm the rug extends far enough behind the chairs for chair pull-out, otherwise guests will catch chair feet on the rug boundary.