
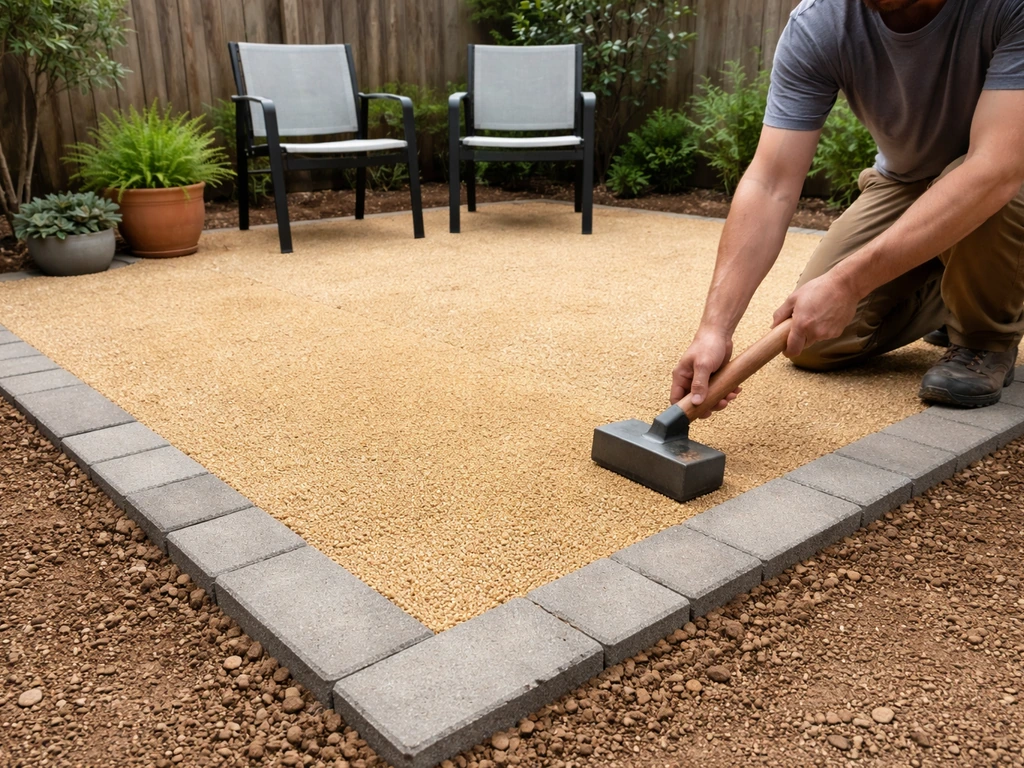
You can build a functional, attractive outdoor space for $3 to $15 per square foot depending on the surface you choose, which is a fraction of the $15 to $30+ per square foot you'd spend on poured concrete or natural stone. The best budget patio alternatives right now are compacted gravel, interlocking pavers or patio tiles, ground-level deck tiles on pedestals, stepping-stone areas, mulch or decomposed granite, and artificial turf. Each one suits different yard conditions, budgets, and skill levels. This guide will help you pick the right one, size it correctly, install it yourself if you want to, and avoid the expensive mistakes that kill most budget patio projects.
Patio Alternatives on a Budget: Cost, DIY Steps, and What to Avoid

Miles Sutton
8 Jul 2026
Best budget patio alternatives by use case
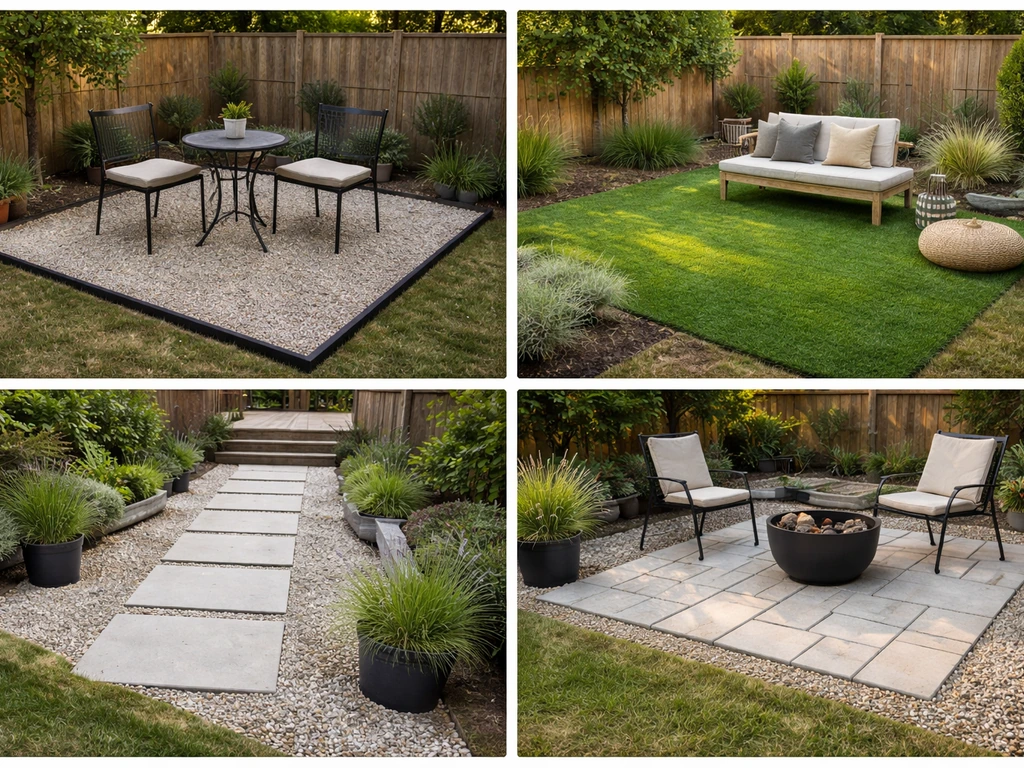
Not every surface works for every situation. Here's a quick shortlist matched to how people actually use their outdoor space, so you can jump to the option most relevant to your yard.
| Use Case | Best Option | Rough Cost per sq ft (materials only) |
|---|---|---|
| Entertaining and dining | Interlocking pavers or patio tiles | $2–$6 |
| Grilling area / BBQ zone | Compacted gravel or pavers | $1–$5 |
| Kids and pets | Artificial turf or rubber mulch | $3–$8 |
| Low-maintenance yard | Decomposed granite or gravel | $1–$3 |
| Small or odd-shaped space | Ground-level deck tiles (snap-together) | $4–$10 |
| Stepping-stone path/lounge area | Concrete stepping stones + mulch | $1–$4 |
| Rental or temporary setup | Interlocking deck tiles or turf tiles | $4–$12 |
If you're entertaining regularly, interlocking pavers give you the most durable, stable, and polished result for the price. If kids or dogs are the priority, artificial turf or rubber mulch is softer and easier to clean. If you just want something low effort that looks intentional, decomposed granite or compacted gravel with good edging is hard to beat. For renters or temporary setups, snap-together deck tiles can be pulled up and moved without losing the investment.
Real cost breakdown: materials, labor, and the expenses people forget
Material costs
The material price ranges above are just the surface layer. Every budget patio alternative also needs a base, and that base often costs as much as the surface itself. A standard gravel base for pedestrian traffic runs 3 to 4 inches deep, which means you need roughly 1 cubic yard of crushed gravel for every 80 to 100 square feet at a typical depth. Crushed gravel runs $25 to $45 per cubic yard at a landscape supply yard. Bedding sand for pavers adds another layer at about $30 to $50 per cubic yard. Geotextile weed fabric, which you should not skip, runs $0.10 to $0.25 per square foot. Plastic or aluminum edging restraints add $0.50 to $1.50 per linear foot.
Labor costs if you hire a pro
Professional installation for pavers typically runs $8 to $20 per square foot all-in, depending on your region, site prep requirements, and paver type. Artificial turf installation runs $8 to $20 per square foot professionally installed, partly because of the infill material and the drainage work required underneath. Gravel or decomposed granite professionally installed is cheaper, usually $3 to $8 per square foot including base prep and edging. Ground-level deck tiles installed by a contractor run $6 to $15 per square foot, depending on pedestal systems and material quality.
Hidden expenses that blow most budgets
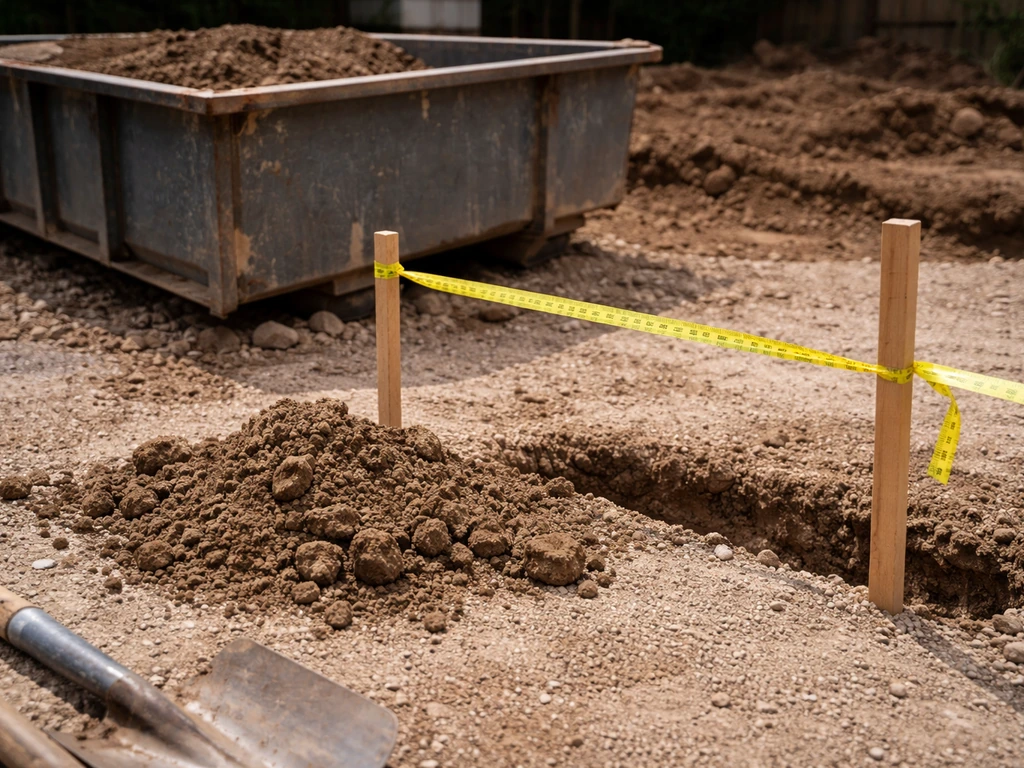
- Excavation and disposal: Removing 4 to 6 inches of soil from a 200 sq ft area generates roughly 3 to 4 cubic yards of spoil. Dumpster rental runs $300 to $500, or you can haul it yourself if you have a truck.
- Grading and leveling: A yard that slopes more than 1 inch per 4 feet needs re-grading before any surface goes down. This can add $200 to $800 to a typical backyard project if you hire it out.
- Drainage: Poor drainage is the most common reason budget patios fail early. Adding a French drain or perforated pipe below a gravel base adds $10 to $25 per linear foot.
- Permits: Most patio alternatives at ground level don't require permits, but raised platforms over 12 to 18 inches may in many municipalities. Check before you build.
- Tool rental: A plate compactor rental runs $60 to $100 per day, and you absolutely need one for pavers and gravel bases. A sod cutter rental adds $80 to $120 if you're pulling up grass.
- Base depth surprises: If you hit soft soil, clay, or saturated ground, you may need to go deeper than the standard 3 to 4 inches, adding more gravel and more cost.
DIY-friendly options vs ones that need a pro
Most budget patio alternatives are genuinely DIY-friendly, but a few have enough complexity or physical demand that hiring a pro is worth considering. Here's an honest breakdown.
| Option | DIY Difficulty | When to Hire a Pro |
|---|---|---|
| Gravel or decomposed granite | Easy | Only if the area is large (500+ sq ft) or needs significant grading |
| Interlocking pavers | Moderate | If the area exceeds 300 sq ft, has complex cuts, or your base is soft/clay |
| Snap-together deck tiles | Very easy | Rarely necessary unless a pedestal system is involved on an uneven roof deck |
| Artificial turf | Moderate–Hard | If drainage is a concern, area is large, or seaming is required |
| Stepping stones in mulch/gravel | Easy | Almost never—this is one of the most beginner-friendly options |
| Decomposed granite | Easy–Moderate | For large areas needing stabilized DG with resin binder |
| Ground-level wood/composite platform | Moderate | If you need footings, a ledger attachment, or it's elevated more than 12 inches |
The honest rule: if the base prep is complex (soft soil, significant slope, poor drainage, or clay-heavy ground), that's where most DIYers underestimate the job. The surface itself is usually the easy part. Get the base right and everything else follows. Bring in a pro specifically for the base work if you're not confident, then do the surface yourself to save money.
Choosing the right surface for your yard conditions
Drainage and slope
Drainage is the single biggest factor that determines which surface will work and which will fail. If you are trying to decide between a patio and an alfresco dining area, start with drainage and comfort underfoot first. The subgrade must be relatively dry with no standing water before you install any surface, especially pavers or turf. If your yard holds water after rain, you need to solve drainage before picking a surface material.
Permeable options like gravel, decomposed granite, and paver systems with open joints handle water naturally by letting it pass through. Impermeable options like solid deck tiles or artificial turf need a drainage layer underneath, typically a 4-inch crushed gravel base with at least a 1 to 2 percent slope away from structures.
For yards with clay or moist soils, adding a geotextile fabric between the subgrade and the base gravel helps preserve load-bearing capacity over time, especially where freeze/thaw cycles occur.
Comfort underfoot and sun exposure
Gravel and decomposed granite can be uncomfortable to walk on barefoot and radiate heat in direct sun. If the patio faces south or west and gets full afternoon sun, opt for lighter-colored pavers, composite deck tiles, or artificial turf designed with heat-reduction infill (standard artificial turf in full sun can get uncomfortably hot, reaching surface temperatures well above air temperature on hot days). Rubber mulch or grass-adjacent turf alternatives are the most comfortable underfoot for barefoot use. Concrete pavers stay cooler than dark natural stone and are a good middle ground between durability and comfort.
Ground firmness and soil type
Sandy, well-draining soil is the easiest to work with. Clay soil compacts well but drains poorly and can shift seasonally, which undermines pavers over time if the base is inadequate. If you have clay, add at least 4 inches of compacted gravel base (not just sand) and consider a geotextile layer. Soft or organic-rich soil should be excavated down until you hit stable subgrade, which sometimes means going 6 to 9 inches total before your base even begins. Skipping this step is the number one reason budget patios shift, sink, and look terrible within two to three seasons.
Sizing, layout, and design rules for small spaces
Most homeowners undersize their patio and then wonder why it feels cramped. A basic two-person bistro table with chairs needs at least 8x8 feet (64 sq ft) to feel comfortable. A four-person dining set needs 10x12 feet minimum. A standard outdoor sofa plus a coffee table needs roughly 10x10 feet. If you're planning a grill zone, add 3 to 4 feet of clearance behind and to each side of the grill. For door access, you want at least 36 inches of clear path from a door to the seating area, and ideally a landing pad of 4x4 feet directly outside the door before stepping into the patio surface proper.
For small or odd-shaped yards, think in zones rather than one large surface. A small 6x8 foot deck tile platform for the grill and a separate 10x10 foot gravel or paver zone for seating, connected by a stepping-stone path, can feel more intentional and spacious than one awkward-shaped slab. Keep circulation paths at least 36 inches wide between furniture and edges. In tight spaces, rectangular layouts are easier to execute on a budget than curves, which require more cuts, more material waste, and more time.
For slope, a patio surface should pitch slightly away from the house, at about a 1 to 2 percent grade (roughly 1/8 inch drop per foot). This keeps water from pooling or flowing toward your foundation. You don't need surveying equipment to get this right; a 4-foot level and a tape measure are enough to check your grade as you go.
How to install the most common budget alternatives
Compacted gravel or decomposed granite
- Mark the area with stakes and string, then strip sod or vegetation to at least 4 inches below your desired finished surface height.
- Compact the subgrade with a plate compactor. If the soil feels soft or spongy, excavate another 2 inches and add more base gravel.
- Lay geotextile landscape fabric over the entire area, overlapping seams by at least 6 inches.
- Install edge restraints (plastic or aluminum edging) around the perimeter, staking them into the subgrade every 12 inches.
- Add 3 to 4 inches of crushed gravel (3/4-inch minus works well) in two layers, compacting each layer with the plate compactor.
- For decomposed granite: add a 2-inch layer of DG over the compacted gravel base. Wet it lightly and compact again. If using stabilized DG, follow the resin binder manufacturer's ratio.
- Check grade with a level and adjust before the surface fully sets.
- Add a top dressing of fine DG or pea gravel for finish appearance and rake level.
Interlocking pavers or patio tiles
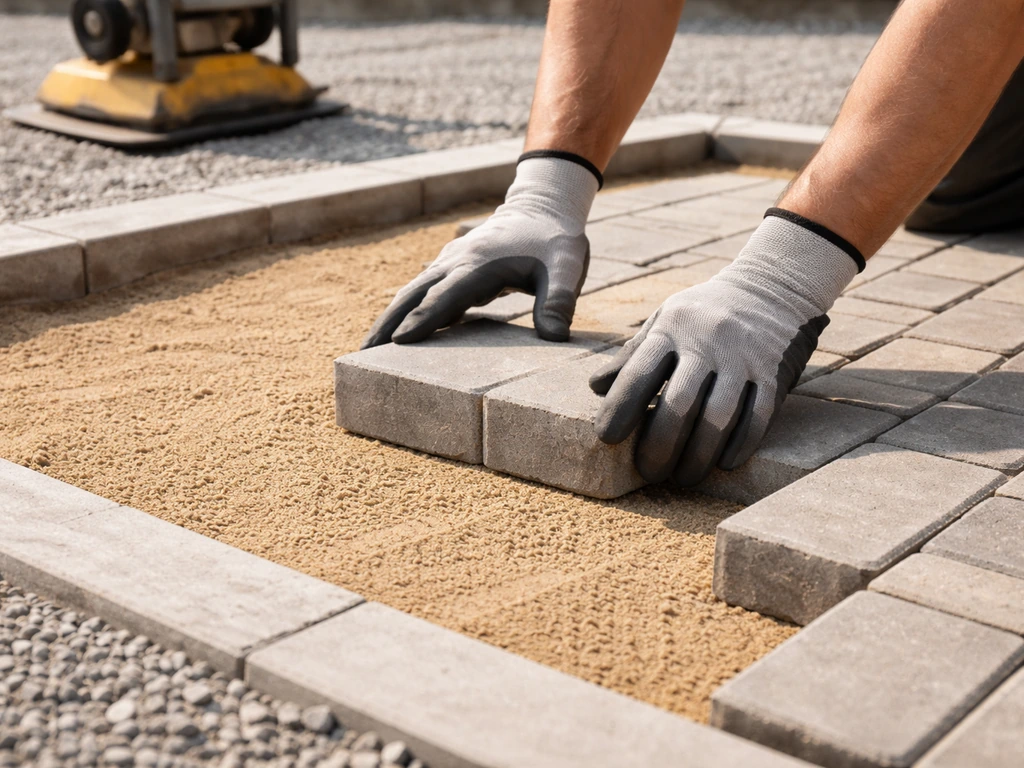
- Excavate 7 to 9 inches below finished grade to account for the paver thickness, 1-inch bedding sand layer, and 4 to 6 inches of compacted gravel base.
- Compact the subgrade firmly. On clay or moist soils, install geotextile fabric before adding base material.
- Add crushed gravel base in 2-inch lifts, compacting each lift. Total compacted depth should be 3 to 4 inches for pedestrian use.
- Screed a 1-inch layer of coarse bedding sand over the gravel base, using 1-inch diameter pipes as guides for a perfectly flat surface.
- Install edge restraints on all sides before laying pavers.
- Lay pavers from one corner in your chosen pattern, keeping joints tight and consistent. Use a rubber mallet to seat each paver.
- Cut border pieces with a circular saw fitted with a diamond blade, or rent a paver splitter for straighter cuts.
- Once all pavers are laid, run the plate compactor over the entire surface with a rubber pad attachment to avoid chipping.
- Spread polymeric sand over the surface and sweep it into joints. Compact again lightly, then mist with water to activate the binder.
- Let cure for 24 hours before heavy use.
Snap-together deck tiles
- Ensure the underlying surface is clean, flat, and stable. For ground-level installation, start with a compacted gravel base or an existing concrete pad.
- For uneven ground, use a pedestal system. Set pedestals on a firm base at roughly 16 to 24-inch intervals depending on tile size and expected load.
- Check that the installation area is properly restrained on all sides so tiles can't shift outward under foot traffic.
- Start from the most visible corner and click tiles together according to the manufacturer's pattern.
- Cut edge tiles with a jigsaw or circular saw. Most composite or wood deck tiles cut cleanly with a fine-tooth blade.
- Leave a small expansion gap (typically 1/8 inch) around fixed structures like walls or posts if using wood-based tiles in climates with humidity swings.
- Inspect the pedestal height and levelness across the entire surface before finishing the last row.
Artificial turf
- Remove existing vegetation and excavate subgrade to 3 to 4 inches minimum, or deeper if drainage is a known issue.
- Grade the subgrade to slope slightly away from structures (1 to 2 percent pitch) to address drainage at the source.
- Add a 3 to 4-inch layer of crushed aggregate base and compact thoroughly with a plate compactor.
- Install a perforated drainage layer or drainage aggregate if the area is prone to standing water.
- Roll out geotextile weed barrier over the base.
- Unroll and cut the turf, allowing a few extra inches on all edges. Let it acclimate for 1 to 2 hours in the sun to relax wrinkles.
- Secure edges with galvanized nails or staples every 4 to 6 inches along the perimeter, and at any seams.
- Add infill material (silica sand, crumb rubber, or organic infill depending on use) and distribute with a stiff broom or power brush.
- Brush the turf fibers against the grain to stand them upright.
Stepping stones in mulch or gravel
- Lay out stepping stones in your intended path or seating zone to find comfortable spacing (typically 18 to 24 inches center to center for walking).
- Trace around each stone with a spade and excavate to the depth of the stone plus 1 inch for a sand bed.
- Add 1 inch of coarse sand or fine gravel to each hole and level it.
- Set the stone so its top surface is flush or slightly proud of surrounding grade.
- Fill in between stones with 2 to 3 inches of mulch, pea gravel, or ground cover plants.
- Install edging around the perimeter of the entire zone to contain loose material.
- Tamp down any shifting stones after the first rain and re-level as needed.
Keeping costs down over time: maintenance routines
The budget win on alternative patios only holds if you maintain them well. Deferred maintenance almost always costs more than the regular upkeep would have. Here's what each surface needs.
| Surface | Routine Maintenance | Frequency |
|---|---|---|
| Interlocking pavers | Re-sweep polymeric sand into joints, check edge restraints, re-level shifted pavers | Annually (spring) |
| Gravel / DG | Rake and redistribute, top off material that has migrated, check edging stakes | 1–2x per year |
| Artificial turf | Rinse with water to remove debris, re-brush fibers, top up infill as needed, inspect seams | Monthly + as needed |
| Snap-together deck tiles | Rinse tiles, check for cracked or warped tiles, re-level pedestals if any have shifted | Seasonally |
| Stepping stones in mulch | Replenish mulch (mulch breaks down), re-level stones that have shifted, pull weeds | Annually |
| Decomposed granite (stabilized) | Spot-repair crumbled areas with fresh DG and tamp, re-edge as needed | Annually |
Pavers are the most maintenance-intensive of the budget options, but the work itself is simple. The most important thing is checking and refreshing the joint sand every spring. Joints that lose their sand let weeds establish and allow pavers to rock, which starts a cascade of problems. For gravel and DG areas, edging is everything: once the edging fails or pulls back, the material migrates into the lawn or garden beds and you lose the tidy look fast. Budget about $30 to $80 per year in materials to keep a 200 sq ft gravel or paver patio looking intentional rather than neglected.
What to avoid: budget mistakes and safety concerns
The most expensive shortcuts
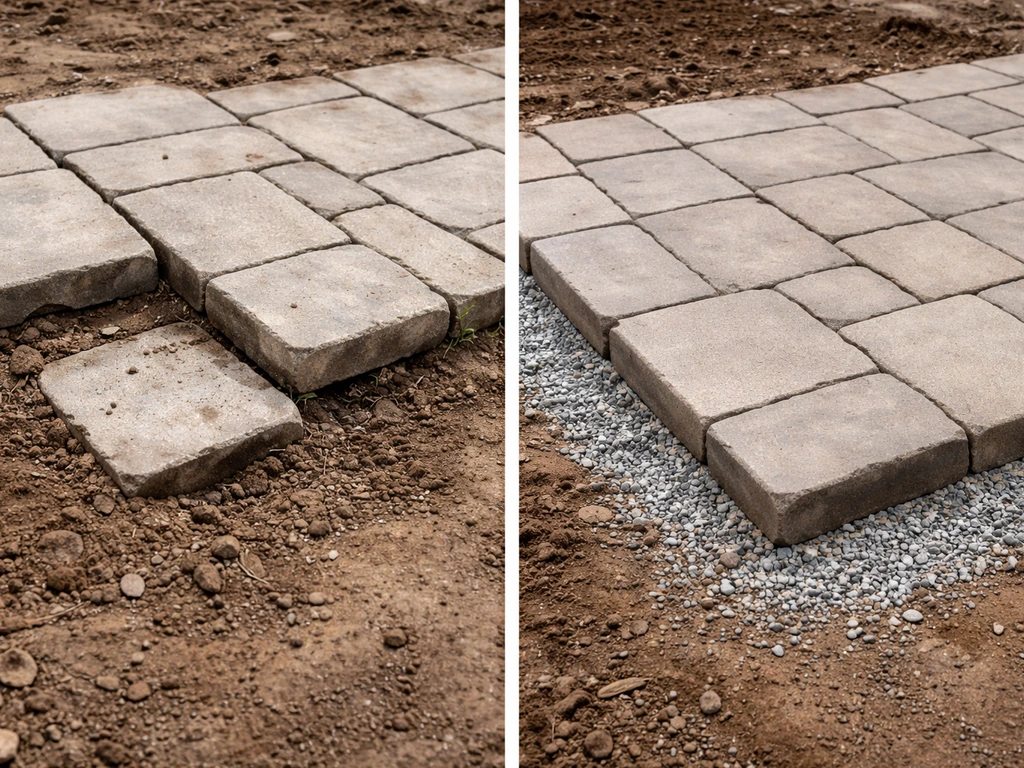
- Skipping base prep: Laying any surface directly on bare soil or sod without excavating and compacting a proper base is the single most common mistake. The surface will shift, sink, and become uneven within one to two seasons, and fixing it costs more than doing it right the first time.
- Skipping the plate compactor: Hand tamping is not sufficient for a gravel base under pavers. Rent the compactor. It costs $60 to $100 per day and is worth every dollar.
- No edging or inadequate edging: Loose materials like gravel and DG will migrate without contained edges. Plastic edging that isn't staked deeply enough will pop out over winter. Use metal or heavy-duty polymer edging staked every 12 inches.
- Wrong surface for a wet yard: Installing pavers or artificial turf over saturated or poorly drained ground without addressing drainage first guarantees failure. Solve drainage before choosing a surface.
- Using the wrong base material: Rounded pea gravel is not a base material. It doesn't compact and stays unstable. Use angular crushed gravel (3/4-inch minus or road base) for bases under pavers.
- Undersizing the project: A patio that's too small for your actual furniture and circulation needs will feel unusable. Measure your furniture first, then add at least 3 feet of clearance on all sides before finalizing dimensions.
- Ignoring freeze/thaw cycles: In cold climates, water that gets into your base and freezes will heave pavers, crack stepping stones, and distort surfaces. Use geotextile fabric, keep joints full, and ensure drainage so water doesn't sit in the base.
- Unstable surfaces near grills or fire: Loose gravel, mulch, or low-quality deck tiles too close to a grill are fire and trip hazards. Keep a 3-foot clearance of non-combustible, stable material around any open flame.
When to stop DIYing and call a pro
Most budget patio alternatives are manageable for a capable DIYer over a weekend. But there are clear situations where professional help is the better financial decision. If your yard has standing water after every rain and you don't know where it's going, call a landscaper to assess drainage before you do anything else.
If the area needs significant re-grading (more than 4 to 6 inches of slope across the patio area), grading equipment and expertise will save you a lot of backbreaking work and a bad result. If the patio attaches to the house in a way that affects drainage toward the foundation, that's worth a professional set of eyes. And if you're considering a raised platform more than 12 inches off the ground, check your local permit requirements before starting.
For readers comparing surface types in more depth, the broader category of patio alternative materials covers options like rubber pavers, recycled composites, and permeable concrete systems that go a step beyond the budget-focused options here. The broader category of patio alternative materials also includes options that balance durability, comfort, and drainage depending on your yard conditions. If you're specifically in the UK, climate considerations around drainage and frost depth differ enough that patio alternatives in UK conditions deserve their own look. And if you're weighing whether to build a patio at all versus a covered alfresco area, the patio vs alfresco comparison is worth reading before committing to a surface type.
Your next steps today
Start by measuring the space you actually want to use, then check whether your yard drains well after a heavy rain. Those two answers will tell you which option is realistic. If drainage is fine and you want a clean, permanent look, go with interlocking pavers on a compacted gravel base. If you are looking at patio alternatives in the UK, interlocking pavers on a well-compacted gravel base are a reliable, long-lasting choice.
If you want something you can install this weekend with minimal tools, stepping stones in pea gravel or snap-together deck tiles are your fastest path. Get your materials quoted at a local landscape supply yard rather than a big box store for anything over 150 square feet, the price difference on gravel and base material is usually 20 to 40 percent. Rent the plate compactor. Do the base prep.
Everything else is just following steps.
FAQ
Which patio alternatives on a budget are best if my yard floods or holds water after rain?
Prioritize permeable surfaces, like compacted gravel or decomposed granite, and paver systems with open joints. If you see standing water, solve drainage first by grading away from the house and confirming the subgrade stays dry before installing anything. If you cannot identify where the water will go, hire a landscaper to assess drainage layout and flow paths.
Can I install patio alternatives over existing grass or old concrete without removing it?
In most cases, you should excavate to stable subgrade rather than laying over soft turf, topsoil, or failing bases. For cracked or uneven slabs, you usually end up with movement and uneven settling, especially with pavers or deck tiles. If you must reuse material, keep it limited to situations where the underlying base is firm, level, and well-draining.
What’s the biggest mistake to avoid with DIY gravel or decomposed granite patios?
Skipping edging and base prep. Once edging fails, material migrates into surrounding beds and you lose the clean outline quickly. Also ensure geotextile is used over soft or organic-rich subgrade, because trapped fines under gravel can cause sinking and patchy low spots.
How do I choose between pavers and decomposed granite if I’m on a budget but want low maintenance?
Pavers are more stable and polished, but they require periodic joint sand refresh so weeds do not establish and units do not rock. Decomposed granite is simpler to install and typically needs less “topping up” than paver joints, but it can need raking and re-leveling over time and may not feel as comfortable bare-foot.
Do I need geotextile fabric under every patio alternative?
Use it whenever your subgrade is clay-heavy, soft, or high in organic content, or when you notice drainage issues. It helps prevent fines from mixing with your base, which reduces sinking and loss of load-bearing capacity over seasons, especially with freeze-thaw cycles.
What should my patio slope be, and how can I check it without special equipment?
Aim for a 1 to 2 percent drop away from the house (about 1/8 inch per foot). You can verify with a 4-foot level and tape measure, checking grade at multiple points so the surface drains consistently rather than forming low “basins.”
Is artificial turf truly “budget-friendly” long-term?
It can be, but only if drainage is built correctly underneath. If the base is compacted and sloped and you use the right drainage layer, it stays usable and clean. If drainage is poor, you can get muddy spots, odors, or uneven settling, which then becomes more expensive than maintaining gravel or pavers.
Will compacted gravel or decomposed granite be comfortable in hot sun?
Not always. Full afternoon sun on darker or heat-absorbing surfaces can feel uncomfortable and radiate warmth. If barefoot comfort matters, choose lighter-colored pavers, consider rubber mulch, or use turf designed with heat-reduction infill. For maximum comfort, grass-adjacent alternatives generally outperform plain gravel.
What clearance rules should I follow if I’m placing a grill and seating on a small patio alternative?
Plan a buffer around the grill, add at least 3 to 4 feet of clearance behind and to each side, and keep a clear circulation path of about 36 inches from doors to the seating area. For door access, many layouts feel better with a small landing pad directly outside the door before stepping onto the patio surface.
How should I size a budget patio alternative so it doesn’t feel cramped?
Use minimum footprint targets, not just the furniture size. Two-person bistro seating needs roughly 8 by 8 feet, a four-person dining set needs about 10 by 12 feet, and a sofa plus coffee table usually feels right around 10 by 10 feet. If you cut corners on space, you will lose circulation and end up with awkward placement.
If my patio area has a significant slope, can I DIY it with budget materials?
DIY is possible only if the change in elevation is modest. If you need re-grading more than about 4 to 6 inches across the patio area, grading equipment and experience matter, and hiring a pro can prevent a failure-prone base. A common issue is creating uneven settlement that shows up quickly with pavers or turf.
How often do I need to maintain pavers, gravel, or deck tiles to keep them from looking bad?
For pavers, check and refresh joint sand each spring to control weeds and prevent rocking. For gravel or decomposed granite, edging upkeep is the priority, because failing restraints cause migration and messy borders. For deck tiles, keep an eye on pedestal stability and any wobbly sections, since movement usually indicates base or support issues.
When is it worth paying for professional installation instead of DIY?
Pay for help when drainage is unknown, when standing water occurs after most rains, or when the site needs substantial re-grading. Also consider pro input if the patio ties into the house drainage pattern, because small errors can push water toward the foundation. Raised platforms more than about 12 inches off the ground may require permits.
Where should I buy materials for patio alternatives to stay within budget?
For larger quantities (roughly over 150 square feet), local landscape supply yards often price gravel, base, and paver-related materials more competitively than big box stores. The savings on base and gravel can be large enough to offset hauling and still beat retail pricing.
Should I rent a plate compactor, and for which patio alternatives does it matter most?
Yes, if your plan includes a compacted base for pavers, gravel, or decomposed granite. Compaction is the difference between a stable patio and one that sinks or shifts. Rent a plate compactor for base prep, then compact in lifts so the depth and density are consistent.