
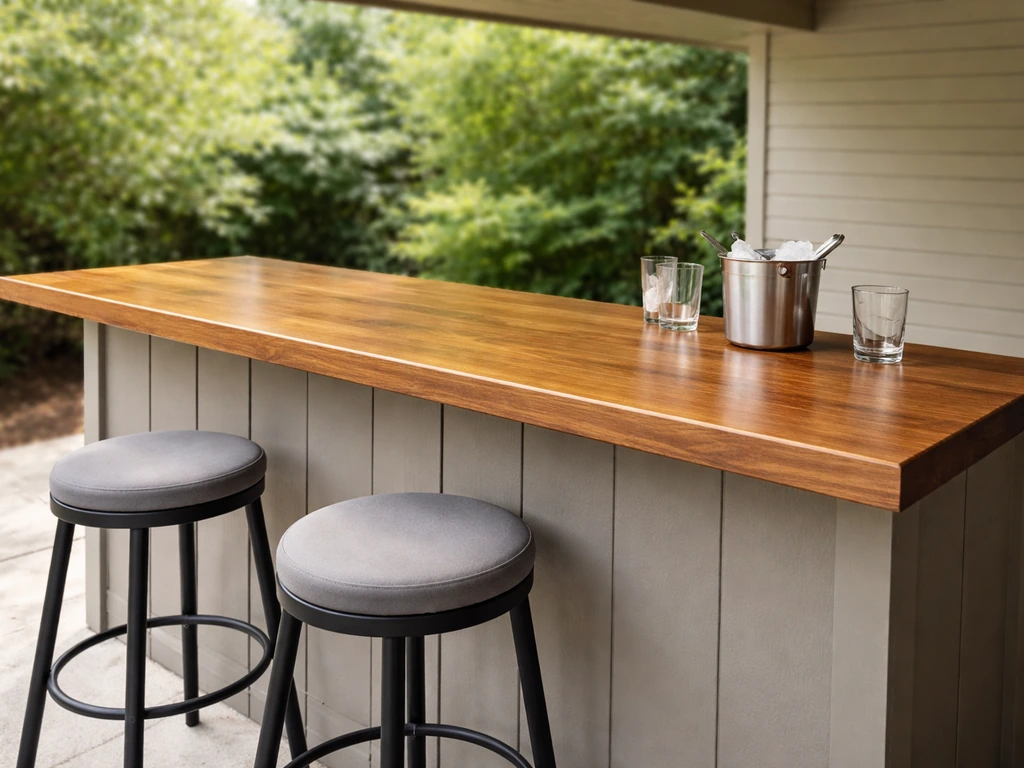
A patio bar top should sit at 40 to 42 inches high, offer a 12 to 15 inch knee overhang for seating comfort, and be made from a material that can handle UV, rain, and temperature swings without warping, staining, or crumbling. Get those three things right and almost everything else is details. The wrong material or a top that's too shallow for stools will frustrate you every time you use the space, so it's worth spending a few minutes planning before you buy or build anything.
Patio Bar Top: Size, Layout, Materials, and Build Guide

Miles Sutton
21 May 2026
Planning your patio bar top: function and layout first
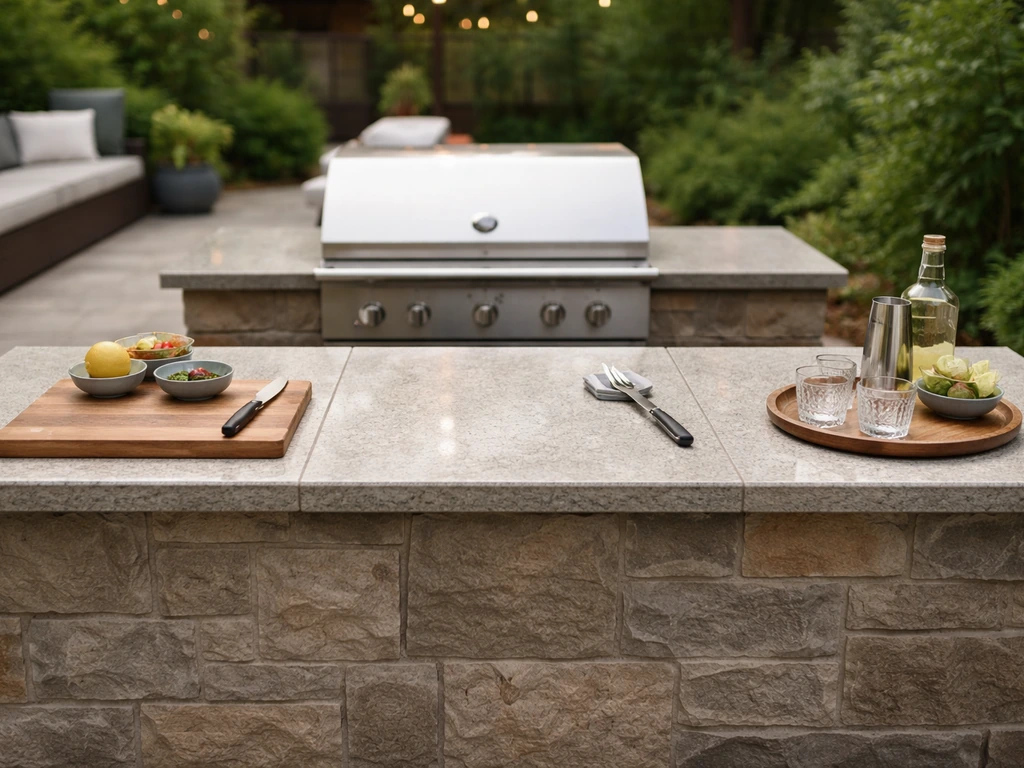
Before you pick a material or measure anything, decide what the bar top is actually doing. Is it a serving surface where you set drinks down while guests stand around? A seated eating area with stools? A surface that doubles as a prep zone next to a grill? Most patio bar tops serve at least two of these roles, and that shapes every decision that follows.
Think of your outdoor space in three zones: prep, cooking, and serving. Your bar top belongs in the serving zone. Placing it there keeps guests away from the grill, prevents traffic jams around the cooking area, and gives you a natural landing spot for drinks and plates. If you're attaching the bar to a house wall or existing structure, the wall becomes your back support and simplifies the build. Freestanding bars need their own stable base and are a bigger project, but they give you flexibility to position the social hub anywhere on the patio.
Layout shape matters too. A single straight run works well in tight spaces and along fence lines. An L-shape lets you separate the serving side from a prep counter. A U-shape is great if you have the room, but you need generous clearances or it quickly feels claustrophobic. If your patio is small, a straight run or a simple peninsula off a wall is almost always the right call.
Getting the sizing right
Bar height outdoors follows the same ergonomic logic as indoors. Aim for a finished top height of 40 to 42 inches. Bar stools with seat heights of 28 to 33 inches pair with that range, and you want roughly 10 to 12 inches of clearance between the stool seat and the underside of the top for comfortable leg room. If your top is too low, stool seats end up cramped; too high and shorter guests feel like they're perching on a ledge.
Overhang is where a lot of DIY bar tops fall short. A 12 to 15 inch overhang gives seated guests actual knee clearance so they can pull in close without banging their legs on the base structure. Twelve inches is the workable minimum; 14 to 15 inches is more comfortable, especially if you're entertaining regularly. For stone tops like granite, the unsupported overhang should stay under 8 to 10 inches for a 3 cm slab unless you add corbels or support brackets. A lighter tile-over-substrate top can extend further, but still needs proper backing. As a general rule, an overhang cannot exceed one-third of the total countertop depth without structural support underneath.
| Dimension | Recommended Value | Notes |
|---|---|---|
| Bar top height | 40 to 42 inches | Standard bar height; pairs with 28 to 33 in stools |
| Stool seat to underside clearance | 10 to 12 inches | Minimum for comfortable leg room |
| Knee overhang | 12 to 15 inches | 14 to 15 in preferred; 12 in minimum |
| Width per person/stool | 24 inches | Comfortable, uncrowded seating |
| Clearance behind stools | 36 inches minimum, 42 to 48 inches ideal | For easy circulation behind seated guests |
| Max unsupported overhang (granite 3 cm) | 8 to 10 inches | Add corbels for anything beyond this |
| Max overhang (general rule) | No more than 1/3 of total top depth | Applies to most stone and engineered tops |
For seating count, allow 24 inches of bar-top width per person. A 6-foot run seats three comfortably with a little breathing room. A 4-foot top fits two. Don't try to squeeze four stools onto a 6-foot bar: guests will be elbow-to-elbow and nobody enjoys that. Behind the stools, you need at least 36 inches of clearance for people to get in and out, and 42 to 48 inches if guests will be walking past regularly.
If accessibility matters for your household or guests, note that ADA guidelines call for a counter surface between 28 and 34 inches high for accessible areas, with knee clearance at least 27 inches high, 30 inches wide, and 19 inches deep. A standard 42-inch bar won't meet that without a lower section, so if wheelchair access is a real consideration, plan a lower section into the design from the start.
Materials and finishes: what actually holds up outside
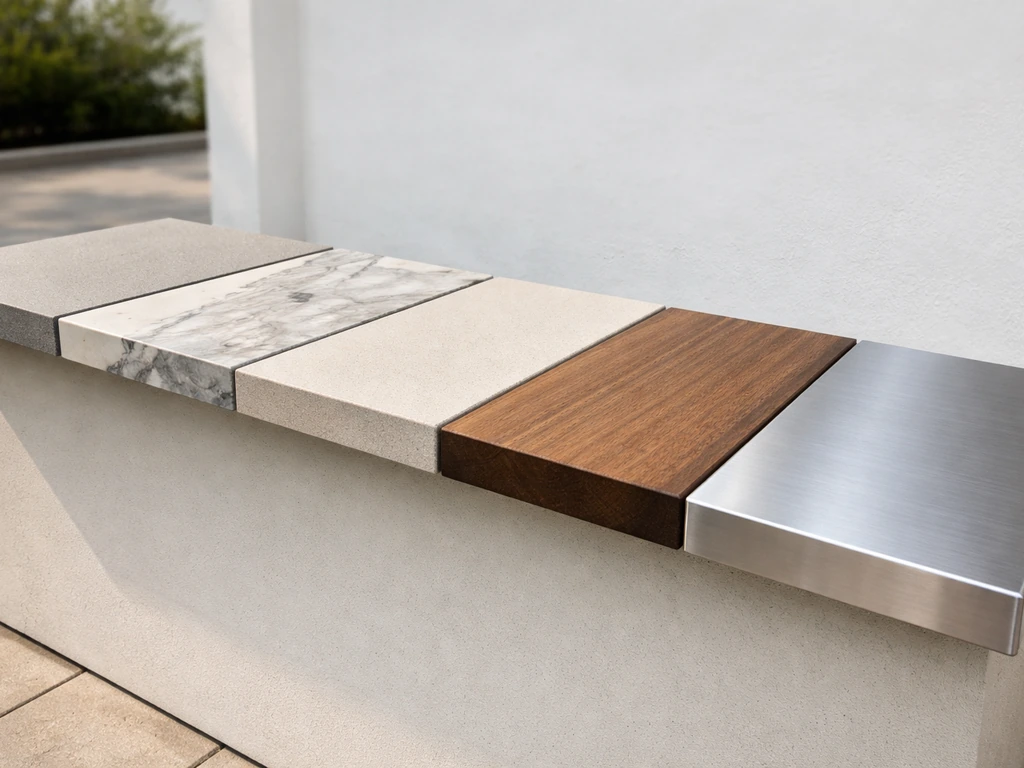
This is where outdoor bar tops diverge sharply from indoor ones. Materials that look great inside can fail fast outside, so the choice matters more than it might seem.
Concrete
Poured concrete is one of the most popular choices for outdoor bar tops and for good reason. It's fully custom, handles heat well, and can be colored, stained, or textured to match almost any style. The catch is maintenance: concrete is porous and needs a quality UV-stable sealer applied in multiple coats, allowing at least 30 minutes between coats for proper adhesion. Expect to reseal every one to two years in high-use outdoor conditions. Acid-based spills (citrus, wine, cocktail mixers) can etch the surface even through a sealer, so it's worth wiping spills quickly rather than letting them sit.
Natural stone
Dense natural stones like granite, quartzite, bluestone, and soapstone are excellent outdoor choices. They're heavy, durable, and genuinely beautiful. The key word is dense: avoid porous stones like limestone or travertine in freeze-thaw climates because absorbed water expands when it freezes and can crack the stone over time. Use a penetrating sealer rather than a topical one so the sealer soaks into the pores and reduces water absorption. Porous stones may need resealing every two to three years; denser granites can go three to five years. Remember that sealers prevent staining but do not prevent etching, so acidic outdoor bar spills still need prompt cleaning.
Porcelain tile
Large-format porcelain is a strong outdoor option. It absorbs less than 0.5% of water by weight, which makes it extremely resistant to freeze-thaw damage. The surface is non-porous, easy to clean, and available in finishes that mimic stone, concrete, or wood. The biggest challenge is the grout and substrate. Use a flexible, low-porosity grout like an epoxy or polymer-modified type to resist cracking in freeze-thaw cycles. The substrate underneath needs to be waterproofed, and the tile needs to be installed on a proper cement board or mortar bed, not plywood alone.
Wood
Wood bar tops are warm, approachable, and work well in casual or tropical-style outdoor spaces. They also require the most ongoing maintenance of any option. Expect to clean, sand edges, and re-oil or reseal regularly. Without consistent upkeep, wood will crack, fade, and develop mildew. If you go this route, use naturally rot-resistant or pressure-treated hardwoods and apply a penetrating oil finish after thoroughly cleaning and prepping the edges first. The effort is real, but for some patio styles the look is worth it.
Stainless steel
Stainless steel is the most weather-proof of the common options. It's non-porous, immune to UV damage, handles heat easily, and needs almost no sealing. The trade-off is aesthetics: it's a utilitarian, modern look that doesn't suit every patio style. It can also show fingerprints and scratches. For a sleek contemporary patio or anything adjacent to an outdoor kitchen, it's hard to beat for pure performance.
What to avoid
Laminate is a definite no outdoors. Moisture infiltrates around seams and edges, causes swelling, and the surface delaminates. Engineered quartz (resin-binder composite) is also a poor outdoor choice: the resins are not fully UV-stable and can yellow, bubble, or degrade with outdoor exposure. Both of these materials are common indoors but should stay there.
| Material | Durability Outdoors | Maintenance Level | Best Patio Style | Key Watch-Out |
|---|---|---|---|---|
| Concrete | Good | Medium (reseal 1 to 2 years) | Modern, industrial, farmhouse | Etches from acids; needs UV-stable sealer |
| Granite / Dense Stone | Excellent | Low (reseal 3 to 5 years) | Traditional, Mediterranean, upscale | Heavy; needs proper corbel support for overhangs |
| Porcelain Tile | Excellent | Low | Contemporary, Mediterranean | Grout selection and substrate waterproofing critical |
| Wood | Fair | High (constant oiling/sealing) | Coastal, tropical, rustic | Cracks, fades, mildew without consistent care |
| Stainless Steel | Excellent | Very Low | Modern, outdoor kitchen-adjacent | Shows scratches; industrial look not for every space |
| Laminate / Quartz | Poor | N/A | None (avoid outdoors) | Moisture failure; UV degradation |
Bar top ideas for different patio setups
There's no single bar top design that works for every patio, and the size and configuration of your space will shape what's practical versus what just looks good in photos.
Small patio or balcony
A single straight run mounted along a fence, wall, or railing is your best option. If you want to visualize the proportions before you start, a patio top view can help you confirm spacing and traffic flow. A wall-mounted fold-down bar top is worth considering if space is really tight: it folds flat when not in use and frees up the patio for other activities. A railing bar top (a surface capped along an existing deck or patio railing) is another clean solution that doesn't consume floor space at all, and it's a natural fit for smaller setups.
Mid-size attached patio
An L-shaped layout works well here. An east tea can patio setup often benefits from an L-shaped layout that keeps serving and prep zones from crossing paths. One run carries the bar and seating; the other acts as a prep or serving counter adjacent to a grill or outdoor kitchen. This shape naturally separates the social area from the cooking zone, which keeps guests comfortable and gives the cook room to work. A concrete or stone top on the seating side with stainless steel on the cooking-adjacent run is a practical material split.
Large or freestanding patio
Freestanding island bars are the centerpiece option for large patios. They can seat guests on two or three sides and become the social hub of the whole space. A peninsula off a main outdoor kitchen structure is another strong option: it extends the seating footprint without requiring you to build a fully independent base.
For a high-fire-pit social setup, a bar top that wraps around or sits adjacent to a patio fire feature creates a natural gathering point, similar in concept to a high top table with fire pit built into the center. A patio high top table with fire pit is a great option when you want a warm focal point that also gives guests a dedicated place to set drinks and plates.
Edge profiles and finishes
Edge style affects both safety and aesthetics. A bullnose or eased edge softens the bar top and reduces the chance of sharp corner injuries, which matters if children use the patio. A waterfall edge (where the top material drops vertically down the side) looks modern and premium but is more expensive to fabricate. For outdoor concrete or tile tops, a simple eased or beveled edge is the most practical because it handles chipping and wear better than thin, sharp profiles.
Built-in vs. modular
Built-in bar tops are permanent, look more polished, and allow for features like storage below, a cooler compartment, or integrated tile work on the base. Modular or prefab bar tables give you flexibility: you can rearrange, take them indoors in winter, and upgrade without demolition. If you're renting, moving soon, or not sure you'll love the layout, go modular. If this is your long-term home and you want a custom outdoor space, a built-in is worth the investment.
DIY vs. hiring a pro
A modular or prefab bar top requires no special skills: you buy it, place it, and you're done. A DIY built-in is a real project and deserves an honest look at what's involved before you commit.
What you can realistically DIY
Wood bar tops are the most accessible DIY build. You can frame a base from pressure-treated lumber, add a plywood substrate, and top it with butcher block or hardwood planks. Tile-over-substrate tops are also manageable if you have basic tiling experience: build the frame, add cement board, waterproof the substrate, set the tile with exterior-rated mortar, and grout with a flexible outdoor-rated product. Concrete poured in place is doable but has a steeper learning curve around mixing, reinforcing, forming, and finishing.
- Build or prepare the base frame using pressure-treated lumber or concrete block; ensure it's level and structurally sound.
- Install a plywood substrate and cover it with cement board for tile or concrete tops; waterproof all surfaces that will be exposed to moisture.
- Use stainless steel or hot-dip galvanized hardware only for all fasteners and support brackets; standard powder-coated hardware will corrode outdoors.
- For overhangs beyond 8 to 10 inches on stone tops, install proper corbels or support brackets rated for outdoor use.
- Apply your chosen top material following manufacturer guidance for outdoor installations.
- Seal and finish the surface with an appropriate outdoor-rated product before use.
When to call a professional
Hire a pro for large stone slabs like granite or quartzite: they're extremely heavy, prone to cracking if not handled correctly, and require precise support planning. Complex built-in layouts with plumbing, electrical (outlets, lighting), or gas connections belong with a licensed contractor. If your patio base isn't level or has drainage issues, get those corrected professionally before any bar top goes in. A poor base ruins any top you put on it. Concrete countertop fabrication is also one where professional results look dramatically better than average DIY attempts: if you want polished, seamless concrete, hire a fabricator.
Weatherproofing, sealing, and keeping it looking good
Outdoor surfaces take more abuse than indoor ones: UV, rain, freeze-thaw cycles, spilled drinks, and heat from nearby grills all work against your bar top over time. A proactive maintenance routine is the difference between a surface that ages gracefully and one that looks rough after two seasons.
Sealing concrete
Use a UV-stable penetrating or topical sealer designed specifically for outdoor concrete. Apply multiple thin coats, allowing at least 30 minutes of dry time between each coat. Plan on resealing every one to two years for a surface that sees regular use and weather exposure. Before resealing, clean the surface thoroughly and let it dry completely. Spot-test the sealer in an inconspicuous area first if you're using a new product.
Sealing stone
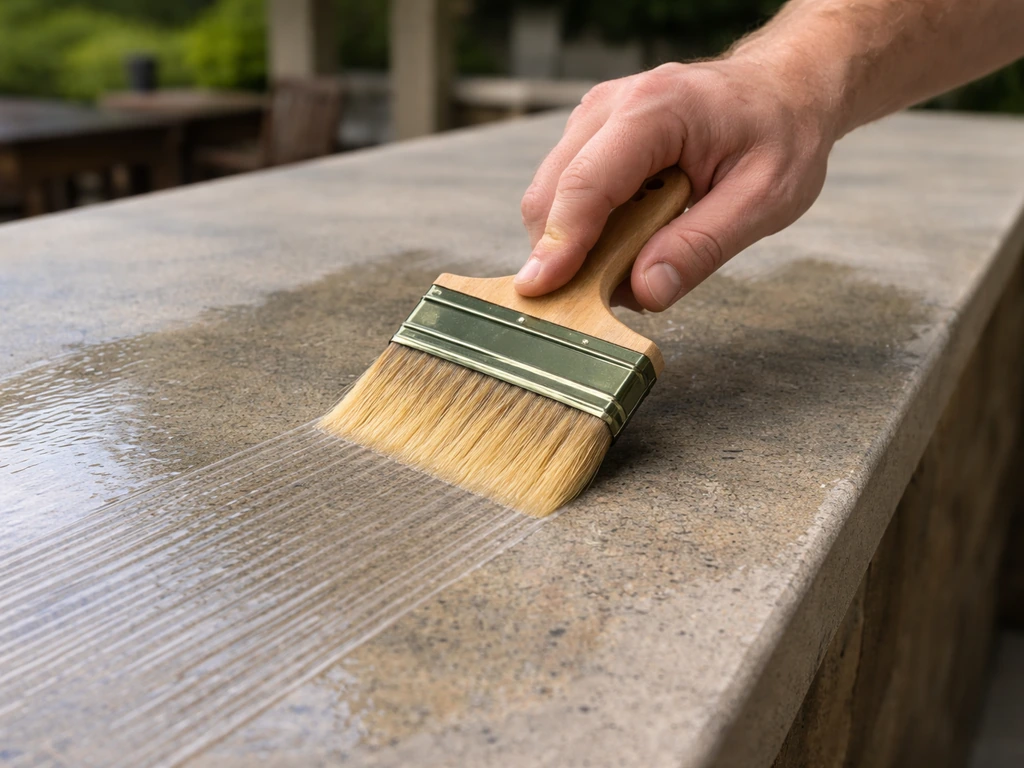
Use a penetrating sealer that soaks into the pores rather than sitting on top. This reduces water absorption, which is the main enemy in freeze-thaw climates. Porous stones like some granites, travertine, and sandstone need sealing every two to three years. Denser granites can go three to five years. Test by dripping water on the surface: if it absorbs instead of beading, it's time to reseal. Keep in mind that sealers stop staining but not etching from acids, so still wipe up spills promptly.
Maintaining wood
Clean the surface, then lightly sand edges and any rough spots before applying an oil or sealant finish. Before applying a wood oil finish, clean the countertop and properly prep the edges as part of the sealing process clean the surface, then lightly sand edges and any rough spots before applying an oil or sealant finish. Plan for reapplication at least once a year, more often if the top is exposed to full sun and rain rather than a covered patio. Use a wood-specific outdoor oil or penetrating finish, not an indoor product. Watch for early signs of graying, cracking, or mildew and address them before they progress.
General weatherproofing habits
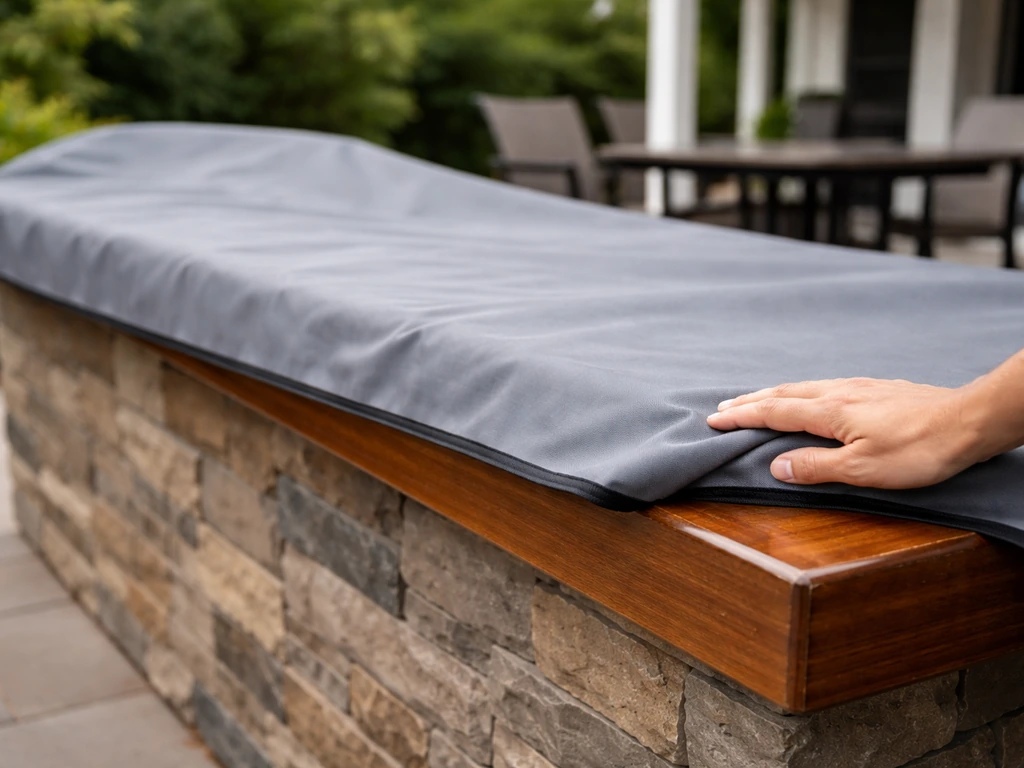
- Cover the bar top with a fitted outdoor cover when not in use, especially during winter or extended rainy periods.
- Check and reseal any grout lines on tile tops every one to two years; cracked grout lets moisture into the substrate.
- Inspect support brackets and fasteners annually for corrosion; replace any that show rust, especially in coastal or high-humidity climates.
- Clean the surface regularly with mild soap and water; avoid abrasive cleaners on sealed or polished surfaces.
- If you're in a freeze-thaw climate, remove or cover the top for winter if the material is borderline (wood especially).
Safety, comfort, and everyday usability
A patio bar top that's uncomfortable or unsafe defeats the whole purpose. A few specific details make a real difference once people are actually using the space.
Stool selection and ergonomics
Match your stool height to your bar height. For a 42-inch top, use stools with seat heights of 28 to 30 inches to hit that 10 to 12 inch clearance sweet spot. Buy stools rated for outdoor use: they need rust-resistant frames and all-weather seat materials. Avoid indoor stools outside even temporarily, since moisture will damage the materials and corrosion will start in the joints.
Stability
A bar top that wobbles is annoying and potentially dangerous, especially with drinks on it. If you're building a base, make sure it's anchored properly to the patio slab or deck framing. For freestanding modular units, check that all legs are on level ground and use leveling feet if your surface isn't perfectly flat. On stone or tile tops with significant overhang, verify that corbels are anchored into solid framing and rated for the weight. Outdoor support brackets should be stainless steel or hot-dip galvanized, not standard powder-coated hardware, which can fail in continuous outdoor moisture exposure.
Clearance and traffic flow
Leave at least 36 inches of clearance behind bar stools for guests to get in and out of their seats. Where people will be walking past regularly, plan for 42 to 48 inches so no one is bumping into seated guests. If your bar is adjacent to a grill, maintain at least 24 inches of side clearance from the cooking area and keep that zone clear during use. Good circulation prevents the patio from feeling cramped and makes the whole space safer.
Edge safety and surface texture
Sharp edge profiles are a real hazard at bar height, particularly at corners. A bullnose, eased, or rounded edge on the bar top significantly reduces the risk of injury. On tiled surfaces, make sure the tile finish provides some texture so condensation or rain doesn't turn the surface into a slip hazard. If you are using a ceramic tile top, choose outdoor-rated tile and grout and make sure the substrate is properly waterproofed to prevent cracking and movement On tiled surfaces. A matte or honed finish is generally safer than a high-gloss polished surface in an outdoor setting.
Putting it all together
The best patio bar tops share a few common traits: they're sized and shaped for the space they're in, built from materials that honestly suit the local climate, sealed and maintained on a regular schedule, and designed so the people using them are comfortable and safe. Start with your function and your space, pick a material that fits your maintenance appetite, get the dimensions right before you build or buy, and you'll have a bar top that works well for years. If any part of the build feels beyond your comfort level, especially the structural support, heavy stone tops, or anything involving utilities, getting a professional involved for that piece is always worth it. If your existing setup uses a glass top, you may need patio glass top replacement rather than a full rebuild.
FAQ
If my patio bar top is 40 to 42 inches, how do I know it will still feel right for stools after I build the base?
Check not just the finished height, but the underside clearance after you account for the frame thickness and any toe-kick. A 42-inch top can still feel too high if your base adds bulk under the counter, so measure from the stool seat to the underside once the base is installed (or planned), then target that 10 to 12 inch leg-room window.
Can I rely on overhang rules of thumb, or do I need to calculate support loads for a cantilevered patio bar top?
It depends on the support system, not the slab thickness alone. Even if the visible overhang is within limits, the framing and any corbels must be sized for the full load plus people leaning. For stone or tile with a cantilever, confirm the overhang rule of thumb applies to your exact countertop depth and that support brackets are rated for exterior loads.
If I use outdoor-rated materials, do I still need to worry about rusting fasteners and hidden water exposure?
Yes, but do it selectively. For example, use stainless or hot-dip galvanized hardware on any part that stays exposed to rain, and consider adding a small drip edge or slope so water does not sit on top edges or seams. If you mix materials, non-stainless connectors can rust behind the look and stain the underside over time.
What should I consider for moisture and freeze-thaw if my patio bar top sits on a deck or framing that can trap water?
If you have freezing weather, make sure your design prevents trapped water around the underside and base joints. A common mistake is using sealant alone, which leaves moisture trapped where it can freeze. Use exterior waterproofing on the base, maintain drainage, and leave a path for any incidental water to escape.
How do I decide when to reseal a concrete or stone patio bar top if it is partially covered?
For covered patios, your reseal schedule can stretch, but it still should not be treated as maintenance-free. Sunlight can degrade sealers even under a roof, and splash zones around bars get frequent chemical exposure from cocktails. As a practical check, do a quick water test, and reseal when water starts absorbing instead of beading.
What’s the safest way to clean patio bar top spills, especially acidic drinks?
Use the manufacturer’s recommended cleaner for the material, then avoid aggressive acids on sealed surfaces. Citrus, wine, and some cocktail mixers can etch despite sealing, so the best practice is immediate blotting and prompt rinsing, then re-drying. Also, never use abrasive pads on polished or honed finishes outdoors because they can create a permanent dull patch.
Why do outdoor tile patio bar tops crack or separate, even when the tile looks fine?
Many grout and substrate failures come from flex and movement, not from the tile itself. Ensure the substrate is waterproofed, use exterior-rated mortar or thinset meant for freeze-thaw conditions, and choose a flexible grout system. Also, avoid tiling over plywood alone, and confirm your base can handle temperature-driven expansion.
How can I tell whether my patio bar top seal has actually worn off?
A keyed test is water behavior. Drip water on the surface, if it absorbs quickly it is time to reseal, if it beads and stays beaded longer you can usually wait. Keep in mind that sealers help with staining, they do not stop acid etching, so a protective schedule should be paired with fast spill cleanup.
What’s the best way to prevent wobble on a freestanding patio bar top on uneven patio surfaces?
For freestanding modular units, verify your floor is truly level before you start using it. If legs sit on slightly uneven pavers or decking, wobble often shows up only after people lean and place drinks. Use leveling feet where possible, and confirm that the unit is anchored if local conditions and wind load apply.
Can I make my patio bar top accessible with a two-level design instead of replacing the whole counter?
Yes, but it must be intentional. If you need wheelchair access, plan a lower serving section and still keep the rest of the bar usable for standing guests. A top that is fully 42 inches will not satisfy accessible counter height, so integrate a two-level design from the start rather than trying to “fix it” later.
Which patio bar top edge style is safest and easiest to maintain in real outdoor conditions?
Choose an edge finish that matches your maintenance ability and safety priorities. A bullnose or eased edge reduces injury risk and chips less easily than sharp profiles, while waterfall edges can look premium but require more precise fabrication and can be harder to keep pristine outdoors. For high-traffic patios, eased or beveled usually gives the best durability-to-effort balance.