A patio top view is simply a scaled drawing of your patio space as seen straight down from above, like a bird's-eye map. You use it to figure out where furniture goes, how people will walk through the space, where the grill or fire pit sits, and whether everything actually fits before you pour a single yard of concrete or buy a single piece of furniture. Done right, even a rough hand-drawn version on graph paper will save you from the most common and expensive patio planning mistakes.
Patio Top View Guide: Plan Measurements, Layout, Spacing

Miles Sutton
4 Jun 2026
What a patio top view actually is
A top view (also called a plan view or site plan) is a drawing that looks straight down at your patio from above, showing the exact footprint of everything at ground level: the patio surface, furniture, built features, doors, fences, and any grade changes. It is fundamentally different from a perspective rendering or photo, because it shows true dimensions and spatial relationships rather than how things look from eye level.
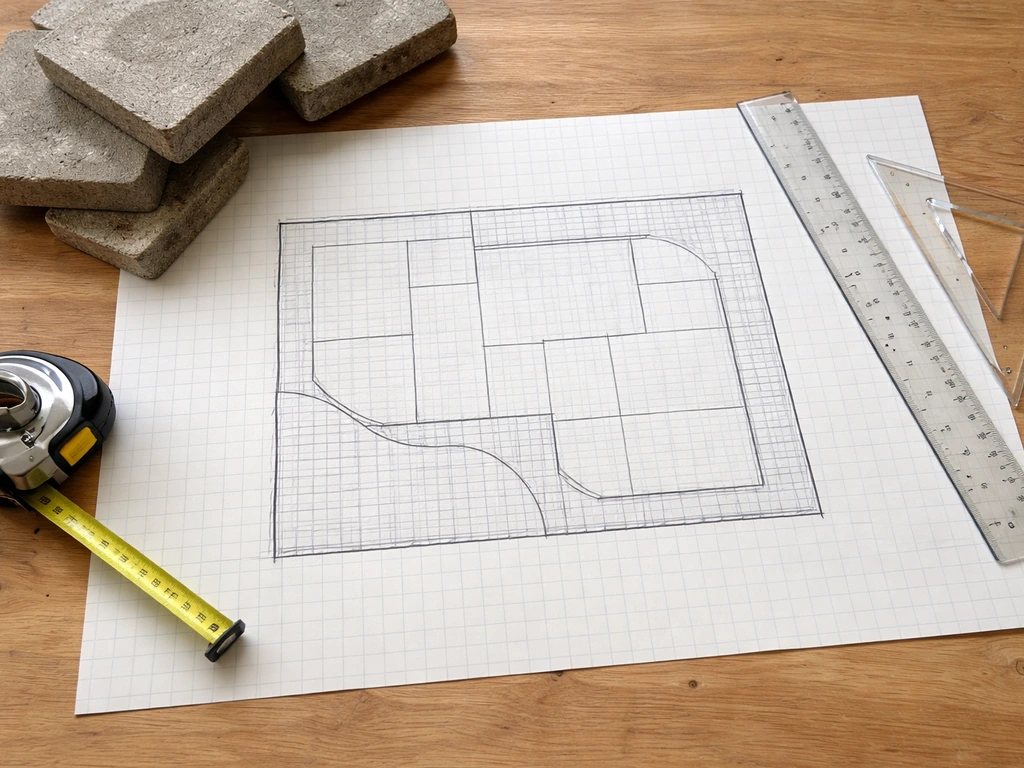
There are three versions you will typically work with, and the right one depends on your goal. A rough sketch is a freehand drawing, not to scale, that you use just to think through a layout idea. A scaled drawing is drawn on graph paper or in software at a consistent ratio, like 1/4 inch equals 1 foot, so every measurement on paper corresponds to a real-world distance.
A formal permit site plan is a scaled drawing that also includes a north arrow, property lines, setback distances, easements, and often drainage/slope information. If you are pulling a permit for a new patio or attached structure, most jurisdictions, including many cities that follow Portland and Vancouver, WA style residential plan sets, require a formal site plan with all those elements. For pure layout planning and furniture placement, a careful scaled drawing is enough.
How to measure your patio and turn it into an accurate sketch
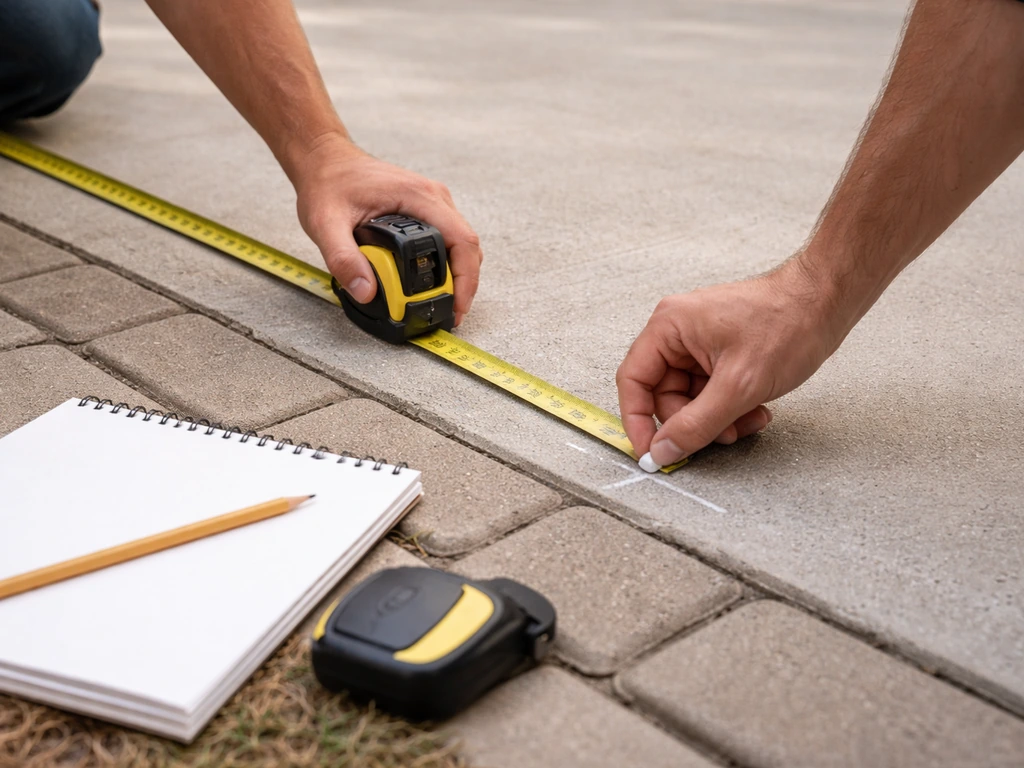
The most important thing you can do before you draw anything is measure everything on the ground, not in your head. Grab a 25-foot or 100-foot tape measure, a helper if possible, and a notepad. Here is the sequence I use.
- Measure the overall patio length and width first. Write both numbers down.
- Measure the location of every door and window that opens onto or overlooks the patio, including the door width and which direction the door swings or slides.
- Measure the distance from the house wall to any fences, property lines, grade changes, or existing structures.
- Measure any fixed features already on the patio: steps, drains, hose bibs, overhead structures, utility boxes.
- Note the location of any overhead utility lines or tree branches that might limit tall features like umbrellas, pergolas, or chimneys.
- Check and record any slope by setting a level on a long board and measuring the drop over a known distance, like 10 feet.
Once you have those numbers, verify that your rectangle is actually square before you trust it. Measure both diagonals corner to corner. If they are equal, the space is square. If they differ, you have an irregular shape and need to sketch it accurately with both measurements noted. For laying out new corners in the field, the 3-4-5 triangle method works well: measure 3 feet along one side, 4 feet along the perpendicular, and if the diagonal between those two points is 5 feet, the angle is a true 90 degrees. Bigger triangles (6-8-10 or 9-12-15) give you more accuracy because small measurement errors matter less at larger scale.
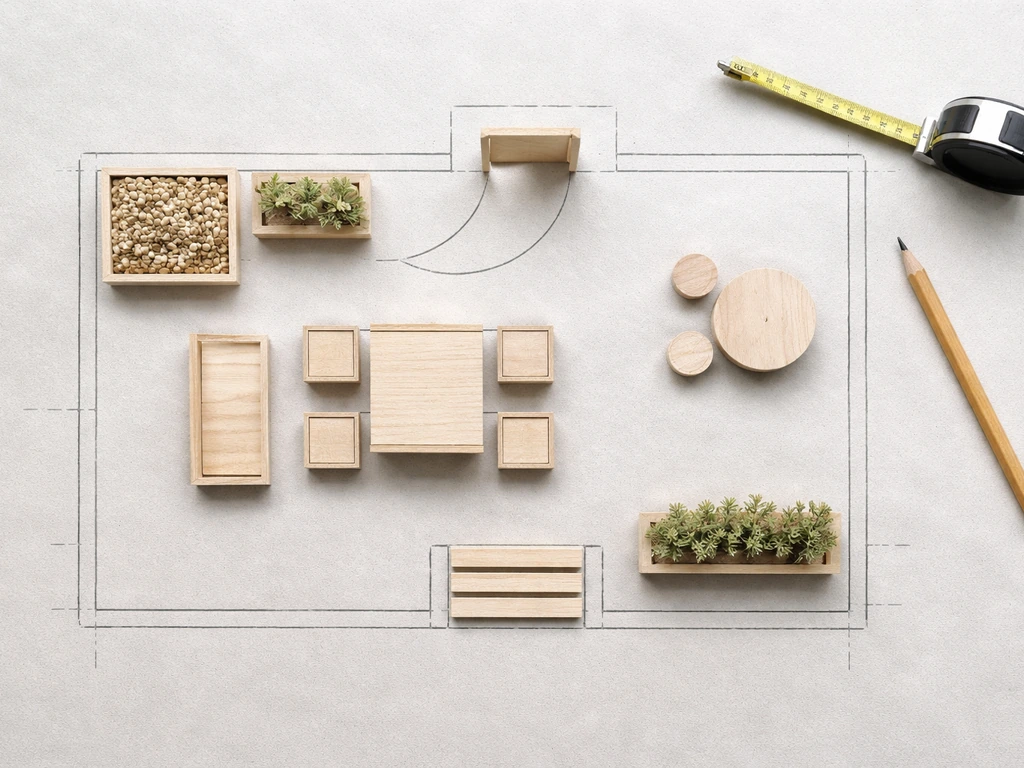
Now translate those measurements onto graph paper. A scale of 1/4 inch equals 1 foot is the most practical for residential patios because a 20-foot patio becomes 5 inches on paper, and most features remain legible. Choose a grid size that matches your scale, typically 4 squares per inch for a 1/4-inch scale. Start by drawing the house wall as a thick line, mark every door and window opening, then draw the patio boundary. Add fences, steps, existing trees, and any fixed features. This becomes your base plan that you can photocopy or redraw multiple times to try different furniture and feature arrangements without erasing endlessly.
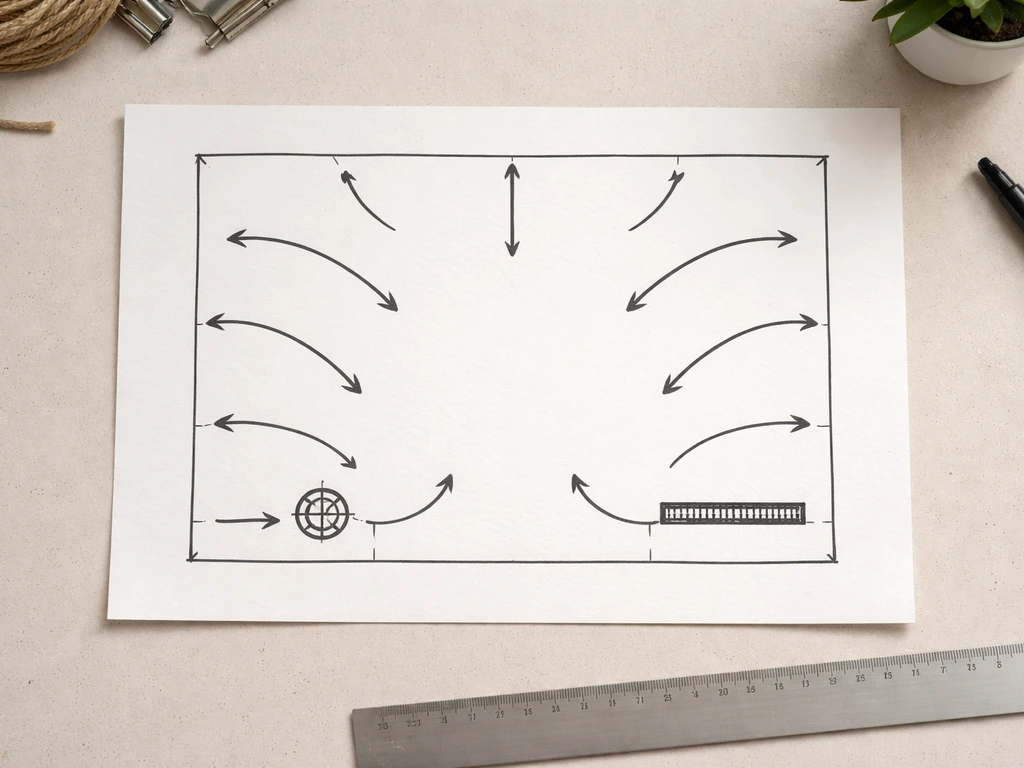
Laying out your patio zones: seating, dining, walkways, and more
The biggest mistake people make is placing furniture first and hoping circulation works out. It almost never does. On your top-down plan, draw the traffic paths before anything else. Identify every door that opens onto the patio, the path to the yard or gate, and any route people naturally walk between those points. Those paths need to stay clear at 36 inches minimum width. That 36-inch number comes up consistently in accessible design guidelines and is also the practical minimum for two people passing comfortably or for carrying a tray. Reduce to 32 inches only at a tight pinch point like a doorway, not for the main walking route.
Once your paths are drawn on the plan, the remaining space divides naturally into zones. A practical residential patio typically has two to three of the following zones depending on size: a dining zone, a lounge/seating zone, a cooking/grilling zone, and sometimes a storage or utility zone. Draw each zone as a rough rectangle or polygon on your plan before you place any specific furniture. This prevents the common problem of accidentally placing a dining table centered on a sliding glass door, which forces everyone to walk around the table to get to the yard. Instead, keep the door-to-yard path clear on one side and push the dining table to the adjacent zone.
Sizing and spacing rules you actually need to know
Real dimensions matter more than general advice when you are planning on paper. Here are the clearances I work with when reviewing a top-down patio plan.
| Element | Minimum Clearance | Recommended Clearance | Notes |
|---|---|---|---|
| Main walkway / traffic path | 36 inches | 42–48 inches | Keep clear from door to yard at all times |
| Chair push-back space (dining) | 36 inches | 42 inches | Behind each pulled-out chair from table edge |
| Circulation between furniture pieces | 24 inches | 30 inches | Side passage, not primary path |
| Turning space (patio corners) | 60-inch diameter circle | 60 x 60 inches | Allows comfortable 360-degree turn |
| Ramp/step landing at direction change | 60 x 60 inches | 60 x 60 inches | Required where direction changes on ramp |
| Fire pit from structures/fences | 10 feet minimum | 12–15 feet | Check local fire code, some require more |
| Grill from combustible wall | 10 feet | 12 feet | Side clearance also matters, not just behind |
Chair push-back space is the one that surprises people most. A standard dining chair needs about 20 inches when tucked and about 36 to 42 inches when pulled out and occupied. If you are picking a patio table for the dining zone, the tabletop material matters too, including options like a ceramic tile top dining chair. On your top-view plan, draw the table footprint, then draw the chairs pulled out around it. That full occupied footprint is what determines whether your dining zone actually fits. A 36-inch round table with four chairs needs roughly a 9-foot diameter circle of clear space on your plan.
Slope affects your top-view plan too, especially for drainage. A patio surface should slope away from the house at roughly 1/8 to 1/4 inch per foot. That works out to about a 1 to 2 percent grade, well within the maximum running slope of 1:20 (5%) for an accessible surface. On your top-down plan, draw a simple arrow showing the direction water flows off the patio, and note any drains, swales, or grade breaks. This becomes important if you pull a permit, since many jurisdictions require drainage information on the submitted site plan.
How common patio shapes translate in top view
The shape of your patio determines how zones and circulation stack up on your plan. Each shape has real advantages and trade-offs that only become obvious when you look at the top-down drawing.
Rectangular patios
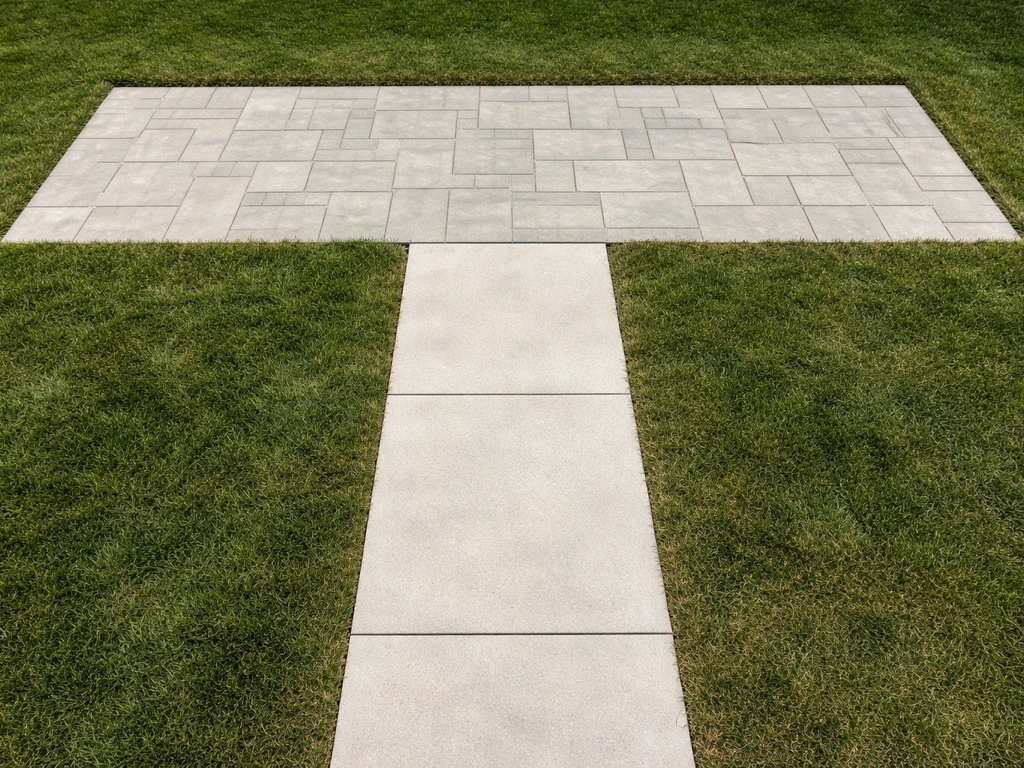
The rectangle is the easiest to draw and the most common. In top view it reads as a clean grid that aligns naturally with the house wall. Zones stack side by side or front to back. The most useful layout strategy is to keep one long side as the traffic corridor and place furniture zones on the opposite long side or in one end. A long narrow rectangle, say 10 feet by 24 feet, works well with a 36-inch path along the house wall, dining at one end, and lounge at the other.
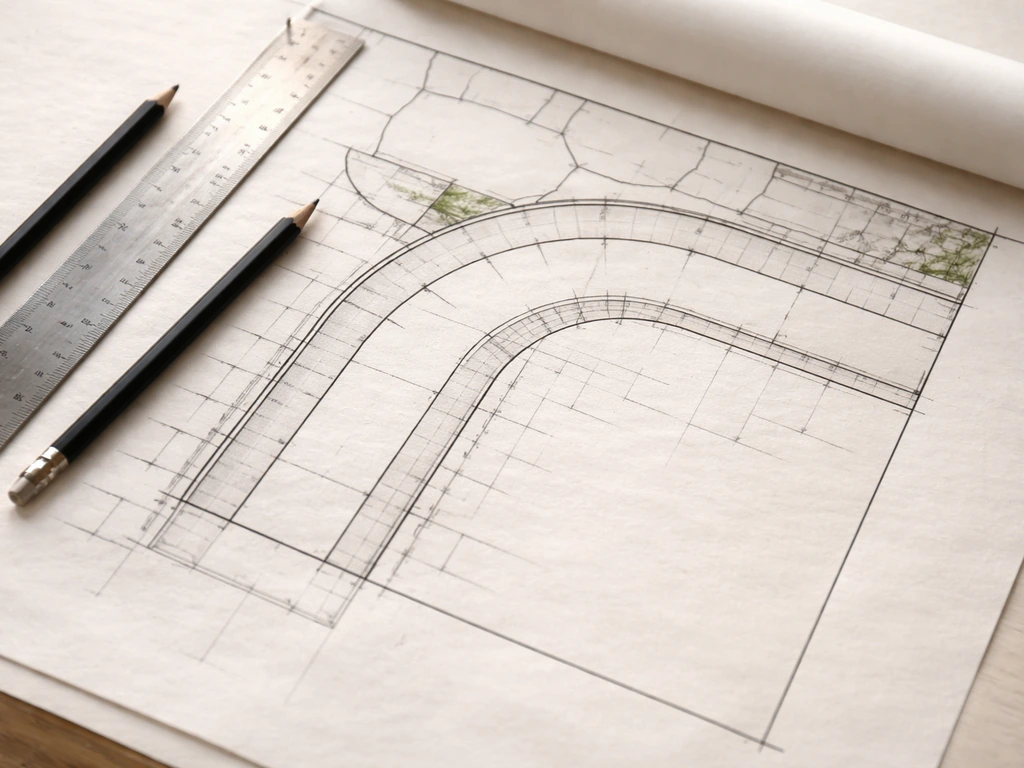
L-shaped patios
An L-shape in top view immediately creates two distinct zones without any additional planning: the two arms of the L become natural rooms. The interior corner is the best spot for a transition feature like a planter, a small fire table, or a bar top element. Traffic flow naturally wraps around the corner, so mark the turn clearly on your plan and verify that you have blank" rel="noopener noreferrer">at least 60 inches of turning space at the inside corner where paths meet.
Circular and round patios
A circular patio in top view is the friendliest shape for a single central feature like a fire pit or round dining table. The challenge is that curved edges waste space in the corners where they meet the house or a rectangular yard. When drawing a circular patio on your plan, draw the circle to scale and then overlay the furniture footprints. A 12-foot diameter circle is about the minimum for a fire pit with seating around it at the required clearances. A 16-foot circle handles a full seating arrangement comfortably.
Multi-level patios
A multi-level patio is the most complex to represent in top view because you have two or more horizontal planes at different elevations. The standard approach is to draw each level separately and show the step or ramp transition as a thick line with hatch marks or arrows. Label each level with its elevation, for example +0 inches at ground level and +18 inches for the upper deck.
The step landing footprint (minimum 60 x 60 inches where a ramp changes direction) must appear on your plan, and you need to show how traffic moves from one level to the other. Multi-level plans are also where overhead clearance notes matter most: a pergola or overhead structure on one level may overhang the step, and you need to verify that in both the top view and a separate elevation sketch.
Adding functional features to your top-down plan
A top view is not just for furniture. The following features should all appear on your patio plan, drawn to scale or at least noted with dimensions.
Steps and doors
Draw every step as a series of parallel lines showing the tread depth, and mark which direction is up. Draw doors with their full swing arc so you can see how much floor space the door occupies when open. A standard 36-inch exterior door sweeps a 36-inch radius arc that blocks a significant chunk of patio floor space. If that arc lands on your dining zone or a main traffic path, you will want to shift things on the plan before you build.
Fire pit and grill placement
Draw a circle or square on your plan representing the fire pit or grill footprint, then draw a 10-foot radius clearance circle around it. Tom’s Guide also recommends using a clearance rule of thumb that accounts for both horizontal distance from combustibles and vertical clearance considerations, which is important when you verify the space in real conditions 10-foot radius clearance circle.
If you are planning an East tea can patio setup, map the fire pit or grill area first so the rest of your seating and traffic paths fit around it fire pit or grill footprint. Every structure, fence, and overhead branch must stay outside that circle. In practice many fire codes and NFPA 1-referenced guidelines use 10 feet as the baseline from combustibles, and some local jurisdictions require more.
Place your fire pit and grill on the plan first, verify the clearance zones fit, then arrange seating around them. This is also worth cross-checking with the specific guidance for a high top table with a fire pit, which has its own seating geometry, or a patio bar top setup where the grill may be integrated.
Lighting positions
In top view, mark the center point of each overhead light or post light with a small symbol, and note whether it is ceiling-mounted (pergola or overhang), post-mounted, or in-grade. This matters because post lights need a footprint on the plan, and in-grade lights must not land under furniture legs or in a drainage path. String light attachment points appear as small circles at the perimeter or structure.
Drainage and slope
On your top-view plan, draw arrows showing which direction water flows off the patio surface. Note any point drains or linear drains with a simple symbol. If your site plan is going to a permit reviewer, they will want to see that the patio drains away from the foundation and that impervious coverage is addressed. Even for a DIY project, getting drainage direction right on paper prevents the real-world headache of water pooling against the house. The patio surface should fall at roughly 1/8 inch per foot minimum, and the cross-slope should not exceed 1:48 (about 2%) if accessibility matters.
Utility lines and overhead clearances
Call 811 before any digging, and mark any known underground utility lines on your plan as dashed lines. Overhead utility lines appear as a dashed line with a note on the height clearance. These matter most for pergolas, raised structures, or tall features like a patio umbrella or outdoor heater. Mark them on the plan so you do not accidentally design a pergola that puts workers within the prohibited clearance zone of a power line.
Tools to use, and when to call in a pro
For most homeowners, graph paper and a ruler get the job done for a planning layout. Use 1/4-inch grid paper, set your scale at 1/4 inch equals 1 foot, and work in pencil so you can revise easily. Trace over finished layouts in pen and photocopy them to try multiple furniture arrangements without re-drawing the base plan. If you want to go digital, landscape design software like GardenBox 3D and several free browser-based tools let you drag and drop furniture footprints at scale and export a PDF to share with contractors for quotes. The PDF export feature alone is worth the learning curve if you are getting multiple bids.
For a basic DIY patio build, a careful hand-drawn scaled plan with all the measurements labeled is enough to order materials, lay out the work, and even get some permits approved. Make sure your plan includes the patio dimensions, the distance from property lines and the house, the slope/drainage direction, and the location of any steps or built features. That is the minimum a building department reviewer needs to evaluate your project.
Hiring a patio designer or landscape designer is worth it in a few specific situations: your yard has significant grade changes that require retaining walls or complex drainage, you are building a multi-level structure that may require engineered drawings, your project is large enough that permit requirements go beyond a simple site plan, or you are struggling to make the layout work within a constrained or irregular space.
A few hours of a designer's time to refine your top-view plan can prevent costly layout mistakes, and the resulting plan is also more likely to produce accurate contractor quotes because everyone is bidding on the same documented scope. If you are investing in a ceramic tile top patio table, a glass top replacement, or a full patio railing bar top setup, having a dimensioned plan also helps you order correctly and avoid expensive returns or custom cuts.
If you plan a patio railing bar top, make sure its footprint and clearances fit inside your dining and circulation zones on the same top-down plan. This kind of dimensioned planning is also helpful when choosing a patio table with a ceramic tile top so it fits your seating zone comfortably patio table ceramic tile top.
The practical next step is simple: take your tape measure outside this week, record every dimension on your patio area, and draw even a rough base plan on graph paper. You do not need it to be perfect on the first pass. Getting real numbers on paper, even imperfectly, is ten times more useful than a mental image. From that base, every other decision, furniture size, zone placement, feature location, permit application, gets easier and more accurate.
FAQ
How do I measure for a patio top view if the space is not a perfect rectangle?
Measure the full outline in sections, then capture at least two non-parallel edges and both diagonal measurements where possible. If the shape is irregular, sketch it as a set of polygons, label each segment length, and include corner-to-corner diagonals so you can scale it reliably on graph paper.
What clearance should I use for walkway space if I have wheelchairs, strollers, or larger items to move?
Use 36 inches for the main circulation path, and treat narrower bottlenecks as exceptions. If the route must accommodate a stroller or wheelchair consistently, keep doors and turns out of the main corridor, and add extra margin around turning points, especially near steps.
Do I need to show furniture legs and overhangs differently in a patio top view?
Yes. Plan using the full occupied footprint, including chair backs when pulled out, and include any table overhang that people will bump into while walking. For umbrellas, include the pivot area and the umbrella base radius, not just the tabletop size.
How should I plan dining around sliding glass doors or steps that open onto the patio?
Treat the door swing arc and the step landing area as “no-furnish zones” on your plan, then place dining in an adjacent zone where the main path does not cross the table’s occupied space. If the door opens into the dining zone, shift the table position rather than reducing clearance.
Where do I place the fire pit or grill first, and what if it conflicts with the door-to-yard route?
Place the fire or grill footprint first because it drives the clearance circle. If the clearance circle touches your main circulation corridor, redesign the layout early by rerouting traffic around the feature, or select a different location or lower-profile setup so the path stays continuous and practical.
How do I reflect deck framing, curbs, or raised borders in a patio top view?
Mark them as built features on the plan, even if they are “small.” Raised borders, curbs, and retaining edges can reduce usable walking and sitting space, and they change where furniture can safely sit without blocking drainage.
What should I do in the plan if my patio surface slope is noticeable across the space?
Draw an arrow for flow direction, then add a second note if the grade changes across zones (for example, higher at one corner). If you have multiple drainage lines, indicate where water will collect or cross over, and avoid placing level-sensitive furniture like tile tables where pooling is likely.
How do I represent a multi-level patio accurately when using patio top view drawings?
Draw each level as its own top-down footprint with labeled elevations, then show the step or ramp transition lines and landings clearly. Also note any overhangs or pergola elements that extend over stairs, because an overhead structure can reduce usable headroom even if the top view looks fine.
Should I include outdoor lighting in my patio top view even for simple fixtures?
Include all fixed lighting footprints and attachment points, especially post lights, in-grade lights, and string light anchors. If a post light base would sit in a dining or seating clearance zone, you can adjust positions now instead of rerouting later during installation.
What common plan omissions cause delays with contractors or permit reviewers?
Omitting the patio boundary scale, not labeling slope or drainage direction, missing the location of steps and door swing arcs, and failing to mark clearances around fixed elements like fire features are the big ones. Adding utility callout lines and overhead clearance notes before design freezes can prevent rework.
How accurate does my patio top view need to be for ordering materials and getting bids?
A planning-level scaled drawing is usually enough to order furniture-sized items, but it must be consistent for anything structural or custom. For tile, railing, or custom built elements, verify dimensions with a second field measurement pass and ensure your plan includes the exact locations and sizes needed for fabrication.
What is the easiest way to avoid the ‘furniture first’ layout mistake when drafting?
Draft traffic paths first, then draw zone boundaries next, and only after that place furniture footprints as real occupied rectangles or polygons. If you do it in that order, you will immediately see whether doors, steps, and circulation routes intersect the dining or lounge clearances.