
The patio must-haves that actually matter come down to five things: a surface that handles your climate, enough seating to fit your real use case, shade or weather protection for your region, safe and useful lighting, and a layout that leaves enough room to move. Get those right first and everything else is a nice-to-have you can add later. Miss one and you end up with a patio you stop using by August.
Patio Must Haves Checklist: Essentials for Any Backyard

Miles Sutton
17 May 2026
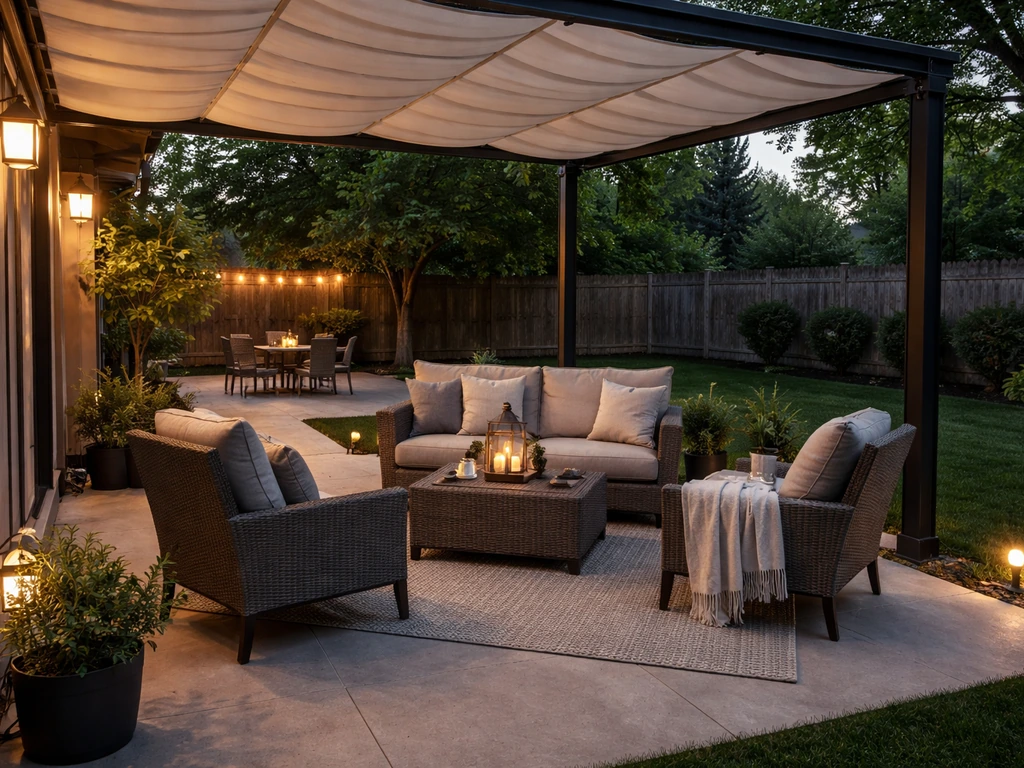
Start by Deciding How You'll Actually Use Your Patio
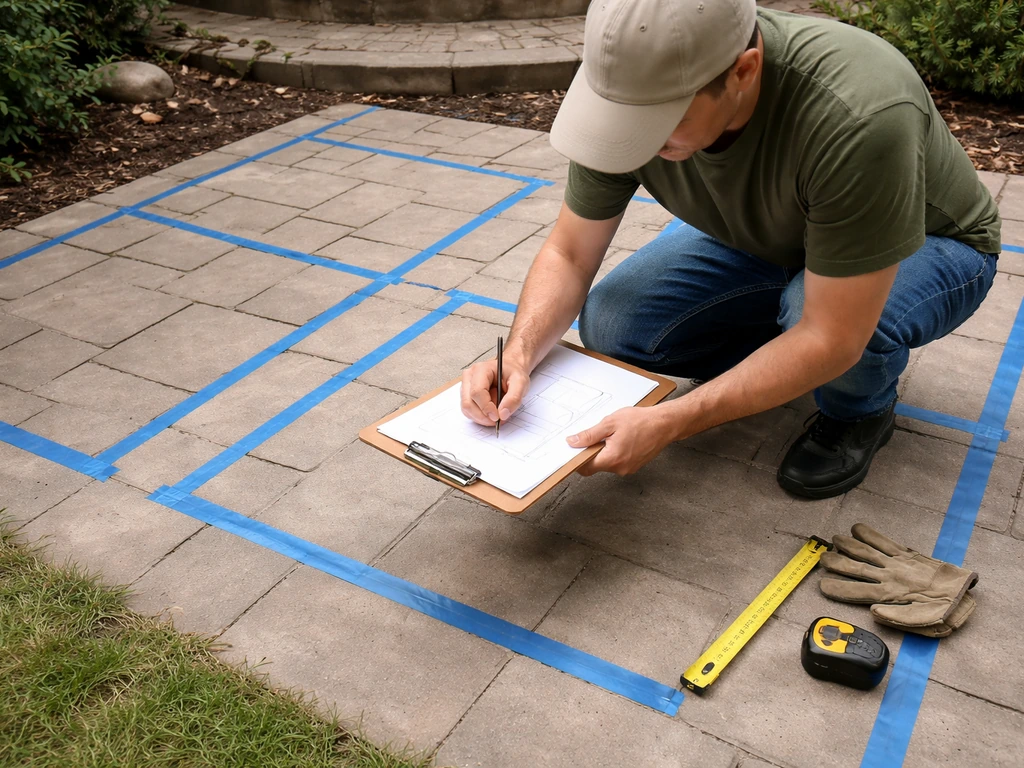
Before you buy a single piece of furniture or pick a paver color, write down how you plan to use the space on an average week. This sounds obvious but most people skip it and end up with a patio that serves no one well. Are you hosting dinner parties for eight people? Drinking coffee alone every morning? Letting kids play while you watch from a chair? Each scenario requires a completely different layout, and trying to design for all of them at once without a plan leads to a cramped, cluttered mess.
The most common beginner mistake is building a patio that's too small. It looks fine on a sketch, but once you add a dining table, six chairs, and a grill, there's no room to walk. A good rule of thumb: a bistro set needs roughly a 3x3 foot footprint, a 4-seat dining set needs about 8x8 feet, and a 6-seat sectional lounge setup needs closer to 10x10 feet. Add circulation space on top of that. If you're building new, size up by at least 20 percent from your first instinct.
Your climate and home style matter too. A patio in the Pacific Northwest needs a roof or solid pergola cover as a baseline. One in Phoenix needs shade and airflow as priorities. And a patio that looks out of place with your home's architecture will always feel off, no matter how nice the furniture is. Lock in your use case, your climate needs, and your style direction before anything else.
The Comfort Essentials: Seating, Surfaces, and Temperature Control
Seating that fits your actual headcount
Seat the number of people you actually host, not your aspirational guest list. For regular use, plan seating for your household plus your typical guest count. If you host six people on a normal weekend, a 72-inch rectangular table covers you comfortably. If you occasionally host eight, size up to 84 inches. Leave at least 36 inches of clearance around a round dining table so chairs can pull out and people can pass without squeezing. Sectional sofas are great for lounging but eat space fast, so measure your patio first and work backward from the footprint.
Surfaces underfoot: rugs and flooring
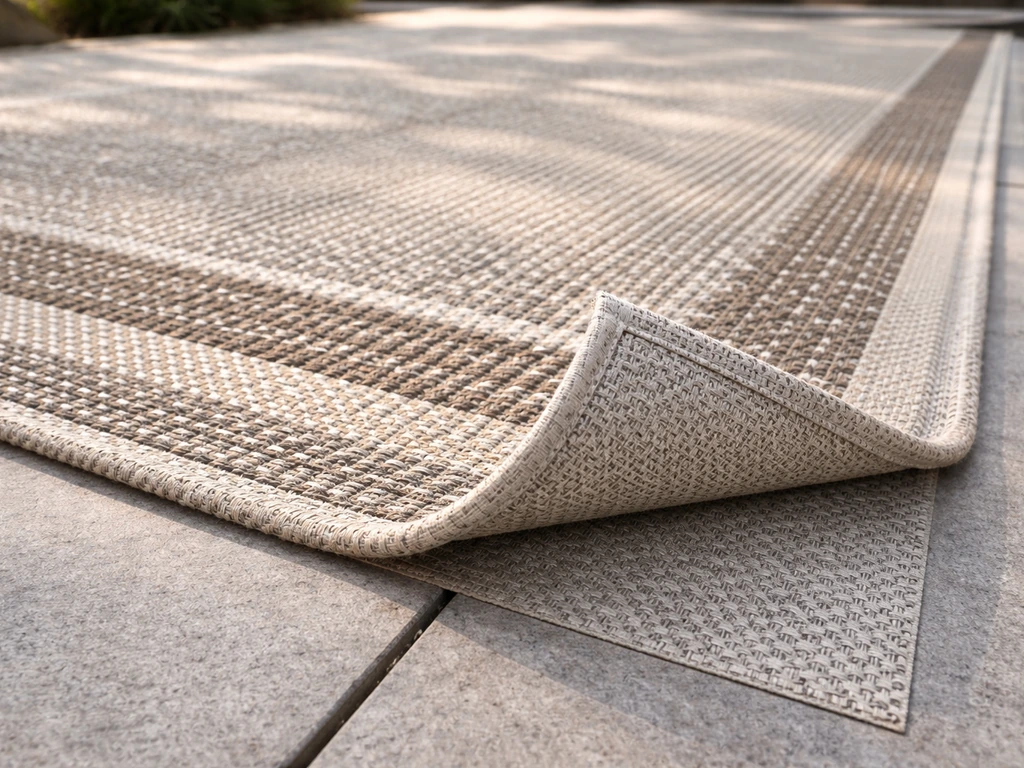
An outdoor rug makes a patio feel finished and defines zones in a larger space. The must-have rule here: pick a breathable, quick-dry material matched to your climate. In humid or rainy regions, a rug that traps moisture underneath it becomes a mold and mildew problem fast. Look for polypropylene or recycled PET options with an open weave that lets water pass through and air dry quickly. Avoid placing any rug directly on a surface that doesn't drain well.
Heating and cooling for shoulder seasons
If you want to use your patio in spring and fall, heat is a must-have, not a luxury. A freestanding propane patio heater covers roughly a 10-foot radius and runs about 4 to 6 hours on a standard tank. Electric infrared heaters mount under a pergola or umbrella and are cleaner for covered spaces. For hot climates, a misting fan or a ceiling fan rated for outdoor/wet locations does far more than shade alone. Install any ceiling fans under a covered structure only, and make sure the fan is UL-listed for outdoor use.
Weather and Shade Protection: What You Actually Need for Your Climate
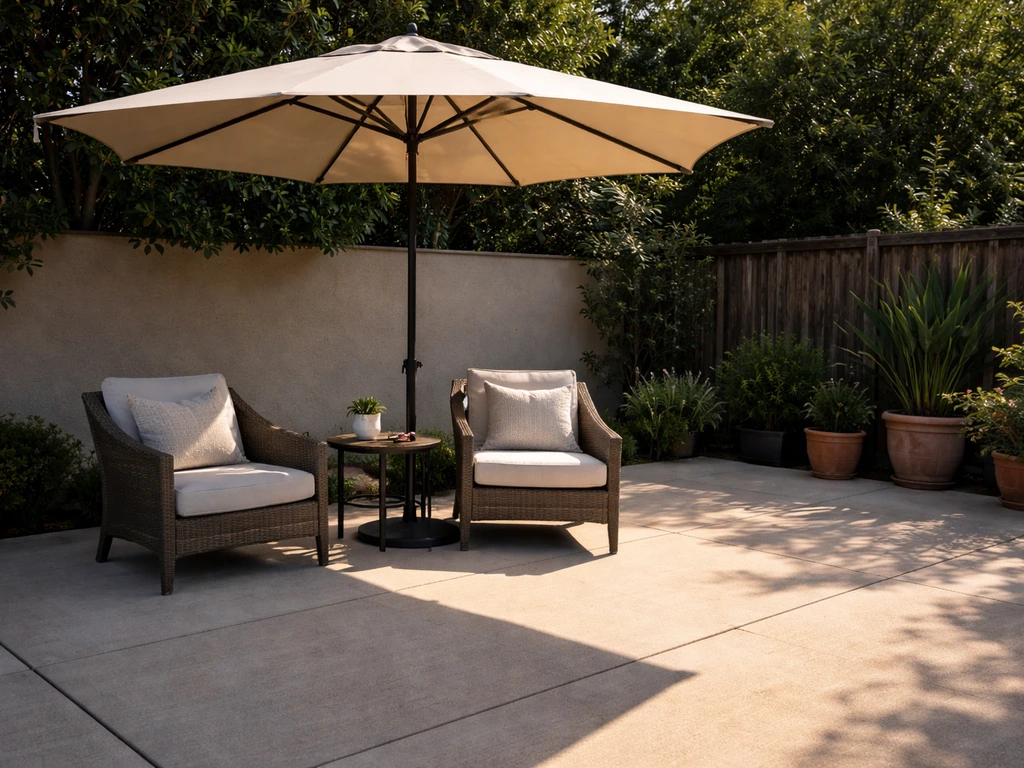
Shade is non-negotiable in most climates. Without it, a south- or west-facing patio is unusable for hours of the day in summer. Your options range from market umbrellas (affordable, flexible) to shade sails (stylish, good for mid-sized spaces) to pergolas with retractable covers or solid roofs (the most coverage, the most cost). Each has real trade-offs.
| Shade Option | Best For | Approx. Cost Range | Key Consideration |
|---|---|---|---|
| Market Umbrella | Small tables, flexible setups | $80 to $400 | Needs a weighted base; folds in wind |
| Shade Sail | Mid-sized open patios | $100 to $600 installed DIY | Requires proper slope (about 25%) for water runoff |
| Pergola with Fabric Cover | Larger patios, aesthetics | $5,000 to $20,000+ installed | Fabric covers last 3 to 5 years before replacement |
| Solid Covered Patio/Pergola | Year-round use, rain regions | $40,000 to $125,000 installed | Likely requires permit; hire a pro |
Whatever shade structure you choose, drainage slope is not optional. A flat shade sail or flat pergola cover will pool water and either collapse or rot. The general rule: one edge of the cover should be 6 to 12 inches lower than the opposite edge, and shade sails specifically need about a 25 percent slope to channel runoff effectively and stay stable in wind. Waterproof polyester canopies can last as little as 3 to 5 years with UV exposure, so factor replacement into your budget.
Wind and privacy screens are often overlooked until the first windy dinner party. A lattice panel, a tall planter row, or an outdoor screen panel on the prevailing-wind side of your patio makes a huge difference in comfort. For rain, make sure your patio surface itself has a slight slope away from your house, typically 1/8 to 1/4 inch per foot, so water drains toward the yard instead of pooling against your foundation.
Beginner patio plans should account for drainage and water runoff to prevent puddling and long-term damage around the patio area. For more patio gardening tips, plan plant placement around light, drainage, and your circulation paths.
Skipping this is one of the most expensive mistakes you can make at the planning stage because fixing drainage after installation means tearing up what you just built.
Lighting and Safety: The Basics You Can't Skip
Good patio lighting does two things: it lets you use the space after dark and it prevents trips, falls, and accidents. You need both ambient light for atmosphere and task or safety lighting for steps, pathways, and cooking areas. String lights handle ambiance well. Low-voltage path lights or recessed step lights handle safety. If you have stairs on or off the patio, those steps need lighting, and in most jurisdictions, exterior stairs also need a switch accessible from both the top and bottom.
For any outdoor electrical work, GFCI protection is not optional; it's required by code. The NEC (Section 210.8) requires GFCI-protected outlets at all outdoor residential locations, and Section 210.52(E) specifies that at least one outdoor receptacle must be provided at the front and back of the dwelling. Any plug-in landscape lighting, string lights, or outdoor appliances must plug into a GFCI-protected outlet. If you're adding new outlets or hardwiring anything, including ceiling fans, overhead lights, or a built-in grill ignition, hire a licensed electrician. The permit and inspection process for outdoor electrical work is straightforward in most municipalities, but the safety risk of getting it wrong is real.
- String lights or overhead pendant lights for ambient evening use
- Low-voltage LED path lights along any walkway to the patio
- Step lights or riser-mounted lights on all exterior stairs
- At least one GFCI-protected outdoor outlet within reach of your seating and cooking areas
- A motion-sensor or switch-controlled light near the door for security and safety
Function for Entertaining and Daily Living
Tables and layout that actually work
A surface to set things down is one of the most underrated patio must-haves. Even if you're building a lounge-only setup with no dining table, you need side tables or a coffee table within reach of every seat. For dining, match your table size to your typical headcount: a 60-inch table seats 6, a 72-inch table seats 6 to 8, and an 84-inch table seats 8 comfortably. Measure your space and leave at least 36 inches from the table edge to any wall, railing, or planter so chairs can push back fully. A tight dining area is one of the fastest ways to make guests uncomfortable.
Storage and utility
Outdoor storage is something nearly everyone adds after the fact and wishes they'd planned from the start. A deck box or outdoor storage bench keeps cushions, throw blankets, and small accessories dry and accessible. If you have a grill, plan a space for propane tank storage that keeps it away from the house and out of direct sun. Built-in storage (benches with hidden compartments, cabinet-style outdoor kitchens) is worth the extra cost if you entertain often. The less you have to haul in and out every time you want to sit outside, the more you'll actually use the space.
Zone your layout before you buy anything
Sketch your patio to scale on paper or use a free online room planner. Mark where the door exits, where the sun hits in the afternoon, and where you want each zone: dining, lounging, cooking, kids' play. Leave clear circulation paths of at least 36 inches between zones. A patio that flows well feels twice as large as one where furniture is placed randomly. If you're combining a dining area and a lounge area on the same patio, use an outdoor rug to visually separate the two zones without adding any structure.
Materials, Durability, and What You'll Need to Maintain
The surface material you choose affects your maintenance schedule for years, so pick it based on your climate and realistic willingness to maintain it. Here's a direct comparison of the most common options. For regions with freeze,thaw cycles, applying a concrete sealer is recommended to limit water absorption and reduce freeze,thaw damage like spalling and scaling (see concretenetwork.com for details) Concrete Network: Sealing a Concrete Patio.
| Surface Material | Installed Cost (per sq ft) | Freeze-Thaw Performance | Maintenance Need | Best Climate |
|---|---|---|---|---|
| Concrete Poured Slab | $6 to $12 | Moderate (cracks without sealing) | Seal every 2 to 3 years; use penetrating silane/siloxane sealer in cold climates | Mild to moderate climates |
| Concrete Pavers | $8 to $25 | Better than poured (flexes with movement) | Re-sand joints every few years; seal optional | Most climates including freeze-thaw zones |
| Flagstone | $15 to $30 | Varies by stone type; needs sealing in cold climates | Seal annually; re-grout or re-sand joints | Mild to moderate climates |
| Natural Stone Pavers | $22 to $50+ | Good with proper installation | Seal regularly; professional installation recommended | Most climates |
If you're in a freeze-thaw climate, concrete pavers consistently outperform a poured slab because they can flex slightly with ground movement rather than cracking. If you do pour a slab, use a penetrating silane or siloxane sealer, not a surface coating. Surface coatings protect appearance but don't stop water from absorbing into the concrete and causing spalling when it freezes. In any climate, sealing reduces damage and extends the surface life significantly.
For paver joints, polymeric sand is the standard choice. It locks joints together and resists weeds and insects. The one mistake to avoid: don't let polymeric sand dry on the paver surface before sweeping and blowing it clean. The polymer haze it leaves is hard to remove once it cures. Follow the manufacturer's instruction on clearing the surface before activating with water.
For furniture materials, powder-coated aluminum is the most maintenance-free option and handles rain, UV, and humidity without rusting. Teak holds up outdoors naturally but grays out without annual oiling if you want to maintain its color. Wicker (resin wicker, not natural) is comfortable and weather-resistant but can crack in extreme temperature swings over many years. Whatever you choose, store cushions in a covered bin or bring them inside during extended wet periods; no outdoor fabric is truly waterproof indefinitely.
Sizing and Budget Checklist, Plus When to DIY and When to Call a Pro
Quick sizing checklist
- Measure your available outdoor space and mark the patio footprint on paper or tape it out on the ground.
- Add up your seating footprints using the rough guides: 3x3 ft for bistro, 8x8 ft for 4-seat dining, 10x10 ft for a 6-person lounge sectional.
- Add at least 36 inches of circulation around dining tables and between zones.
- Confirm your patio surface slopes away from the house at 1/8 to 1/4 inch per foot.
- Check that your shade structure has a drainage slope of at least 6 to 12 inches on one edge (or 25% for a shade sail).
- Verify you have at least one GFCI outdoor outlet near the entertaining area.
- Confirm stair lighting and pathway lighting are in your plan if the patio is accessed via steps.
Budget ballpark by project type
- Basic DIY paver patio (materials only): $3 to $8 per square foot
- Professionally installed paver patio: $8 to $28 per square foot depending on materials and region
- Flagstone patio installed: $15 to $30 per square foot
- Pergola with fabric cover: $5,000 to $20,000+ installed
- Solid covered patio structure: $40,000 to $125,000 depending on scope and region
What to DIY and what to hand off
DIY makes sense for straightforward tasks: laying pavers on a flat, well-drained surface, adding string lights to existing outlets, assembling furniture, and painting or staining a wood deck. If you're comfortable with basic grading and you've done your research on base preparation, a DIY paver patio is a realistic weekend project for a small to mid-sized area.
Call a pro for anything involving drainage design, electrical work, structural posts or beams, retaining walls over 3 to 4 feet (which trigger permit requirements in most jurisdictions, including Fairfax County, Portland, and Montgomery County as examples), and any covered structure that requires a building permit. The reason to hire out drainage work specifically is that an improperly graded base causes settling and puddling that costs far more to fix later than it would have cost to do right the first time. This is the area where DIY savings most reliably evaporate.
A good approach for most homeowners: DIY the planning, layout, furniture selection, and decorating. If you are also working on the finishing touches, use patio decorating tips to bring your layout to life without overcrowding the space. Get professional bids for the surface installation and any covered structure. Get an electrician for any new circuits or hardwired lighting. That division gets you the best of both, you control the design and keep costs down where skill matters less, and you protect your investment where it actually matters.
If you're just starting out and want to test what works before committing to a full build, a simple DIY approach with a defined layout and a few key essentials is a smart first step. If you want more patio tips and tricks, keep refining your setup based on how you actually use the space day to day. For a patio garden for beginners, start simple with a clear layout and a few easy plants that match your sunlight and watering routine. There's a lot of overlap with the thinking behind patio do it yourself ideas and patio tips and tricks when it comes to phasing a patio project over time, and that modular approach works especially well for renters or anyone on a tighter budget who wants to build toward a complete setup gradually.
FAQ
How do I know if my patio is actually big enough for the activities I planned?
Do a “walk test” on paper: place your main table and grill first, then measure the 36-inch circulation space around the table edge and between zones. If you cannot draw a continuous path from the door to seating without crossing through chair overhangs, the patio is functionally too small even if it looks fine in a sketch.
Is polymeric sand still a good idea if I live in a very wet climate or get heavy rain?
Yes, but treat it as maintenance-critical. After heavy wash events, joints can lose fines, so plan on re-application or spot-top-ups based on the product instructions. Also avoid using it where runoff keeps re-wetting the joints constantly, since repeated saturation can break down joint stability over time.
What should I do if my patio already slopes the wrong way (toward the house)?
Start by identifying whether the issue is the subbase grade, the surface grade, or clogged drainage lines. In most cases, the permanent fix requires reworking grading or drainage beneath the surface, which is why early planning matters. If you cannot regrade yet, you may be able to divert runoff with targeted channel drainage, but do not rely on temporary fixes long term.
Can I use an outdoor rug if my patio furniture sits directly on it year-round?
You can, but choose a quick-dry rug and expect periodic lifting or repositioning. Heavy furniture legs can trap water and dirt under the rug edge, reducing airflow. If you notice persistent dampness after rain, switch to a smaller zone rug and lift it during extended wet spells.
What’s the safest way to place string lights and extension cords outdoors?
Use outdoor-rated cords and keep connections off the ground as much as possible. Plug everything into a GFCI-protected outlet, and avoid running cords through high-traffic areas where people will trip or where grill heat could damage the insulation. If you are adding outlets specifically for lighting, hire an electrician to handle the new circuit properly.
Do I really need both ambient lighting and task lighting on a patio?
If you plan to cook, use steps, or walk around after dark, yes. Ambient lighting helps mood, but safety lighting is what reduces falls near steps, railings, and cooking surfaces. A common failure is relying on decorative string lights only, which often leaves shadows where people step or reach.
How much shade should I plan for if my patio is south- or west-facing?
Plan for time-specific usability, not full-day coverage. South and west exposure usually require a strategy that blocks peak afternoon sun, such as a pergola with a solid or retractable top, shade sails with a properly sloped installation, or a market umbrella sized for your main seating zone. Measure the sun path around the hours you actually use the patio, for example 2 to 6 p.m.
What’s the right way to think about privacy screens if my yard has wind exposure?
Treat privacy as a wind-management problem first. Place screens on the prevailing wind side and allow for airflow where possible, because solid tall panels can create turbulence and higher wind pressure. For planters or lattice, secure them so they cannot tip, and confirm your patio footing can handle the added loads if you anchor anything.
Should I choose a heater, a fan, or both for shoulder seasons and hot summers?
Use heat for spring and fall, and use airflow for hot weather. A propane patio heater or electric infrared heater extends usable hours when temperatures drop, while a misting fan or an outdoor-rated ceiling fan improves comfort during hot spells. If your cover is permanent, ceiling fans can work well under it only if they are rated for outdoor use and installed in a covered location as specified.
When is it smart to hire a pro instead of DIY, beyond just “electrical and drainage”?
Any situation involving structural changes or water control deserves a professional. This includes pergola or roof posts, any retaining wall over typical permit thresholds, and any covered structure that may require a building permit. Even small-looking drainage adjustments can cause uneven settling, puddling, or foundation runoff if grading is off.
How should I plan outdoor storage if I live in a place with frequent rain?
Prioritize sealed or breathable storage and reduce how often you leave fabric exposed. A deck box with drainage gaps and a secure lid helps, but bring cushions inside during extended wet periods or use covers designed to vent. For grills, store propane away from direct sun and away from house walls, and ensure the storage location does not obstruct any required clearances.
What’s the easiest way to prevent a “tight dining area” when space is limited?
Choose a table size that matches your normal headcount, then set a rule: 36 inches from the table edge to any wall, railing, or planter so chairs can pull fully. If you cannot hit that clearance, downsize the table or redesign the seating orientation rather than squeezing chairs in. Squeezed seating is one of the fastest ways to make the patio feel unusable.
If I’m installing a slab instead of pavers, what’s the most important surface treatment step?
Use the correct sealer type and apply it as specified for your climate. The key is using a penetrating silane or siloxane sealer rather than a surface coating, since coatings do not address water absorption that leads to freeze-thaw spalling. Plan re-sealing based on wear and weather exposure, not on a fixed calendar date.