
You can start a patio garden this week with a few containers, the right potting mix, and a handful of easy plants, no landscaping experience required. The key is matching your plant choices to the light you actually have, picking containers with drainage holes, and building a simple watering habit from day one. Most beginner patio gardens fail for the same three reasons: wrong light assumptions, pots without drainage, and overwatering. Solve those three things and you're most of the way there.
Patio Garden for Beginners: Setup, Plants, and Care Plan

Miles Sutton
27 May 2026
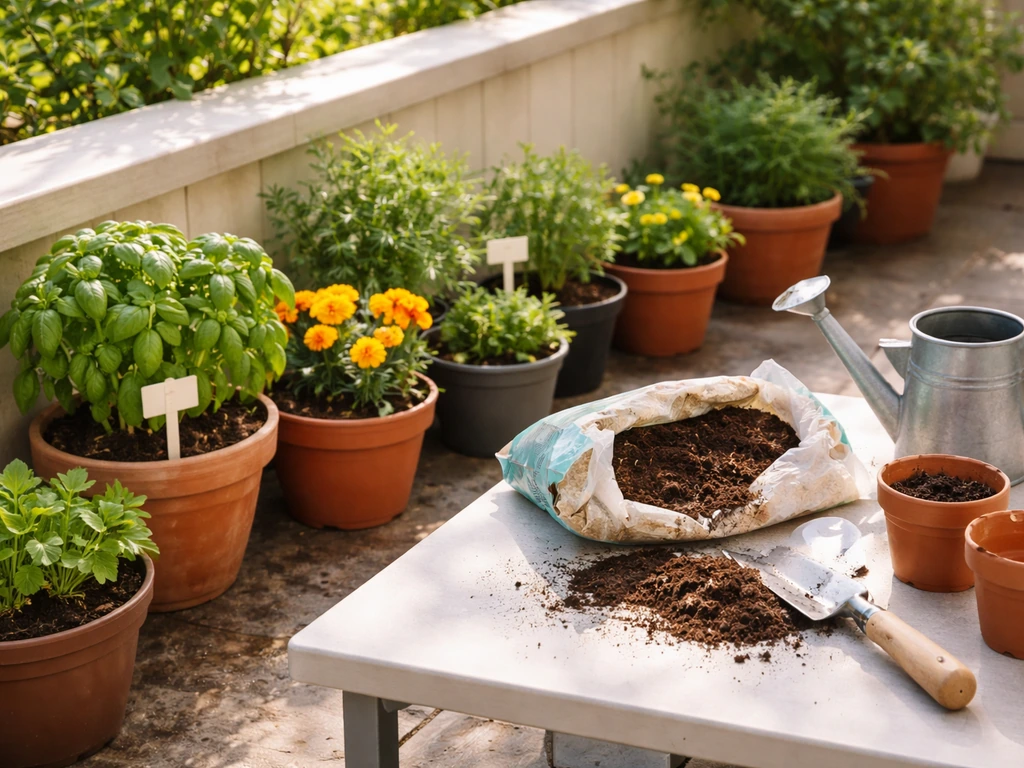
Getting your patio setup right from the start
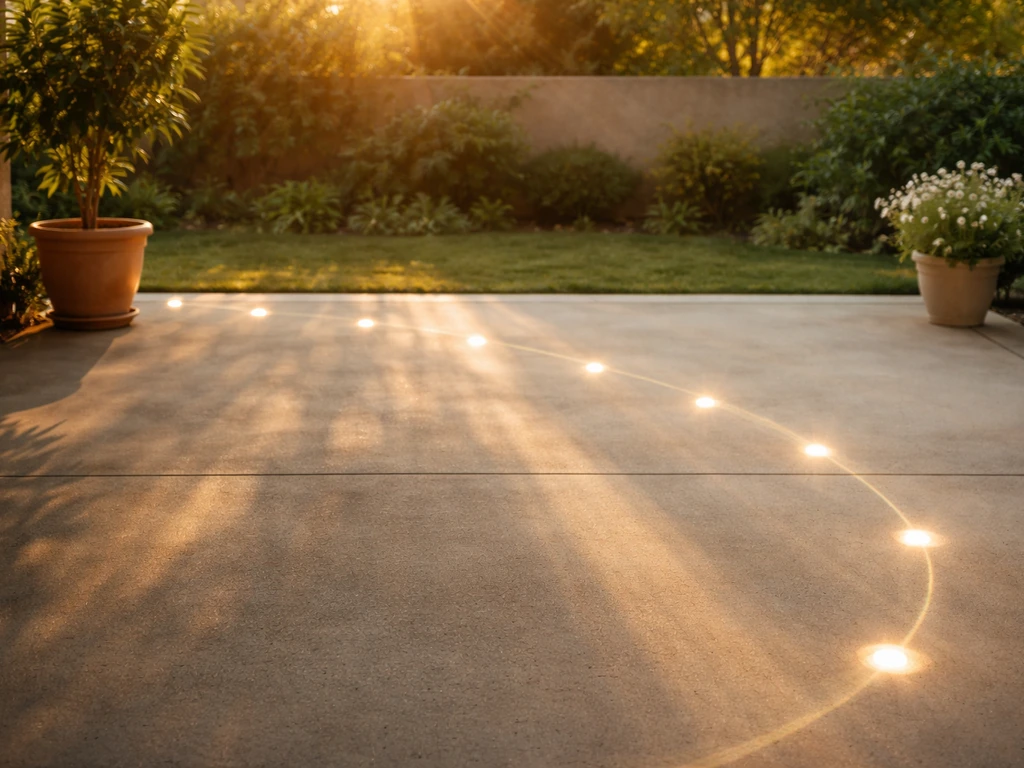
Before you buy a single plant, spend one day watching how sunlight moves across your patio. This is the single most useful thing you can do. Count the hours of direct sun your space gets, and be honest. A spot that gets bright light from 10am to 4pm is getting about 6 hours of full sun, which is the minimum for most vegetables and herbs. Anything under 6 hours is considered partial shade or low light, and you need to choose plants accordingly.
"Full sun" officially means 6 to 8 hours of direct sunlight per day. If your patio gets fewer than 6 hours, that doesn't mean you can't garden there, it just means you should lean toward shade-tolerant plants like ferns, impatiens, hostas, coleus, or leafy greens like lettuce and spinach. Trying to grow tomatoes in 3 hours of sun is a recipe for frustration.
Wind is the other factor most beginners ignore. A south-facing patio with afternoon sun can also be a wind tunnel, which dries out containers twice as fast and can damage tall or fragile plants. Position taller pots or a trellis on the windward side as a simple buffer, or cluster your containers together so they shelter each other.
For layout, think in zones. Put the tallest plants and trellised climbers at the back or perimeter. Medium pots, herbs, peppers, compact flowers, go in the middle layer. Low sprawling plants or small succulents sit at the front edge. This gives you visual depth and keeps taller plants from shading shorter ones. Even a 6-foot by 8-foot patio can hold 8 to 12 containers arranged this way without feeling cluttered.
Picking the right beginner plants
Containers vs. in-ground planting on a patio
On a typical patio, concrete, pavers, or decking, containers are your default choice. They give you total control over soil quality, drainage, and placement, and you can move them as the season changes or as you learn more about your light conditions. In-ground planting only makes sense if your patio has a built-in garden bed, a raised bed frame, or a border strip of exposed soil around the perimeter. If you have that option, low-maintenance perennials like lavender, ornamental grasses, or coneflowers work well in-ground with much less watering attention than containers.
For most beginners starting on a standard paved or decked patio, stick with containers. Before you start shopping, note the patio must have essentials like drainage-friendly containers so your plants can thrive from day one. They're forgiving, flexible, and you can start small and expand over time.
Easy plants that actually survive beginner mistakes
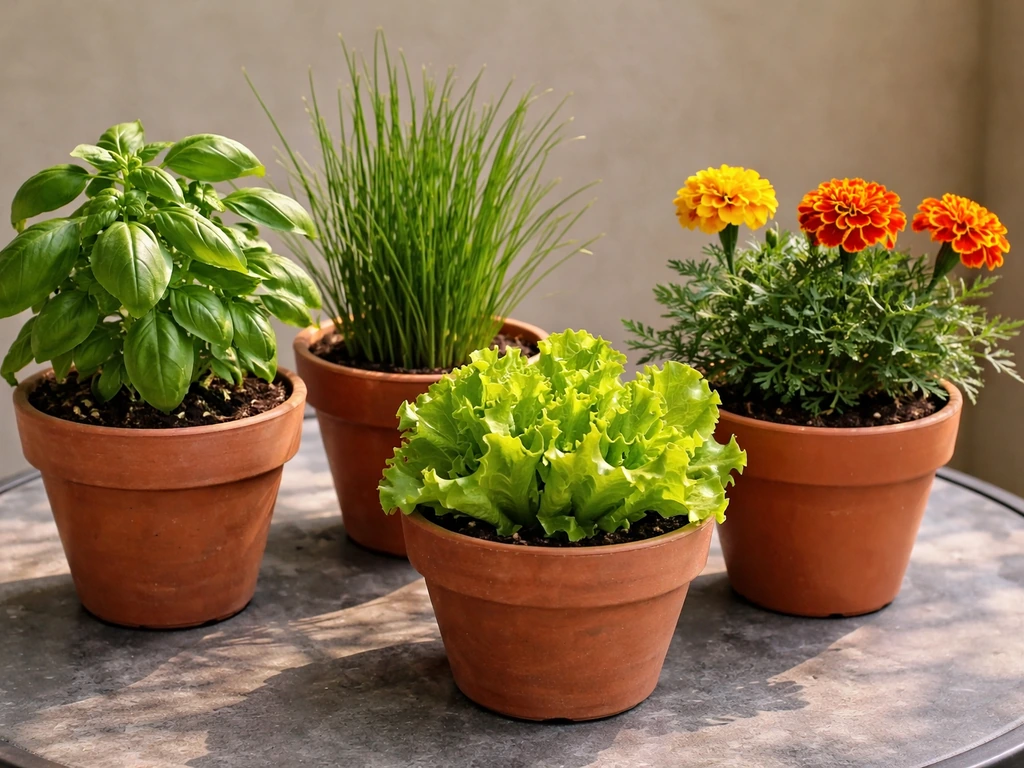
The best beginner plants are ones that give you clear visual signals when something is wrong and that bounce back from occasional over- or under-watering. Here are reliable choices organized by your sun situation:
| Sun Level | Easy Plant Choices | Notes |
|---|---|---|
| Full sun (6+ hours) | Basil, cherry tomatoes, zucchini, marigolds, petunias, peppers | Need consistent watering; cherry tomatoes in 5-gallon+ pots |
| Partial sun (3-6 hours) | Parsley, mint, chives, lettuce, kale, pansies, begonias | Great for north- or east-facing patios |
| Low light (under 3 hours) | Ferns, hostas, impatiens, coleus, peace lily | Focus on foliage; flowering will be limited |
| Any light level | Succulents (dry climates), pothos (indoors/shade), herbs like mint | Mint spreads aggressively; keep it in its own pot |
If you want food production from your patio garden, cherry tomatoes and herbs give you the best return for the space and effort. A single cherry tomato plant in a 5-gallon pot in full sun can produce fruit all summer. Basil planted nearby is both useful in the kitchen and reportedly helps repel some pests.
Soil, containers, and tools you actually need
Containers: what to look for
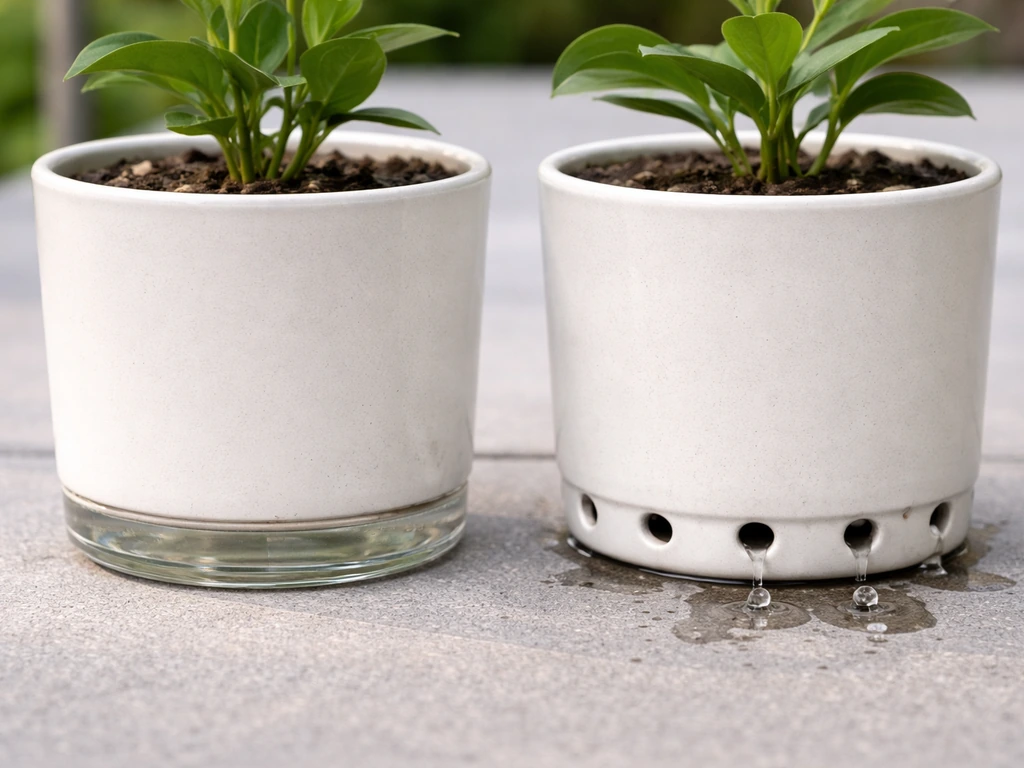
The single non-negotiable feature in any container is drainage holes. Without them, water pools at the bottom, cuts off oxygen to the roots, and root rot follows quickly. If you fall in love with a decorative pot that has no holes, use it as an outer cachepot and set your actual growing pot (with holes) inside it. Just make sure to empty any water that collects in the outer pot after rain or watering, never let the inner pot sit in standing water.
For materials, here's a quick comparison to help you decide:
| Container Material | Pros | Cons | Approx. Cost (10-12 inch pot) |
|---|---|---|---|
| Plastic | Lightweight, cheap, holds moisture well | Less attractive, can degrade in UV over time | $3-$10 |
| Terracotta/clay | Breathable, classic look, heavy (wind stable) | Dries out faster, cracks in frost, heavy to move | $8-$25 |
| Fabric grow bags | Excellent drainage, air-prunes roots, folds flat | Dries out very fast, less durable long-term | $5-$15 |
| Glazed ceramic | Attractive, retains moisture longer than terracotta | Heavy, can crack in hard frost, pricier | $20-$60 |
| Lightweight composite | Looks like stone or wood, durable, UV resistant | Higher upfront cost | $15-$50 |
For a first patio garden, plastic pots or fabric grow bags are genuinely the smartest choice. They're cheap enough that mistakes don't hurt, they're lightweight so you can rearrange easily, and they perform just as well as expensive options for plant health. Save the decorative ceramic pots for visible spots where looks matter more.
Soil: don't use garden soil in pots
Regular garden soil compacts in containers, drains poorly, and can introduce pests and disease. Always use a potting mix specifically labeled for containers. A good all-purpose potting mix has perlite or vermiculite blended in for drainage. For succulents or herbs that hate wet roots (like rosemary and thyme), add extra perlite, roughly 20 to 30 percent of the total volume. For vegetables and heavy feeders like tomatoes, a potting mix with some added compost gives you a nutrient head start.
Tools you'll actually use
- A hand trowel: for filling pots, transplanting seedlings, and checking soil depth
- A watering can with a long narrow spout or a hose with an adjustable nozzle: for gentle, targeted watering
- A spray bottle: useful for misting cuttings or treating small pest problems
- Gardening gloves: protect your hands from soil, fertilizer, and sharp edges
- A moisture meter (optional but helpful): takes the guesswork out of watering for beginners, around $10-$15
- Plant saucers: catch drainage from pots on a wood deck or indoors to prevent water damage
You do not need a big tool collection. The trowel, watering can, and gloves cover about 90 percent of what you'll do in a patio garden.
Watering, fertilizing, and a simple care schedule
How often to water
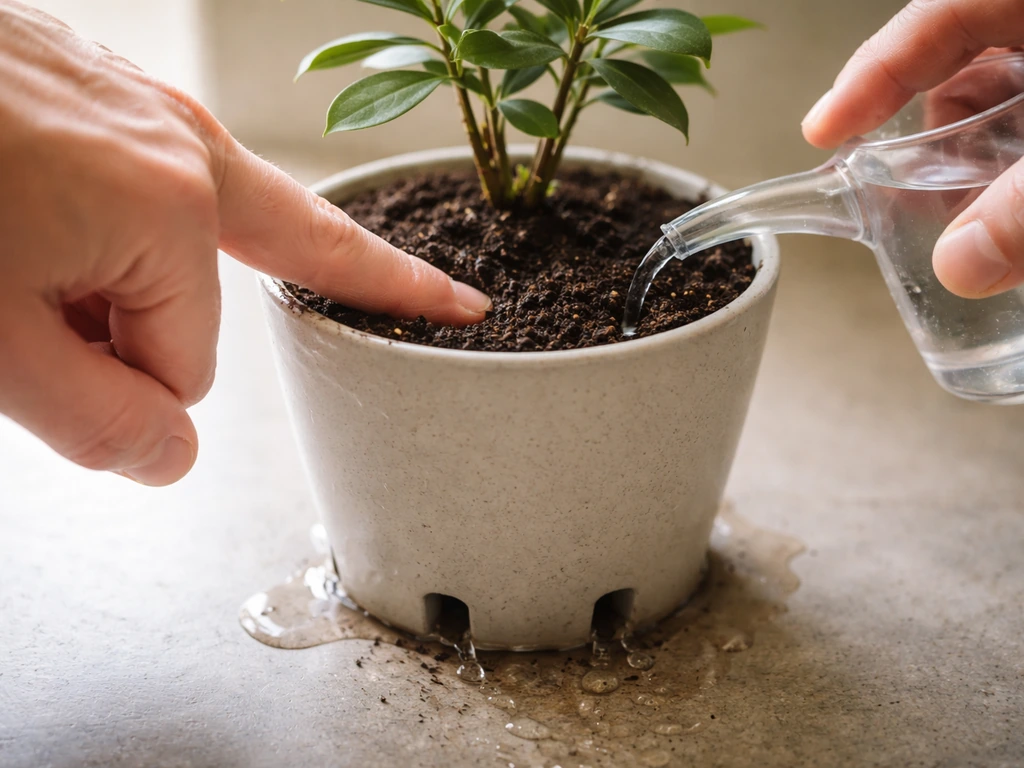
Forget fixed schedules to start with. The most reliable method is the finger test: push your finger about 2 inches into the soil. If it feels dry all the way to your fingertip, water thoroughly. If it still feels moist, wait and check again the next day. This approach accounts for variables that a fixed schedule can't, hot spells, cloudy weeks, different pot sizes, and different soil textures. Sandy or fast-draining potting mixes dry out much faster than denser mixes, so the same plant in two different pots might need watering on completely different days.
When you do water, water until it runs freely out of the drainage holes. This ensures the entire root zone gets moisture and flushes out any salt buildup from fertilizers. Light, shallow watering, just wetting the top inch, leads to shallow roots and plants that struggle in heat. In summer, most patio containers in full sun will need daily watering or close to it.
Fertilizing basics
Potting mix nutrients wash out with every watering, so containers need regular feeding. A balanced liquid fertilizer (look for numbers like 10-10-10 or similar on the label) applied every two weeks during the growing season is a straightforward starting point. For flowering plants and vegetables, a fertilizer slightly higher in phosphorus and potassium (the second and third numbers) during the blooming or fruiting phase gives better results. Slow-release granular fertilizers mixed into your potting soil at planting time can reduce how often you need to fertilize, they feed for 2 to 3 months. Don't over-fertilize; more is not better and can burn roots or push excessive leafy growth at the expense of flowers and fruit.
A basic weekly care checklist
- Check soil moisture daily in summer, every 2 to 3 days in cooler months
- Water thoroughly when the top 2 inches of soil are dry
- Remove dead or yellowing leaves as you spot them
- Deadhead spent flowers (pinch or snip off faded blooms) weekly to encourage new flowering
- Check the undersides of leaves for pests every week or two
- Fertilize with liquid fertilizer every 2 weeks during the growing season
- Empty any water that collects in saucers or cachepots within a few hours of watering
Patio garden design ideas for small spaces
A small patio footprint is not a limitation, it's a design constraint that actually makes things easier to manage. The most practical approach for a small patio is vertical gardening. A simple wall-mounted pocket planter or a tiered plant stand lets you grow 8 to 12 plants in the floor space of 2 to 3 pots. Herbs are perfect for vertical planters since they're lightweight and don't need huge root depth.
Clustering containers in odd numbers (3, 5, 7) looks more natural than even rows. These patio tips and tricks will help you set up your space so your plants thrive from the start. Vary the heights using pot risers, upturned pots, or a simple plant stand ladder. This layered look works on even a 4-by-6-foot balcony or a narrow side patio. If your patio has a railing, railing planters are an excellent space multiplier and put trailing plants like sweet potato vine or lobelia right where they'll show off.
Color-blocking is the easiest way to make a small patio garden look intentional rather than random. If you want your patio to look polished, use these patio decorating tips alongside your plant choices to create a cohesive style. Choose two or three complementary colors and stick with them, for example, white, purple, and silver-gray foliage looks crisp and cohesive even in a dozen pots. If you're growing edibles alongside ornamentals, tuck herb pots into flower arrangements so the whole thing looks designed, not just functional.
For inspiration on specific styles and patio-wide decorating approaches, the topics of patio decorating tips and patio must-haves cover the broader design picture beyond just the garden elements, which is worth exploring once your plants are sorted. If you want more inspiration, you can also browse patio do it yourself ideas for small-space layouts, plant styling, and easy container setups.
Beginner mistakes that are easy to avoid
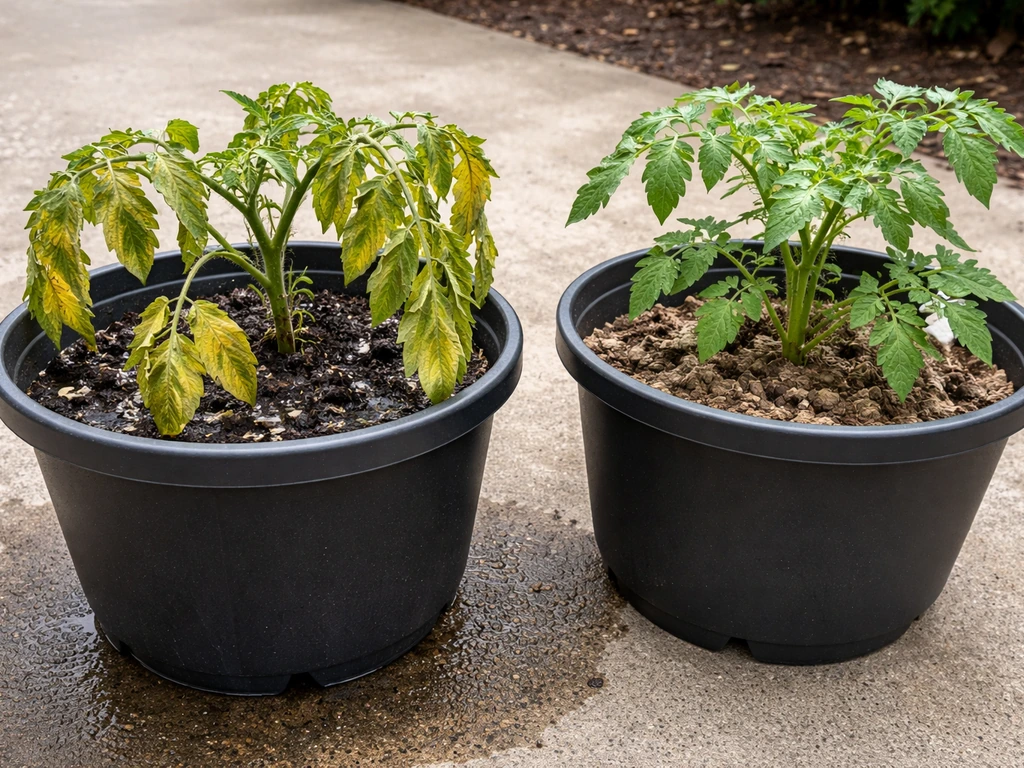
Most failed patio gardens share the same handful of root causes. Knowing them ahead of time puts you well ahead of the learning curve.
- Overwatering: The most common killer of container plants. More plants die from too much water than too little. Use the finger test every time instead of a fixed daily schedule.
- Pots without drainage holes: Standing water at the bottom of a pot is fatal to most plants within days. Always check for holes before buying, or drill your own.
- Using garden soil in containers: It compacts, drains poorly, and brings pathogens. Always use bagged potting mix for pots.
- Wrong light, wrong plant: Buying what looks pretty at the nursery without checking sun requirements. Always read the plant tag and compare it to your actual sun hours.
- Starting too big: Buying 20 plants when you've never grown before is overwhelming. Start with 3 to 5 containers and add more as you get comfortable.
- Ignoring pests until it's too late: Check leaf undersides weekly. Aphids, spider mites, and fungus gnats are much easier to treat early. A spray of diluted neem oil or insecticidal soap handles most common patio garden pests.
- No drainage plan for the patio surface: On a wood deck, standing water under pots causes rot and staining. Use pot feet or saucers and make sure water drains away from the deck surface. If your patio has poor drainage overall, that's worth addressing structurally before you invest heavily in plants.
What to do today: a simple beginner build plan
Here is a realistic sequence you can follow this week to go from zero to a functioning patio garden:
- Day 1 — Assess your space: Spend the day noting sun hours, wind direction, and available floor and wall space. Measure your patio footprint. Decide how many containers realistically fit without blocking movement.
- Day 1 — Make a plant shortlist: Based on your sun assessment, write down 3 to 5 plants you actually want to grow. Check that their sun requirements match what you have.
- Day 2 — Buy supplies: Get pots with drainage holes (start with 3 to 5 in a mix of sizes), a bag of all-purpose potting mix, a bag of perlite, plant saucers, a hand trowel, and a watering can. Budget around $50 to $100 for a modest starter setup.
- Day 2 — Visit a local nursery: Buy healthy transplants rather than seeds if you're a first-timer — they're much more forgiving. Look for compact, stocky plants with no yellowing leaves or visible pests.
- Day 3 — Plant and set up: Mix a small amount of perlite into your potting mix if you're planting herbs or anything that dislikes wet roots. Fill pots, plant at the same depth as they were in their nursery containers, and water thoroughly until it drains from the bottom.
- Day 3 — Arrange and position: Place your containers in their planned spots. Group them for visual effect and to help shelter each other from wind. Set saucers under all pots on decking.
- Day 4 onward — Start your care routine: Do the finger test every morning. Water when needed. Check for pests twice a week for the first month while you're learning your garden's patterns. Mark your calendar for fertilizing every two weeks.
If your patio needs structural work before gardening makes sense, things like improving drainage, adding a raised bed, or modifying the surface to handle heavy containers, that's worth getting a professional opinion on first. A patio contractor can assess load limits for large planters on a deck, fix grading issues that cause water to pool, or help you add a built-in raised bed along a perimeter wall. It's the kind of one-time investment that makes the ongoing gardening much easier.
Keeping it going: seasonal care and ongoing maintenance
Once your patio garden is up and running, the maintenance rhythm becomes genuinely simple. Here's how to think about it across the seasons: If you're planning your setup for patio must haves 2023, focus on reliable basics like drainage, enough light, and a simple watering routine.
| Season | Key Tasks |
|---|---|
| Spring | Refresh potting mix or top-dress with compost; start warm-season plants after your last frost date; divide overgrown perennials; clean and inspect pots for cracks |
| Summer | Water daily or near-daily in heat; deadhead flowers weekly; watch for pests closely; feed every 2 weeks; move sun-sensitive plants to shade during heat waves |
| Fall | Bring tender plants indoors before first frost; cut back spent annuals; plant cool-season crops like kale, lettuce, and pansies; clean empty pots and store them |
| Winter | Protect terracotta pots from freezing (they crack); bring ceramics indoors or to a garage; plan next year's layout; clean and store tools properly |
End-of-season pot cleaning is worth doing properly. Empty the old potting mix, scrub pots with a dilute bleach solution (about 1 part bleach to 9 parts water), rinse well, and let them dry before storing. This kills fungal spores and pest eggs that would otherwise carry over into next season. Fresh potting mix each spring gives your plants the best start and avoids the nutrient depletion and compaction that builds up in reused mix.
As you gain confidence, you'll naturally start expanding, adding more containers, trying vegetables you've never grown, or exploring design upgrades like trellises, lighting, or a dedicated herb wall. The topics of patio gardening tips and patio tips and tricks are good places to go deeper on specific techniques once you've got your first season under your belt. The foundation you build in year one makes everything that follows much easier to manage and much more enjoyable.
FAQ
Can I start a patio garden with only one or two containers, or should I aim for 8 to 12 right away?
You can absolutely start small. With one or two containers you can learn your exact watering rhythm and light patterns faster, then add more pots once you know how quickly your specific mix dries out.
What if my patio gets bright light but very little direct sun, can any vegetables still work?
Yes, but choose leafy greens and fast-growing options first, and accept smaller yields. For example, lettuce and spinach can do well in partial shade, while fruiting crops like tomatoes usually need near full sun to perform consistently.
How do I tell whether my plant is underwatered or overwatered?
Look at the container soil and the plant behavior together. If the fingertip test shows moist soil but leaves look limp or yellow, you may be overwatering. If the soil is dry and the plant wilts shortly after, that points to underwatering.
Is it okay to use a decorative pot without drainage as long as I add gravel to the bottom?
No, gravel or rocks do not replace drainage because water still collects in the root zone. Use a true growing pot with holes (and the decorative pot only as an outer cachepot), then empty any collected water after watering or rain.
What pot size should I choose for different beginner plants?
A simple rule is to match plant needs to root depth. Many herbs and smaller flowers do well in 1 to 3 gallon containers, while cherry tomatoes typically need about 5 gallons. When in doubt, choose the larger pot you can move comfortably, since bigger volumes dry out more slowly.
Do I need to mist my patio plants or use a humidity tray in containers?
Usually, no. Misting can encourage leaf diseases if foliage stays wet. Instead, focus on correct watering, wind protection, and spacing, since wind is a common cause of quick container drying.
How often should I fertilize, and what signs mean I should adjust?
Use the recommended interval as a baseline, then watch the plant. If you see lots of lush leaves but few flowers or fruits, reduce feeding or switch to a fertilizer ratio more focused on blooming or fruiting. If growth stalls and leaves look pale, you likely need more nutrients or fresher mix.
Can I use regular garden soil or compost in my patio containers?
Avoid it. Regular soil compacts in pots and drains poorly, which increases root stress. Use a labeled container potting mix, and if you want more nutrients, blend in compost only in moderation (or use a mix already formulated for vegetables).
What’s the safest way to deal with wind on a patio without overcomplicating the setup?
Start with placement. Cluster containers together for natural shelter, position taller plants toward the windward side, and use a trellis or stake as a buffer for fragile or tall plants.
Should I expect to water daily in summer, even if it rained?
Not always, but it is common in full sun. After rain, check the soil with the finger test. Containers can drain quickly and get hotter than you expect, so the soil may be dry again even if the patio surface looks wet.
How do I clean and reuse pots properly without harming plants?
After the season, dump old mix and scrub the container with a dilute bleach solution (then rinse thoroughly). Let pots dry completely before storing, and plan to refresh potting mix each spring since nutrient depletion and compaction happen even if the pot looks fine.
Can I mix edible plants and ornamentals in the same area of my patio?
Yes, and it often looks better. Just be mindful of watering and feeding differences, herbs and many flowers can share containers, but heavy feeders like tomatoes may need larger pots and more consistent nutrient support.