
A patio must have five things to actually work: a stable, properly sloped surface; enough room to move around comfortably; shade or cover for the hours you actually use it; safe electrical and drainage details; and a maintenance plan you'll realistically follow. Everything else is personal preference. Get those five right and your patio will be useful, safe, and durable for decades. Skip any one of them and you'll be regretting it within a season or two.
Patio Must Have Checklist: Essentials for a Great Build

Miles Sutton
17 May 2026
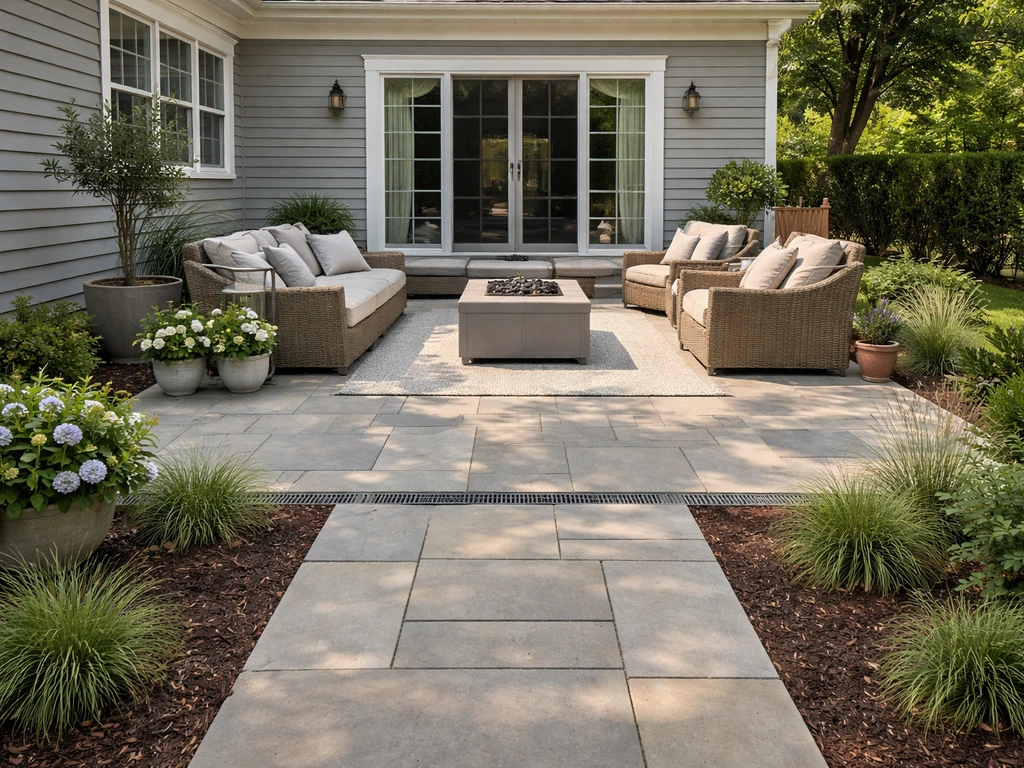
Start by defining what your patio actually needs to do
The word 'must have' means something different depending on why you're building the patio in the first place. A space designed for weekend dinner parties needs more square footage, a dining-height surface, and probably some overhead lighting. A quiet morning coffee corner can be compact and low-key. A grilling setup needs clearance from the house and somewhere to park a cart. Before you pick a single paver or piece of furniture, spend five minutes answering these questions honestly.
- Primary use: dining, lounging, grilling, play space, or a mix?
- How many people do you regularly host — 2, 6, or 12?
- Do you have kids or pets who need open running room?
- Are you budget-focused now but willing to phase in upgrades later?
- Do you want a low-maintenance surface or are you comfortable with seasonal upkeep?
Your answers shape every decision below. A dining-focused patio for six people needs roughly 12 by 12 feet just for the table zone alone. A two-person lounge patio can be as small as 10 by 10 feet and still feel generous. Getting this clarity upfront prevents the most common mistake: building a patio that looks great in photos but doesn't actually fit how you live.
Essential layout and sizing basics
Sizing is where most DIY patios go wrong. People eyeball it, run out of space, and end up with furniture crammed against the wall. Use these numbers as your minimum floor, not your target. The target should always be a little bigger.
Walkways and circulation
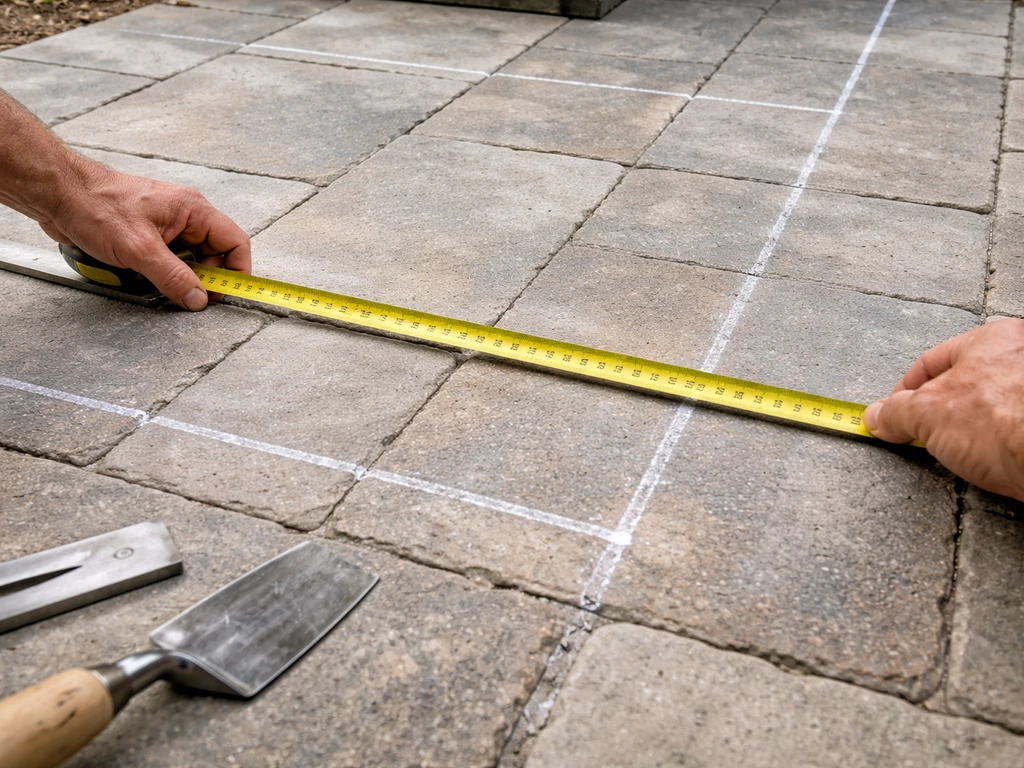
Keep at least 36 inches of clear walkway from any door path so you can move chairs and people without blocking traffic. Main walkways through the patio should be 36 to 42 inches wide to avoid bottleneck lanes, and aim for 4 feet if you can swing it. Between seating and walls or fences, leave 24 to 30 inches minimum so guests can squeeze through without knocking things over. If anyone using the space has mobility needs, you'll want a 60 by 60-inch turning area built into the layout. The ADA access guide also addresses turning space needs around narrow obstructions, including larger clearances for 180-degree turns on accessible routes.
Dining and seating zones
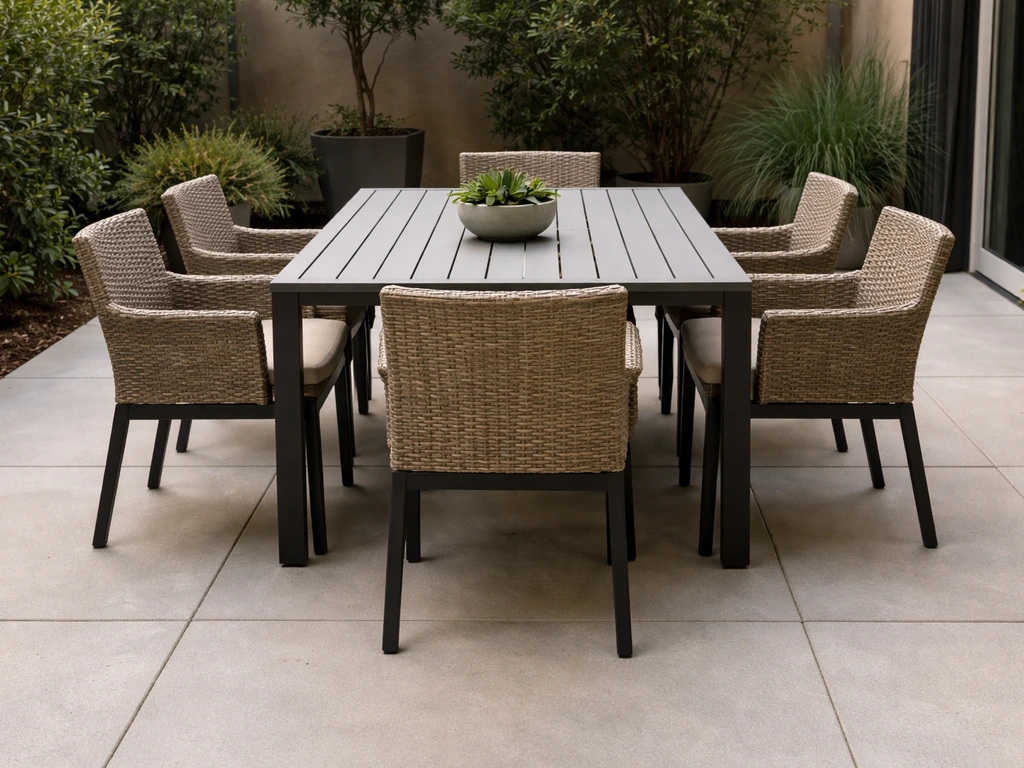
For a dining area, allow 3 feet of clearance all the way around the table so chairs can be pulled out and people can walk behind seated guests. A practical way to calculate the footprint you need: take your table's diameter or length, add the depth of chairs on each side, then add 12 to 18 inches of extra clearance. That total is your dining zone. Don't try to share that zone with a seating group. Give each area its own dedicated space, even if they're adjacent.
Placement relative to the house
Position the patio so the most-used door opens directly into the main activity area. Sliding glass doors are common transition points, so leave a clear 36-inch path from the door panel's swing or slide path before any furniture begins. If you're planning a grill station, keep it at least 10 feet from the house and away from low-hanging eaves or overhead covers.
Safety, code, and durability, the stuff you can't skip
Slip resistance
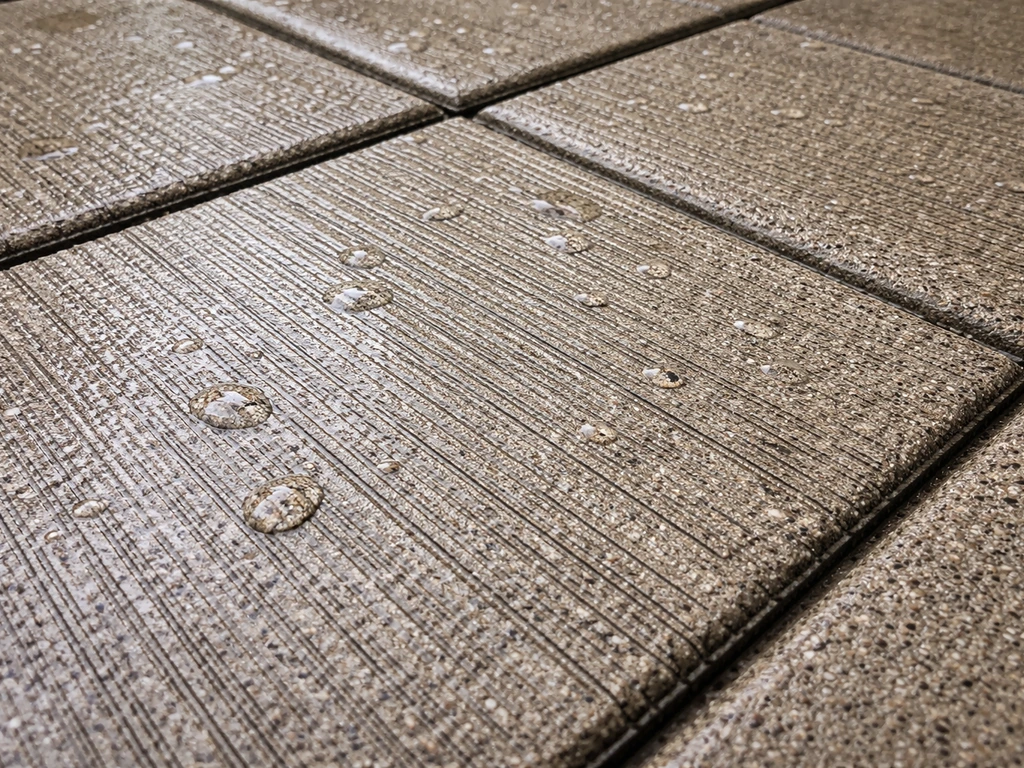
Surface texture matters a lot, especially when the patio gets wet. Smooth concrete and polished stone can become dangerously slippery. If you're using outdoor porcelain tile, look for a Pendulum Test Value (PTV) of 36 or higher, which is the threshold for safe use in wet external conditions. For concrete, a broom finish adds grip without much extra cost. Pavers with a natural or tumbled texture are generally safer wet than smooth alternatives.
Base preparation and structural stability
A patio surface is only as good as what's underneath it. For paver patios, the standard base is 4 inches of compacted paver base aggregate topped with 1 inch of bedding sand before the pavers go down. Skimping on compaction or aggregate depth is the number one cause of sinking, settling, and low spots that collect water. Install edge restraints anchored into the compacted aggregate layer to keep pavers from migrating outward over time. For concrete slabs, proper subgrade preparation and jointing follow the same principle: a stable, compacted base prevents cracking. ACI 360R-10 is a referenced technical guide for slabs-on-ground and relates slab design and performance to the soil-support and base approach.
Electrical and lighting safety
Any outdoor electrical outlet on your patio must be GFCI-protected, this is a requirement under the National Electrical Code and will be checked during any permit inspection. Don't treat this as optional. If you're adding outlets or hardwired lighting during your build, include them in any permit application. Planning your lighting layout before the surface goes down lets you run conduit cleanly and avoid cutting through finished work later.
Local permits and setbacks
Check your local codes before you build. Many municipalities require permits for permanent structures (covered patios, pergolas, attached decks) and enforce setback rules from property lines. Fines and forced removal aren't hypothetical, they happen. A quick call to your building department takes 10 minutes and can save you months of headaches.
Comfort and usability essentials
Seating that actually works
Standard outdoor dining chairs sit at about 17 to 19 inches off the ground, which pairs with a 29 to 30-inch table height. Lounge chairs and deep-seat sofas are lower and designed for relaxing, not eating. Don't mix dining and lounge furniture at the same table, the height mismatch makes everyone uncomfortable. Whatever you choose, make sure the furniture can handle your climate. Powder-coated aluminum, teak, and all-weather wicker all hold up well outdoors. Untreated wood and cheap steel do not.
Shade or cover
A patio without shade is only usable during a narrow window of the day in most climates. You don't need a full pergola or roof to solve this. A quality cantilever umbrella covers a dining area without blocking sightlines. Shade sails are affordable and can cover large zones at an angle that sheds rain as well. If you're investing in a longer-term setup, a pergola with a louvered or polycarbonate roof gives you the most flexibility. The key is planning the shade solution before the patio is finished so you can install posts or anchor points at the right spots.
Surface materials compared
| Material | Durability | Slip Resistance (Wet) | Maintenance Level | Best For |
|---|---|---|---|---|
| Concrete (broom finish) | Very high | Good | Low to medium | Large areas, clean aesthetic |
| Concrete pavers | High | Good | Low | DIY-friendly, flexible design |
| Natural stone (flagstone) | Very high | Varies by texture | Medium | Character, irregular layouts |
| Outdoor porcelain tile | High | Good if PTV 36+ | Low | Modern look, easy cleaning |
| Gravel/decomposed granite | Medium | Fair | Low | Budget builds, informal spaces |
Weather-readiness and drainage, non-negotiables
Water is the enemy of every patio. It causes heaving in freeze/thaw climates, undermines base layers, pools against your house foundation, and accelerates surface wear. Getting drainage right from the start is far cheaper than fixing it after the fact.
Slope requirements
Your patio surface needs to slope away from the house. The minimum acceptable slope is 1/8 inch per foot (1%), but the recommended target is 1/4 inch per foot (2%). For interlocking concrete pavers specifically, that 2% slope is the published minimum for positive drainage. On a 12-foot-deep patio, a 2% slope means the far edge sits 3 inches lower than the edge at the house. It doesn't look dramatic, but it moves water reliably. If your patio slopes toward the house at all, you have a problem that will get worse every year.
Managing runoff and waterproofing near the house
Direct runoff away from your foundation. Where the patio meets the house, make sure there's no sealed joint that traps water against the wall. A small gap with a compressible backer rod and exterior caulk allows for thermal movement and prevents water intrusion. In areas with heavy rain or clay soil, consider a perimeter drain or French drain at the outer edge to handle high-volume runoff. If you're in a freeze/thaw climate, any water that gets under your surface in fall will expand in winter and push things apart.
Material choices for your climate
In freeze/thaw climates, choose materials rated for that exposure. Concrete pavers and porcelain tile with low water absorption handle freeze/thaw well. Unsealed natural stone and standard brick can spall (chip and flake) when water trapped in the material freezes. In hot, sunny climates, light-colored surfaces reflect heat better and stay cooler underfoot. In high-rain regions, prioritize textured surfaces and permeable options like gravel or permeable pavers.
Maintenance, cleaning, and keeping it in good shape long term
The best patio is one you'll actually maintain. Each material has a different upkeep rhythm, and being realistic about this during the planning phase saves frustration later. If you hate weekend chores, don't install a material that needs annual sealing and re-jointing.
What each common material needs
- Concrete: Sweep and hose regularly. Reseal every 3 to 5 years in mild climates with light use, more often in harsh or high-traffic conditions. Address cracks promptly to prevent water infiltration.
- Concrete pavers: Sweep debris, rinse occasionally. Re-sand joints every few years as polymeric sand breaks down. Check edge restraints annually and reset any shifted pavers before they create trip hazards.
- Natural stone (flagstone, slate): Sweep and rinse. Seal once a year for porous stones like limestone or sandstone. Check joints for weeds and re-point as needed.
- Outdoor porcelain tile: Easiest to maintain. Sweep and mop with a pH-neutral cleaner. Inspect grout joints for cracking and re-grout as needed.
- Gravel/decomposed granite: Rake periodically to redistribute material. Top up with fresh gravel every couple of years. Install a weed barrier underneath at the start to reduce ongoing weed pulling.
Seasonal checks worth doing every year
- Walk the surface in spring after freeze/thaw season and look for heaved pavers, cracked concrete, or shifted edges.
- Check that the drainage slope is still intact — settling can flatten it over years.
- Inspect any electrical fixtures for moisture damage or corrosion.
- Clean and re-seal if the surface is showing water absorption (concrete that soaks up water instead of beading is telling you it needs sealing).
- Check furniture hardware for rust or loosening and address it before the main season.
When to DIY and when to call a pro
Laying a paver patio on a flat, well-drained lot is a realistic DIY project for a capable homeowner with a long weekend and a rented plate compactor. Pouring a large concrete slab, installing a covered pergola structure, running outdoor electrical, or dealing with a challenging grade, those are jobs where a professional pays for themselves in avoided mistakes. There's no shame in doing the design and prep yourself and hiring out the technical parts. In fact, that's often the smartest approach for keeping costs manageable without gambling on structural or safety issues.
If you're looking for more inspiration beyond these fundamentals, the practical overlap with patio decorating tips, garden integration, and DIY ideas is worth exploring once you have your core plan locked in. You can build on that foundation with patio gardening tips that match your light, space, and watering needs. If you want more patio do it yourself ideas, focus next on layout inspiration and materials that fit your weather and maintenance schedule DIY ideas. But start here: define your goals, measure your space, plan your drainage slope, confirm your surface choice, and nail down your shade solution. If you want inspiration, review patio must haves 2023 so your layout and finishes match what homeowners are prioritizing this year. For more ideas on layout, comfort, and styling, use these patio tips and tricks to fine-tune your plan as you build patio decorating tips. Those five things will make or break your patio more than any decorative detail will. If you are looking for a starting point, a patio garden for beginners can be as simple as container plants, a few hardy herbs, and a small lighting or watering setup to keep things thriving.
FAQ
How do I confirm my patio actually has the right drainage slope before it’s finished?
Plan the slope using the final finished surface, not the subbase. If you level your base flat and then change materials or thickness later, you can accidentally end up with near-zero or even negative drainage. Re-check slope after the bedding sand or leveling layer is installed, before you set the final pavers or tile.
Can I rely on a patio edge drain instead of detailed base layers and slope?
Yes, but only if the system is designed for the job. For example, a French drain needs a proper outlet path and, in some places, filter fabric and washed stone sized correctly to avoid clogging. If the patio drains into an area that already floods, you can move the problem instead of solving it.
Is it okay to anchor things like pergolas, rails, or umbrellas directly into the patio surface?
In most cases, you want to avoid “floating” furniture on a patio that may shift slightly over time. For pavers, the safest approach is to keep furniture anchored to its own stable base (like weighted planters) and avoid drilling into pavers unless you have a clear plan for sealing and maintenance. If you must anchor (for a pergola or shade), anchor into structural posts and allow for movement around the patio surface.
What outdoor electrical details matter besides adding a GFCI outlet?
A GFCI outlet is protected by the device itself, but it still needs weather-rated components. Use an outdoor-rated in-use cover, ensure all connections are properly weather-sealed, and keep the outlet location accessible so you can test it. If you install lights later, include them in your original conduit plan to avoid cutting through finished work.
How do I choose a patio surface if I get both heavy rain and freezing winters?
If you’re between options, prioritize the finish for your specific wetness level and cleanup needs. In freeze/thaw climates, avoid highly absorbent, unsealed stone that can trap water and spall when it freezes. In consistently wet regions, choose textured surfaces or permeable pavers so puddling is less likely.
What hidden “underneath” costs prevent sinking, cracking, or shifting later?
Budget for the stuff that prevents failures, not just the top layer. For pavers, that usually means adequate base depth, proper compaction, and edge restraints, plus a correct amount of bedding sand. For concrete, it means correct subgrade compaction and joint planning, including where cracks are allowed to form instead of where you want them not to.
What’s the most common layout mistake when combining dining and a lounge area on the same patio?
Dining and lounging can share a patio, but they should not share circulation space. A common mistake is placing seats where people must walk through the middle of the dining zone to reach the grill or door. Instead, treat each activity area as its own footprint and connect them with dedicated clear walk lanes.
How do I plan shade so it covers the patio during the actual times I’ll use it?
For shade, measure the sun patterns for the exact hours you use the space, and plan for seasonal change. A cantilever umbrella needs clearance and stable placement, shade sails require anchoring points at correct tension, and pergolas need post locations that do not interfere with doors, walkway widths, or furniture clearance.
What are the most important freeze/thaw considerations beyond material selection?
Many patios fail because of freeze/thaw water trapped under or inside materials. Use materials rated for freeze/thaw where possible, avoid sealing that traps moisture in inappropriate spots, and ensure water can move away from the base. If you have drainage issues, fix those before you spend money on high-end surface finishes.
Do permeable patio options still work if I don’t want frequent maintenance?
If you’re using porous or permeable surfaces, remember that maintenance is different. Permeable pavers and gravel systems can clog over time and may need periodic vacuuming or regrading, especially after heavy seasons. Make sure your maintenance plan matches how quickly debris collects in your yard.
What should I consider about furniture fit and safety, not just style and materials?
Weather-resistant furniture is only half the story, look at how the pieces interact with your space. Chairs need to clear walk paths, tables should match the activity height, and deep seating should be placed where it will not block access when pulled out or when people stand up. If your patio gets windy, plan for anchors or heavier bases so items don’t become a safety issue near doors and walkways.