The single biggest patio mistake is skipping the planning phase and going straight to picking materials. Get clear on how you'll actually use the space first, pick the right size and layout, nail your drainage slope, and the rest falls into place. This guide walks you through every major decision in order, with real numbers and honest trade-offs so you don't end up redoing anything a year from now.
Patio Tips and Tricks: Design, Layout, Materials, Next Steps

Miles Sutton
18 Jun 2026
Start with how you'll actually use the space
Before you measure anything, write down the two or three main things you want the patio for. Dinner parties? Morning coffee alone? Kids playing while you grill? Your honest answer changes almost every decision that follows, from size to shade to how much lighting you need at night.
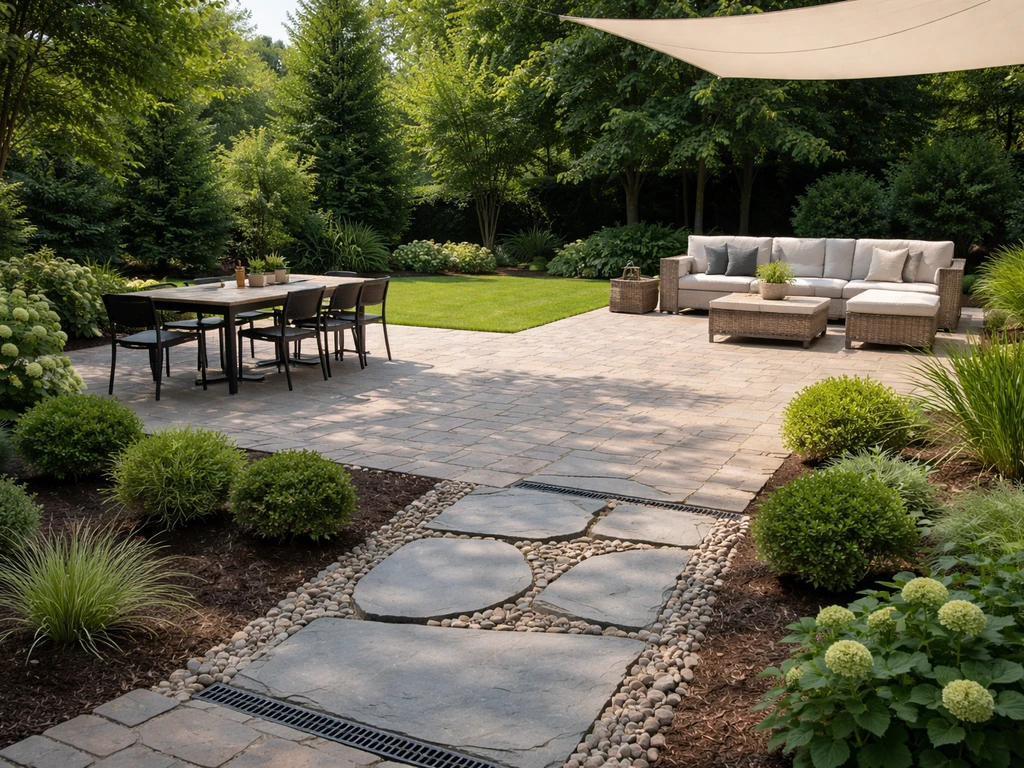
Think in zones. A well-designed patio typically layers three functional areas: dining, lounging, and a bar or prep zone. These don't have to be rigidly separated, but naming them helps you figure out how much square footage you actually need and where each area should land relative to sun, wind, and your house entry. A pergola is one of the best tools for defining these zones because it adds overhead structure without closing the space off. If you're planning an outdoor kitchen or serious entertaining setup, that zone needs to anchor near your house for utility connections.
It's also worth thinking through the seasonal rhythm now. If you're in a hot climate, afternoon shade is non-negotiable for a dining zone. In a cooler region, you might want sun exposure and a windbreak instead. Getting your comfort plan mapped at the start means your shade structures, privacy screens, and furniture placement all work together instead of fighting each other. Patio decorating tips and patio must-haves can add polish later, but the zone plan is what makes everything feel intentional.
Size, layout, and traffic flow planning
Most homeowners undersize their first patio. A 10x10 foot slab feels workable on paper but gets cramped fast once furniture is in place. A realistic dining area for four needs roughly 12x12 feet minimum. Add a separate lounge zone and you're looking at 300 to 400 square feet for a patio that comfortably does both.
Layout spacing matters just as much as total square footage. Plan for about 30 to 36 inches on main walkways through the patio, and leave 24 to 36 inches beyond the edges of your dining table so chairs can pull out without hitting anything. For a lounge area, keep roughly 14 to 18 inches between your sofa and coffee table so it feels usable, not cramped. These aren't design preferences, they're functional minimums.
If your yard allows it, multi-level designs are excellent for naturally separating zones without needing furniture or planters to do the work. Even a single step down from a dining area to a lounge area creates a clear visual break. For irregular or sloped lots, plan your levels early since they directly affect your grading and drainage work.
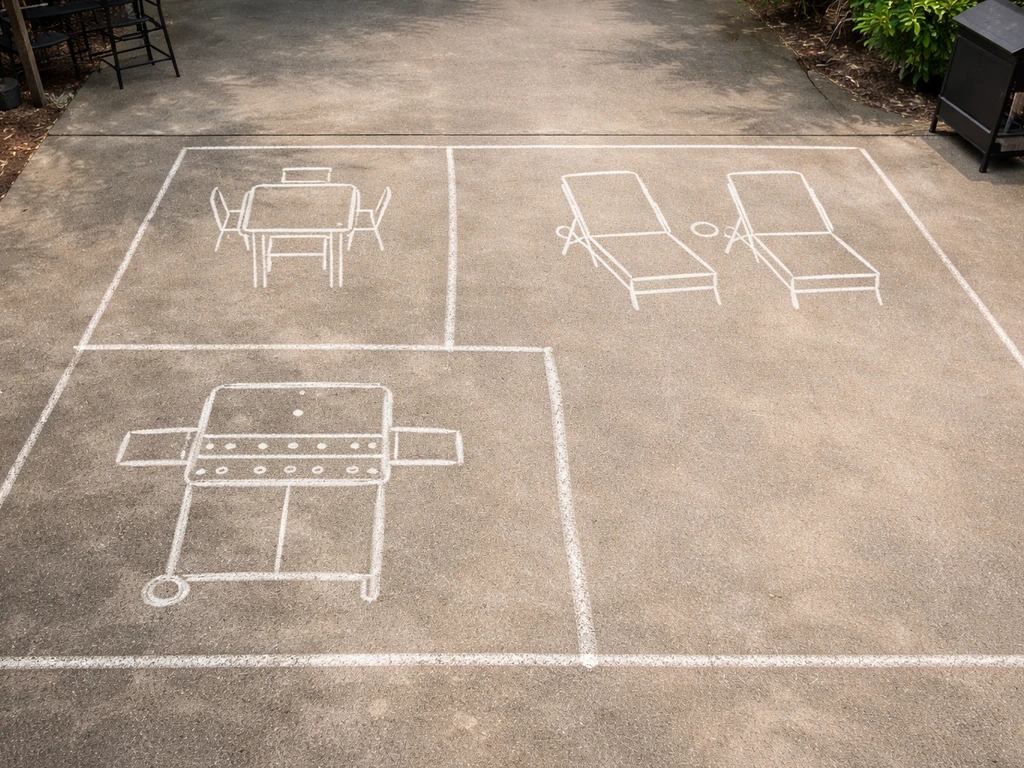
Mark out the footprint on the ground with stakes and string or spray paint before you commit to anything. Walk through it with furniture in mind. Does the path from the back door to the dining table feel natural? Can two people pass each other without squeezing? If something feels tight on the ground at this stage, it will feel tighter with furniture in place.
Material and finish choices that fit your climate and style
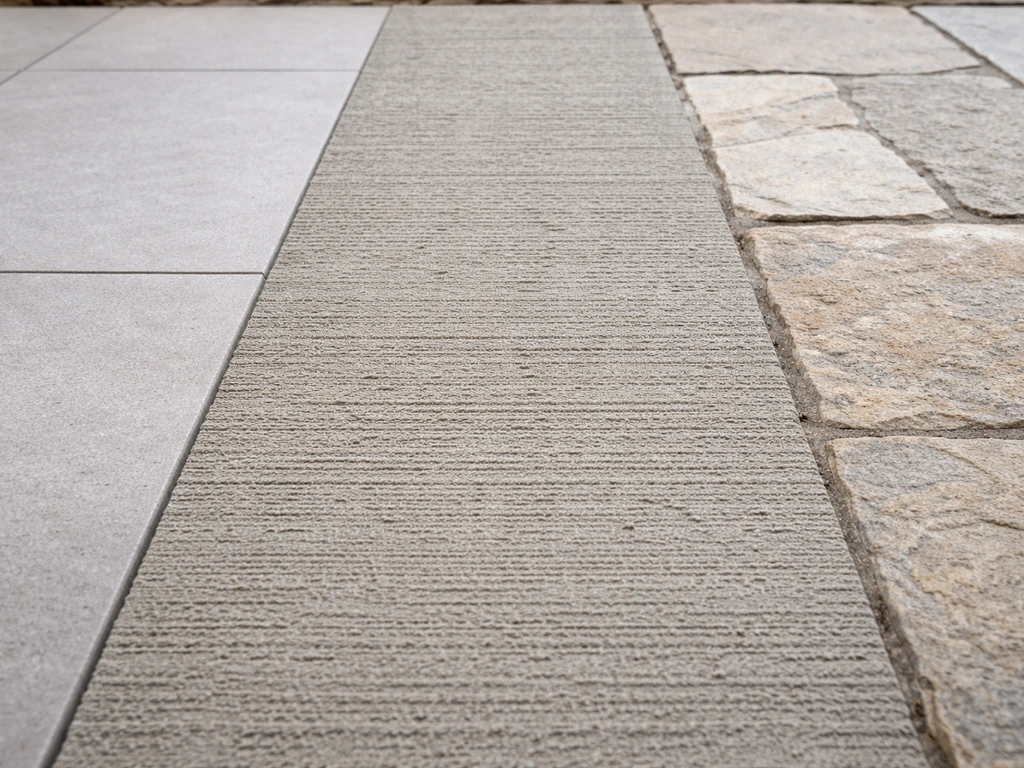
Your climate should be the first filter on material choice, not aesthetics. If you're in a freeze-thaw zone, you need materials rated for that cycle. Porcelain pavers engineered for exterior use are tested to ASTM C-67 freeze-thaw standards and hold up well. Concrete pavers from a reputable manufacturer do too. Plain flagstone mortared in place is more vulnerable: freeze-thaw cycles work into the mortar joints over time and you'll be re-grouting every few years.
For slip resistance, broom-finished concrete is the practical standard for exterior slabs. The broom texture creates ridges before the concrete fully cures, giving you grip without a specialty coating. Outdoor porcelain pavers often carry an R11 or similar slip-resistance rating, which is worth checking on the spec sheet if you're buying through a stone or tile supplier.
On cost, poured concrete runs roughly $4 to $12 per square foot installed depending on whether it's plain or decorative (stamped, stained). Paver installations generally cost more but offer easier repair since individual pieces can be replaced. Covered patios and pergola additions push costs significantly higher, with full covered outdoor living projects ranging from $40,000 to $125,000 depending on scope and materials. Knowing that range early saves a lot of frustration when you start getting quotes.
| Material | Best Climate Fit | Slip Resistance | Maintenance Level | Relative Cost |
|---|---|---|---|---|
| Concrete (broom finish) | Most climates | Good (textured) | Low | $ |
| Concrete pavers | Most climates incl. freeze-thaw | Good | Low-Medium | $$ |
| Porcelain pavers | Most climates incl. freeze-thaw | Very good (R11+) | Low | $$$ |
| Flagstone (mortared) | Mild climates preferred | Moderate | High (re-grout) | $$-$$$ |
| Permeable pavers | Most climates | Good | Medium | $$$ |
If you're using concrete pavers or natural stone, plan on a maintenance coat of sealer every 3 to 5 years. Efflorescence (the white salt deposits that appear on masonry) is a cosmetic issue, not structural, but a good sealer reduces it significantly. Permeable pavers are worth considering if drainage is a challenge on your site, but they require proper subgrade preparation including a geotextile layer and specific aggregate bedding to perform as intended.
Shade, weather protection, and privacy
Shade is where most patios fall short. You can have a beautiful layout and great materials, but if the dining table gets blasted by afternoon sun, nobody wants to sit there in July. Map your sun angles before you finalize furniture placement. West and southwest exposures need the most attention for afternoon shade.
Retractable awnings are one of the most flexible options. They mount to the house and extend over the patio, and modern versions include integrated wind sensors that retract automatically. For installation, you need a minimum of 7 feet 6 inches from the patio floor to the bottom of the roof or eave where the awning mounts, so check that clearance before you shop. Choose the awning placement based on where your sun actually hits, not just what looks centered on the house.
A pergola gives you a more permanent shade structure and is excellent for defining outdoor rooms. It doesn't block all sun (unless you add a cover or shade cloth), but it creates a psychological ceiling that makes the space feel intentional. You can add climbing plants, string lights, or a fabric shade panel over time. If you want a living backdrop, use patio gardening tips to choose climbing plants that match your sun and privacy goals.
For privacy, an 8-foot fence or privacy screen is a common height for outdoor living and pool areas. If you don't want a solid fence, a combination of a 6-foot fence with tall planters or trellised plants on top can hit that effective height without looking like a fortress. Screens also double as windbreaks, which makes a big comfort difference in exposed yards.
Lighting, seating zones, and layout add-ons that actually get used
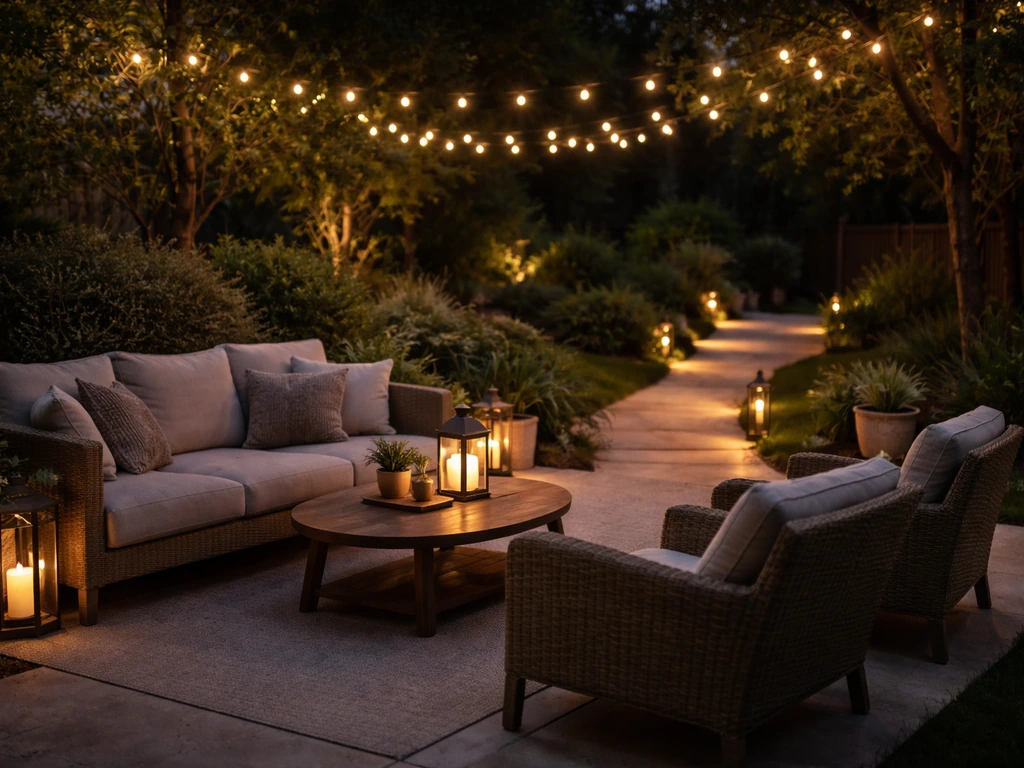
Good patio lighting does three things: it makes the space safe to move through at night, it creates ambiance in the seating areas, and it highlights features you want to show off. If you want patio must haves for 2023, plan lighting and seating zones so the space works after dark and for real hang time patio must haves 2023. Plan these as separate layers rather than trying to do everything with one type of fixture.
For path and walkway lighting, space fixtures about 6 to 8 feet apart and stagger them on alternating sides rather than lining them up like a runway. For steps and level transitions, light them uniformly to avoid glare and eliminate trip hazards. Any outdoor fixture needs to be rated for wet locations (look for the UL wet-location listing), especially near areas that get direct rain or spray.
String lights are the easiest way to add warmth to a dining or lounge zone. If you want even more impact, patio decorating tips like mixing textures and adding personal touches can make your zones feel finished, not temporary String lights. The one rule that matters: plug them into a covered GFCI outlet. An uncovered standard outlet is a safety issue outdoors, and a non-GFCI outlet is a code issue in most jurisdictions. If you're running low-voltage landscape lighting on a transformer, size the transformer to handle your total fixture wattage with some headroom, and factor in voltage drop for any runs longer than about 100 feet since long cable runs reduce light output at the far end. If you’re running a low-voltage landscape lighting system, include the cable and transformer in your design, and size the load by calculating total lamp wattage for proper transformer selection running low-voltage landscape lighting on a transformer.
For seating and dining zones, think about how you want the furniture to anchor the space. A dining set needs a defined area, either through paver pattern, a change in material, or a simple outdoor rug. The lounge zone benefits from furniture arranged to face inward (conversation-focused) rather than all facing a single direction. If you're tight on space, benches built into a raised planter wall or a low retaining wall pull double duty.
A few practical add-ons worth planning for from the start: an outdoor-rated electrical outlet near the dining zone, a water spigot close to any planting or container garden area, and a spot for a small side table or serving surface near the grill or prep zone. These feel minor until you don't have them.
Drainage, leveling, and safety before you build
This is the section most DIYers skim and later regret. A flat patio puddles. Standing water stains the surface, grows algae, accelerates freeze-thaw damage, and can work its way toward your foundation. Every patio surface needs a slope away from the house.
The standard guidance from multiple sources lines up around 1/4 inch per foot of slope away from the house (roughly 1% to 2% grade). Some sources cite 1/8 inch per foot as a minimum, but 1/4 inch per foot is safer and is what most concrete contractors and paver installers use as their working target. Over a 10-foot patio depth, that's a 2.5-inch drop from the house wall to the outer edge. That's barely visible but makes a real difference in how water moves off the surface.
For a DIY paver patio, the standard base build-up is 4 inches of compacted gravel base plus 1 inch of paver sand as the bedding layer. The gravel base provides the structural foundation and drainage. The sand layer lets you fine-tune the level before setting pavers. Skimping on either layer is the most common reason paver patios settle unevenly within a couple of years.
Edge restraints are not optional. They hold the perimeter pavers in place and keep the whole field from spreading over time. Joint sand (polymeric sand is worth the extra cost) locks the paver field together and resists weed intrusion. Mark and excavate your perimeter before anything else, since the layout of the whole project depends on getting the boundary right.
On safety: any change in level needs to be clearly visible or lit. A single step that blends into the surrounding surface is a trip hazard. Contrasting paver color, a change in material, or step lighting at every transition solves this. If you're building near a pool or in a wet climate, slip-resistant surface texture isn't a nice-to-have, it's a safety requirement.
Budgeting, DIY vs. pro, and your patio planning checklist
DIY makes the most sense for straightforward paver patios on reasonably flat ground with no major drainage complications. If you’re looking for patio do it yourself ideas, use the zone plan and sizing steps above to keep the project focused and avoid costly rework. The physical work is manageable with the right tools (plate compactor rental is essential), and you can save 30 to 50 percent on labor compared to a professional install. Where DIY tends to go sideways: improper base prep, off-level sections, and drainage slopes that are either missing or running the wrong direction. If your site has significant slope, poor soil, or you're dealing with drainage that affects the house foundation, a pro is worth every dollar.
Concrete patio slabs are harder to DIY well because getting the pour, finish, and slope right in a single window of time takes real experience. Most homeowners are better off hiring a concrete contractor for poured slabs and saving their DIY effort for the paver, landscaping, lighting, and furniture work around it.
When budgeting, build in a 10 to 15 percent contingency. Unexpected subgrade problems (tree roots, poor compaction, buried debris) are common and will add to your base prep costs. Get at least two quotes if you're hiring, and ask each contractor how they handle drainage slope specifically. The answer tells you a lot about whether they'll do it right.
Before you buy materials or hire anyone, collect this information. It will save you multiple trips to the supplier and make every conversation with a contractor faster and more useful.
- Measure your available space and mark the proposed footprint on the ground
- Note the slope of your existing yard and which direction water currently drains
- Identify where your house entry, utility connections (hose spigot, outlets), and any existing structures are relative to the patio area
- Decide on your primary zones: dining, lounge, bar/prep, and approximate square footage for each
- Check local permit requirements (many jurisdictions require a permit for patios over a certain size or for any covered structure)
- Set a realistic total budget including base prep, materials, edging, lighting, and furniture
- Choose your surface material and confirm it's rated for your climate (freeze-thaw, slip resistance)
- Plan your shade solution and confirm mounting clearance if using an awning (minimum 7 ft 6 in floor to eave)
- Identify your lighting zones: path/walkway, step transitions, and ambiance layers
- Confirm GFCI outlet access for any plug-in lights or outdoor appliances
- Decide DIY or pro for the hardscape work, and gather at least two quotes if hiring
- Plan your drainage slope: 1/4 inch per foot away from the house as your target
A well-planned patio doesn't have to be complicated or expensive to get right. Most of the mistakes that lead to redos come from skipping the planning steps above, not from choosing the wrong color pavers. Get the zone plan, sizing, drainage, and base prep right first. Everything else, including the decorating, the garden containers, the lighting ambiance, builds on top of that foundation and can be refined over time. If you are starting from scratch, a patio garden for beginners can be as simple as one container cluster near seating plus a few low-maintenance plants that handle your sun and weather.
FAQ
How do I verify that my patio has the correct drainage slope before I set pavers or pour concrete?
Start by choosing a reference point, usually the patio’s outer edge near the house or the step down to landscaping. Measure 1/4 inch of fall per foot from that reference, then re-check with a level or string line after you add base materials. If you only slope at the top surface, any settlement in the base can reverse your drainage over time.
Can I rely on a slight slope away from the house, or do I need to slope every section evenly?
Yes, but in most climates you still need an overall slope away from the house. You can combine an overall slope with localized micro-slopes using a screed or adding/removing paver sand in problem areas, then compact and confirm with a straightedge. Avoid “low spots” even if the average grade looks right.
What should I do if my drainage problem is connected to downspouts or a low spot in the yard?
If your plan includes a yard drain, French drain, or downspout discharge, tie your patio drainage plan to that system. Don’t drain onto a neighbor’s property or toward your foundation. A good rule is to keep surface runoff moving outward and away from the structure, and route it to an approved drainage location.
When is it worth hiring a professional instead of doing a DIY patio?
If you’re on a slope or near a foundation, proper grading matters more than the patio material. A pro should confirm subgrade type, compaction targets, and how water will move during heavy rain, not just how the patio looks. DIY is more reasonable when the site is relatively level and drainage is straightforward.
Why would water pool on a patio even if I think the slope is correct?
Even with a correct slope, you can get standing water if the base is uneven or restrained edges were missed. For pavers, check that the gravel base is compacted uniformly and that paver sand thickness is consistent. For concrete, minor thickness variations can create puddles, so finishing and form setting quality are critical.
How do I choose and install edge restraints so my paver patio doesn’t spread or sink?
Treat edge restraints as the last line of defense against movement. On DIY paver jobs, improper excavation depth or skipping restraints can cause the border to sink or spread, which then breaks the joint sand and invites weeds. Use restraints that match your paver thickness and lock them into the base, not just onto the surface.
How do I maintain polymeric or standard joint sand so weeds and settlement don’t return?
For pavers, joint sand coverage and compaction are key, and polymeric sand helps reduce weed growth and washout. For your first season, avoid power washing and avoid heavy dragging of stone or furniture across joints. If joint sand washes out, refresh only after the patio is dry so it can re-bond properly.
Is mortar-set flagstone really a bad idea in freezing climates, or are there ways to make it work?
In freeze-thaw climates, don’t rely on plain flagstone set with mortar alone if water can get into joints and freeze. A safer approach is exterior-rated units and correct installation so water drains and can expand without forcing mortar joints to fail. Also ensure proper joint filling and sealing strategy for the specific stone type you selected.
Will sealing prevent efflorescence permanently, or is it something I should plan to manage over time?
Sealing helps with efflorescence and stain resistance, but it won’t fix a true drainage or moisture problem. Test the patio first by checking water absorption and efflorescence pattern, then choose a sealer made for your material. Reapply on schedule (often every few years) and clean gently beforehand so the sealer bonds.
Are permeable pavers a good fix for drainage issues, and what can go wrong if my site conditions aren’t right?
Yes, but you need careful planning for subgrade and aggregate selection. Permeable pavers work best with the correct thicknesses and a geotextile layer that prevents fines from clogging. If your soil drains poorly or the water has nowhere to go, permeable options can still create problems.
How should I lay out patio lighting so it’s both safe and flattering without blinding people?
Most lighting gets safer and more attractive when you separate path lighting from accent lighting. For step transitions and level changes, use uniform spacing and glare control, then add a secondary layer like string lights or seating-level lamps for ambiance. Keep all fixtures wet-location rated and use outdoor-rated wiring practices to match code in your area.
What’s the easiest way to avoid buying a patio dining set that won’t fit comfortably in my layout?
A common mistake is underestimating clearance for furniture movement. Use the walkway clearances and chair pull-out spacing, then confirm the turning radius if you plan to move grill accessories or bring in larger items. If you expect frequent serving, build in a little extra space between dining chairs and the bar or prep zone.
Where should outdoor electrical outlets go, especially if I’m adding a grill, lights, and maybe a small fridge?
Plan the electrical outlet locations before you finalize furniture, because you rarely want extension cords across dining traffic paths. Put an outlet near where people sit and where the grill prep happens, and consider weatherproof covers. Also ensure the circuit and GFCI protection match your intended load (for example, refrigerators, heaters, and string light transformers).