
When you search 'patio pros landscape & design,' you're usually looking for one of two things: a specific company that goes by that name, or a qualified landscape and patio design team you can actually trust to build something great. Either way, the process for finding, evaluating, and hiring the right pro looks the same, and so does the planning work that needs to happen before a single paver gets set. This guide walks you through all of it, from your first contractor conversation to the day you sign off on a finished patio you're proud of.
Patio Pros Landscape and Design: How to Hire and Plan

Miles Sutton
29 Apr 2026
What 'Patio Pros Landscape & Design' Actually Means
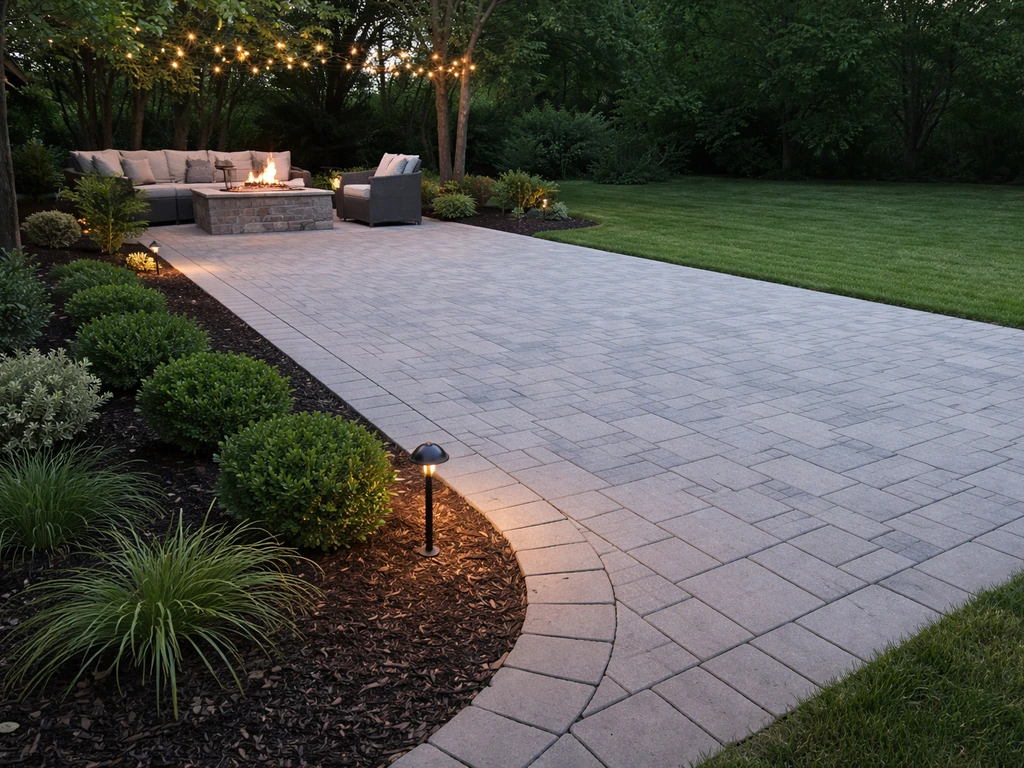
There are a handful of companies around the country that literally operate under the name 'Patio Pros Landscape & Design' or close variations of it. You'll find similar names in Utah, Arizona, Rochester, and other markets. But more often, people searching this phrase aren't after one specific company. They want a professional landscape and patio design team in their area who does this work at a high level. Think of it as a category search, not just a brand search.
Landscape and patio design firms typically offer a full-service package: site assessment, design consultation, material selection, permits, installation, and sometimes ongoing maintenance. Some lean more toward hardscape (patios, walkways, retaining walls) while others are full landscape contractors who also do softscape like planting and irrigation. When you're hiring for a patio build, you want someone whose portfolio is heavy on hardscape, not just lawn care.
Whether you're looking for a named Patio Pros business nearby or simply the best patio contractor in your area, the evaluation criteria are the same. The sections below apply to both situations equally.
How to Choose the Right Landscape and Patio Design Pro
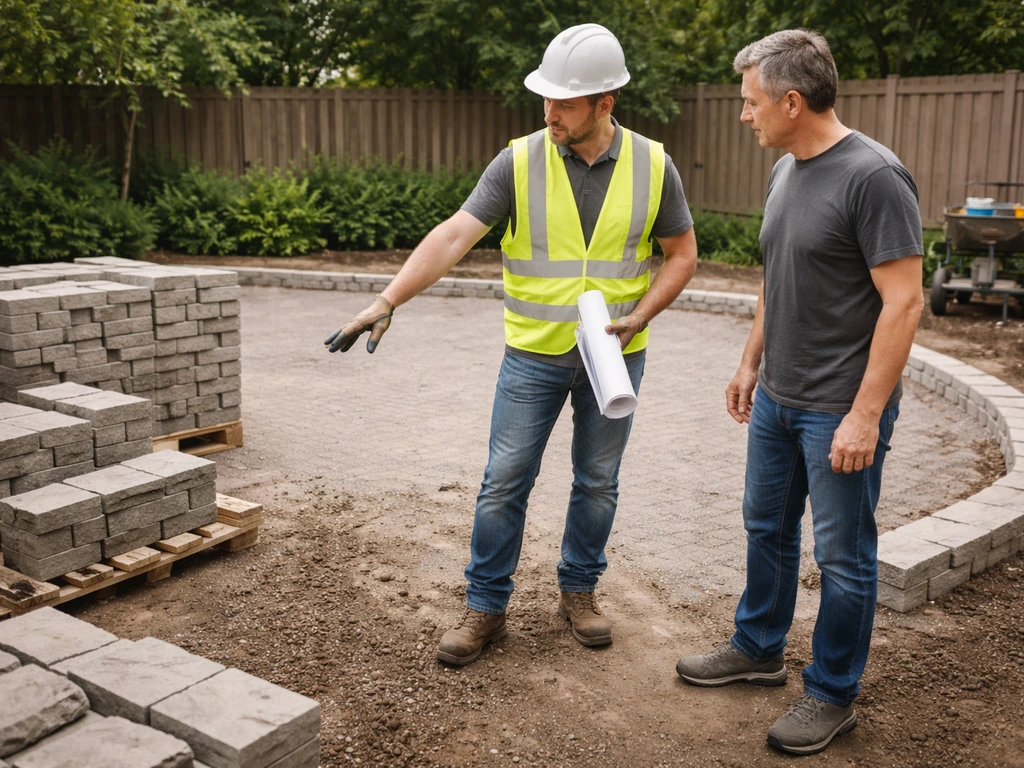
Choosing a patio contractor isn't just about price. A low bid from someone who skips proper base prep will cost you far more in repairs within a few years than a fair bid from someone who does it right. Here's how to vet candidates before you invite anyone to give you a quote.
Credentials Worth Looking For
Licensing requirements vary by state, but a few credentials signal real expertise. The National Association of Landscape Professionals (NALP) offers a Landscape Industry Certified Technician credential that covers installation, maintenance, and irrigation, and it's designed for experienced professionals, not entry-level workers. For paver-specific work, the Interlocking Concrete Pavement Institute (ICPI) certifies technicians and foremen. Some project specifications actually require the job foreman to hold an ICPI certificate and be present on-site during installation. General contractor licensing and liability insurance are non-negotiable starting points.
Questions to Ask Before You Hire
- Are you licensed, bonded, and insured? Can you provide documentation?
- Do you or your foreman hold ICPI certification or equivalent paver installation credentials?
- Can I see three to five recent patio projects similar to mine (photos and addresses I can drive by)?
- Who exactly will be on my job site, and will a supervisor be present daily?
- How do you handle drainage design, and what slope do you build to?
- What's your subbase process, and what base material and depth do you use?
- Have you pulled permits for this type of project in my municipality before?
- How do you handle change orders, and will those be in writing?
- What does your warranty cover, and for how long?
- What is your projected timeline from start to completion?
A contractor who gets defensive or vague about any of these questions is a red flag. Good contractors answer them without hesitation because they already do the work correctly. Also check their BBB rating, Google reviews, and Angi or Houzz profiles. Look for patterns in the feedback, not just the star rating.
Portfolio Fit and Reference Checks
Ask for references from projects completed in the last 12 to 18 months. Call them. Ask specifically whether the contractor stayed on schedule, how they handled problems, and whether the patio has held up with no settling or drainage issues. A patio that looks great on day one but is buckling or washing out by year two is a sign of poor base prep, and references from recent customers will tell you that.
The Patio Design Process: From Site Visit to Build Plan
A professional landscape and patio design firm should walk you through a defined process before any digging starts. If someone shows up, gives you a price in 10 minutes, and wants a deposit, walk away. Here's what a legitimate design-build process looks like.
- Initial consultation: The contractor visits your site, walks the space with you, asks about how you plan to use the patio, and notes any obvious constraints like slopes, drainage issues, tree roots, or existing structures.
- Site assessment: They measure the space, check grade and drainage direction, note soil conditions, and identify utility locations (more on that in the permits section).
- Design proposal: You receive a layout plan, usually to scale, showing the patio footprint, any features like seating walls or fire pits, and the relationship to your home and yard.
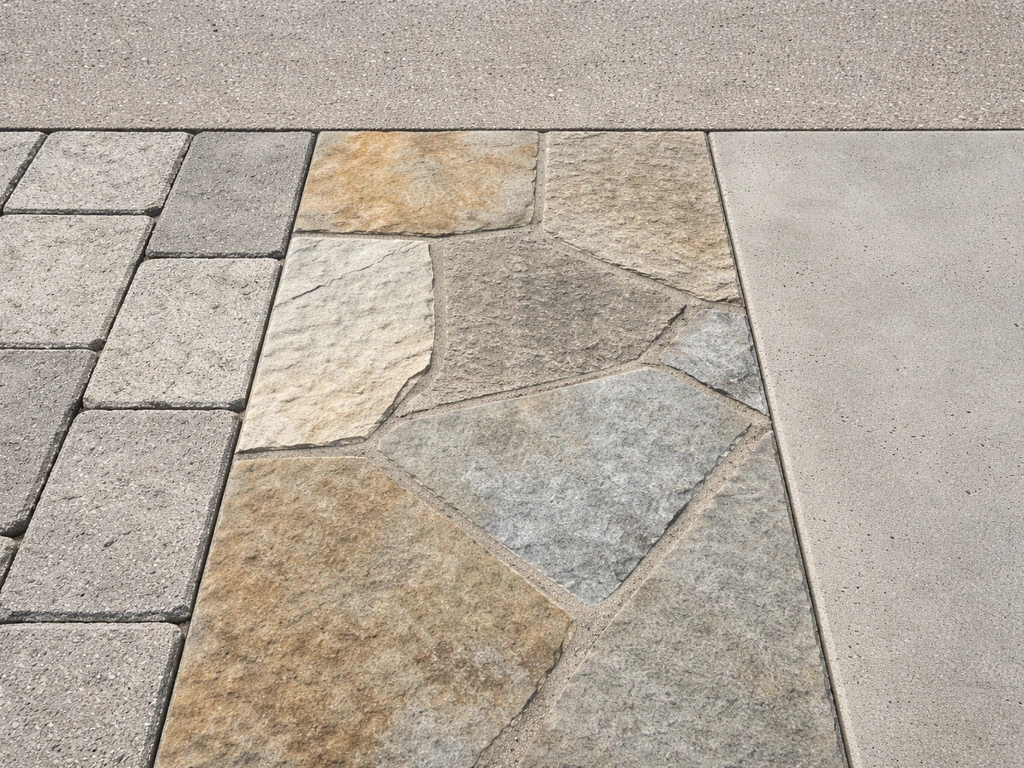
- Material selection: You choose your surface material (pavers, natural stone, concrete, etc.), edge treatments, and any accessories like lighting or drainage channels.
- Scope of work and bid: You receive a written proposal covering every phase of work, the material specs, the timeline, and a line-item or detailed cost breakdown.
- Permitting: The contractor pulls any required permits before work begins.
- Build: Work proceeds in phases, from excavation and base prep through surface installation and finishing details.
- Walkthrough and sign-off: You inspect the finished project with the contractor against the agreed scope before making final payment.
If you're working with a landscape and design firm (rather than a hardscape-only contractor), the design phase may also include plantings, lighting plans, and outdoor living features as part of the same proposal. That's actually an advantage because it keeps everything coordinated and avoids conflicts between trades.
Sizing, Layout, and Materials: Making the Right Choices
How Big Should Your Patio Be?
A good rule of thumb: your patio should be at least as large as your largest indoor room that gets regular use. For a dining area, plan for at least 12 by 12 feet just for the table and chairs, with room to pull chairs out. A comfortable outdoor living room with seating and a coffee table needs 16 by 16 feet or more. If you're adding a grill station, a fire feature, or a separate lounge zone, size up accordingly and plan traffic flow between zones.
Drainage and Slope Are Non-Negotiable
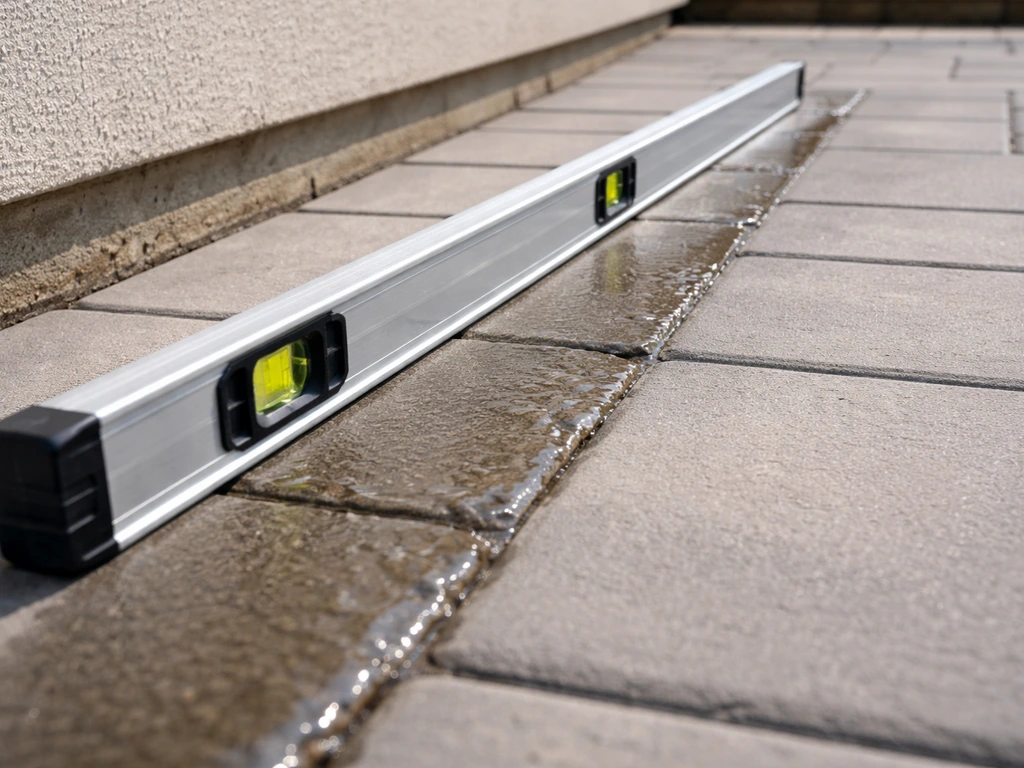
Every properly built patio slopes away from your home's foundation. The City and County of Denver homeowners' runoff guide recommends a surface drainage swale slope of blank" rel="noopener noreferrer">1/4-inch fall per foot measured horizontally. The standard spec is about 1/4 inch of drop per foot of distance, which works out to blank" rel="noopener noreferrer">roughly a 2 percent slope. This keeps water from pooling against your foundation or under the patio structure. For larger patios or low-lying areas, a perforated drainage pipe (typically 4 inches in diameter, surrounded by at least 3 inches of open-graded stone wrapped in geotextile) placed along the pavement perimeter handles more aggressive water movement. Ask any prospective contractor how they handle drainage for your specific site conditions.
Material Comparison
| Material | Cost Range (per sq ft installed) | Durability | Maintenance | Best For |
|---|---|---|---|---|
| Concrete pavers | $15–$30+ | Excellent, freeze-thaw resistant | Moderate (joint sand, occasional sealing) | Most climates, custom layouts, long-term value |
| Poured concrete | ~$10 and up | Good (can crack over time) | Low to moderate | Simple shapes, tight budgets, large areas |
| Natural stone (flagstone/travertine) | $20–$40+ | Excellent | Moderate (sealing recommended) | Premium look, irregular or formal patterns |
| Brick pavers | $15–$25+ | Very good | Moderate | Traditional or cottage aesthetics |
| Gravel/decomposed granite | $3–$8 | Fair (shifts over time) | Higher (raking, replenishing) | Informal areas, budget-friendly edging zones |
For most homeowners wanting a durable, attractive patio that holds its value and handles weather well, concrete pavers are the go-to recommendation. If you’re weighing different options, it helps to review patio types pros and cons so you can match the material and layout to your climate, budget, and maintenance comfort level concrete pavers. They're freeze-thaw resistant, replaceable if one unit cracks, and available in a wide range of sizes and styles. Maintenance is straightforward: sweep polymeric jointing sand into the joints after installation, compact it, and reseal every few years as needed to stabilize the joints and protect the surface.
The Right Build-Up for a Paver Patio
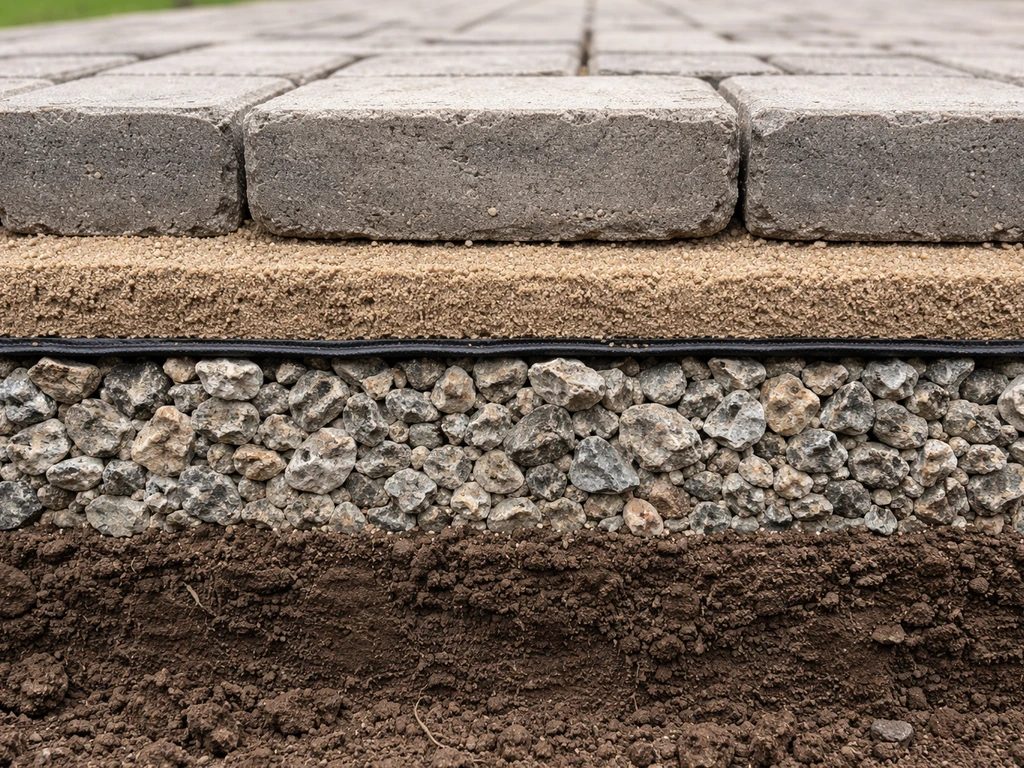
Here's exactly what a properly constructed paver patio should look like from the ground up: compacted subgrade soil (with an optional geotextile fabric to prevent soil migration into the base), a 4 to 6 inch compacted gravel base, 1 inch of leveled bedding sand (sometimes spec'd as 1 to 1.5 inches), pavers set to the design pattern, and polymeric jointing sand swept and compacted into the joints. The gravel base is the most important layer. Skimping here, or skipping proper compaction, is what causes settling and uneven surfaces years later.
Outdoor Living Features to Consider
- Seating walls: built-in perimeter walls double as extra seating and define the space without furniture crowding
- Fire pits or fire tables: a popular addition that extends outdoor use into cooler months; built-in versions require clearance planning and sometimes a gas permit
- Outdoor kitchens or grill stations: best planned as part of the original design so utility runs (gas, electric, water) are handled before paving
- Pergolas or shade structures: coordinate with the patio footprint from the start since post footings affect the base layout
- Landscape lighting: low-voltage LED path and accent lighting can be integrated into the design with conduit runs placed before the base goes in
- Steps and pathways: connecting the patio to the yard or other areas of the property with matching materials ties the design together
Budgeting and Project Costs: DIY vs. Pro
Patio project costs vary widely depending on size, material, site conditions, and region. A basic poured concrete patio runs around $10 per square foot installed, while a custom paver patio with features can easily reach $25 to $35 per square foot or more. A 400-square-foot paver patio, which is a reasonable size for outdoor dining and a small lounge area, might run $6,000 to $14,000 or more depending on your market and the complexity of the design.
Where the Money Goes
- Excavation and haul-off: removing existing grass, soil, or old concrete adds cost and is often underestimated
- Base materials: gravel, sand, and geotextile are relatively cheap per unit but add up across a large area
- Pavers or surface material: typically the single largest material cost
- Labor: usually 40 to 60 percent of total project cost for professional installation
- Features and extras: seating walls, fire pits, lighting, and drainage systems each add incrementally
- Permits and inspections: usually a few hundred dollars depending on jurisdiction
Is DIY Worth It Here?
DIY paver installation is doable for a motivated homeowner on a small, flat area (think 150 to 200 square feet with minimal drainage complexity). The main risks are under-compacting the base and getting the slope wrong. Both lead to settling and water issues within a few years. For anything larger, with any grading challenge, drainage concern, or design complexity, hiring a professional is the better value decision long-term. You also lose the ability to claim warranty coverage from a manufacturer or installer if you do the work yourself and something goes wrong.
When comparing bids, be cautious about the lowest number. If one bid is dramatically lower than two others, ask specifically what's included in the base prep. A contractor who's bidding 2 inches of base instead of 5 or 6 is cutting corners that matter. Get bids that are spec-equivalent before comparing prices.
Project Prep, Permits, and Safety
Call 811 Before Any Digging Starts
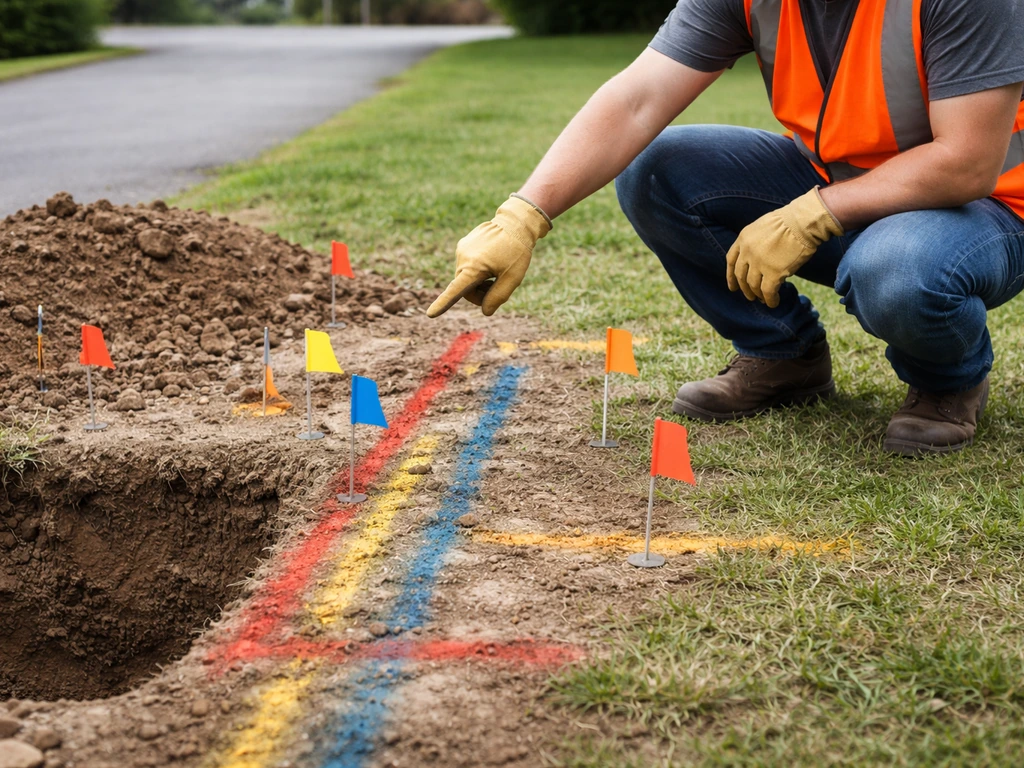
This one is non-negotiable. Call 811 (the national call-before-you-dig number) before any excavation begins. This triggers underground utility locating, and it's legally required in all 50 states. Utilities are marked with colored flags or paint, and the validity period on a ticket is typically limited to a set number of days, so make sure the ticket is still valid when work starts. Your contractor should verify that the utility ticket covers the correct address, includes start and end dates, names the contractor, and specifies the project type before any digging begins. In the zone immediately around marked utilities, hand tools or soft-dig methods should be used instead of equipment.
For deeper excavations (generally anything reaching 5 feet or more), OSHA requires daily inspection of the excavation and adjacent areas by a competent person before work begins each day. Even for a typical patio excavation that's shallower, a daily check for signs of soil instability or changing conditions is good practice.
Permits: When You Need Them
Many municipalities don't require a permit for a ground-level patio under a certain square footage, but rules vary significantly by location. Raised patios, structures with footings (like pergola posts), gas line additions, or electrical work almost always require permits. Your contractor should know what's required in your area and pull the permits themselves. If a contractor suggests skipping permits to save money, that's a serious red flag. Unpermitted work can complicate your homeowners insurance and create problems when you sell the property.
Site Prep Checklist Before Work Starts
- Clear the area of furniture, planters, and anything else in the work zone
- Confirm 811 has been called and utilities are marked
- Identify and protect any tree roots, irrigation lines, or drainage features you want to keep
- Confirm with your contractor where excavated material and deliveries will be staged
- Let neighbors know if work will affect shared areas or sightlines
- Confirm permit is posted on site before work begins (if required by your municipality)
Hiring, Timeline, and What 'Done Right' Looks Like

The Contract: What Must Be in It
A contract is a legally binding agreement that defines the scope of work, the schedule, the payment terms, and what happens when something changes. Per NAHB guidance, a good contract explains exactly what work will be done, when it will be completed, and what payment requirements apply to you as the homeowner. Per BBB recommendations, the payment schedule should be tied to job progress, not to arbitrary dates, and your final payment should not be due until the work is complete and you have inspected it. Stagger your payments across meaningful milestones: deposit at signing, payment at base completion, payment at surface installation, and final balance at walkthrough and approval.
The contract should also include a change order provision. Any changes to scope, materials, or timeline must be documented in writing and signed by both parties before work continues. Verbal agreements about changes are how cost disputes start. Also confirm the warranty terms in writing: what's covered, for how long, and what voids the warranty.
Realistic Timelines
A straightforward patio installation typically takes 2 to 5 days of active work once the crew is on site. But the timeline from first consultation to project start often runs 2 to 8 weeks depending on the contractor's schedule, permitting timelines, and material lead times. If you're planning for a spring or early summer deadline, start the contractor search and consultation process in late winter.
Popular landscape and patio pros in high-demand markets book out 4 to 8 weeks or more during peak season. When you’re comparing local options, focus on Utah patio pros that specialize in both hardscape and the drainage details that keep a patio performing well. If you’re searching patio pros utah options, prioritize companies with strong drainage planning and a solid portfolio of paver or hardscape installs.
If you're searching patio pros az options, prioritize companies with strong drainage planning and a solid portfolio of paver or hardscape installs. Popular landscape and patio pros in high-demand markets book out 4 to 8 weeks or more during peak season.
The Final Walkthrough
Before you make your final payment, do a thorough inspection of the finished patio with the contractor present. Check for consistent joint width and polymeric sand fill, verify the slope direction with a level or by watching where water runs, look for cracked or chipped units, confirm edge restraints are secure, and make sure any drainage features are functional and unobstructed. If anything doesn't match the agreed scope or isn't right, document it in writing and hold the final payment until corrections are made. A contractor who does quality work won't object to this process.
Maintenance After the Build
A paver patio is relatively low maintenance, but not zero maintenance. In the first year, some joint sand may wash out and need to be replenished. Polymeric sand stabilizes the joints and resists washout better than regular sand. Applying a sealer every 3 to 5 years helps lock in joint sand, protect the surface color, and make cleaning easier. Concrete pavers are freeze-thaw resistant by design, but sealing adds an extra layer of protection in climates with harsh winters or heavy rainfall. If a paver cracks or shifts, it can be lifted and replaced individually, which is a major advantage over poured concrete.
Your Next Steps
If you're ready to move forward, here's a practical shortlist of immediate actions. Start by identifying three to five landscape and patio design contractors in your area using Google, Angi, Houzz, or local referrals. If you are specifically looking for patio pros in Utah, focus on contractors with local experience and recent projects that match your climate and site conditions landscape and patio design contractors in your area.
Start by identifying three to five patio pros near you using Google, Angi, Houzz, or local referrals patio pros near me. Check credentials and reviews, then contact each one to schedule a site consultation. Prepare your list of questions before those meetings, and take notes. Once you have written proposals, compare them on specs (not just price), and ask for clarification on any vague line items.
Choose the contractor whose credentials, communication, and scope of work give you the most confidence, then review the contract carefully before signing. From there, you're in good hands, as long as you stay engaged, ask questions as the project progresses, and do a thorough walkthrough before signing off.
FAQ
Can I hire Patio Pros Landscape & Design even if I am not looking for a paver patio?
Yes. Many design-build firms can adapt their drainage and grading methods to other hardscape options (like flagstone or concrete) as long as you confirm the base build and slope spec in writing. Ask whether they still use a compacted gravel base and polymeric jointing where applicable, since the under-structure is what prevents settling.
What should I ask to confirm the contractor is not cutting corners on base preparation?
Request the thickness and compaction plan by layer (subgrade treatment, gravel base depth, bedding sand depth) and ask for the equipment they use for compaction. Also ask how they handle areas that are naturally soft, sloped, or near downspouts, and whether they will adjust base thickness rather than “make it work” with thinner layers.
How do I know if my yard needs extra drainage beyond the standard 1/4 inch per foot slope?
Ask for a drainage sketch showing downspout discharge, any low spots, and where water will go after it leaves the patio. If you have frequent pooling, a wet basement, or a yard that takes a long time to dry, you should expect perimeter drains or upgraded stone and pipe details to be discussed during the site visit.
Should I be worried if a patio proposal does not list exact material thicknesses?
Yes, it is a red flag. Vague specs make bids impossible to compare and are often where corners get hidden. Ask for a written section that specifies base depth, bedding sand depth, paver thickness (if applicable), and jointing sand type, plus whether geotextile is included where needed.
Do I need to worry about the patio heaving or cracking in freeze-thaw climates?
You should, and you can reduce risk by confirming proper subgrade prep and drainage, not just “freeze-thaw resistant pavers.” Ask how they prevent water from being trapped in the base, whether they use geotextile, and whether they are targeting the right slope in your specific location.
What is the typical approval timeline for changes once work starts?
Get the change order process in the contract, including how quickly you will review and sign changes and whether work pauses during approval. A practical detail to request is a clear description of what constitutes an urgent field adjustment versus a billable change, so you are not surprised by additional costs.
Is it normal for the contractor to propose a deposit, and how much is reasonable?
Deposits are common, but the risk is if the deposit is large or if payment is not tied to progress milestones. Ask for a schedule that pays after completed steps (for example, base completion and surface installation) and confirm you retain enough holdback to ensure punch-list items are finished.
What should I do if the project hits weather delays or material shortages?
Ask how weather impacts the schedule and what they do when joints or bedding cannot be installed under certain conditions. Also confirm whether the contract addresses material lead times, substitute approvals if a color or size is backordered, and how those substitutions affect cost and warranty coverage.
Can I use my own designer, or do I need to hire the patio pros for design?
You can usually use a separate designer, but you must confirm the contractor will build from your drawings and will still take responsibility for drainage and base specs. If they are hesitant, ask whether they will at least verify grading, slope, and drainage details before excavation so the final build matches your design and performs correctly.
How should I plan for the patio height relative to doors and existing grading?
Ask for a height and clearance plan, including how they will transition from the patio to interior thresholds and garage doors. If the patio ends up too high, it can create water entry risks, and if it is too low, it can worsen pooling. A site measurement walk-through should cover these transitions.
What should I inspect during the final walkthrough to avoid future settlement or drainage problems?
Beyond checking appearance, verify slope direction by observing where water runs after a hose test (if allowed) or by confirming the contractor’s drainage explanation. Also check that edge restraints are installed firmly, joints are evenly filled with polymeric sand, and any catch basins, drain lines, or pipe outlets are unobstructed.
How long will polymeric sand and sealer realistically last in my climate?
Your article notes resealing every few years, but the timeline depends on rainfall intensity, sun exposure, and how often the patio is cleaned. Ask the contractor what maintenance schedule they recommend for your area and whether they expect joint sand replenishment in year one based on local conditions.