
Finding patio pros near you takes about 30 minutes of focused searching, but hiring the right one takes a little more work. The best approach is to start with Google Maps or a local search, build a shortlist of three to five contractors, check their reviews and portfolio photos, then call each one with a tight set of questions before you ever ask for a quote. What separates a great hire from a frustrating one is almost always the prep you do before anyone shows up to measure your yard.
Patio Pros Near Me: How to Hire the Right Contractor

Miles Sutton
29 Apr 2026
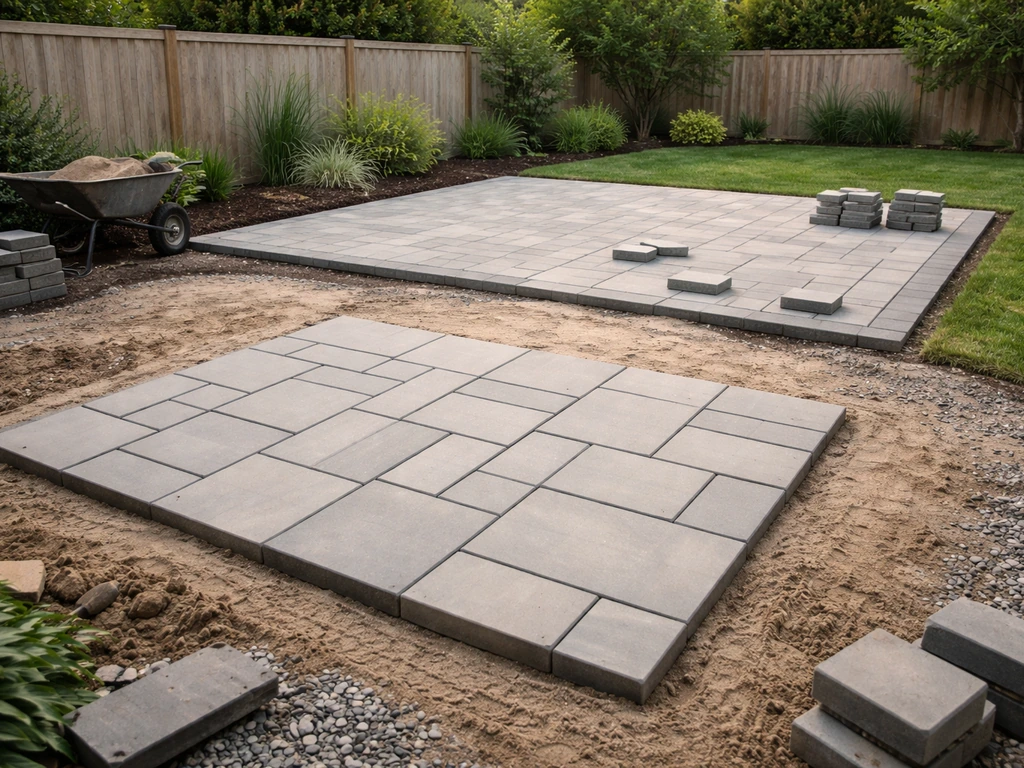
First, get clear on exactly what you're hiring for
Before you even open Google, spend five minutes defining your project. This sounds obvious, but a lot of homeowners search for 'patio pros near me' and waste days trading emails with contractors who specialize in the wrong thing. Patio work breaks down into a few distinct categories, and not every contractor does all of them well.
- New patio build: A fresh installation on bare ground or lawn. This is the most involved job and typically requires site prep, grading, base work, and full material installation.
- Patio repair or resurfacing: Fixing an existing slab, re-leveling sunken pavers, patching cracked concrete, or applying a new surface over existing material. Many general contractors skip this work, so look for specialists.
- Paver or natural stone patio: Requires a contractor comfortable with sand-set or mortar-set systems, polymeric sand jointing, and proper edge restraint. Not every concrete contractor qualifies.
- Poured or stamped concrete: A totally different trade than pavers. Look for concrete contractors with stamping and finishing experience if you want decorative work.
- Wood or composite deck or covered porch: Structural work that often requires a building permit and sometimes an engineer. Not the same as a ground-level patio.
- Design help only: Some patio pros offer design consultations or drawings without doing the installation. Useful if you want plans before committing to a build.
Write down the surface type you want (pavers, concrete, flagstone, composite decking), the approximate square footage, whether there's an existing patio to demo, and your rough budget range. Having this ready makes every contractor conversation faster and filters out mismatches immediately.
How to find the right patio pros near you

Start with Google Maps. Search 'patio contractor' or 'paver installation' plus your city or neighborhood. Look at the top results, but don't stop at just the sponsored listings. Scroll through the organic map results too, because some excellent local contractors don't run ads. Google's Local Services Ads do require businesses to complete background checks and carry appropriate licenses and insurance before advertising, which adds a baseline credibility layer, but plenty of quality unlisted contractors exist as well.
Once you have a list of eight to ten names, apply these filters to get down to your shortlist of three to five:
- Reviews with photos: Look for contractors whose clients have uploaded actual project photos. A 4.7-star average backed by 40 reviews with pictures of completed patios is far more useful than a 5.0 with five text-only reviews.
- Portfolio fit: Does their work look like what you want? A contractor who specializes in flagstone dry-stack walls and natural stone work may not be the best choice for a polished stamped concrete slab.
- Service area confirmation: Some contractors list a broad service area but only actively work within 15 to 20 miles of their base. Call and confirm they actually service your address.
- Years in business and physical address: Favor contractors who have been operating locally for at least three to five years and have a real business address, not just a P.O. box.
- Responsiveness: Send a short inquiry message to your top five. How fast and how clearly they respond is a real signal of how the project will go.
- Specialty platforms: Houzz, Angi, and the ICPI (Interlocking Concrete Pavement Institute) contractor finder are worth checking for paver specialists specifically.
If you're in a specific region, there may also be well-known regional specialists. For example, homeowners in the Southwest often search for patio pros in Arizona or Utah because those markets have large outdoor living contractor communities with experience in desert climates and specific regional materials. For help narrowing down options, it helps to compare patio pros utah specifically for local drainage experience and region-appropriate materials patio pros in Arizona or Utah. For help choosing among Utah patio pros, focus on contractors with experience in local drainage, freeze-thaw resistance, and region-appropriate materials. Knowing your regional context can help you find contractors who understand local soil conditions, freeze-thaw patterns, and material availability.
Questions to ask every contractor before you get a quote
This is where most homeowners leave money on the table. Asking the right questions before quoting forces contractors to scope the job correctly, reveals their experience level, and makes your estimates actually comparable. Here's the list I'd run through on every call or site visit:
- What's included in your quote — materials, labor, demo, haul-away, permits, and base prep? Get this in writing.
- How do you handle grading and drainage? Where will water go when it rains? This is a major quality differentiator.
- What base thickness do you use, and how do you compact it? (For pavers, a minimum 4-inch compacted gravel base is standard; 6 inches or more in freeze-thaw climates.)
- Do you handle the permit application, or is that my responsibility?
- Are you licensed and insured for this type of work in this state? Can you provide a certificate of insurance?
- Who actually does the work — your crew, or a subcontractor?
- What's the realistic timeline from signed contract to project completion?
- What warranty do you offer on labor, and what's the manufacturer warranty on materials?
- Have you done projects similar to mine in size and material type? Can I see photos or contact a past client?
- How do you handle unexpected issues like tree roots, poor subgrade, or underground utilities?
Any contractor who gets defensive about insurance, licensing, or warranty questions is a red flag. Good contractors answer these questions confidently because they already have the documentation ready.
How to compare quotes without getting confused

Three quotes for the same patio can vary by 30 to 50 percent, and that gap is almost never explained upfront. Here's how to read estimates fairly so you're comparing the same job, not guessing.
The main cost drivers for patio work
| Cost Factor | Low End | High End | Notes |
|---|---|---|---|
| Concrete patio (per sq ft) | $6 | $12 | Basic broom finish; stamped or colored adds $4-$10/sq ft |
| Paver patio (per sq ft) | $10 | $25 | Concrete pavers on the low end; natural stone on the high end |
| Flagstone patio (per sq ft) | $15 | $30+ | Irregular flagstone with mortar joints runs higher |
| Demo and haul-away | $1 | $3/sq ft | Often excluded from base quotes; always ask |
| Grading and base prep | $500 | $2,000+ | Highly variable by slope, soil, and area size |
| Permits | $50 | $500+ | Varies by municipality; sometimes passed through at cost |
| Drainage solutions | $200 | $2,000+ | French drains, channel drains, re-grading |
| Sealing (first application) | $0.50 | $2/sq ft | Sometimes included, often quoted separately |
When you receive quotes, build a simple side-by-side sheet. List every line item from each contractor and mark what's included or excluded. Pay specific attention to whether base prep, demo, permits, edge restraints, and the first sealing are included. A quote that looks $1,500 cheaper is often just less complete. Ask each contractor to match the same scope before you declare a winner.
Also ask about payment terms. A reputable contractor typically asks for 10 to 30 percent upfront to cover material orders, with the balance due on completion. Anyone asking for more than 50 percent upfront before work starts is a risk.
DIY vs hiring pros: be honest with yourself
Some patio work is genuinely DIY-friendly. A small 100 to 150 square foot ground-level paver patio on flat, well-draining soil is a realistic weekend project for someone comfortable with physical labor and basic tool use. You can rent a plate compactor, buy paver base and polymeric sand, and follow step-by-step instructions. The materials cost is the same as what a contractor pays; you're saving the labor markup.
But there's a list of situations where hiring a pro is worth every dollar:
- Complex grading or significant slope: Getting drainage right on a sloped yard requires experience with grading tools and an understanding of water flow. A bad slope decision leads to water pooling against your foundation or flooding a neighbor's yard.
- Structural patios, porches, or raised decks: Any patio that involves footings, posts, beams, or structural connections needs a contractor who understands load paths and local building codes.
- Large-scale concrete pours: A concrete patio over 200 to 300 square feet involves multiple people, precise timing, and equipment that's hard to manage solo.
- Permitting requirements: If your project needs a permit (more on this below), a professional contractor who knows the local process will save you significant headaches.
- Drainage and water management: French drains, channel drains, and re-grading around a home's foundation are not beginner territory.
- Large removal and disposal: Demolishing and hauling away an existing concrete slab requires equipment most homeowners don't have access to.
If you're on the fence, consider a hybrid approach: hire a pro for the site prep, grading, and base compaction, then handle the surface installation yourself. Some contractors will do this, and it cuts cost while protecting you on the parts that are hardest to fix later.
Permitting and site prep: what contractors should be handling
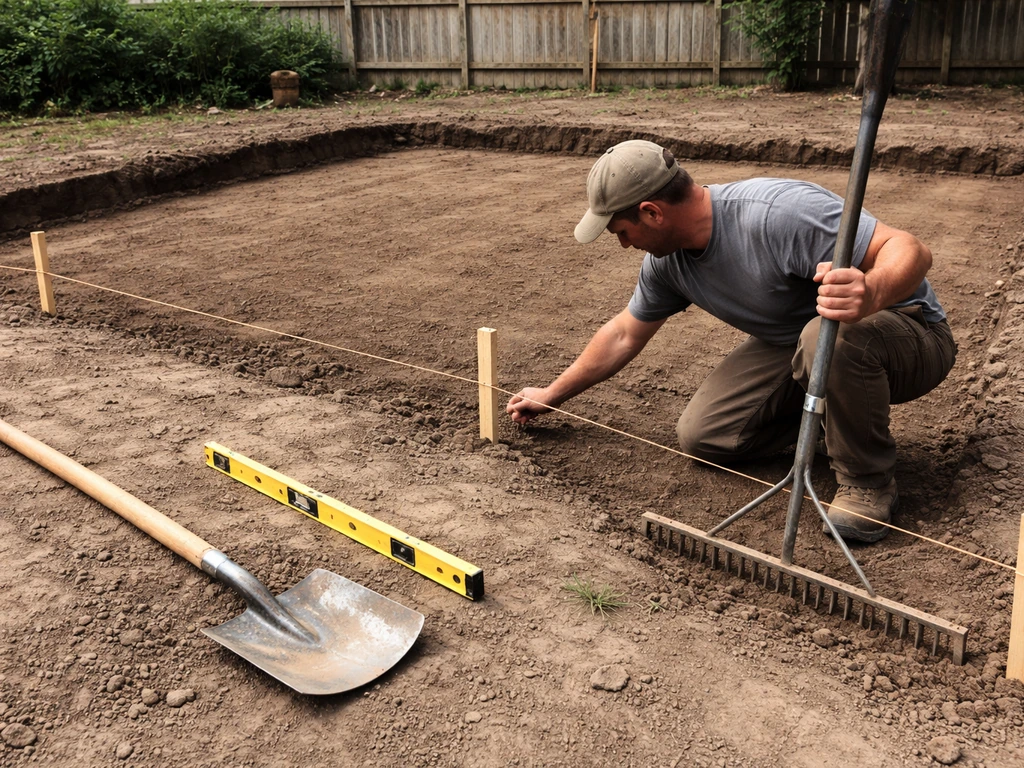
Many homeowners are surprised to learn that even a ground-level patio can require a permit in certain municipalities. Rules vary widely, but patios attached to the house, patios over a certain square footage (often 200 square feet), covered patios, and any work near a setback line frequently trigger permit requirements. A contractor who tells you 'we never pull permits' without checking your local code is cutting corners that could create problems at resale or during insurance claims.
On the site prep side, the single most important step before any digging starts is calling 811. This is the national call-before-you-dig number in the United States. State law in most states requires property owners to notify 811 at least three full business days before any excavation, including grading and demolition work. OHIO811’s FAQs note Ohio’s specific notice window as at least 2 working days (excluding weekends/holidays and the notification day) and no more than 16 calendar days before digging notify 811 at least three full business days before excavation. After you call or submit online, utility companies will come out and mark buried gas, electric, water, and telecom lines with paint and flags. Your contractor should be initiating this process, but you should confirm they have before work starts. If you're managing the project yourself, call 811 directly, not the utility company. It's a free service.
Site prep responsibilities a good contractor should own include: clearing and removing existing sod or hardscape, excavating to the correct depth (typically 6 to 10 inches below finished grade for a paver system, accounting for base, bedding sand, and paver thickness), grading for drainage (a minimum slope of 1 inch per 8 feet away from structures is standard), compacting the subgrade with a plate compactor, installing a weed barrier fabric if appropriate, and building the correct base layer. ICPI’s Tech Spec 4 is listed as available for structural design guidance for interlocking concrete pavement systems, which can support base and design choices for these patio systems. Any contractor who skips or rushes the base prep is setting up a patio that will shift, sink, or crack within a few years.
Project execution and materials checklist
Whether you're overseeing a contractor or doing the work yourself, these are the checkpoints that determine whether a patio holds up over time. Use this as a project walkthrough guide:
- Excavation depth confirmed: For pavers, dig out 6 to 10 inches below finished grade. For concrete, 4 to 6 inches below finished grade plus subbase depth.
- Subgrade compacted: The native soil should be compacted before any base material goes down. Soft, unstable spots should be corrected with compactable fill.
- Gravel base installed and compacted in lifts: Base gravel should be added in 2 to 3-inch lifts and compacted at each stage. Don't dump it all in at once.
- Base thickness appropriate for climate and use: 4 inches minimum in mild climates, 6 to 8 inches in freeze-thaw zones, and more under heavy vehicle or equipment loads.
- Bedding layer correct for surface type: 1-inch layer of coarse bedding sand for sand-set pavers; no sand bed for mortar-set or concrete.
- Edge restraints installed before surface: Plastic or metal edge restraints must be staked before pavers are laid, not added as an afterthought.
- Material selected for climate compatibility: In freeze-thaw climates, avoid pavers or concrete with high absorption rates. Check material specs for freeze-thaw ratings.
- Slip resistance considered: Textured or brushed finishes for pool areas or wet-prone patios. Highly polished stone in wet areas is a liability.
- Joints filled with polymeric sand (for pavers): Compact pavers, then apply polymeric sand, sweep in, and activate with water. This inhibits weeds and ant infiltration.
- Concrete curing period respected: Poured concrete needs a minimum 28 days to fully cure. No heavy furniture or loads for at least 7 days.
- First sealing scheduled: Pavers and concrete should be sealed after full cure. For concrete, wait 28 to 60 days. For natural stone, timing depends on the stone type.
- Final grade check: Confirm water is shedding away from structures before calling the job done.
If you're comparing different patio surface materials and trying to decide between pavers, concrete, flagstone, or other options, the trade-offs in durability, cost, maintenance, and repairability are worth a deeper look. When you compare patio types pros and cons, look beyond price to factors like durability, maintenance, drainage, and how easy the surface is to repair later. Each material type has its own ideal climate range, DIY difficulty level, and long-term cost profile.
Aftercare: keeping your patio in shape for the long haul
A well-built patio is a low-maintenance investment, but 'low maintenance' doesn't mean zero maintenance. The homeowners who get 20-plus years out of their patio are the ones who do a handful of simple things consistently.
Cleaning and sealing schedule
- Annual cleaning: Sweep and wash the surface each spring. A standard garden hose works for pavers. For concrete, a pressure washer on a low to medium setting removes staining. Avoid high pressure on sealed surfaces or mortar joints.
- Spot treatment: Address oil, rust, or organic stains quickly with appropriate cleaners. Letting stains sit makes them much harder to remove and can penetrate sealers.
- Paver resealing: Reseal concrete pavers and natural stone every 2 to 4 years depending on sun exposure, traffic, and climate. You'll know it's time when water stops beading on the surface.
- Concrete resealing: Decorative or stamped concrete benefits from resealing every 2 to 3 years. Penetrating sealers for uncolored slabs can go 4 to 5 years between applications.
- Polymeric sand top-up: Check paver joints each spring. If sand is washing out, sweep in fresh polymeric sand and activate it. This is a 2-hour DIY job.
Spotting problems before they get expensive
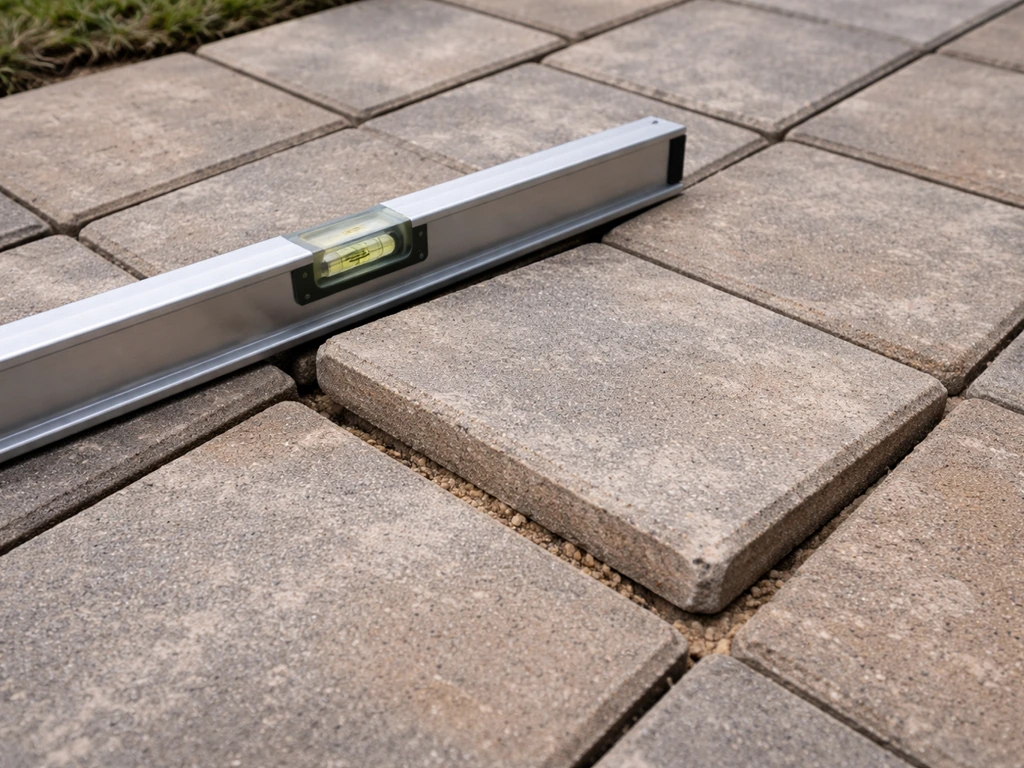
The earlier you catch a patio problem, the cheaper it is to fix. Walk your patio once a year with these specific things in mind:
- Uneven settling or rocking pavers: One or two low or rocking pavers usually means a small soft spot in the base or bedding sand. This is a simple fix if you catch it early. Left alone, water infiltrates the void, the problem spreads, and you're looking at a larger re-do.
- Standing water after rain: Water pooling on the surface or against the house is a drainage failure. It can indicate the patio has settled and the slope has reversed, or that a drain is blocked. Address this quickly to protect your foundation.
- Cracks in concrete: Hairline cracks under 1/8 inch wide in the first year are common as concrete cures. Cracks that grow wider, run through the slab, or show vertical displacement (heaving) need professional evaluation.
- Spalling or surface flaking: Concrete that's flaking off in layers is usually caused by freeze-thaw damage, de-icer salt use, or a poor cure. Resurfacing is possible but the underlying cause needs to be corrected first.
- Weed growth in paver joints: A small amount of weeds each spring is normal. Heavy weed growth means your polymeric sand has failed or was never installed. Treat with a patio-safe weed killer and top up the sand.
- Efflorescence (white chalky deposits): Common on concrete and natural stone. It's a mineral migration to the surface and is mostly cosmetic. A diluted acid wash removes it. Persistent efflorescence can signal a moisture issue underneath.
Most patio contractors who do quality work will offer a warranty on labor and settlement issues for at least one year, and some extend that to two or three years. If you notice a problem in that window, document it with photos and contact your contractor in writing right away. After the warranty period, most repairs are DIY-manageable if caught early, which is why the annual walkthrough habit is genuinely worth building.
Your next steps starting today
Here's a simple action sequence you can start right now to go from searching to a signed contract with a contractor you trust:
- Define your project in writing: surface type, square footage estimate, whether demo is needed, your rough budget, and your target completion date.
- Search Google Maps for patio contractors or paver installers in your city. Build a list of 8 to 10 names with at least 10 reviews each.
- Filter to your top 3 to 5 using portfolio fit, review photo quality, years in business, and service area confirmation.
- Send a brief inquiry to each one with your project summary and ask for a site visit. Keep it to 3 to 4 sentences.
- At each site visit, run through the question checklist in this article. Take notes. Notice how each contractor listens and responds.
- Request written, itemized quotes from your top three. Give them all the same scope so you're comparing apples to apples.
- Use the cost driver table to build your side-by-side comparison. Flag any missing line items and ask for clarification before making a decision.
- Confirm licensing and insurance in writing before signing anything.
- Verify your contractor will call 811 before any digging begins, and confirm who is pulling the permit if one is required.
- Schedule your first annual maintenance walkthrough on your calendar for one year after project completion.
The right patio pro is out there in your market. A vetted patio pro can also help with landscape and design so your patio blends with the rest of your outdoor space. The search just goes better when you show up prepared, know what questions to ask, and understand enough about how these projects work to recognize a quality answer when you hear one. If you are looking for rochester patio pros, use the same checklist to confirm they specialize in the surface type and site prep your yard needs. Once you find patio pros that match your project, confirm they can handle site prep, permits, and warranty expectations before you sign.
FAQ
What should I clarify about warranty coverage before I sign with patio pros near me?
Ask whether their warranty covers workmanship only or also covers material defects and labor for removal and reinstallation. Also confirm the warranty claim process (how soon you must notify them, whether photos are required, and whether repairs are scheduled or prorated).
How do I set fair payment terms so I do not get stuck during the patio build?
Request a written payment schedule tied to milestones, for example deposit at scheduling, then payments after demo, base inspection, surface install, and final clean-up. Avoid any plan that allows change orders without prior written approval of price and scope.
What documents should I request from patio contractors besides “we are insured” claims?
Get proof of insurance that matches the type of work, general liability plus workers’ compensation for crews. Then ask for the exact license number and service area, and verify they will list you as additionally insured if required by your municipality or HOA.
How can I confirm utilities are actually handled correctly when I hire patio pros near me?
Confirm the contractor will visit the site after you call 811 and before digging starts, and that they will provide a pre-work utility mark protection plan. If you see flags or paint missing, paused work, or moved marks, require them to re-check before excavation.
What if the ground condition is worse than expected after demolition?
Ask what happens if they find unsuitable soil, poor drainage, or unexpected buried obstructions after demo. A good contractor explains whether they will adjust base depth, add drainage solutions, or provide an alternate scope with a written change order.
Should I ask for a staged walkthrough during construction, not just a final inspection?
Clarify whether base inspection is included, for example a staged approval after excavation and compaction and before bedding sand and pavers. If they do not offer a walkthrough at those points, insist on photos and measurements of depth and slope.
How do I tell if a patio contractor understands drainage for my yard?
Ask how they handle drainage details for your specific site, where water is supposed to go, and how they’ll maintain the slope at doorways and along the house. If they cannot explain a clear drainage plan, treat that as a sign their estimate is incomplete.
How can I make sure two quotes are truly apples to apples?
Before comparing estimates, ask for a spec sheet or itemized line descriptions that include thicknesses, base course type, bedding sand depth, edge restraint system, and sealer type. “Allowances” and vague wording are often where unexpected costs come from.
What questions should I ask about the construction timeline and weather delays?
Ask for the exact number of days to complete each phase and what weather triggers a pause. Then confirm what they do to protect excavations and base during rain (covering, re-grading, and re-compaction).
If they use sealing or paver coatings, what should I ask about slip resistance and maintenance?
If you have pets, food areas, or kids using the patio, ask about slip resistance and sealer curing time. Also confirm whether the sealer is water-based, the expected lifespan, and how often resealing is recommended for your climate and product choice.
Do patio permits and HOA requirements usually get handled by the contractor, or should I manage part of it?
Even if you have an HOA or neighborhood rules, ask the contractor to list required submittals and who provides drawings or material selections. Confirm whether permits are pulled by the contractor or you, and who pays plan review or resubmission fees.
Is it a red flag if a contractor says they do not pull permits at all?
If they say “we never pull permits,” ask what code triggers they consider and ask them to show a city or county confirmation process. Then decide whether to require permit handling in writing, since resale and insurance issues can become your problem later.