
A patio safety fence needs to be at least 4 feet tall, have no gaps wider than 4 inches, sit no more than 4 inches off the ground, and include a self-closing, self-latching gate with a latch at least 54 inches high or positioned on the pool side where a child cannot reach it. That combination covers most residential hazards, whether you are keeping young kids away from a pool edge, a raised deck drop, stairs, or a pet escape route. The exact specs depend on your specific hazard, so the first step is always identifying exactly what the fence has to stop.
Patio Safety Fence: Choose, Install, and Maintain It

Miles Sutton
29 Apr 2026
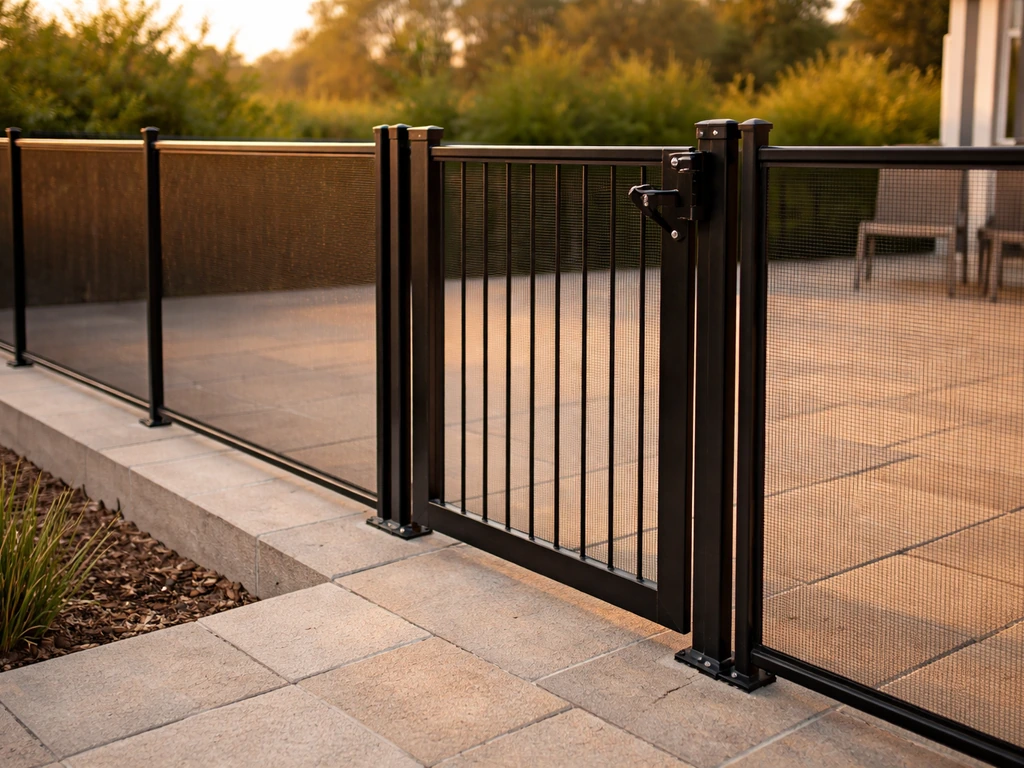
Figure out the hazard and what the fence must prevent
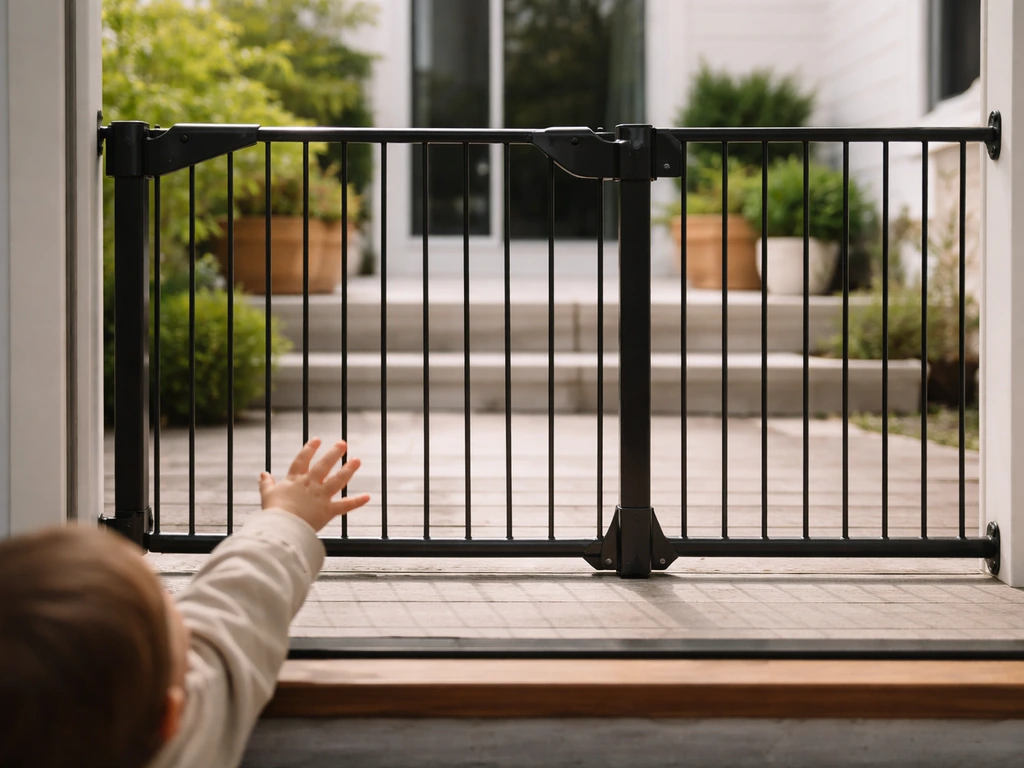
Before you buy a single post or panel, spend five minutes thinking about what you are actually defending against. The answer changes everything: the height you need, how tight the gaps must be, whether you need a lockable gate, and how rigid the structure must be.
The four most common patio safety hazards are: young children reaching a pool or water feature, toddlers or pets escaping the patio perimeter, a fall from a raised patio or elevated deck edge, and unsupervised access to a dangerous area like outdoor stairs, a utility zone, or a door that leads somewhere hazardous. Also be aware of any patio warning signage or hazard indicators that apply to your specific setup. Each one has a different "worst case" to design around.
- Pool or water hazard: a child going through, over, or under the fence and reaching water unsupervised. This is the highest-stakes scenario and drives the strictest rules.
- Pet or toddler escape: a child or dog squeezing through a gap, lifting a light panel, or pushing through a weak corner.
- Fall from an elevated edge: an adult or child stumbling off a raised patio surface that is more than 30 inches above grade. Here the fence acts as a guard rail, not just a barrier.
- Access restriction: keeping kids away from stairs, a hot tub, or a mechanical area even when a pool is not involved.
For pool barriers, the Consumer Product Safety Commission (CPSC) is your reference point. Their guidelines (CPSC Publication 362) call for a minimum 4-foot barrier with openings that prevent a 4-inch sphere from passing through, no more than 4 inches of clearance at the bottom, and a gate that is the weakest link in the system. If a wall of your house serves as part of the pool enclosure, any door opening onto the pool area needs its own protection, such as a self-closing, self-latching device or an alarm.
For elevated patios, the standard shifts slightly. Building codes (following IRC Section R312 logic) require guards on open-sided walking surfaces that are more than 30 inches above the floor or grade below, and those guards must be at least 36 inches tall. So a raised patio that is 3 feet off the ground technically needs a 36-inch guard around its open sides. For a raised patio, focusing on raised patio safety can help you decide how tall your guards should be before you finalize the layout. If that same raised patio has a pool below it, you apply the stricter 48-inch pool barrier standard.
If your hazard is purely pet or toddler containment on a ground-level patio, a 36-inch fence often works, but going to 48 inches is cheap insurance and future-proofs against climbing attempts. Write down your hazard type before moving to the next step; it will make every decision easier.
Choose the right patio safety fence type and gate features
There is no single "best" patio safety fence material. The right choice depends on your hazard, your budget, how permanent you want the installation to be, and how it needs to look. Here is how the main options stack up.
| Fence Type | Best For | Typical Height | Key Strength | Watch Out For |
|---|---|---|---|---|
| Removable mesh (ASTM F2286) | Pool barriers, rental properties, temporary setups | 4 ft (48 in) | Easy install/remove, no permanent anchor needed | Must meet ASTM F2286 standard; smaller base gap limit than rigid fences |
| Aluminum picket/panel | Pool surrounds, elevated patios, permanent installs | 48–60 in | Low maintenance, rust-resistant, clean look | Higher upfront cost; must verify picket spacing (max 1¾ in vertical gap) |
| Wood picket or board | Pet containment, perimeter fencing, decorative patios | 36–48 in | Affordable, customizable, DIY-friendly | Requires painting/sealing; can warp or rot if not maintained |
| Vinyl panel | Low-maintenance residential patios | 36–48 in | No rust, no rot, easy to clean | Less rigid than aluminum; UV can cause brittleness over time |
| Wrought iron / steel | Elevated patios, decorative pool surrounds | 48–60 in | Very strong and durable | Heavy; steel rusts without proper coating; expensive to repair |
For a pool barrier, removable mesh fencing certified to ASTM F2286 is a legitimate, code-accepted option in many jurisdictions (including under Los Angeles building guidance) and works well for homeowners who want flexibility. For a permanent installation around a pool or elevated patio, powder-coated aluminum picket fencing is the most practical long-term choice: it does not rust, the picket spacing is easy to control during manufacturing, and it looks sharp with minimal upkeep.
Gate requirements: this is where most fences fail
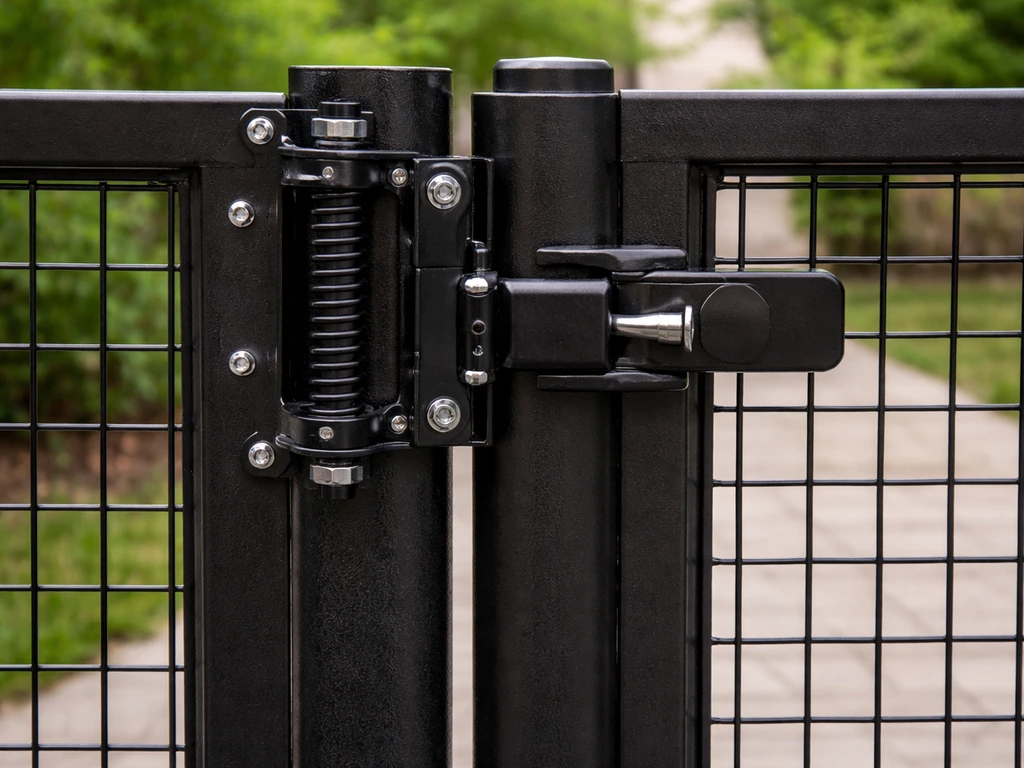
The CPSC describes the gate as the "weak link" in any safety fence, and that is exactly right. A perfectly built fence with a floppy, slow-to-close gate is nearly useless. Every pool-adjacent or child-safety gate must be self-closing (it swings shut on its own when released) and self-latching (the latch engages automatically). The latch must be out of a young child's reach, which in practice means either placing it at least 54 inches above the ground, or mounting it on the pool side of the gate so a child cannot reach through and release it.
Gate swing direction also matters. Local codes often require the gate to swing outward, away from the pool or hazard area, so a child pushing on it from inside cannot accidentally open it. Check your local building department's specific requirements, but outward-swing plus self-closing plus high latch is the baseline you should start with regardless.
One more gate detail that is easy to overlook: the openings near the latch area. CPSC guidance specifically calls out limiting gaps adjacent to the latch so that a small child cannot reach through the fence, grab the latch, and release it. If you are buying a prefabricated gate, verify that the panel design does not create a large open area right next to the latch hardware.
If your patio also needs a gate for general access rather than just safety (like a gate into the backyard from the patio), you might want to review patio safety gate options separately, since access gates often have slightly different size and hardware requirements than primary safety enclosure gates. If you are shopping for one, compare patio safety gate options to ensure the latch height and self-closing action match the rest of your barrier plan.
Sizing and layout: where it goes and how to measure
Measuring correctly before you order anything saves a lot of money and frustration. Here is a straightforward process.
- Walk the perimeter of the area you need to enclose and sketch a rough footprint on paper. Note any existing walls, the house wall, steps, or structures that will serve as part of the barrier.
- Measure the total linear footage of fence you need, accounting for corners. Add 10% for waste and cutting.
- Mark every gate location. You typically need at least one gate for entry, and if a pool is involved, any door in the house wall that opens toward the pool counts as a gate point needing its own hardware.
- Measure the exact width of each gate opening you want. Standard prefab gates run 36–48 inches wide. Plan your post spacing to accommodate the gate width plus the gate hardware clearance (usually 1–2 inches on each side).
- Check the height of any existing structures that will form part of the barrier (house walls, retaining walls, garden walls). If those surfaces have climbable features like railings, window sills, or lattice within 36 inches of the fence line on the outside, CPSC guidelines require you to account for that as a potential climb-over point.
- Confirm post spacing. For most panel-style fencing, posts go every 6–8 feet. Tighter spacing (every 4–6 feet) adds rigidity and is worth doing for pool barriers and elevated-patio guards.
- Verify your base clearance at every section. No more than 4 inches between the bottom rail and the ground. On sloped ground you will need to step the fence panels down incrementally to maintain that gap limit at every low point.
Corner placement deserves special attention. Corners are where gaps tend to open up and where fence rigidity is lowest. In r/Homebuilding threads, homeowners also discuss the practical “gap” expectations inspectors look for when you are trying to prevent dangerous openings blank" rel="noopener noreferrer">gap expectations inspectors look for. Use true corner posts (not a standard line post used at an angle), and make sure the fence panels meet tightly at each corner with no diagonal gap a child or pet could squeeze through.
If you are dealing with a raised patio specifically, the perimeter guard starts at the point where the surface is more than 30 inches above grade and continues along any open side. You do not need to fence the side where a wall or step structure already provides equivalent protection, but confirm that the existing structure actually meets the height and opening requirements before relying on it.
Installation steps for common patio surfaces
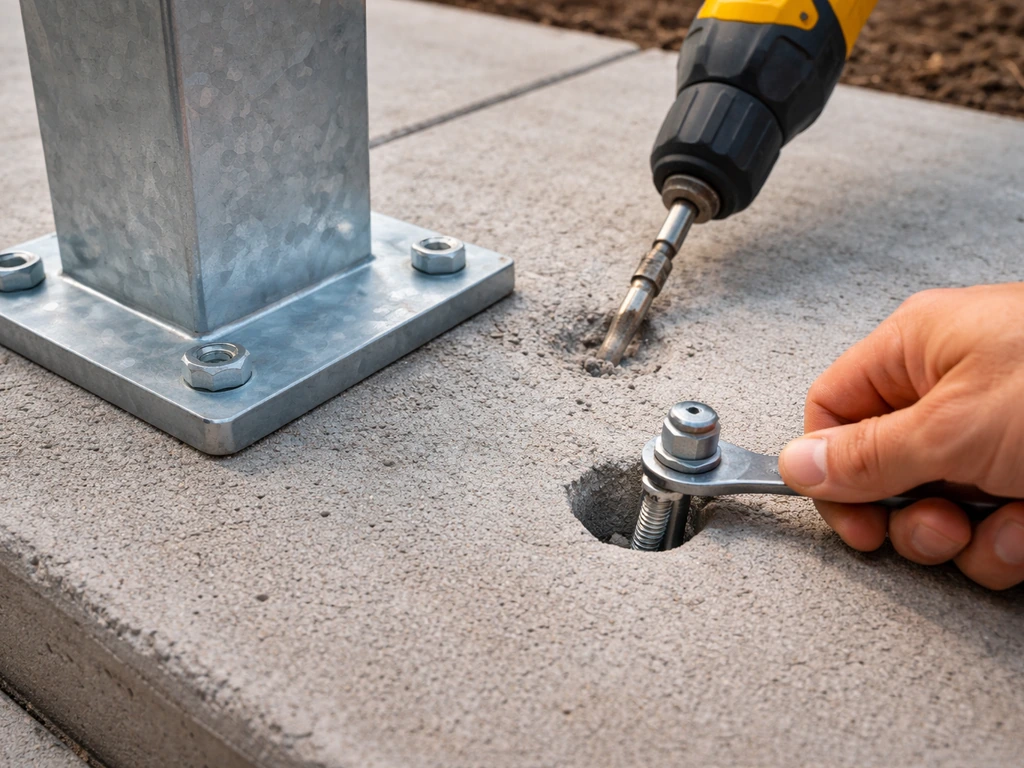
How you anchor the posts is the single most important variable in a patio safety fence installation. A fence that looks great but has wobbly posts will fail exactly when it matters most. The approach differs by surface type.
Concrete and brick patios
Surface-mount post bases anchored with concrete anchors (wedge anchors or sleeve anchors) are the standard approach for existing concrete or brick slabs. Use a hammer drill to bore into the slab, set the anchor to the depth the manufacturer specifies (typically 2.5–3.5 inches into the concrete), and torque the fastener to spec. Do not guess at this: undertorqued anchors pull out under lateral load, which is exactly the load a safety fence sees when someone leans or pushes on it.
For brick or paver patios, anchor into the mortar joints or the concrete base beneath the pavers rather than into individual pavers, which can crack. If your pavers sit on a sand base with no concrete below, a core-fill anchor may not hold adequately, and you should consult a professional about whether a footing is needed.
After anchoring, check each post for plumb (vertical alignment) using a level. A post that is even slightly out of plumb will cause the panels above it to gap unevenly, and the gate will not swing or latch correctly.
Wood deck surfaces
On a wood deck, posts for safety rails or fence panels should be bolted directly through the deck framing (rim joist or structural beam), not just screwed into the decking boards. The decking boards themselves have almost no lateral strength; the structure underneath is what holds. Use carriage bolts or through-bolts with washers and nuts. If your deck's framing is aged or shows any sign of rot or corrosion, address that before installing a fence that depends on it for structural integrity. InterNACHI's deck inspection guidance specifically flags fastener corrosion and decay as a leading cause of guard and railing failures, so this is not a step to skip.
Ground-level installations in soil or grass
For fence sections that run across soil or lawn adjacent to a patio, set posts in concrete footings. Dig holes to at least one-third the post height (so a 72-inch post gets a minimum 24-inch hole), mix fast-setting concrete per the bag instructions, and allow it to cure fully before attaching panels. Slope the concrete slightly away from the post at the top to shed water and reduce rot at the base.
Common installation mistakes to avoid
- Skipping base clearance checks on sloped ground. Measure the gap at the lowest point of each panel, not just at the posts.
- Using the wrong anchor hardware for the slab depth. If your concrete is only 2 inches thick, standard sleeve anchors will not achieve adequate embedment.
- Hanging the gate before testing post plumb and panel level. Always confirm the fence line is true before installing gate hardware.
- Over-tightening gate hinges and binding the self-closing spring. The gate should swing freely and close fully under spring tension alone.
- Leaving sharp cut ends on metal pickets or mesh edges exposed at child height. Cap or file them.
DIY vs professional: cost, permits, and compliance basics
A straightforward patio safety fence around a ground-level space using prefab aluminum panels is a realistic DIY project for a handy homeowner with a drill, level, and a free weekend. The materials for a 60-linear-foot aluminum pool fence (posts, panels, one gate, and anchors) typically run $800 to $1,800 depending on height and brand. A professional installation of the same fence adds $1,000 to $2,500 in labor, so DIY saves real money here.
Where DIY gets risky: elevated patios where structural bolting into deck framing is involved, any installation that requires cutting through or anchoring into thin or damaged concrete, and situations where local code requires an inspection sign-off. For those, a licensed fence contractor or deck contractor with permit experience is worth the cost.
On permits: most municipalities require a permit for any fence or barrier associated with a pool, and many require one for any fence over a certain height (commonly 6 feet, but sometimes as low as 4 feet in some jurisdictions). Pool barrier requirements are especially strictly enforced because they are tied to drowning prevention. Call your local building department before you start. Ask specifically whether a pool fence permit is required, what inspection is needed, and whether you need to submit a site plan. This call takes 10 minutes and can save you from having to tear out and redo work.
If your fence is associated with a raised patio, your local building code (typically following IRC R312) will likely require guards on open sides more than 30 inches above grade. This may or may not trigger a permit depending on your jurisdiction, but it does affect liability and homeowner's insurance if something goes wrong, so build to the standard regardless.
Removable mesh fencing certified to ASTM F2286 is accepted in many jurisdictions as a pool barrier without the same permit requirements as a permanent fence, but verify this locally. Some areas still require a permit even for temporary mesh fencing around a pool.
Maintenance and safety checks over time
A patio safety fence is not a "set it and forget it" installation. The most common failure mode is gradual: a post base fastener corrodes, a gate spring weakens, a bottom rail lifts from ground movement, and suddenly the fence that looked fine is no longer functioning as a barrier. A quick seasonal inspection catches these issues before they matter.
What to check every season (especially spring)
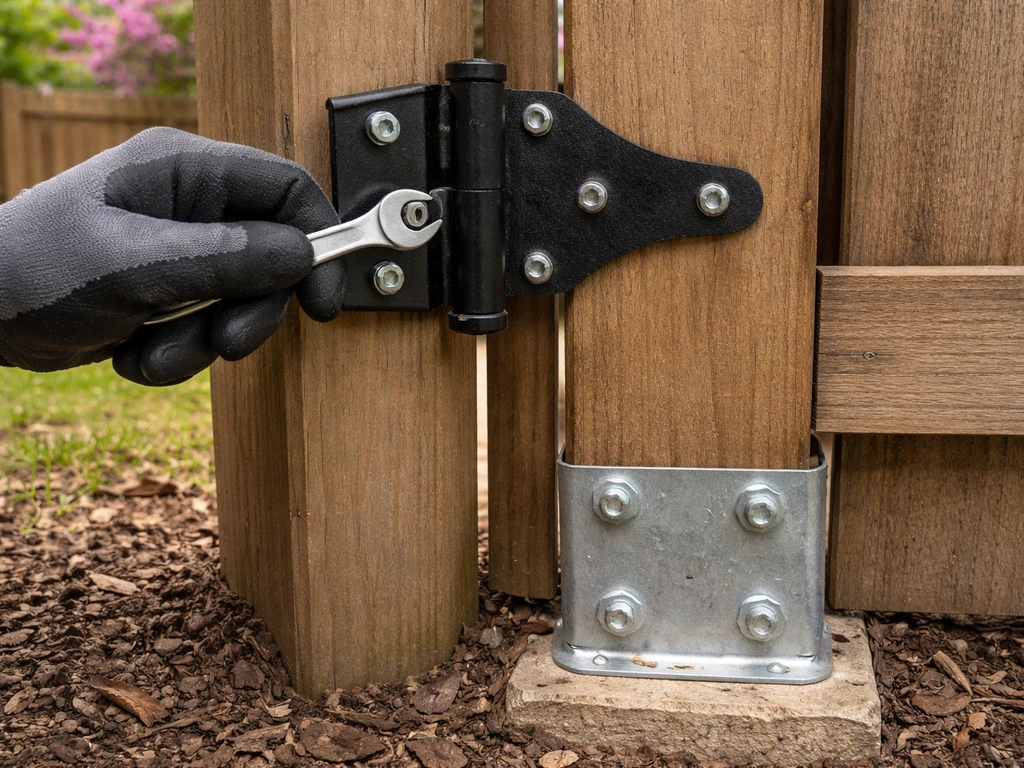
- Post rigidity: grab each post and push laterally. Any movement beyond a very slight flex means the anchor has loosened or the footing has shifted. Re-torque anchor bolts or re-pour the footing.
- Base clearance: re-measure the gap between the bottom rail and the ground at multiple points. Ground settling, frost heave, or mulch buildup can change this over winter.
- Gate function: open and release the gate from various angles. It must swing fully closed and latch every time without assistance. Adjust the spring tension or hinge position if it does not.
- Latch operation: test the latch under normal hand pressure and verify it cannot be released by a small child reaching through the fence adjacent to the hardware.
- Fastener and hardware corrosion: look at every visible screw, bolt, hinge, and latch for rust or deterioration. On wood deck installations, check for decay at the post base where it meets the framing.
- Panel and picket condition: look for bent or dislodged pickets, cracked vinyl, torn mesh, or any gap that has opened up at a corner or panel joint.
- UV and finish degradation: powder-coated aluminum and vinyl both degrade with prolonged UV exposure. Look for chalking, cracking, or brittleness in vinyl panels, and touch up any chips in powder-coat finishes before rust can start underneath.
For wood fences, add an annual seal or paint refresh to your maintenance schedule. A fence that is structurally sound but has unpainted or uncoated wood at the base will rot from the inside out within a few years in wet climates, and by the time it looks bad externally, it may already be structurally compromised.
If you have a pool and added door alarms or self-latching devices on house doors as part of your pool barrier system (as CPSC recommends when the house wall serves as part of the enclosure), test those devices every spring too. Battery-powered door alarms are easy to forget until the battery dies.
Beyond the fence itself, patio safety is a layered system. Depending on your setup, you might also want to look at complementary measures like patio safety netting for overhead or irregular-gap coverage, patio safety locks for secondary gate security, and patio safety railings along elevated edges where a full fence panel is not practical. Each layer adds redundancy, and redundancy is what actually keeps kids and pets safe over time.
FAQ
Do I have to have a fence around the entire patio, or can I rely on the house wall or existing structures?
You can often omit fencing where a wall or other feature already blocks access, but you must confirm it provides equivalent protection, including the required barrier height and opening limits. Also check door openings that lead to the hazard, those typically need their own self-closing, self-latching protection or an alarm.
Is 4 feet always enough for a patio safety fence, or should I plan for 48 inches anyway?
If the barrier is protecting against pool access or climbing risk, 48 inches can be a practical upgrade, especially for toddlers who test boundaries. The article’s baseline is 4 feet for many residential pool barriers, but the safer decision is to match the fence height to the most persistent climbing route you see in your yard.
Can I install the patio safety fence after the fact, for example to fix a gap after furniture or landscaping changes?
Yes, but gaps often appear at corners, along steps, or where the ground settles. When doing a retrofit, re-check spacing, gate operation, and the bottom clearance after landscaping or seasonal settling, since the “look” of the fence can stay the same while performance changes.
What’s the biggest mistake people make at the gate, even when the fence panels look correct?
The most common issue is buying or installing a gate that does not reliably self-close and self-latch under real conditions. Confirm the swing clears furniture and that latch engagement is consistent when the gate is pushed from different angles, then test it after weather changes.
How do I make sure the gate latch is actually out of reach for toddlers?
Do more than measure latch height, also test reach from inside and outside the fence. Check whether a child could climb the bottom rail, nearby pavers, or another object close to the latch area, then adjust positioning or add a shield panel to remove climbing advantage.
Are removable mesh fences safe and acceptable, or are they only temporary?
Removable mesh barriers can be effective when they are certified for the intended pool barrier standard and are installed with proper tension and anchoring. They still require periodic checks, especially at the bottom edge and around corners, since loosened mesh can create a pathway over time.
My patio has uneven ground. What should I do about the bottom clearance requirement?
Start by leveling the fence line so the bottom gap stays within the allowed limit across the entire run. If the grade changes significantly, you may need adjustable bases or a layout adjustment, because a fence that complies at one spot can exceed the gap requirement in a low area.
How often should I inspect the patio safety fence, and what should I specifically look for?
Do a quick check each season and add a more detailed inspection after freeze-thaw cycles, heavy rains, or a hard winter. Focus on post base corrosion or loosening, any widening gaps near corners, gate spring strength, latch alignment, and bottom rail lift or separation from the ground.
Can I mount posts into brick or pavers without concrete footings?
It depends on the substrate. For paver or brick surfaces, anchor into mortar joints or the concrete base beneath pavers, avoid relying on individual pavers. If your patio has a sand base with no concrete below, post-holding may be unreliable without footings, so plan on a professional assessment if you are unsure.
If my deck is older, how do I decide whether it’s safe to bolt posts into the deck framing?
Don’t bolt into decking boards alone, use through-bolts into structural framing. If you see rot, corrosion, or loose structural members, address that first, because safety fences are loaded laterally when someone leans or pushes on them.
Do I need a permit for a patio safety fence if it is not taller than 4 feet?
Many municipalities require permits for pool-related barriers even when height is modest, and some also require permits above a certain height threshold. The most reliable approach is to call your building department and ask specifically about pool fence permits, inspection needs, and whether a site plan is required.
What do I do if my fence design still leaves a small opening near the latch area?
Don’t assume the opening is harmless, openings near the latch area can allow a child to reach through and disengage the latch. If you find a gap adjacent to latch hardware, swap to a gate design with tighter end tolerances or add a compatible infill section to eliminate the reachable void.
Is it worth adding extra safety layers like nets or railings in addition to a patio safety fence?
Often yes, especially if your patio has irregular gaps, overhead hazards, or elevated edges where a full fence run is awkward. Layering is most effective when each layer covers a different failure mode, for example overhead coverage for swings or netting for uneven openings.