
Your patio is probably safer than you think, but there are almost certainly one or two things on it right now that could hurt someone. A cracked paver near the door, a grill too close to the fence, a single dark corner by the steps, or a loose post on a railing, these are the hazards that cause real injuries, and most of them take under an hour to identify and a weekend to fix. This guide walks you through a fast audit you can do today, then gives you practical fixes for every major risk category, whether you have a simple concrete slab, a paver patio, or a raised wood deck.
Patio Safety Guide: Checklist, Fixes, and Seasonal Tips

Miles Sutton
29 Apr 2026
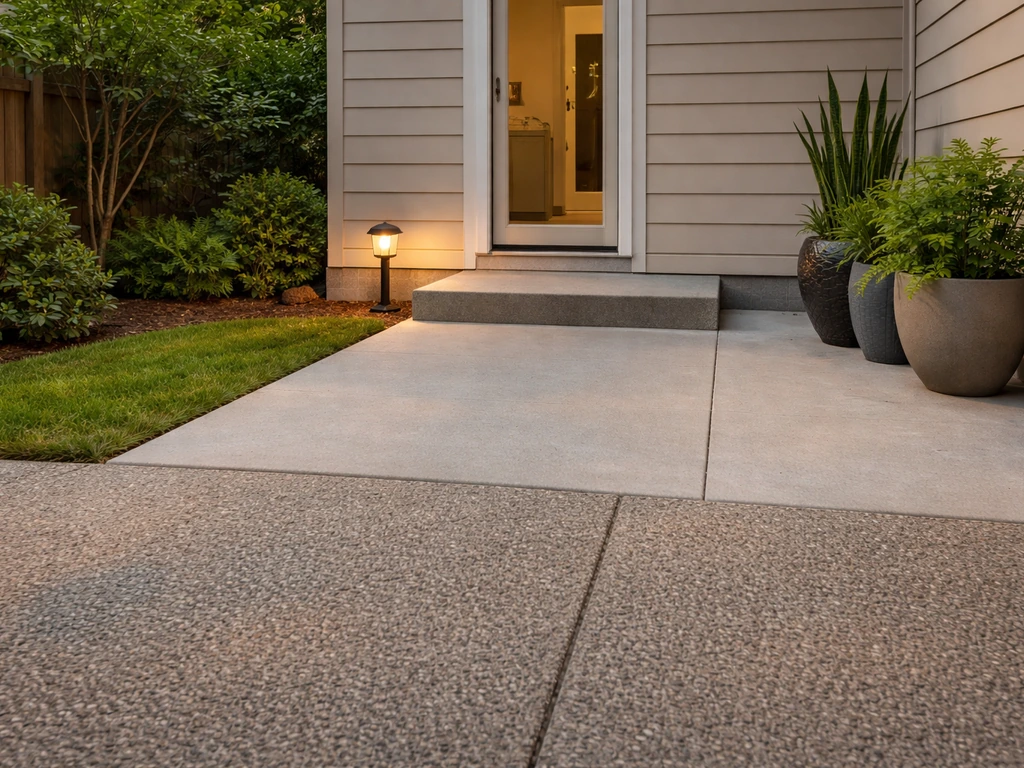
Quick patio safety audit: what to check today
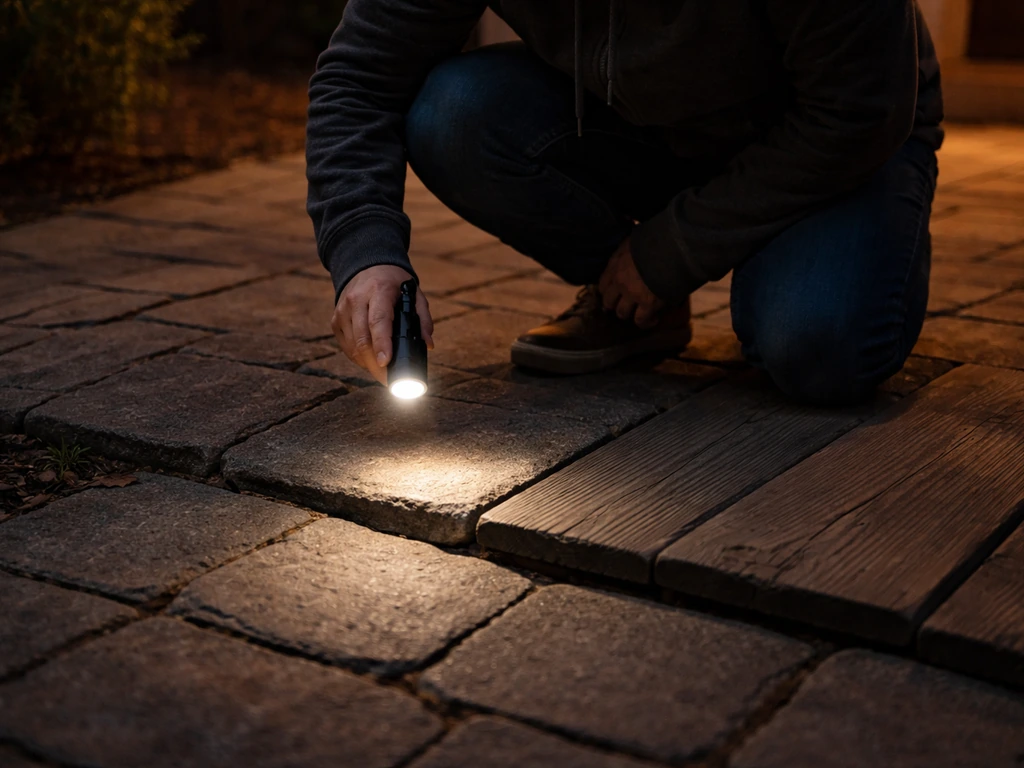
Before you spend money or call anyone, walk your patio slowly with fresh eyes, as if you're seeing it for the first time. Better yet, walk it at night with only your existing lighting on. Here's what to look for during that first pass:
- Any surface that rocks, tilts, or shifts underfoot — pavers, tiles, deck boards, or concrete chunks that have heaved
- Trip hazards at transitions: where the patio meets the door threshold, a step down to the lawn, or a change in material
- Railings or posts that wiggle more than a few millimeters when you push on them laterally
- Dark zones: spots where you genuinely cannot see the ground clearly after sunset
- Extension cords or power cables running across walking paths
- Grill, fire pit, or patio heater placement relative to overhangs, fences, and furniture
- Standing water or visible algae/moss growth on the surface
- Clutter, pots, or furniture legs encroaching on the main walking path
- Gates or doors that swing into pedestrian paths unexpectedly
- Any sharp edges on furniture, brackets, or hardware at hip or head height
Run through that list and flag anything that applies with a piece of painter's tape or a quick photo on your phone. Prioritize items that affect walkways and transitions first, those cause the most falls. Then work through fire, lighting, and structural issues in that order. The sections below give you specific fixes for each category.
Slip, trip, and fall prevention: surface, leveling, and transitions
Slips and falls are the most common patio injury, and they almost always happen at one of three places: the door threshold step down onto the patio, an uneven surface mid-patio, or the edge transition from patio to lawn or path. The fix depends on your surface material.
Concrete and pavers
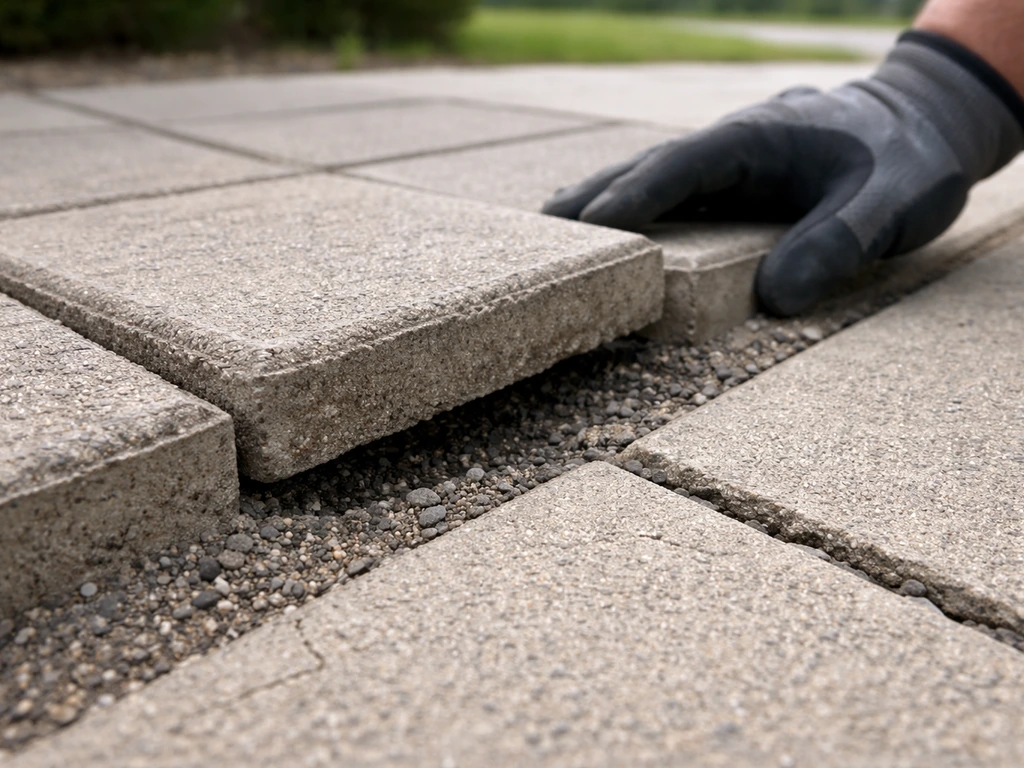
A single lifted paver or a crack that has heaved 3/8 inch or more is enough to catch a toe. For pavers, the fix is usually straightforward: pull the offending paver, re-level the base material (usually sand or a sand-cement mix), and reset it. For concrete, shallow cracks under 1/4 inch wide can be filled with a polyurethane caulk or concrete crack filler. Larger heaved sections may need grinding or, in the worst case, partial replacement. On smooth concrete, moss and algae are a serious slip risk, a pressure wash followed by an application of concrete sealer with a grit additive (anti-slip aggregate, typically around $15-$30 per gallon as an additive) restores traction significantly.
Wood and composite decking
Wet wood becomes a slip hazard quickly, especially on north-facing or shaded surfaces. If your deck boards feel slick, a deck cleaner followed by a non-slip coating or traction strips on high-traffic areas makes a real difference. Check each board for raised fasteners or popped screws and drive them flush immediately, a fastener head even 1/8 inch above the surface is a stubbing hazard. Composite decking is generally more slip-resistant when new, but surface oxidation and algae growth reduce that over time.
Step and threshold transitions
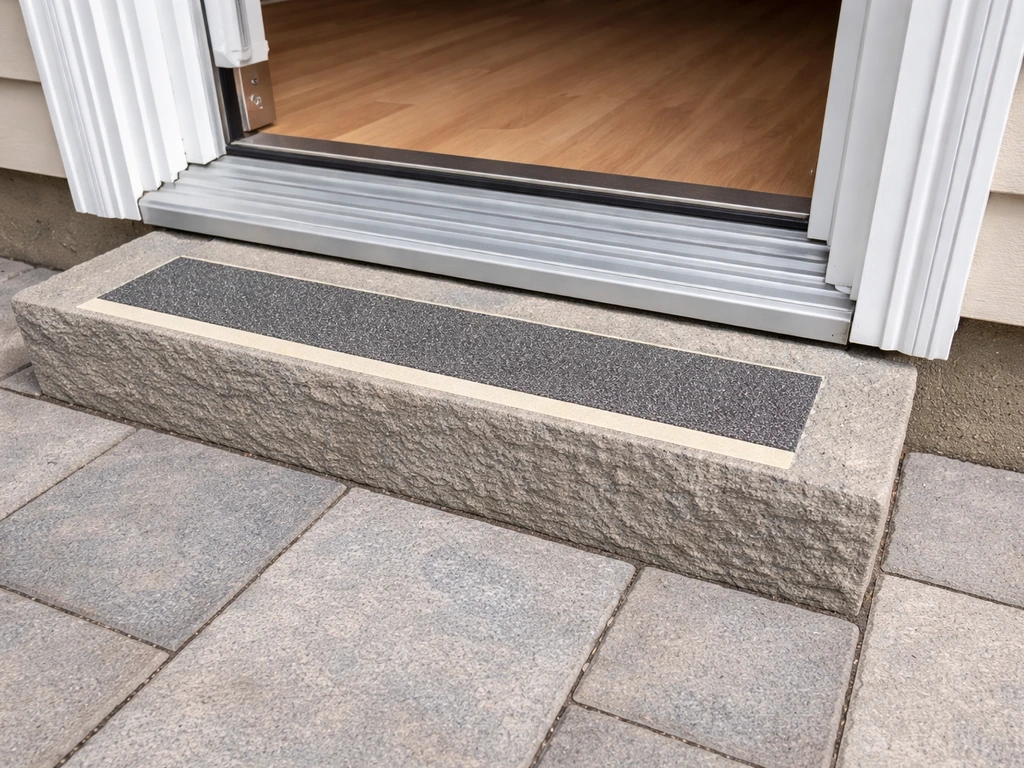
The step between your back door and the patio surface is statistically one of the most dangerous spots. A single step down of more than about 7.75 inches (the standard maximum riser height in residential building codes) with no handrail is a fall waiting to happen, especially in the dark or with hands full. If you have a single step that's awkwardly deep, a threshold ramp or a secondary step block brings the drop to a safer height. On any step, a strip of non-slip tape or a contrasting color edge (even just bright exterior paint on the nose of the step) helps people see the transition before they hit it.
Lighting, visibility, and walkway design
Walk your patio after dark tonight. If you can't clearly see the ground surface, any step changes, or the edge of the patio without squinting, your lighting is inadequate. This is one of the cheapest and highest-impact upgrades you can make. Solar path lights along walkway edges cost $5-$15 each and require no wiring. Low-voltage LED step lights mounted into risers run about $10-$20 per light and a single transformer can run a dozen of them. The goal is to see the hazards, not to flood the space with brightness, directional lighting aimed at the walking surface is more useful than a single overhead fixture that casts deep shadows around furniture.
Walkway design matters too. Furniture and planters have a way of gradually narrowing walkways over time. A clear pedestrian path should be at least 36 inches wide (48 inches is better for two people passing or someone carrying items). Check that no chair legs, table corners, or pot edges are protruding into the main travel path. Pay particular attention to the area immediately outside the back door, that's the zone where people are carrying items and not yet fully watching their feet.
Glare is an underrated hazard. A very bright spotlight positioned at eye level when you're descending a step can actually make it harder to see the ground, not easier. Aim lights downward or use fixtures with shielding so the light falls on the surface rather than into the eyes.
Fire and heat safety: grills, heaters, candles, and smoking areas
This is the category where people tend to get casual, and it's also where the consequences are most severe. A few non-negotiable rules that are worth reviewing before every season:
- Gas or charcoal grills need at least 10 feet of clearance from the house wall, eaves, and overhead structures — many manufacturer manuals specify this explicitly, and it's not just a suggestion
- Never place a grill under a pergola, umbrella, awning, or low-hanging branches, even briefly
- Portable propane patio heaters should stand on a level, stable surface with nothing flammable within 3 feet on all sides and overhead; a heater that tips over near a wood deck or furniture is a serious fire risk
- Tabletop fire bowls and candles should not be left unattended, especially at gatherings where people are moving around or when there's any wind
- If you have a designated smoking area, use a deep sand-filled container or a commercial smokeless ashtray — never a standard cup or dish that can be knocked over
- Keep a dry-chemical fire extinguisher rated for Class B fires (grease and flammable liquid) somewhere accessible on the patio — mounted to an exterior wall at head height works well
Extension cords running to outdoor string lights, speakers, or appliances deserve specific attention. Outdoor-rated cords (look for a 'W' in the cord's jacket rating, such as SJTW or SOW) resist moisture and UV degradation. An indoor cord used outside can degrade quickly and create both shock and fire risks, particularly in wet conditions. Never run cords under rugs or furniture legs, and inspect them at the start of each season for cracking, fraying, or discoloration.
Safe layout for kids, pets, and gatherings
The way you arrange your patio changes its risk profile significantly. For everyday use this is minor, but for gatherings with kids, elderly guests, or pets it matters a lot. The biggest layout risks are unsecured perimeters on raised patios, unprotected water features, and the path between the back door and anything dangerous.
If your patio is adjacent to a pool or hot tub, a gate that self-closes and self-latches is not optional, it's the most effective barrier between a young child and the water. CPSC guidelines specify that pool barriers should be at least 4 feet high and use self-closing, self-latching mechanisms positioned above the reach of young children. If your house wall serves as part of the pool barrier, any door from the house to the pool area must also be self-closing and self-latching. Patio safety gates and patio safety locks are a related topic worth exploring if you have this situation on your property. If you have a gate or barrier on your patio, make sure the patio safety lock or latch is secure and self-closing Patio safety gates and patio safety locks.
For raised patios, guardrails become critical. For raised patio safety, keep guardrails and transitions in good condition and inspect the structure on a regular schedule raised patios. Most building codes require a guardrail on any surface more than 30 inches above grade, with balusters spaced no more than 4 inches apart to prevent a child from getting their head through. Patio safety railings are worth a dedicated inspection at least once a year. For ground-level patios during gatherings, simply pulling furniture away from the edges and clearing tripping hazards from the center removes most of the risk.
Pets add their own hazards, primarily to themselves. Dogs can knock over tabletop heaters, get tangled in furniture legs, or push through an unsecured gate toward a street or pool. A patio safety fence or netting around specific areas (a fire pit, a hot tub, or a raised edge) is often a practical solution when pets and kids share the space regularly. Patio safety netting can be another option for creating a safer barrier around high-risk spots.
Materials, drainage, and structural stability
Surface traction and drainage are two sides of the same coin. Standing water on a patio surface is a slip hazard in summer and an ice hazard in winter. Proper slope for a patio is typically 1/8 to 1/4 inch drop per foot away from the house, enough to move water off quickly without making the surface feel tilted. If you see water pooling after rain, the cause is usually a settled area or an inadequate slope, both of which require re-leveling to fix properly.
| Surface Type | Common Safety Issue | Traction When Wet | Typical Fix |
|---|---|---|---|
| Concrete (smooth) | Slippery when wet, heaving cracks | Poor without treatment | Anti-slip sealer or grit additive |
| Concrete (broom-finished) | Crack trips, edge heaving | Moderate | Fill cracks, re-level edges |
| Clay/ceramic tile | Very slick when wet | Poor | Replace with textured tile or apply anti-slip coating |
| Concrete pavers | Individual settling, joint weed growth | Moderate to good | Re-level pavers, re-sand joints |
| Natural stone (flagstone) | Uneven surface, algae buildup | Varies widely | Deep seal, periodic cleaning |
| Pressure-treated wood | Raised fasteners, rot, slippery algae | Poor when wet | Re-fasten boards, clean and coat |
| Composite decking | Surface oxidation, algae | Good when new, degrades | Clean annually, traction strips if needed |
For structural checks on raised patios and deck-style structures, focus on three things: the ledger board connection to the house (any gaps, rot, or pulling-away from the wall is a serious red flag), the post bases (look for rust on hardware, rot at the base of wooden posts, or concrete that has cracked around the post anchor), and the beam-to-post connections. Shake each post by hand. More than about 1/4 inch of lateral movement suggests a fastening or rot issue that needs attention before the structure is used.
Maintenance and seasonal safety: keeping hazards from coming back
Most patio hazards don't appear suddenly, they develop slowly between uses. A consistent seasonal maintenance routine catches them before they become injuries. Here's a practical schedule:
Spring (before first use of the season)
- Walk the full surface and mark any frost heave, cracked tiles, or lifted pavers from winter freeze-thaw
- Clean all surfaces with appropriate cleaner and inspect traction — reapply sealers or coatings if needed
- Check all outdoor lighting fixtures, replace bulbs, and test solar panels for adequate charging
- Inspect all railings, posts, and gate hardware; tighten fasteners and treat any rust
- Check extension cords and outdoor outlets for damage from winter moisture or UV
- Clear debris from drainage channels, scuppers, or gaps between pavers
Fall (before winter or reduced use)
- Sweep and clear all leaves and organic debris — wet leaves are extremely slippery and promote mold growth underneath
- Store or secure furniture, planters, and decorative items that could become projectiles or trip hazards in storms
- Apply a penetrating sealer to wood, concrete, or natural stone if due — this prevents water infiltration that leads to freeze-thaw cracking
- Drain and store any water features, hoses, and outdoor appliances
- Remove and store any rugs or mats that will hold moisture and breed mold on the surface beneath
Monthly during active use
- Quick visual scan for weeds growing in paver joints (they can lift pavers over time)
- Check that furniture placement hasn't crept into walkway clearances
- Test any motion-sensor lighting to confirm it's triggering properly
- Look under furniture and rugs for trapped moisture or surface damage
When to DIY vs. hire a pro
Most surface-level patio safety fixes are solid DIY territory. Resetting a paver, filling a crack, adding step lighting, swapping out a gate latch, or applying an anti-slip coating are all weekend jobs for someone with basic tools and a few hours. The honest line between DIY and professional work comes down to structural involvement, height, and electrical.
Call a contractor or structural engineer when you see any of these red flags:
- A ledger board that has pulled away from the house, shows rot, or has visible water damage at the connection point
- Posts that have visible rot at the base, or where the concrete footing has cracked and shifted
- A deck or raised patio surface that feels spongy or bouncy when you walk on it — this often indicates joist rot
- Guardrails that feel loose even after tightening all visible fasteners
- Any standing water issue that traces back to grading problems against the house foundation
- Electrical outlets, junction boxes, or fixtures that show any sign of corrosion, tripping breakers, or moisture intrusion
For raised patio structures specifically, a professional inspection every 5 to 7 years is a reasonable baseline, or sooner if you notice any of the above. Many deck inspection services charge $150 to $400 for a full evaluation, which is genuinely worthwhile before a heavy-use summer season. If you're building new or making structural changes, check your local permit requirements, many jurisdictions require permits for raised structures over a certain height, and an inspected, permitted build gives you documented safety compliance.
The goal isn't to make your patio feel like a hazard course, it's to spend a couple of hours now so you're not thinking about these things every time guests arrive. A patio warning sign can also help you and your guests notice hazards in the moment, especially around step transitions and lighting gaps patio safety. Fix the surface trips, get the lighting right, place the grill properly, and check the structural basics once a year. For ladders, OSHA emphasizes blank" rel="noopener noreferrer">maintaining 3-point contact while climbing or descending to reduce fall risk. That's genuinely most of what patio safety comes down to in practice. When using a ladder to reach or fix anything on your patio, California DIR advises maintaining three-point contact while climbing or descending.
FAQ
How do I figure out whether a crack or lift is actually a serious patio safety hazard, or just cosmetic wear?
Use a simple toe-test and measure the change in level. If you can catch a toe, the gap is noticeable under normal walking, or a crack has heaved enough that you feel a step when moving across it, treat it as unsafe. Also check for movement after rainfall or freeze-thaw, if the edge lifts or reopens seasonally, plan on re-leveling or repair rather than just filling.
What’s the safest way to inspect my patio at night without missing glare or shadowed steps?
Do two passes: first with only existing lighting, second after you temporarily turn on any portable lights at floor level and aim them toward walk surfaces. Glare often hides the exact edge you need to see, so stand where someone would be descending the step and verify you can identify the transition without squinting.
If my walkway is narrow, is widening the only solution for patio safety?
No. You can also keep the “clear path” wider by moving furniture and tall planters back a few inches from the travel line, and by trimming or relocating items that create partial pinch points. For temporary events, use stanchions or cones to mark a dedicated route instead of relying on people to intuit a safe path.
Can I use outdoor extension cords safely for patio lighting or a speaker?
Yes, but only with outdoor-rated cords (look for SJTW/SOW style jackets) and correct placement. Avoid running cords across door thresholds where they get stepped on, keep connections elevated off puddles, and unplug immediately if the cord jacket feels warm, has discoloration, or the insulation looks cracked.
What’s the difference between traction solutions for concrete versus wood when it comes to patio safety?
Concrete traction usually focuses on restoring surface grip (grit additives or textured sealer) and controlling algae, while wood traction often requires a non-slip coating or traction strips plus rapid drying. If the deck is slick due to algae, cleaning first matters, otherwise coatings may bond poorly and wear out faster.
How often should I re-check patio safety items like rails, gates, and step lighting?
Do quick checks monthly during peak season for rails that loosen, gates that stop self-latching, and lights that go out. Then do a deeper seasonal sweep twice a year, specifically re-tightening fasteners on step hardware, verifying latch spring tension, and testing all low-voltage lighting so you’re not discovering dark areas mid-gathering.
My patio has a self-closing pool or hot tub gate. What’s the correct way to test it for real patio safety?
After you close the gate, confirm it fully latches every time by releasing it from a partially open position and watching the last few inches. Test with the area around the latch clear, because debris or misalignment can slow the close and prevent the latch from engaging even if the gate looks aligned.
Are patio safety gates and locks always required for homes with kids, or are there alternatives?
Barriers are the key, but the approach depends on your layout. If you cannot install a compliant self-latching barrier, consider a secondary barrier like a fenced play zone or netting around the high-risk area, and ensure doors leading to the patio pool area self-close and self-latch too. The safest setup is one where adults can leave doors open only briefly, but children cannot access the hazard independently.
When should patio electrical or structural issues be handled by a professional?
Call a pro if you see any structural red flag involving movement (post wobble, loose railings, ledger issues), signs of rot at connections, or cracked bases around anchors. For electrical, any repeated tripping, buzzing, burning smell, or water intrusion into an outlet, junction, or transformer housing is a stop and call situation rather than a DIY repair.
How can I reduce patio safety risks during winter beyond basic ice melt?
Plan for two steps: prevent water from freezing by addressing drainage and low spots, then choose de-icing that won’t damage surfaces. If you used an anti-slip sealer or grit additive, avoid aggressive scraping that removes the texture. For steps and edges, keep non-slip traction accessible, and avoid over-applying melt compounds right next to bare wood or metal hardware where corrosion can accelerate.