
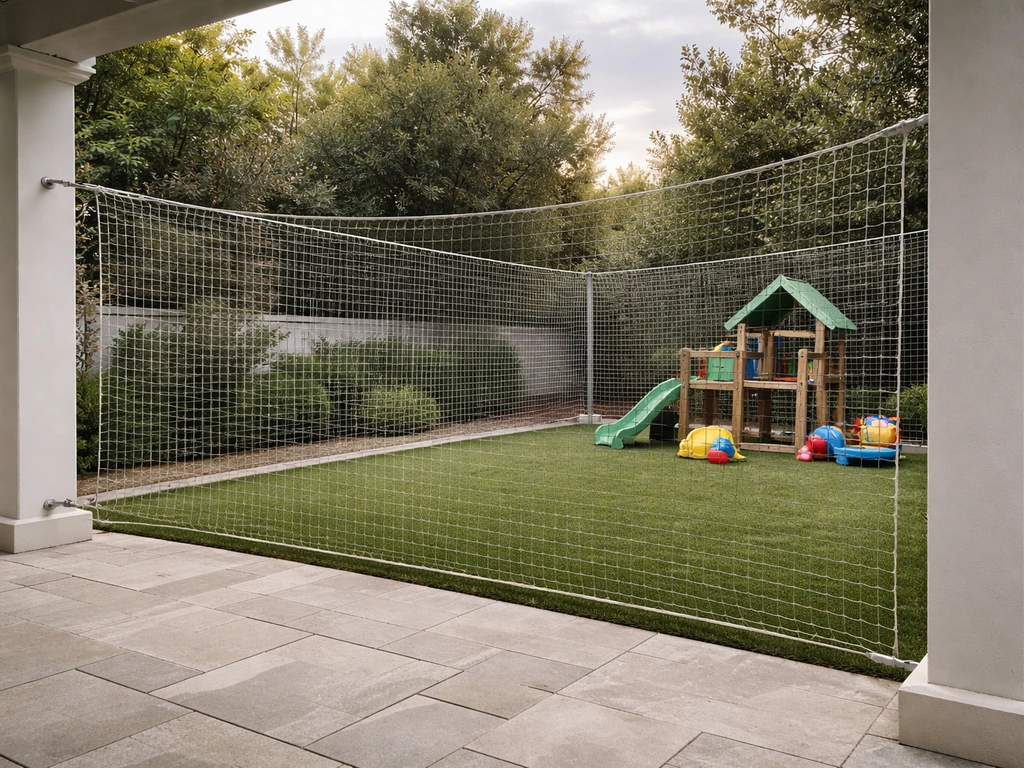
Patio safety netting is a tensioned mesh barrier installed around or above a patio space to stop balls, debris, or people from passing through a hazard zone. The right type depends on what you're blocking: a knotted polyethylene ball-stop net handles sports impacts, a finer UV-stabilized mesh catches small debris, and a heavier cable-supported system works as a fall barrier on elevated patios. Get the mesh size, material weight, and anchor setup right and you have a system that lasts years with minimal upkeep. Get them wrong and you're looking at sagging, tearing, or worse, a net that gives way when it's actually needed.
Patio Safety Netting: A Step-by-Step Guide to Install

Miles Sutton
11 May 2026
What patio safety netting actually is and what it stops
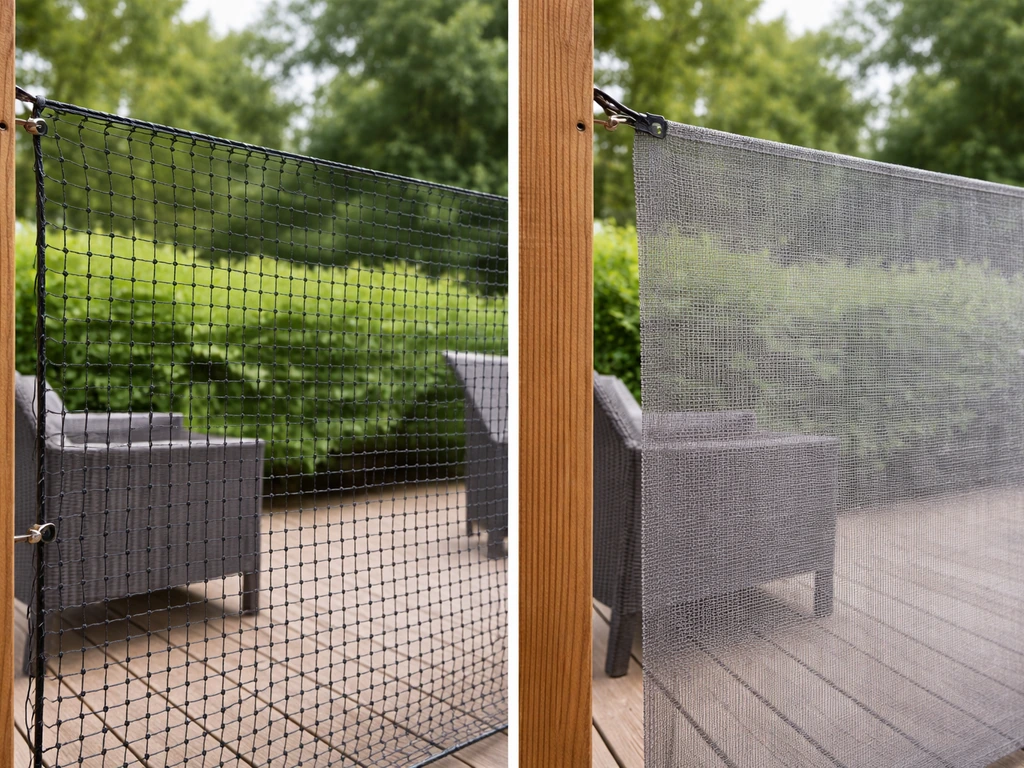
Safety netting is not decorative mesh or privacy screening, even though both look similar from a distance. It's an engineered barrier rated for specific impact loads or containment purposes. Ball-stop netting is designed to retain balls within a sports or practice area and prevent them from damaging adjacent property or hitting people nearby. Debris netting is a heavier-duty system built to catch falling construction materials, tools, or loose objects before they reach people below, and in some configurations it meets the requirements for a complete guardrail or fall-prevention system when supported by cables.
On a residential patio, you're typically dealing with one of three hazard types. The first is lateral impact, where a basketball, soccer ball, or golf shot comes flying across the yard and into your sitting area, glass door, or a neighbor's property. The second is overhead debris, things like loose fascia, bird nest material, overhanging branches, or objects falling from an upper-level deck above your patio. The third is blank" rel="noopener noreferrer">fall containment on a raised patio, where an edge drop poses a risk to kids, pets, or guests. Patio safety netting handles all three when specified and installed correctly for the scenario.
When you actually need netting on your patio
Not every patio needs netting, so it's worth being honest about when it earns its place. Here are the scenarios where homeowners consistently find it necessary:
- You have a backyard sports setup (basketball hoop, soccer goal, batting cage, or golf net) within 20 to 30 feet of the patio and balls regularly end up in the seating area or hit the house
- Kids play high-energy games in the yard with the patio serving as the boundary, and you want a clear physical stop rather than a rule they'll ignore
- Your patio sits below an upper deck or balcony, and you need overhead protection from falling objects or debris
- You have a raised patio with an edge drop of 18 inches or more and existing railings are low, spaced too widely, or absent, creating a fall risk for toddlers and pets
- You live near a golf course, sports field, or have neighbors who practice regularly and errant shots reach your space
- You're turning part of the patio into a contained play zone and want a perimeter barrier that's softer and more visually open than a solid fence
If your concern is more about edge containment on an elevated patio, patio safety railings or a patio safety fence may be the better structural solution, since netting on its own requires a solid anchor framework to function safely. If your goal is mainly patio safety, compare netting with patio safety railings or a patio safety fence for edge containment on an elevated patio, since rigid barriers can reduce reliance on tensioned anchors. If you are dealing with an elevated edge risk, patio safety railings or a patio safety fence can be the more structural option than netting alone. Patio safety fences and railings can provide stronger, more rigid edge protection when you have a raised patio drop. For smaller access control needs like gate openings, a patio safety gate is more appropriate. A patio safety gate is designed for access control, so it should be sized and installed to match the rest of the barrier system. Netting fills the gaps between those harder structures or handles containment across large open spans where rigid materials would be too expensive or visually heavy.
Choosing the right netting type and material
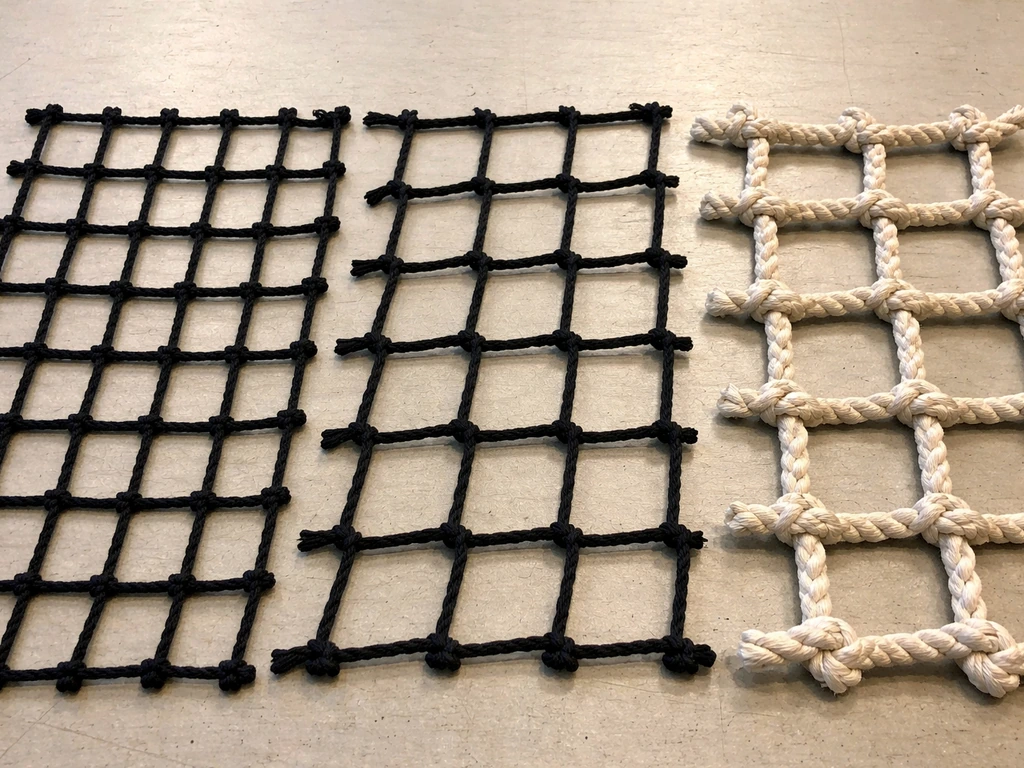
This is where most people go wrong, buying whatever looks right at the hardware store rather than matching the net to the actual load. There are three main netting categories for residential patio use, and they are not interchangeable.
Ball-stop and sports containment netting
This is knotted or knotless polyethylene (PE) netting, typically in #36 to #60 twine thickness for residential use. Mesh openings are usually 1.75 inches to 4 inches square depending on the ball size you're stopping. A #36 twine net at 1.75-inch mesh handles tennis balls and smaller. For basketballs and soccer balls, 3.5- to 4-inch mesh in #42 or heavier twine is standard. Look for UV-stabilized black polyethylene: black absorbs UV rather than reflecting it, which significantly extends service life outdoors. Expect 5 to 10 years from a quality PE net with proper tensioning and annual checks.
Debris and overhead containment netting
If your main concern is catching falling material from above, you want a denser, heavier net with a small mesh opening, typically 3/4 inch to 1 inch. High-density polyethylene (HDPE) shade cloth-style debris netting in 150- to 200-gram-per-square-meter weight is common for residential use. For more serious overhead protection, look at polypropylene debris nets rated to specific impact loads. These are heavier to handle but catch smaller objects including gravel, hardware, and broken glass.
Fall containment and perimeter barrier netting
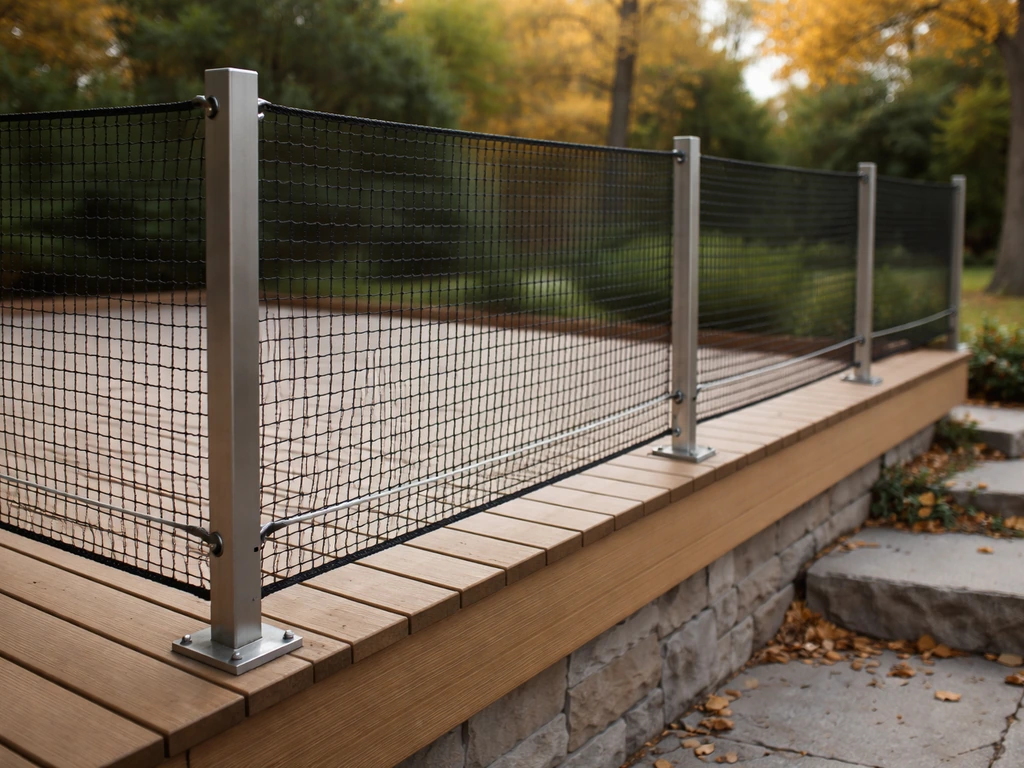
On a raised patio where you want netting to act as a secondary fall barrier between posts or alongside existing railings, you need a system that's cable-supported along both the top and bottom edges. For raised patio fall containment, focus on raised patio safety by using a cable-supported perimeter and properly tensioned netting. Vertical netting used as a guardrail supplement must be tensioned against cables or a rigid frame, not just tied to occasional anchor points. Heavy-duty knotless netting in polypropylene at 5mm to 6mm cord diameter is the right starting point for this use. If the patio edge drop exceeds 30 inches and children are regularly present, treat this as a structural safety project and consult a professional.
| Net Type | Best Use | Typical Mesh Size | Material | Expected Lifespan |
|---|---|---|---|---|
| Ball-stop (knotted PE) | Sports containment, ball deflection | 1.75" to 4" | UV-stabilized polyethylene | 5 to 10 years |
| Debris net (HDPE) | Overhead falling object protection | 3/4" to 1" | High-density polyethylene | 3 to 7 years |
| Perimeter barrier net | Raised patio edge, fall prevention | 1.5" to 2" | Polypropylene, 5-6mm cord | 7 to 12 years with cable support |
| Knotless sports net | High-impact ball containment | 1.75" to 3.5" | Nylon or PE blend | 8 to 15 years |
Planning and sizing before you buy anything
Measuring accurately before you order saves a lot of frustration. Nets are sold by the panel and getting the wrong dimensions means either gaps at the edges or excess material that sags badly. Here's how to approach it.
- Measure the span you need to cover from anchor point to anchor point, both width and height. Use a tape measure along the actual attachment line, not the ground.
- Add 10 to 15 percent to both dimensions for overlap at the edges and to account for sag under tension. A net pulled tight still sags slightly under its own weight and more under wind load.
- For ball-stop installations, calculate the clearance zone: the net should sit at least 3 feet back from the play surface edge so a ball hits the net mid-span rather than at a seam or anchor point.
- For overhead debris netting, measure the footprint of the area below the hazard and add 18 inches on each side as a catch margin for objects that could fall at an angle.
- Identify your anchor points on paper before buying. Posts, wall studs, beam ends, and pergola uprights are all usable. Mark their positions and confirm they can take the load (more on this in the mounting section).
- Check local wind load. In areas with regular 30-plus mph gusts, tension netting needs intermediate supports so individual spans stay under 20 to 25 feet to avoid catastrophic sag or anchor pull-out.
One thing people consistently underestimate is sag allowance. A 20-foot span of ball-stop netting under normal tension will sag 6 to 12 inches at the center. If you need the bottom edge at a specific height (say, 6 inches off the ground to prevent balls rolling under), order the net 12 to 18 inches taller than the measured span height to compensate. If you're using a pole-to-pole tension system similar to those used around baseball fields and practice ranges, the manufacturer will typically provide a sag calculator based on net weight and span length.
DIY vs hiring a pro: an honest breakdown
This is one area where the honest answer is: it depends heavily on height, anchor complexity, and what the netting is actually protecting against. DIY is genuinely reasonable for ground-level sports containment nets attached to existing fence posts or pergola beams. The hardware is straightforward, tensioning is learnable, and the consequence of a minor mistake is a sagging net rather than a safety failure.
Hire a professional when any of these apply: the net will act as a fall barrier on a raised patio with a significant drop, you need to set new posts in concrete to carry the anchor load, the span exceeds 30 feet without intermediate supports, or you're dealing with wind-exposed locations where tension loads are harder to calculate. Professional installers for sports netting and fall protection systems will pull permits where required, calculate anchor loads correctly, and use commercial-grade hardware that you can't always source at retail.
Cost-wise, a DIY ball-stop net installation for a 20-by-10-foot span typically runs $150 to $400 in materials including the net, cable, turnbuckles, and anchor hardware. A professional pole-to-pole system for the same span starts around $800 to $1,500 installed depending on whether new posts are needed. For overhead debris netting on a covered patio, DIY material costs are usually $80 to $200, while a pro installation adds $300 to $600 in labor.
Mounting safely: anchor points, tensioning, and what not to do
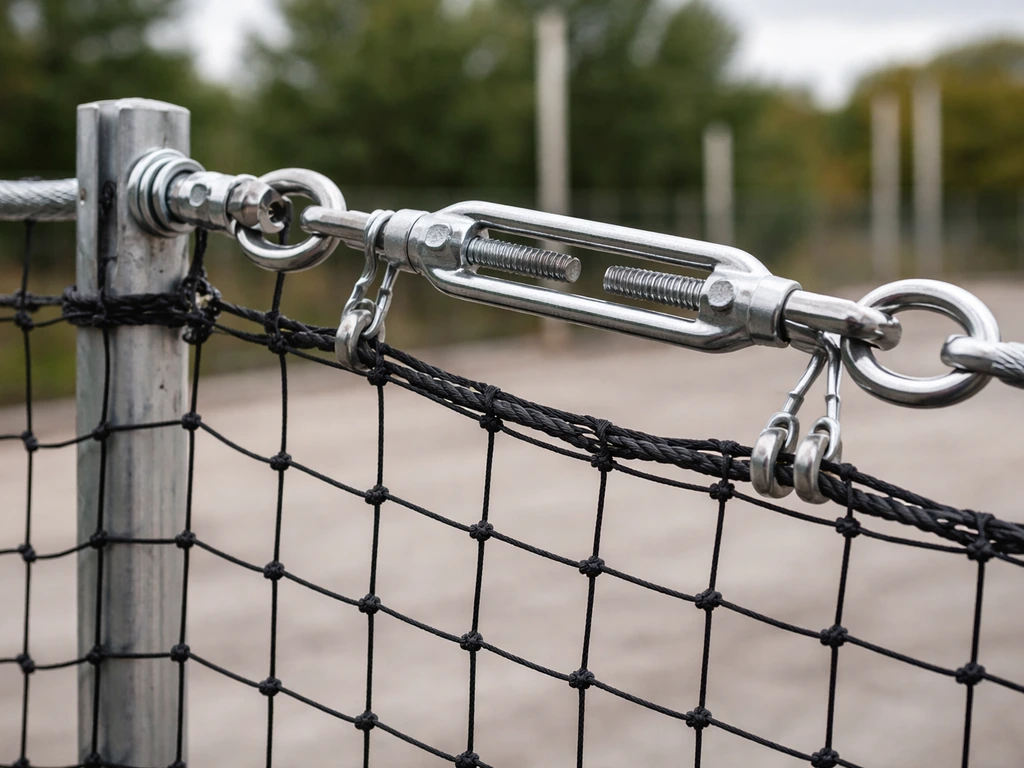
The net itself is rarely what fails. It's almost always the anchor point or the tensioning hardware. Here's how to get both right.
Choosing and preparing anchor points
Every anchor point needs to handle both the static weight of the net and the dynamic load from ball impacts or wind. For wall anchors, use lag screws (minimum 3/8-inch diameter, 3 inches into solid wood or masonry anchors into concrete block) rather than eye bolts into drywall or hollow structures. For post anchors, posts should be set at least 2 feet deep in concrete for a 6-foot-tall net. Space anchor points no more than 10 feet apart along any cable run to prevent excessive sag between them. If you're attaching to an existing pergola or covered patio structure, check that the beams are structurally sound before adding lateral tension loads.
Tensioning the net correctly
Run a top cable first, tensioned between anchor points with turnbuckles at each end. The net attaches to this cable using zip ties, hog rings, or carabiner clips spaced every 12 to 18 inches. A bottom cable or ground anchor keeps the net from billowing inward. Tension the net until it's taut but not rigid: you want a slight give so ball impacts are absorbed across the mesh rather than transferred directly to anchor points. Over-tensioning is a common mistake that causes anchor pull-out and net tearing at the border seams. A good rule: once tensioned, you should be able to push the center of the net inward about 4 to 6 inches with hand pressure.
Avoiding trip hazards and edge failures
Ground-level net edges are the most common trip hazard in residential installations. Keep the bottom of the net either tight to the ground using ground stakes every 2 feet, or terminate it at least 36 inches above a walkable surface so nobody catches a foot in it. Never leave loose net material pooling on the patio surface. Excess length should be trimmed or rolled and secured, not left hanging. Along the sides, tuck border ropes behind anchor posts rather than leaving them as loops people can walk through or catch limbs on.
Keeping the system safe over time
A tensioned net system needs regular attention to stay reliable. UV degradation, stretch creep in anchor hardware, and physical damage from impacts all accumulate gradually, and a net that looked fine last fall may be significantly compromised by spring.
Inspection schedule
- Monthly visual check: look for tears, fraying at border ropes, and any anchor points that appear to have shifted or loosened
- After any significant weather event (wind over 40 mph, heavy snow load, or hail): check cable tension, inspect all turnbuckles and hardware for movement, look for mesh tears
- After any hard impact (a direct basketball shot at high velocity, for example): inspect the impact zone and the two nearest anchor points for stress
- Seasonal (spring and fall): re-tension cables with turnbuckles, re-stake any ground anchors that have shifted, wash the net, and inspect the full border rope for UV brittleness
Cleaning and UV maintenance
Rinse netting with a garden hose twice a year to remove dirt, mold, and organic debris that can accelerate UV degradation. For significant mold buildup, a diluted bleach solution (1 part bleach to 10 parts water) applied with a soft brush and rinsed thoroughly works well on polyethylene and polypropylene without damaging the material. Avoid pressure washing directly on knotted mesh since the force can weaken knots over time.
When to replace sections or the whole system
You can patch small tears (under 4 inches) with a net repair kit, which uses the same twine material and a simple knotting technique. Anything larger than a 6-inch tear, any fraying along a border rope, or any section that has turned brittle or discolored from UV exposure should be replaced rather than patched. The border rope (the thick perimeter cord) is usually the first to fail on a PE net: if it feels stiff, cracks when bent, or has visible surface crazing, replace the net regardless of how the mesh itself looks. Full net replacement intervals are roughly 5 to 8 years for standard UV-stabilized PE in a sunny climate, and 8 to 12 years for nylon or polypropylene with good UV protection.
Your next steps today
Start by walking your patio and identifying the single most pressing hazard: stray balls, falling debris, or a fall edge. Children’s Hospital Pittsburgh recommends using home- and yard fall prevention guidance to identify and address key hazards around the house and patio area stray balls, falling debris, or a fall edge. That determines your net type. Then measure the span you need to cover, add 15 percent, and identify your anchor points before you buy anything. For most homeowners, a UV-stabilized knotted polyethylene ball-stop net in #36 to #42 twine is the right starting point and is available from sports netting suppliers, online retailers, and some farm supply stores for $1 to $3 per square foot. Order the hardware (cable, turnbuckles, lag screws, and carabiner clips) at the same time so you're not waiting on a second delivery.
Once installed, do a load test before you call it done: push on the center of the net, check that anchor points don't flex or shift, and walk the perimeter looking for any loose edges at ground level. If everything holds and there are no trip hazards, you're good. Set a reminder to re-tension and inspect in six months. That one habit keeps a well-installed patio safety netting system performing reliably for years.
FAQ
Can patio safety netting be used to protect against both ball impacts and falling debris at the same time?
Yes, but only if the product is engineered and rated for containment, not if it’s just decorative “netting” or privacy mesh. If you need to stop both balls and falling objects, choose a small-mesh debris spec with the appropriate material weight and confirm the system uses a top and bottom tension method (cable-supported) rather than occasional tie points.
Will debris netting from a home store be strong enough to serve as fall protection on a raised patio?
Not ideal. Shade-cloth style debris netting can work for overhead containment, but it often lacks the cord diameter, border strength, and tensioning design needed for guardrail or fall barrier performance. If the net must act as a secondary fall barrier, use a cable-supported perimeter system and treat it as fall protection hardware, not a substitute for a railing or fence.
Is it safe for children and pets, and how can I avoid tripping or entanglement hazards?
If the net is installed too low or slack, it can become an entanglement hazard for kids or pets, especially near gates or stair landings. Keep the bottom edge either tight to the ground with properly placed stakes, or raised to at least a safer height above walk paths, and secure any cut ends so nothing pools or hangs.
How do I choose the right mesh size if I’m not sure what exact ball size will be entering the patio area?
For sports containment, you generally want mesh small enough to limit ball passage without being so fine that it increases wind drag and makes tensioning harder. If you’re between sizes, err toward the smaller opening for ball containment, but keep in mind the net’s cord weight and tie method, because fine mesh can tear faster if the border rope is undersized.
What changes should I make for patio safety netting in a windy location?
Wind changes everything. If your patio is wind-exposed, sag and load spikes can increase, and over-tensioning can pull anchors out. Plan for more anchor points, shorter cable runs between turnbuckles, and a net type/material that’s designed for outdoor wind loads rather than only impact loads.
How can I tell early that my installed netting is failing even if the mesh still looks intact?
Common failure points are the border rope and corner/edge terminations, not the mesh sheet. Inspect the border cord for stiffness or surface cracking, confirm turnbuckles are still holding tension, and look for fraying at seams and attachment spacing gaps before they grow into tears.
Do I really need carabiners or hog rings, or can I just use any ties I have for attaching the net to the cable?
Carabiners, hog rings, or zip ties all work when used with correct spacing and a properly tensioned top cable, but they must be matched to the net’s border construction. Use the manufacturer’s attachment method for that specific net type, and avoid mixing hardware styles on the same system if it changes how forces transfer at the border.
Can I attach patio safety netting to an existing pergola or fence if it looks sturdy?
It depends on your setup. If you’re mounting into existing framing, you must verify the beams or fence posts can carry tension loads laterally and against dynamic impacts. If you cannot confirm structural integrity, add intermediate supports or hire a pro before installing, because “sound-looking” pergola beams can still be inadequate under tension.
What should I do if I need to resize or relocate the netting after installation?
You can, but only if you keep the system tensioned as designed. The safest approach is to reinstall with the same tensioning logic (top cable, bottom restraint, and proper anchor spacing) rather than relying on stretch and re-tie adjustments, which often leaves slack pockets that let debris or balls through.
What are the signs that I should stop relying on the net and replace it immediately?
If you ever see anchor movement, cable slippage, or the center sag increasing noticeably between inspections, stop using the barrier until it’s corrected. For raised patios, treat any loss of tension as a potential fall protection failure, and do not patch or “live with it,” replace any brittle border sections.