
For most patios, a 13-gallon trash can with a tight-fitting lid, made from UV-stabilized resin or powder-coated steel, placed within a few steps of your main seating or cooking area, is the right starting point. If you host larger groups or leave the can outside full-time, size up to 18-23 gallons and make sure the lid locks or latches. Get those two decisions right and everything else, odor, pests, looks, becomes much easier to manage.
Trash Can for Patio: How to Choose, Place, and Maintain

Miles Sutton
13 May 2026
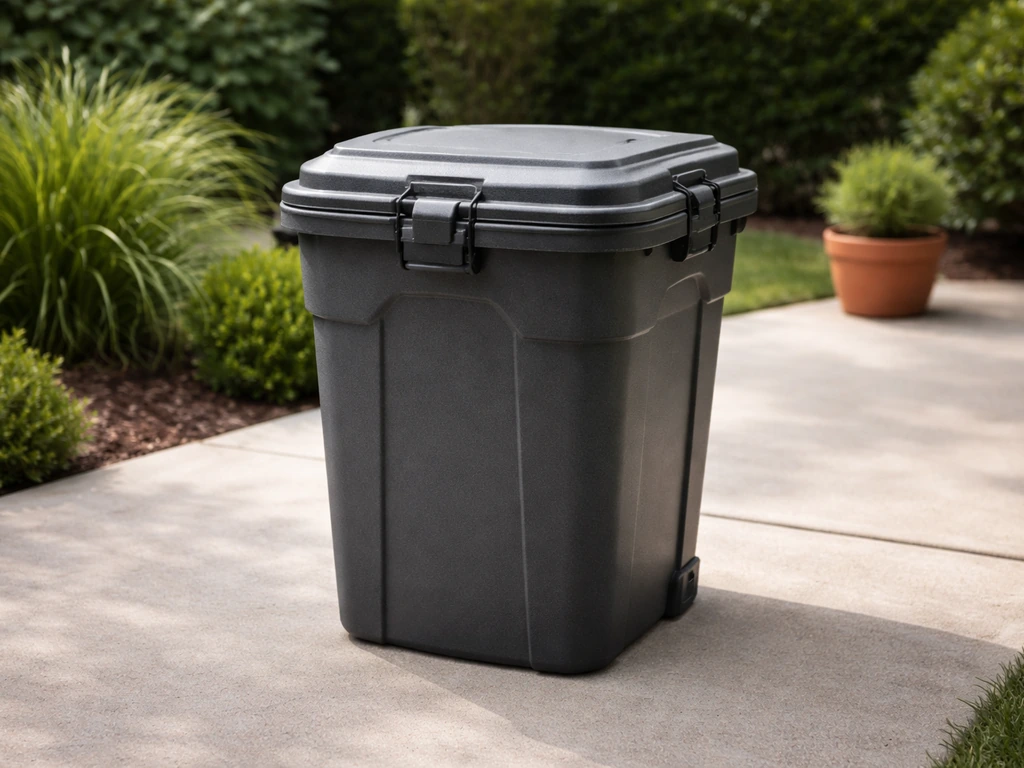
Choosing the right size and capacity for a patio trash can
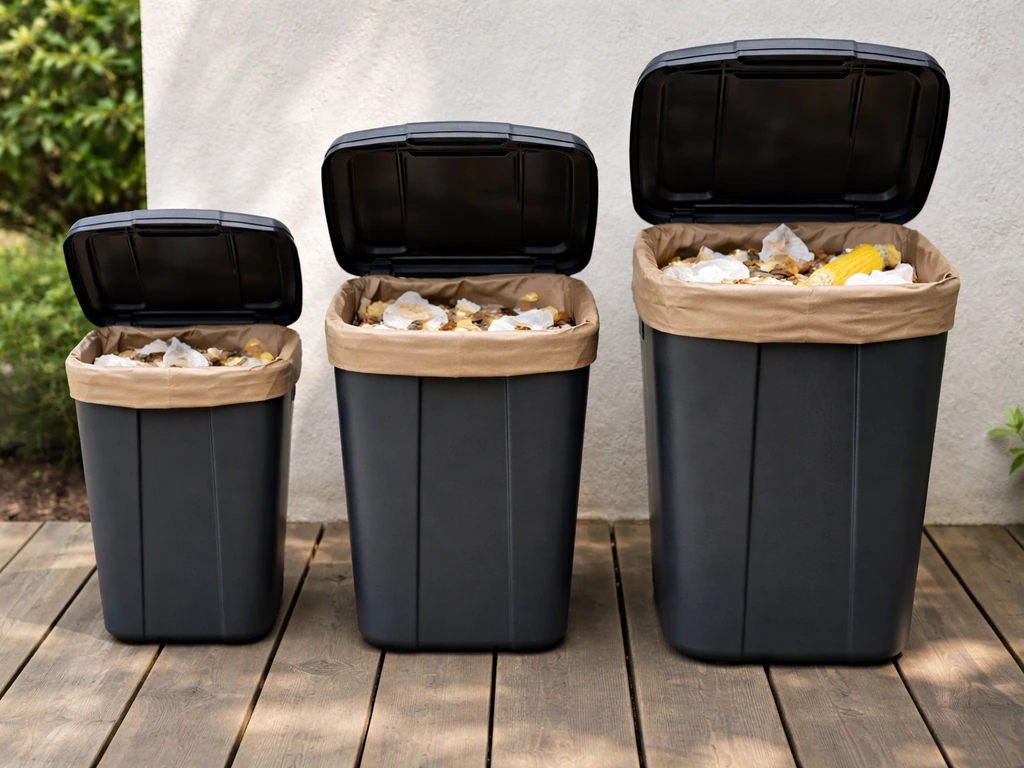
Size is the most common mistake people make. Too small and you're emptying the can every hour during a cookout; too large and it looks awkward on a small deck and never fills enough to justify the footprint. A 13-gallon can is the sweet spot for most homeowners. It matches standard 13-gallon trash bag liners (so you're never hunting for oddly sized bags), fits neatly beside a grill station or patio table, and handles a modest gathering without needing a mid-party dump run.
If your patio is more like an outdoor living room, regular entertaining, a full outdoor kitchen, or a large family, move up to 18-23 gallons. That range works well for bigger households and handles party trash, food scraps, and packaging without overflow. On the flip side, if you have a compact balcony or a small side patio where space is tight, a 10-gallon can is plenty and won't dominate the space. Small patio setups genuinely benefit from a purpose-built compact option rather than cramming in a full-size can. A well-sized small patio trash can makes it easier to keep food scraps contained and the area looking tidy.
| Patio Type | Recommended Capacity | Liner Size |
|---|---|---|
| Small balcony or side patio | 10 gallons | 10-gallon bags |
| Standard residential patio / deck | 13 gallons | 13-gallon bags |
| Large patio or outdoor kitchen | 18-23 gallons | 18-20-gallon bags |
| High-traffic entertaining space | 23+ gallons or dual cans | Varies |
One practical tip: if you regularly host and hate making trash runs mid-party, keep a second smaller can nearby as an overflow or recycling bin rather than defaulting to one giant container. Two 13-gallon cans side by side, one for trash, one for recycling, looks intentional and keeps things organized.
Placement and workflow: where it goes and how it actually gets used
The most-used trash can is the one that's easy to reach without thinking about it. Choosing a garbage can patio with an easy to reach setup makes it more likely you will actually use it instead of letting waste pile up on tables. For a grilling setup, that means within arm's reach of the prep area, ideally 3 to 5 feet from the grill or side table where food gets unwrapped and plated. For a dining area, put it at the end of the table nearest the door so guests can drop napkins and plates on their way back inside. Placement that requires crossing the patio or stepping around furniture gets ignored, and trash ends up on tables.
Think through your trash pickup logistics too. The can should be on a path you naturally walk when heading to the curb or to your main outdoor garbage bin. If it's tucked behind a planter or in a corner you never pass, you'll forget to empty it and end up with a smelly, overfull mess. For patios attached to the house, positioning the can near the door that leads to your side yard or driveway makes emptying it almost automatic.
Keep food-waste bins at least a few feet away from where people sit and eat. Close enough to use easily, far enough that odors and insects stay away from the dining zone. If you have a covered patio, avoid placing the can directly under an overhang where heat and humidity concentrate, that accelerates odor and makes the interior of the can break down faster.
Weather-proof materials, durability, and rodent resistance
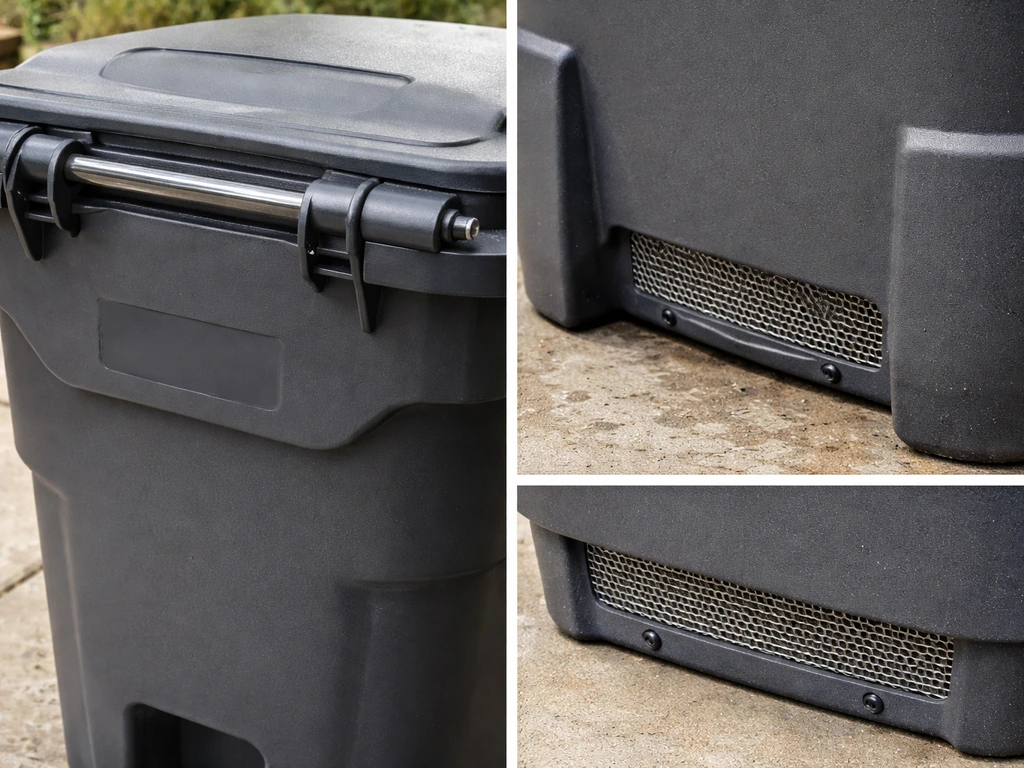
Outdoor trash cans live a harder life than indoor ones. Rain, UV exposure, freeze-thaw cycles, and direct sun will crack cheap plastic, rust uncoated metal, and warp lids within a season or two. The materials that hold up best outdoors are UV-stabilized high-density polyethylene (HDPE) resin and powder-coated or galvanized steel. HDPE resin is the most forgiving, it resists cracking in cold, doesn't rust, and is easy to rinse clean. Powder-coated steel looks sharp and is very durable, but check that any seams or hinges are also coated or stainless; bare metal at joints will rust.
Avoid standard polypropylene plastic cans that aren't rated for UV exposure, they go brittle and crack, especially in climates with harsh summers or cold winters. If you're in a region with heavy rain, look for a can with a drainage hole or plug at the base so water that gets in doesn't pool and create a mosquito habitat or accelerate corrosion from the inside.
Rodents are a real issue if you're tossing food scraps into an outdoor can. A loose-fitting lid is an open invitation. Look for cans with lids that latch, lock, or use a weighted mechanism that keeps them sealed under pressure. Regulations in many jurisdictions already require this for good reason, Pennsylvania, for example, requires food-waste containers to be leak-proof, nonabsorbent, rust and corrosion-resistant, and fitted with tight-fitting lids.
In Pennsylvania, food-waste containers are required to be leak-proof, nonabsorbent, rust and corrosion-resistant, and fitted with tight-fitting lids michigan. gov.
Even if your area doesn't mandate it, treating those standards as your baseline is smart practice. Steel cans are harder for rodents to chew through than plastic, which is worth considering if raccoons or rats are a known problem in your neighborhood.
- HDPE resin: best all-around for weather and cold-climate durability, lightweight, easy to clean
- Powder-coated steel: great durability and aesthetics, check that joints and hinges are also coated
- Galvanized steel: extremely durable, heavier, excellent rodent resistance
- Standard thin plastic: avoid for full-time outdoor use — UV degradation is fast
- Drainage plug or hole: important in rainy climates to prevent water pooling inside
Lids, odor control, and easy-clean design
The lid is the single most important feature on an outdoor trash can. A loose or missing lid lets in rain, insects, and animals, and lets odors escape freely. For a patio, a lid that stays closed on its own, either through a latch, a weighted seal, or a step-pedal mechanism, is worth prioritizing over a simple push-top. Step-pedal lids are especially useful when your hands are full of dishes or food scraps. Swing-top lids look sleek but don't seal, so they're better for low-odor recycling than food waste.
Odor control comes down to three things: how well the lid seals, how often you empty the can, and whether you line it. Always use a liner bag, even outdoor cans benefit from liners because they make cleanout dramatically faster and prevent waste from sticking to the interior. For food-heavy trash, look for cans with a charcoal filter built into the lid or an odor-absorbing ring around the rim. These don't eliminate the need to empty regularly, but they make a real difference between emptying.
Easy-clean design matters more than people expect until they're scrubbing a stained, sticky can in the backyard. Smooth interior walls (no ridges or texture where residue can cling), a wide enough opening to hose out, and a removable inner bucket if the design includes one, all of these make weekly cleanouts a two-minute job instead of a twenty-minute one. Round or oval cans are easier to rinse than square ones with tight corners.
Storage options and aesthetics for different patio styles
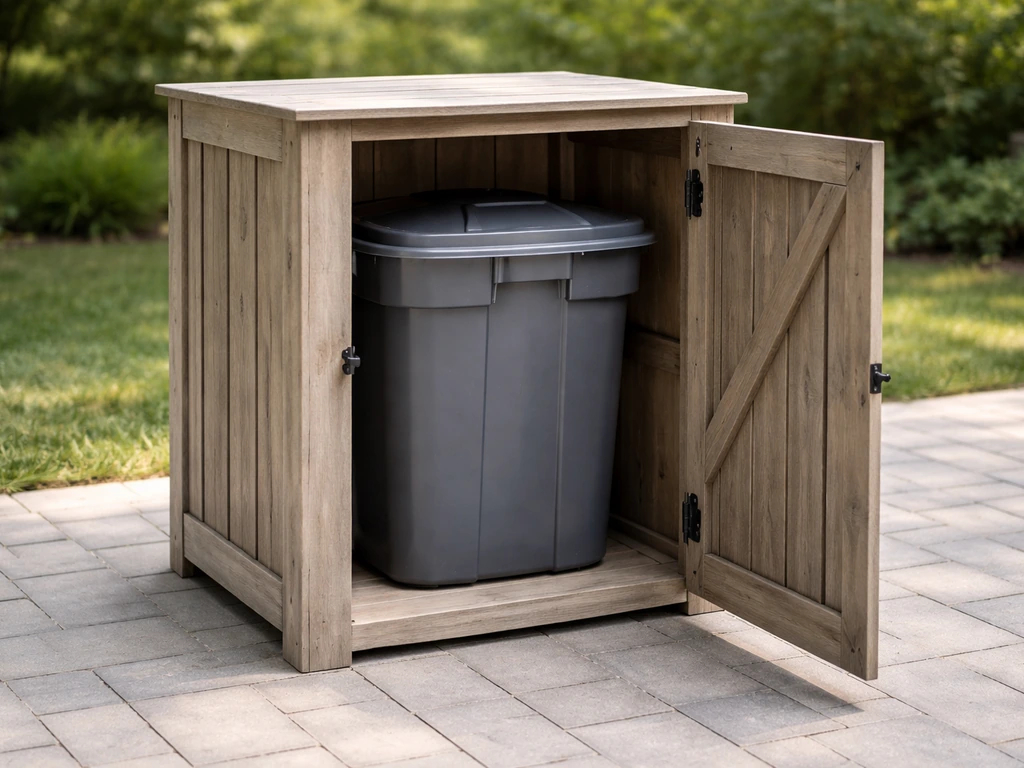
A trash can doesn't have to be an eyesore. If your patio has a defined style, modern, farmhouse, tropical, traditional, there are options in materials and colors that fit without looking like an afterthought. Powder-coated steel in black or dark gray reads as intentional and matches most contemporary outdoor furniture. Natural wicker-look resin cans blend into casual or coastal spaces. For a more classic or formal patio, a galvanized steel can with a lid looks purposeful rather than purely functional.
If you'd rather hide the can entirely, a few storage approaches work well on patios. A deck storage bench with a built-in trash compartment keeps the can out of sight and doubles as seating. A small enclosure built from the same decking material as your patio floor (or a prefab wood slat screen) can house a standard can while blending into the overall design. Some homeowners tuck the can inside an outdoor storage cabinet, which works well as long as ventilation is adequate, a closed cabinet with no airflow turns into an odor trap fast. Leave the back panel open or add ventilation gaps if you go this route.
Color choice is underrated. A gray patio trash can or a black patio trash can tends to hide grime and staining better than white or light-colored options, which show dirt quickly in an outdoor environment. If your patio furniture is a particular color family, matching or complementing the can is a simple way to make it feel like part of the setup rather than a utility item you tolerated.
Maintenance and replacement tips
A patio trash can needs more maintenance than an indoor one because of weather exposure and heavier use. The basic routine is straightforward: empty it at least once a week (more often in hot weather when food scraps can smell within 24-48 hours), rinse the interior with a garden hose, and let it dry completely before inserting a new liner. Once a month, give it a more thorough scrub with a diluted dish soap solution or an outdoor cleaner, paying attention to the lid's interior and any hinge areas where grime builds up.
Inspect the lid and hinge mechanism twice a year, spring and fall are natural checkpoints. Hinges on cheaper cans strip or corrode and a lid that doesn't close properly defeats the purpose. Replacing a hinge screw or adding a zip-tie through the hinge point can extend the life of an otherwise functional can, but if the lid no longer seals or the body has cracks that trap moisture, it's time for a new can. Most resin cans last 3 to 5 years with regular outdoor exposure before UV degradation becomes obvious; powder-coated steel can last a decade or more if the coating stays intact.
If you're replacing an old can, bring the old one with you or note the exact dimensions before buying. Patio layouts often have a specific footprint where the can fits neatly, an inch too wide can make a difference if it's going between a grill cart and a railing. Also confirm that the new can uses standard bag sizes so you're not special-ordering liners.
How to finalize your patio trash can setup today
Before you buy, take three measurements: the available floor space where the can will live, the clearance needed for the lid to open fully (top-lift lids need overhead room, step-pedals need toe clearance), and the distance from that spot to your nearest door or trash pickup path. Then decide your two non-negotiables: the lid type that fits how you use the patio (step-pedal for food-heavy setups, latch-lid if pests are a concern) and the material that matches your climate (resin for cold or wet climates, coated steel if aesthetics are a priority).
- Measure the available footprint and lid clearance before choosing a model
- Pick 13 gallons for a standard patio, 10 for compact spaces, 18-23 for large or high-use setups
- Choose UV-stabilized HDPE resin or powder-coated steel for full-time outdoor use
- Prioritize a locking or latching lid if food scraps or pests are a concern
- Position the can within easy reach of your grill or dining area but away from direct seating
- Line the can every use, rinse weekly, and do a full scrub monthly
- Replace the can when the lid no longer seals or cracks appear in the body
Getting the trash situation right on your patio is one of those small details that makes a noticeable difference in how enjoyable the space is. The right can stays out of the way visually, keeps odors and pests in check, and holds up season after season without becoming a maintenance headache. Nail the size, lid, and placement and everything else falls into place.
FAQ
How do I measure clearance so the lid opens properly on a patio?
Measure your actual opening needs, not just the can’s footprint. Top-lift lids need overhead clearance to swing up safely, while step-pedal lids need clear toe room in front of the can (and often a little extra space to avoid bumping the pedal). If you’re placing the can next to a railing or grill cabinet, confirm lid clearance with a tape measure while standing in your normal patio walking position.
Should I use one trash can or separate bins for trash and recycling on my patio?
For recycling, a second bin is best when it lets you sort while you’re already at the table, but keep the separation simple. Use one liner for trash and a separate liner or dedicated bag for recycling, and avoid mixing wet food waste into recycling bags, which increases odors and attracts pests.
How often should I empty a patio trash can to prevent odors?
Start with weekly emptying, then adjust based on heat and food content. If you regularly dispose of meat scraps or oily packaging, empty every 2 to 3 days in hot weather to prevent smells and residue buildup that is harder to rinse off later.
Do I still need a trash liner for an outdoor patio trash can?
Do not rely on a bag alone. Even with a tight lid, use a liner bag, then tie it off at the end of each use session for food-heavy waste. This reduces sticking to the interior and makes cleanup faster when you rinse the can.
What’s the best way to position and prep a patio trash can in wet or cold weather?
If your can sits in light rain or under an overhang, add a mat or place it on a surface that drains so it doesn’t sit in pooled water at the base. For climates with freeze-thaw cycles, avoid leaving water inside the can, after rinsing let it dry fully before adding a new liner.
Can I add deodorizer products or odor filters to an outdoor trash can?
Yes, but do it carefully. If you add odor controls like charcoal inserts or odor-absorbing rings, follow the manufacturer instructions for replacement intervals, and never use products that could leak onto food waste bags or stain the liner. Also, test a small area of the can if the product has dyes or strong cleaners.
What should I do if pests keep getting into my patio trash can?
Rats and raccoons can often access anything with a gap. If you see claw marks, bent hinges, or a lid that doesn’t sit flush, switch to a model with a latch or weighted seal, and consider securing the lid mechanism so it closes tightly every time. Steel bodies are also harder to chew than basic plastic.
Where should I place a patio trash can relative to dining seating and a covered overhang?
Avoid putting food-waste bins directly beside seating, and also avoid “directly under” a covered patio ceiling if condensation and heat buildup are common. Instead, place it within easy reach but behind the immediate dining line, and keep it on your normal walk path to the door or curb so it doesn’t get neglected.
How can I tell whether my patio trash can needs repairs or replacement?
If the lid is the priority feature, hinges are the next failure point. Inspect hinge screws and hinge alignment twice a year, spring and fall are a good schedule. If the lid no longer closes evenly or the seal gaps, repair hinges immediately or replace the can if the body is cracked.
When replacing a worn patio trash can, what details should I verify before buying?
Don’t assume the old can’s size equals the new one. Many patio setups depend on bag compatibility, so confirm the new model uses standard 13-gallon liners (or your current liner size) before you buy. Also check the exact width if it fits between a grill cart and a railing.